

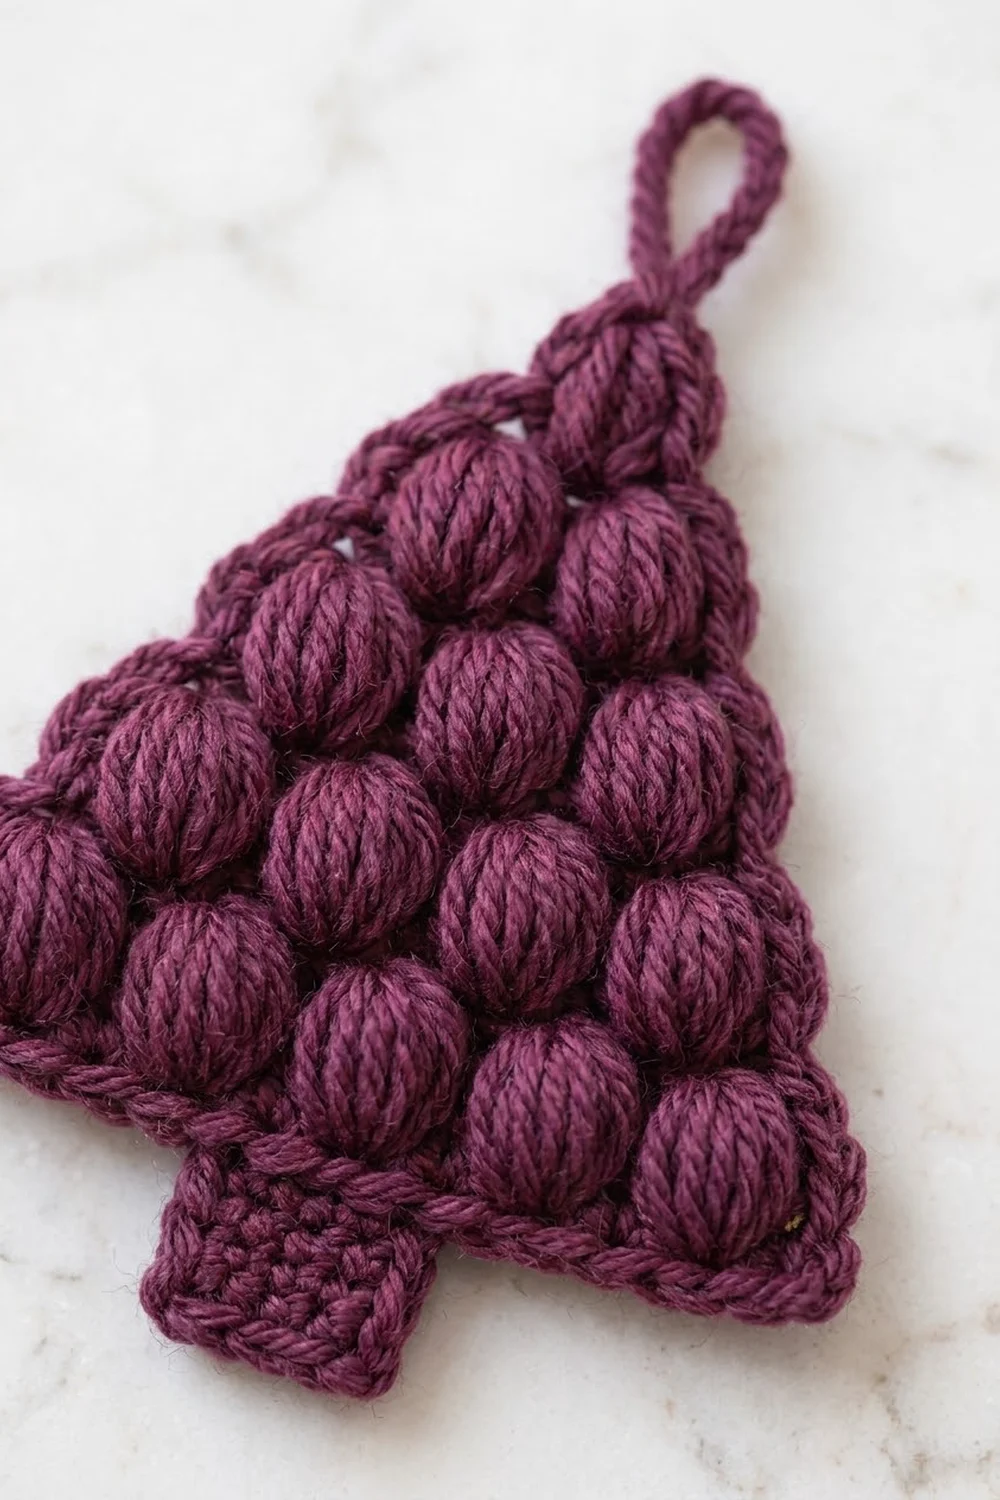
This little tree ornament is made of rows of plump puff stitches stacked into a neat triangle. A firm single crochet border outlines it, a short square trunk sits underneath, and a chain loop at the top is ready for a branch. The puffs line up in a brick pattern, so every row sits between the puffs of the row below, and the shape reads as a tree from across the room.
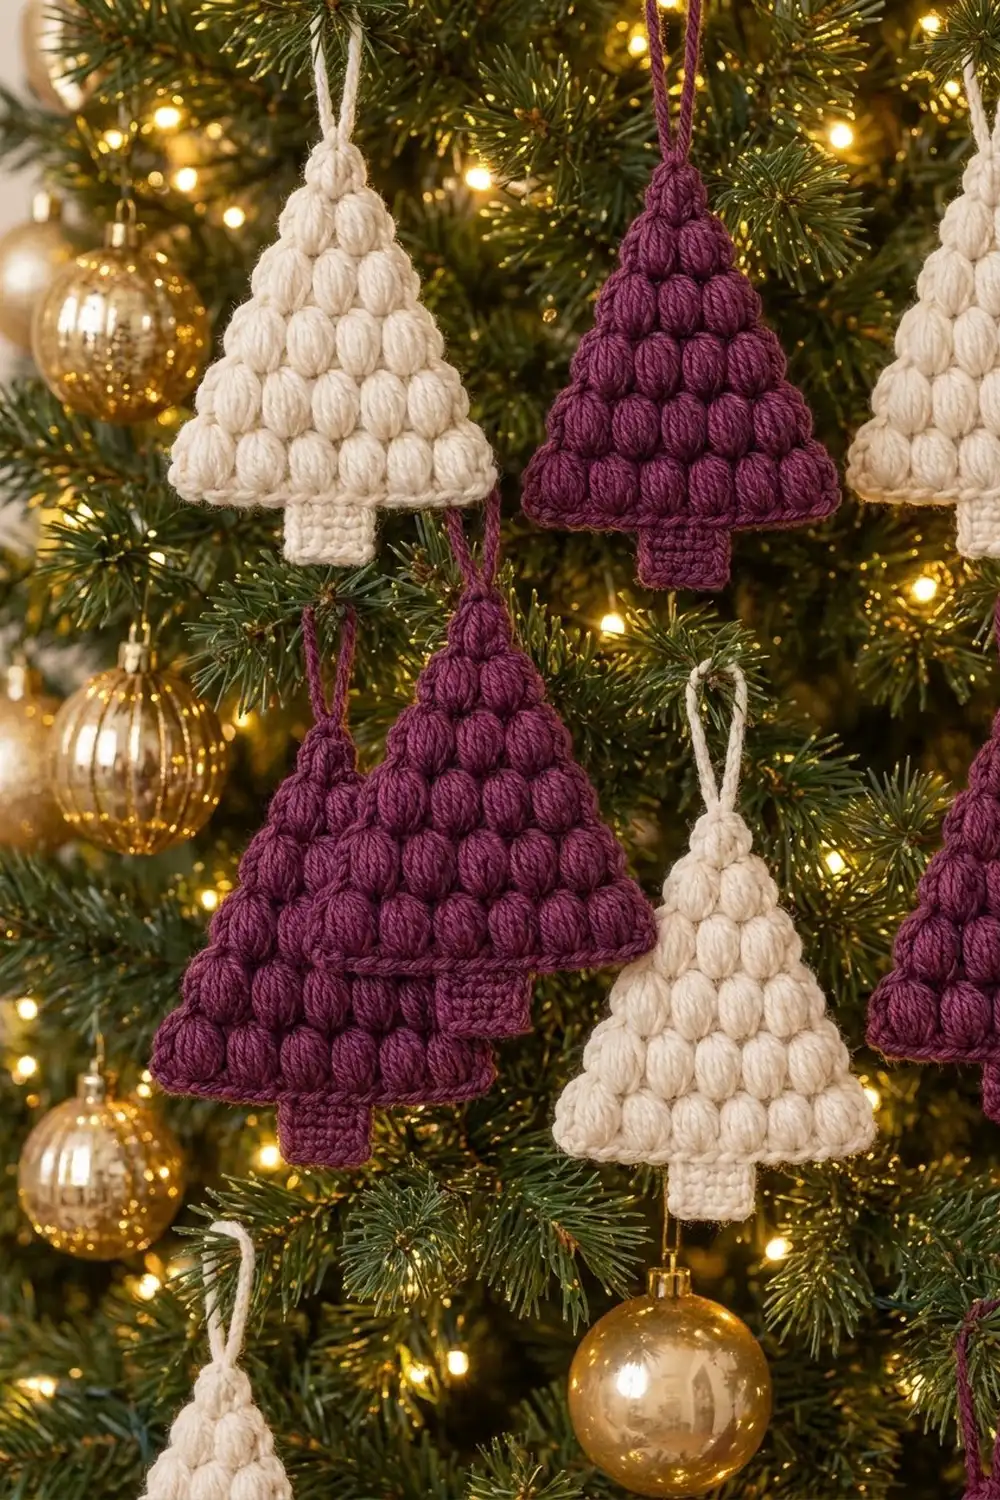
The sample is worked in deep plum, a rich berry-wine shade, with a matching version in soft cream. Both colors look great against green branches and gold baubles. Make a few of each and hang them alternately for a calm, coordinated tree.
The pattern uses US crochet terms. The finished ornament measures 3.75 in (9.5 cm) wide and 4.5 in (11.4 cm) tall from the tip of the tree to the bottom of the trunk, not counting the hanging loop. The loop adds about 1.5 in (3.8 cm).
Construction is simple and all in one piece. You work the tree flat from the bottom up, alternating puff rows with plain single crochet rows and losing one stitch at each edge on every single crochet row. Then you work one border round all the way around, making the hanging loop at the tip. Last, you crochet the trunk straight off the center of the bottom border. There’s no sewing apart from weaving in ends.
Finished Size and Construction
- Finished size: 3.75 in (9.5 cm) wide x 4.5 in (11.4 cm) tall, plus a 1.5 in (3.8 cm) hanging loop
- Skill level: Easy / advanced beginner
- Terminology: US crochet terms
- Yarn weight: Worsted weight (#4, medium)
- Hook: 5.0 mm (H-8)
- Number of pieces: 1 (the trunk and loop are worked directly onto the tree)
- Layout: One triangle worked in rows, bottom to top, with the trunk centered below
- Tree size before border: 3.25 in (8.3 cm) wide x 3.25 in (8.3 cm) tall
- Border depth: 0.25 in (0.6 cm), one round of single crochet
- Trunk: 1.25 in (3.2 cm) wide x 0.75 in (1.9 cm) tall
Materials
Yarn: Use a smooth worsted weight yarn. Acrylic, cotton blend, or wool blend all work. Smooth plied yarn gives the clearest, roundest puffs. Avoid fuzzy or very splitty yarn, because puffs need loops that slide easily.
- Plum (sample color): 10 g, about 20 m (22 yd), per ornament
- Cream (alternate color): 10 g, about 20 m (22 yd), per ornament
Each ornament is one solid color. If you’re making a set, multiply by the number of ornaments in each color. These amounts include a small margin for gauge differences and the swatch check.
Tools:
- 5.0 mm (H-8) crochet hook
- Yarn needle
- Scissors
- Stitch marker (optional, for marking the RS)
- Ruler or tape measure
- Pins and a foam blocking mat
- Spray bottle with water
Abbreviations (US Terms)
- ch – chain
- sc – single crochet
- sc3tog – single crochet 3 together
- sl st – slip stitch
- st(s) – stitch(es)
- yo – yarn over
- RS / WS – right side / wrong side
- puff – puff stitch (see below)
Special stitch – Puff stitch (puff): [Yo, insert hook in st, yo and pull up a loop to about the height of two sc] 4 times in the same st (9 loops on hook). Yo and pull through all 9 loops, then ch 1 to close. The closing ch doesn’t count as a st and isn’t worked into on the next row. Each puff counts as 1 st.
sc3tog: [Insert hook in next st, yo and pull up a loop] 3 times (4 loops on hook), yo and pull through all 4 loops.
Gauge and Checkpoints
Gauge matters more for the look than for fit. Still, the border and trunk counts are designed around these measurements, so check them on your first ornament before you make a batch.
Gauge in puff pattern: 4 sts = 1 in (2.5 cm) across a puff row (2 puffs + 2 sc), and 4 rows (2 sc rows + 2 puff rows) = 1 in (2.5 cm) tall.
Your first ornament is your test piece. Measure it at these checkpoints:
- After Row 2: width is 3.25 in (8.3 cm) across 13 sts.
- After Row 4: height is 1 in (2.5 cm).
- After Row 8: height is 2 in (5.1 cm).
- After Row 12: height is 3 in (7.6 cm).
- After Row 13: triangle is 3.25 in (8.3 cm) wide x 3.25 in (8.3 cm) tall.
- After the border: 3.75 in (9.5 cm) wide x 3.75 in (9.5 cm) tall.
- After the trunk: 4.5 in (11.4 cm) total height.
If your piece is too big: Change to a 4.5 mm hook, or pull your puff loops up a little shorter.
If your piece is too small: Change to a 5.5 mm hook, or pull your puff loops up a little taller.
If the width matches but the height doesn’t, the issue is almost always loop height in the puffs. Adjust that first before changing hooks.
Tree
The tree is worked in turned rows. Row 1 is the RS. All puff rows are even-numbered WS rows, so the puffs pop toward the RS. Mark the RS of Row 1 if it helps.
Each sc row skips the first st and leaves the last st unworked, so it loses one st at each edge. This shifts every puff row half a puff inward and makes the brick pattern.
Foundation: Ch 14.
Row 1 (RS): Sc in 2nd ch from hook and in each ch across. Turn. (13 sc)
Row 2 (WS, puff row): Ch 1 (doesn’t count as a st), sc in first st, *puff in next st, sc in next st; rep from * 5 more times. Turn. (13 sts: 6 puffs + 7 sc)
Row 3 (RS, trim row): Ch 1, skip first sc, sc in each of next 11 sts (skip the closing chs of the puffs and work into the top of each puff), leave last sc unworked. Turn. (11 sc = 13 existing sts − 2 edge sts left unworked)
Row 4 (puff row): Ch 1, sc in first st, *puff in next st, sc in next st; rep from * 4 more times. Turn. (11 sts: 5 puffs + 6 sc)
Row 5 (trim row): Ch 1, skip first sc, sc in each of next 9 sts, leave last sc unworked. Turn. (9 sc = 11 existing sts − 2 edge sts)
Row 6 (puff row): Ch 1, sc in first st, *puff in next st, sc in next st; rep from * 3 more times. Turn. (9 sts: 4 puffs + 5 sc)
Row 7 (trim row): Ch 1, skip first sc, sc in each of next 7 sts, leave last sc unworked. Turn. (7 sc = 9 existing sts − 2 edge sts)
Row 8 (puff row): Ch 1, sc in first st, *puff in next st, sc in next st; rep from * 2 more times. Turn. (7 sts: 3 puffs + 4 sc)
Row 9 (trim row): Ch 1, skip first sc, sc in each of next 5 sts, leave last sc unworked. Turn. (5 sc = 7 existing sts − 2 edge sts)
Row 10 (puff row): Ch 1, sc in first st, *puff in next st, sc in next st; rep from * once more. Turn. (5 sts: 2 puffs + 3 sc)
Row 11 (trim row): Ch 1, skip first sc, sc in each of next 3 sts, leave last sc unworked. Turn. (3 sc = 5 existing sts − 2 edge sts)
Row 12 (puff row): Ch 1, sc in first st, puff in next st, sc in last st. Turn. (3 sts: 1 puff + 2 sc)
Row 13 (RS, tip): Ch 1, sc3tog over all 3 sts. Don’t turn and don’t fasten off. (1 st)
You should now have 6 puff rows of 6, 5, 4, 3, 2 and 1 puffs, for 21 puffs in total. Each row’s puffs sit centered between the puffs below. Check the triangle measurement before going on.
Border
The border is one round of sc worked with the RS facing. It squares off the stepped edges, outlines the puffs, and makes the hanging loop in one pass.
Border gauge: about 4 sc = 1 in (2.5 cm) along every edge, the same as the body.
Border Round (RS): Ch 1, sc in top of the sc3tog just made, ch 15 for the hanging loop, sc in same st (tip done: 2 sc + ch-15 loop).
First side: Working down the row-ends, sc once in each row-end from Row 12 to Row 1. Add a second sc in the row-ends of Rows 10, 6 and 2. (15 sc: 12 row-ends + 3 extra)
Bottom: Working in the free loops of the foundation chain, 3 sc in first ch (corner), sc in each of next 11 ch, 3 sc in last ch (corner). (17 sc: 3 + 11 + 3)
Second side: Working up the row-ends, sc once in each row-end from Row 1 to Row 12. Add a second sc in the row-ends of Rows 2, 6 and 10. (15 sc: 12 row-ends + 3 extra)
Join with a sl st to the first sc. Fasten off and weave in the end.
Border total: 2 + 15 + 17 + 15 = 49 sc, plus the ch-15 loop.
Why the math works: The bottom edge has 13 foundation sts at 4 sts per inch, which is 3.25 in (8.3 cm). The 13 sc across it (11 straight + 1 at the center of each corner group) match it exactly. The extra 2 sc at each corner turn the angle without cupping. Each slanted side is about 3.6 in (9.1 cm) long, since it rises 3.25 in (8.3 cm) while moving in 1.5 in (3.8 cm). At 4 sc per inch, that side needs about 14 to 15 sc. Working 12 row-ends plus 3 extras gives 15, so the edge lies flat without ruffling or pulling in. The extras are spread evenly (every fourth row-end) so the outline stays smooth.
Checkpoint: The bordered tree measures 3.75 in (9.5 cm) wide and 3.75 in (9.5 cm) tall, not counting the loop.
Trunk
The trunk is worked in rows straight off the bottom border. It’s centered on the 11 straight sc between the two 3-sc corner groups.
Hold the tree upside down with the RS facing. Count the 11 straight sc along the bottom edge (not the corner groups). Join yarn with a sl st in the 4th of these sc. This leaves 3 sc free on each side of the trunk.
Row 1 (RS): Ch 1, sc in same st as join and in each of next 4 sc. Turn. (5 sc)
Rows 2–4: Ch 1, sc in each st across. Turn. (5 sc)
Fasten off after Row 4, leaving a 6 in (15.2 cm) tail. Weave the tail down one side edge of the trunk to tidy it.
Trunk checkpoint: 1.25 in (3.2 cm) wide (5 sc at 4 sc per inch) x 0.75 in (1.9 cm) tall. The trunk is a little shorter per row than the puff body because plain sc rows are shorter than puff rows. The total ornament height is now 4.5 in (11.4 cm).
Final Blocking
- Weave in all ends on the WS. Run each end through the backs of a few sc in the border so it can’t show through the puffs.
- Lay the ornament RS up on a blocking mat.
- Pin the bottom two corners 3.75 in (9.5 cm) apart. Then pin the tip so the tree is 3.75 in (9.5 cm) tall from the bottom border edge.
- Pin the trunk corners square at 1.25 in (3.2 cm) wide, centered under the tree.
- Pin the hanging loop straight up. Shape it into a neat teardrop about 1.5 in (3.8 cm) long.
- Mist lightly with water. Don’t flatten the puffs; just let the edges relax.
- Leave to dry completely, then unpin.
- For acrylic, you can steam-block instead. Hold the iron above the piece and never press it onto the puffs.
Final Quality-Control Checklist
- 6 puff rows with 6, 5, 4, 3, 2 and 1 puffs (21 total)
- Puffs offset in a brick pattern, each centered between two puffs below
- Every puff closed with a firm ch 1 and fully rounded on the RS
- Side edges straight and diagonal after the border, with no ruffles
- Border count of 49 sc: 15 per side, 17 across the bottom, 2 at the tip
- Two neat corners at the bottom with 3 sc each
- Trunk 5 sc wide, 4 rows tall, with 3 border sc free on each side
- Hanging loop centered at the tip and not twisted
- Size 3.75 in (9.5 cm) x 4.5 in (11.4 cm), plus the loop
- All ends woven in invisibly
Troubleshooting
Puffs look flat or lean sideways. Pull every loop up to the same height before you close the puff, and close with a firm ch 1. Uneven loops make lopsided puffs.
Puffs are popping to the back. Puffs should be worked on WS rows (the even rows). If yours are showing on the wrong side, just treat that face as the RS and work the border with it facing you.
The brick pattern doesn’t line up. Make sure each trim row skips the first st and leaves the last st unworked. If you work into all the sts, the puffs will stack in columns.
Stitch counts are off on a trim row. You may have worked into a puff’s closing ch. Work into the top of the puff only.
Border edges ruffle. Leave out one or two of the extra sc on each side. Keep both sides matching.
Border edges pull in or cup. Add one more extra sc on each side, in the row-end of Row 4 or Row 8.
Trunk is off-center. Unpick it, count the 11 straight bottom sc again, and rejoin in the 4th one.
Loop flops over. Pull the loop up with a crochet hook. Then work a sl st along the back of the chain, or reduce the chain to ch 12 next time.
Care
Spot clean, or hand wash in cool water. Squeeze gently, reshape, and lay flat to dry. Store flat or hang it up so the puffs don’t get crushed.
Final Notes
Everything in this pattern follows one measurement chain. The 4 sts per inch gauge gives a 13-stitch base of 3.25 in (8.3 cm). Thirteen rows at 4 rows per inch give a 3.25 in (8.3 cm) tall triangle. The 0.25 in (0.6 cm) border brings it to 3.75 in (9.5 cm) square. The 0.75 in (1.9 cm) trunk finishes the ornament at 4.5 in (11.4 cm) tall. If your first ornament hits each checkpoint, every one after it will match. Make one in plum, one in cream, and keep going until the tree is full.
Happy crocheting!