

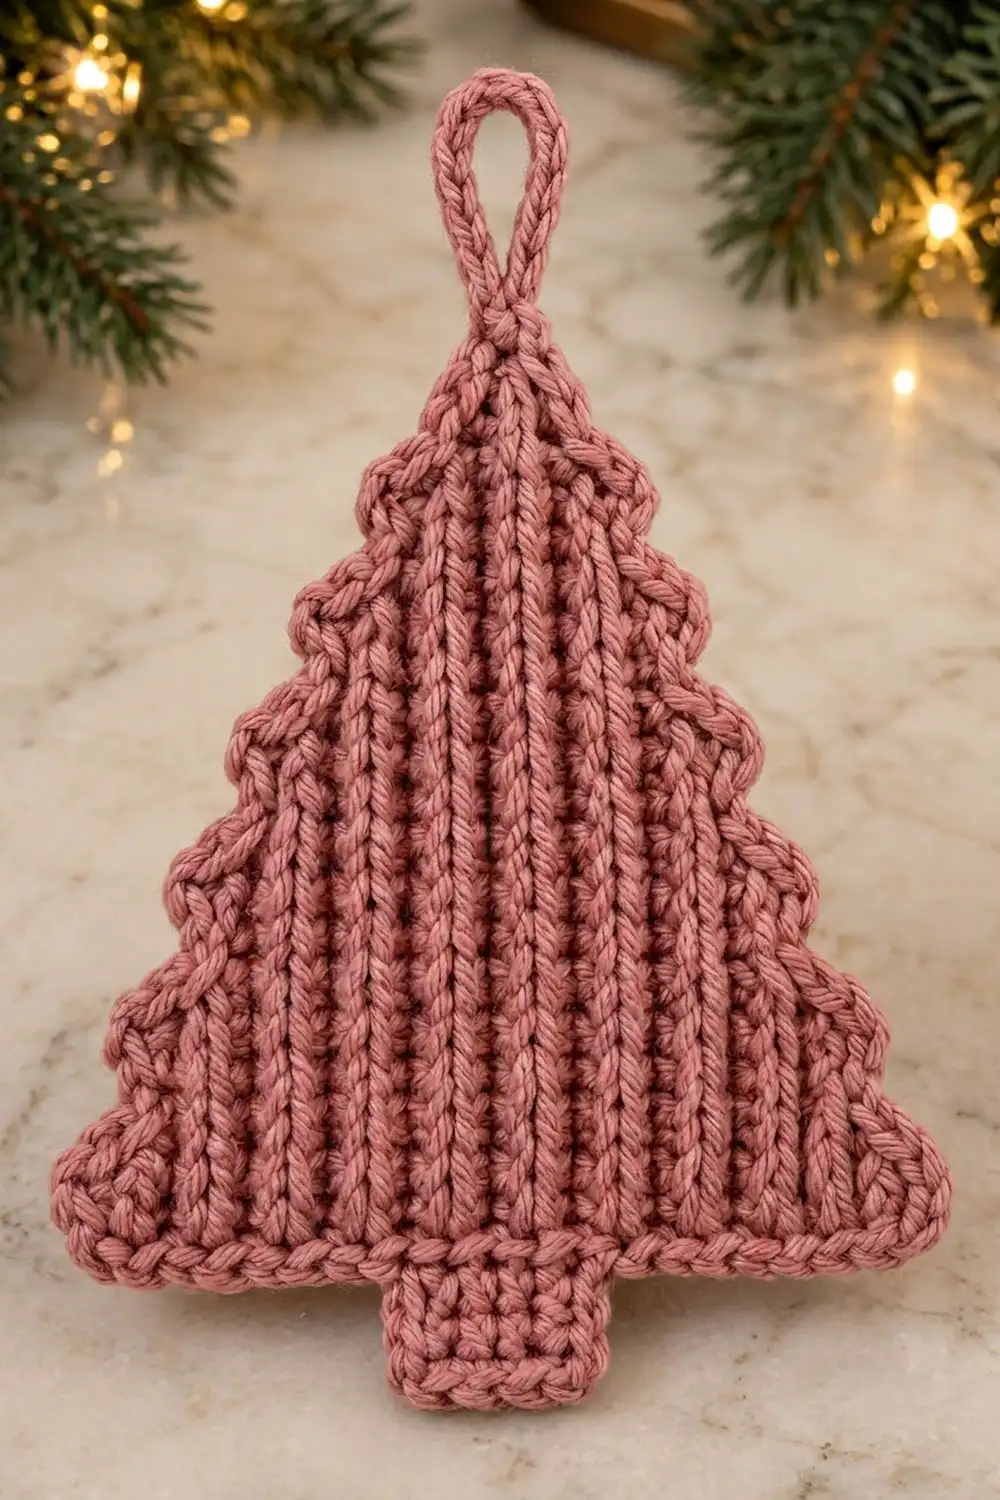
This little tree ornament has a knit-look surface of crisp vertical ribs. It also has a tiered outline with small stepped notches, a tidy square trunk, and a sturdy hanging loop at the tip. It looks good on the tree, on a gift tag, or tucked into a card.
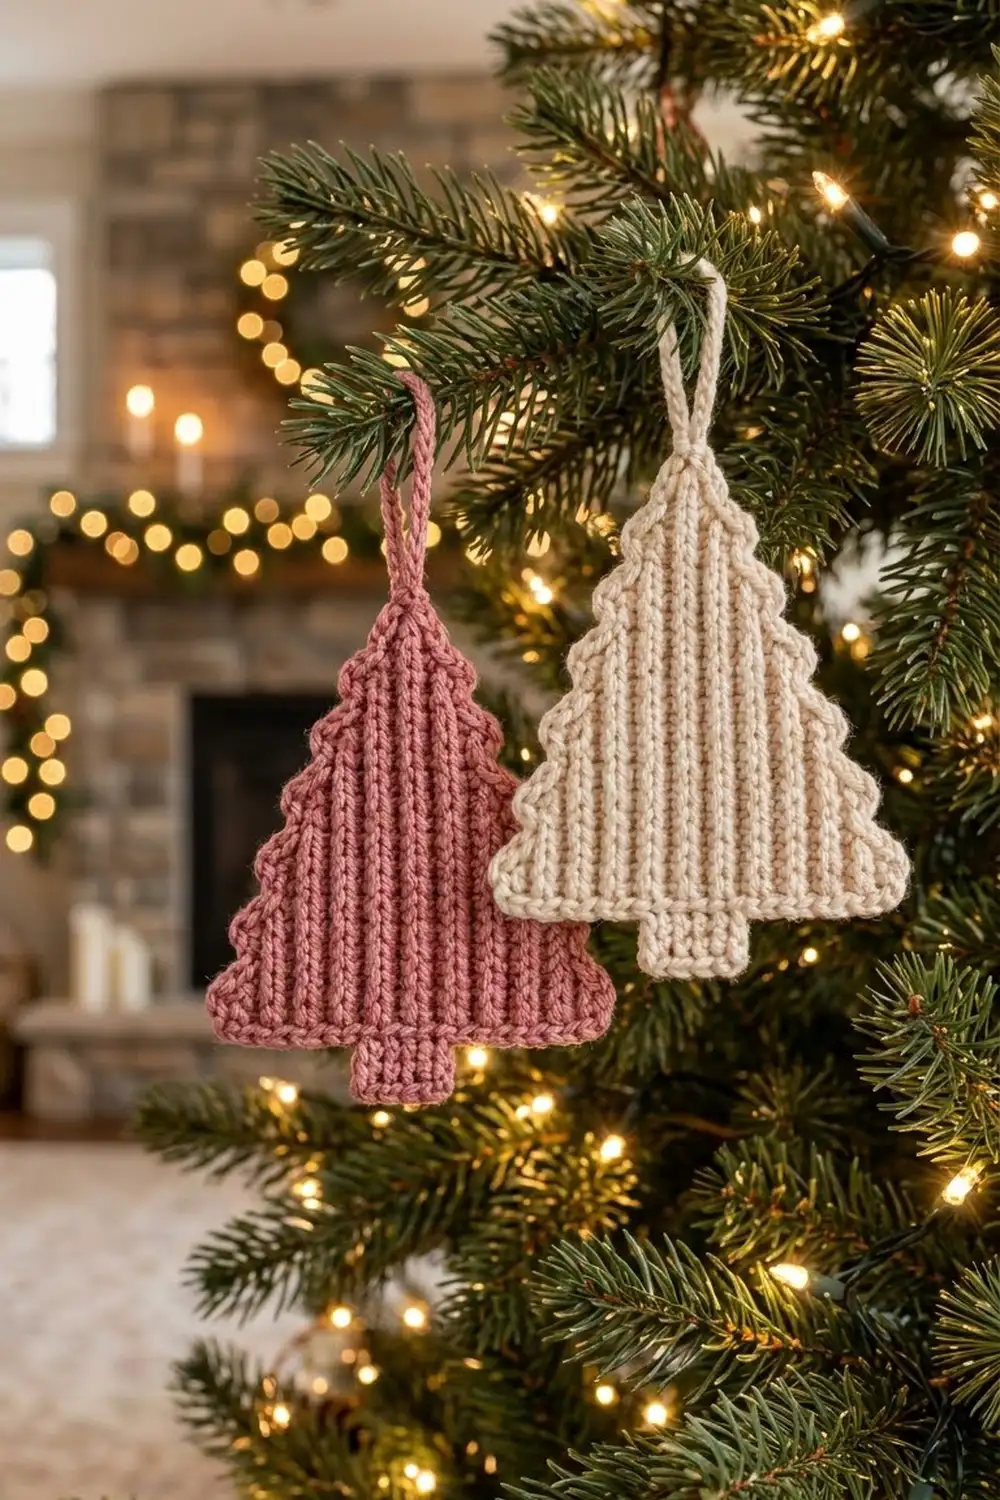
The samples are made in a soft dusty rose and a warm cream. Each ornament uses only one color, so you can make a matching set from leftover yarn. Muted pinks, creams, sage, and deep red all suit the clean, modern style.
The pattern uses US crochet terms. The finished ornament measures about 5.2 in (13.2 cm) wide and 5.4 in (13.7 cm) tall without the hanging loop. With the loop, it is about 6.6 in (16.8 cm) tall.
You work the tree body sideways in rows of single crochet through the back loop only. Each row forms one vertical column of the tree, so the ribs run from tip to base. You shape the stepped outline by changing the height of each row. Next you add a small trunk to the bottom edge, work a two-round border, and finish with the loop.
Finished Size and Construction
- Finished size: 5.2 in wide x 5.4 in tall (13.2 x 13.7 cm), plus a 1.2 in (3.0 cm) loop
- Skill level: Easy to intermediate
- Terminology: US crochet terms
- Yarn weight: DK (weight 3)
- Hook: 4.0 mm (G-6)
- Number of pieces: 1 (single piece)
- Layout: One standalone ornament, nothing to join
- Body size (before trunk and border): 4.7 in wide x 4 in tall (11.9 x 10.2 cm)
- Size before border (body + trunk): 4.7 in wide x 4.9 in tall (11.9 x 12.4 cm)
- Border depth: about 0.25 in (0.6 cm) on each side
Materials
Choose a smooth DK yarn with good stitch definition. Cotton, cotton blends, and smooth acrylics show the ribs best. Avoid fuzzy or loosely plied yarns, because they blur the ribs and the stepped edge.
Yarn (per ornament, one color):
- Color A – Dusty Rose: 12 g / about 28 m (31 yd), or
- Color B – Cream: 12 g / about 28 m (31 yd)
These amounts include a margin of about 25% for your gauge swatch and for weaving in ends. One ornament actually uses about 9–10 g.
Tools:
- 4.0 mm (G-6) crochet hook
- Tapestry needle
- Scissors
- 2 locking stitch markers
- Ruler or tape measure
- Blocking mat and rust-proof pins
- Spray bottle with water
Abbreviations (US Terms)
- ch – chain
- sl st – slip stitch
- sc – single crochet
- sc2tog – single crochet 2 together
- BLO – back loop only
- st(s) – stitch(es)
- rnd – round
- RS / WS – right side / wrong side
Special stitch – sc BLO: Insert the hook under the back loop only of the stitch (the loop farther from you). Yarn over, pull up a loop, yarn over, and pull through both loops on the hook. When you work sc BLO in rows, a raised ridge forms every 2 rows. These ridges make the vertical ribs.
Note on chains: The turning ch 1 never counts as a stitch. When a row starts with extra chains, work the new sc into the chain as usual.
Gauge and Checkpoints
Gauge: 18 sts and 18 rows of sc BLO = 4 in (10.2 cm). That is 4.5 sts and 4.5 rows per inch.
Make a swatch first. Ch 19, then sc in 2nd ch from hook and in each ch across (18 sc). Work sc BLO rows until the swatch is 18 rows tall. Lightly steam it, then measure.
This is a single-piece project, so your first ornament is the real test. Check these points as you go:
- After Row 11 (center row): the center row is 18 sts tall and measures 4 in (10.2 cm). The piece is about 2.4 in (6.1 cm) wide.
- After Row 21: the body measures 4.7 in wide x 4 in tall (11.9 x 10.2 cm).
- After the trunk: the total height is 4.9 in (12.4 cm).
- After the border: the ornament measures 5.2 x 5.4 in (13.2 x 13.7 cm).
Too big? Go down a half size to 3.75 mm. Too small? Go up to 4.5 mm (US 7). Stitch gauge sets the height and row gauge sets the width, so check both.
Tree Body
Hold the work so the foundation chain runs up and down. The hook end of the foundation chain is the top of the tree. The slip-knot end is the bottom.
Odd rows always start at the top and work down, and even rows start at the bottom and work up. This puts every height change at the top edge, so the bottom edge stays straight.
Work every sc in BLO, except when the stitch goes into a chain.
Rising Side (Rows 1–11)
Row 1 (start at top): Ch 3, sc in 2nd ch from hook and in next ch. (2 sc)
Row 2 (start at bottom): Ch 1, turn, sc BLO in first st, 2 sc BLO in last st. (3 sc)
Row 3 (start at top): Ch 2, turn, sc in 2nd ch from hook (1 new st), sc BLO in each of next 3 sts. (4 sc)
Row 4: Ch 1, turn, sc BLO in each of first 3 sts, 2 sc BLO in last st. (5 sc)
Row 5 – first tier step: Ch 4, turn, sc in 2nd ch from hook and in next 2 ch (3 new sts), sc BLO in each of next 5 sts. (8 sc)
Row 6: Ch 1, turn, sc BLO in each of first 7 sts, 2 sc BLO in last st. (9 sc)
Row 7: Ch 2, turn, sc in 2nd ch from hook (1 new st), sc BLO in each of next 9 sts. (10 sc)
Row 8: Ch 1, turn, sc BLO in each of first 9 sts, 2 sc BLO in last st. (11 sc)
Row 9 – second tier step: Ch 4, turn, sc in 2nd ch from hook and in next 2 ch (3 new sts), sc BLO in each of next 11 sts. (14 sc)
Row 10: Ch 1, turn, sc BLO in each of first 13 sts, 2 sc BLO in last st. (15 sc)
Row 11 – center/tip row: Ch 4, turn, sc in 2nd ch from hook and in next 2 ch (3 new sts), sc BLO in each of next 15 sts. (18 sc)
Place a marker in the top st of Row 11. This is the tip of the tree.
The 3-stitch jumps in Rows 5, 9, and 11 make the stepped notches on the left slope.
Falling Side (Rows 12–21)
Row 12 – tip step down: Ch 1, turn, sc BLO in each of first 15 sts. Leave the last 3 sts unworked. (15 sc)
Row 13: Ch 1, turn, sc2tog BLO over first 2 sts, sc BLO in each of next 13 sts. (14 sc)
Row 14 – second tier step: Ch 1, turn, sc BLO in each of first 11 sts. Leave 3 sts unworked. (11 sc)
Row 15: Ch 1, turn, sc2tog BLO, sc BLO in each of next 9 sts. (10 sc)
Row 16: Ch 1, turn, sc BLO in each of first 9 sts. Leave 1 st unworked. (9 sc)
Row 17: Ch 1, turn, sc2tog BLO, sc BLO in each of next 7 sts. (8 sc)
Row 18 – first tier step: Ch 1, turn, sc BLO in each of first 5 sts. Leave 3 sts unworked. (5 sc)
Row 19: Ch 1, turn, sc2tog BLO, sc BLO in each of next 3 sts. (4 sc)
Row 20: Ch 1, turn, sc BLO in each of first 3 sts. Leave 1 st unworked. (3 sc)
Row 21: Ch 1, turn, sc2tog BLO, sc BLO in last st. (2 sc)
Fasten off, leaving a 4 in (10.2 cm) tail.
Row height check: 2, 3, 4, 5, 8, 9, 10, 11, 14, 15, 18, 15, 14, 11, 10, 9, 8, 5, 4, 3, 2. The two sides mirror each other exactly. The body is 21 rows wide, which is 4.7 in (11.9 cm) at 4.5 rows per inch. It is 18 sts tall at the center, which is 4 in (10.2 cm).
Trunk
Work the trunk in plain sc through both loops. This gives it a small grid texture that stands apart from the ribs.
Count the row-ends along the straight bottom edge from left to right (Rows 1–21). The center 5 row-ends belong to Rows 9–13.
Row 1: With RS facing, join yarn in the bottom row-end of Row 9. Ch 1, sc in the same row-end and in each of the next 4 row-ends (Rows 10–13). (5 sc)
Rows 2–4: Ch 1, turn, sc in each st across. (5 sc)
Fasten off. The trunk measures about 1.1 in wide x 0.9 in tall (2.8 x 2.3 cm). The total height is now 4.9 in (12.4 cm).
Border
Border gauge: 1 sc per edge unit, which is 4.5 sc per inch. This matches the body gauge, so the edge lies flat without ruffling or cupping.
An edge unit is one row-end, one free stitch top, or one free chain loop. Follow the counts below instead of spacing stitches by eye.
Rnd 1 (sc): With RS facing, join yarn in the bottom row-end of Row 1 (the bottom-left corner). Then work:
- Bottom-left corner + bottom edge: 3 sc in Row 1 row-end, then 1 sc in each row-end of Rows 2–8. (10 sc)
- Trunk left side: 1 sc in each of the 4 trunk row-ends. (4 sc)
- Trunk bottom: 3 sc in first st, sc in next 3 sts, 3 sc in last st. (9 sc)
- Trunk right side: 1 sc in each of the 4 trunk row-ends. (4 sc)
- Bottom edge + bottom-right corner: 1 sc in each row-end of Rows 14–20, then 3 sc in Row 21 row-end. (10 sc)
- Right slope: Work 1 sc in each of the 2 sts of Row 21. Then work up the steps to the tip: 1 sc in the top row-end of each of Rows 21–12, and 1 sc in each free stitch left by the step-downs (3 + 1 + 3 + 1 + 1 + 1 + 3 + 1 + 1 + 1 = 16). (2 + 10 + 16 = 28 sc)
- Apex: 3 sc in the marked top st of Row 11. Move the marker to the center sc of these 3. (3 sc)
- Left slope: Work down the steps: 1 sc in the top row-end of each of Rows 10–1, and 1 sc in each free chain loop or stitch left by the step-ups (16 in total). Then work 1 sc in each of the 2 foundation ch loops of Row 1. (10 + 16 + 2 = 28 sc)
Join with sl st to first sc. (96 sc)
Count check: 10 + 4 + 9 + 4 + 10 + 28 + 3 + 28 = 96.
Rnd 2 (outline): Ch 1, sl st BLO loosely in each sc around. Join with sl st to first sl st. (96 sl st) Fasten off.
This round makes the crisp, raised chain-like outline. Keep it loose so the edge doesn’t pull in.
Why the math works: Each slope gets 28 sc. That is 2 (the outer edge of the end row) + 10 (row tops) + 16 (the total rise from 2 sts to 18 sts). The rising side gains exactly 16 stitches and the falling side loses exactly 16, so the two slopes match. The bottom edge gets 1 sc per row-end, and row gauge equals stitch gauge, so the border is the same length as the body edge. The 3-sc groups at the 4 outer corners and at the tip add just enough ease for each corner to lie flat.
Hanging Loop
Join yarn in the marked sc at the tip. Ch 14, then sl st into the same st to form a loop. Work 20 sc over the ch-14 loop, packing the stitches tightly. Sl st into the tip st to close. Fasten off, and weave the tail through the base of the loop twice to secure it.
The finished loop stands about 1.2 in (3.0 cm) tall.
Final Blocking
- Weave in all ends along the back of the ribs, where they hide best.
- Mist the ornament with water until it is damp, not soaked.
- Lay it RS up on the blocking mat.
- Pin the base straight to 5.2 in (13.2 cm) across, measured over the border.
- Pin the tip so the height from the trunk bottom to the tip is 5.4 in (13.7 cm).
- Pin the point of each tier step so the notches look crisp and match on both sides.
- Square the trunk to 1.1 in (2.8 cm) wide.
- Smooth the ribs with your fingers so they run straight from tip to base. Don’t stretch them flat.
- Let it dry completely, then unpin.
- For a stiffer ornament, use a light spray starch before drying.
Final Quality-Control Checklist
- The body has 21 rows and 10–11 visible ribs, and is 18 sts tall at the center
- Row heights mirror each other: 2, 3, 4, 5, 8, 9, 10, 11, 14, 15, 18, then back down
- Each slope has two stepped notches at matching heights
- The bottom edge is straight and the trunk is centered under Rows 9–13
- Border Rnd 1 = 96 sc; Rnd 2 = 96 sl st
- The finished size is 5.2 x 5.4 in (13.2 x 13.7 cm)
- The loop is centered, firm, and about 1.2 in (3.0 cm) tall
- All ends are woven in securely
Troubleshooting
The ribs don’t show. You are working through both loops. Use BLO on every row, in both directions.
The tree leans to one side. Some row heights are off. Recount every row against the height list.
The notches are uneven. Check Rows 5, 9, and 11 (each adds 3 sts) and Rows 12, 14, and 18 (each leaves 3 sts unworked).
The border ruffles. Your sc are too loose, or you added extra stitches. Recount to 96, or go down one hook size for the border only.
The border pulls in. Work Rnd 2 looser, or use a hook one size larger for the sl st round.
The trunk is off-center. Recount the row-ends. The trunk must start in Row 9.
The loop flops over. Pack more sc over the chain, up to 22, so it stands upright.
Care
Hand wash in cool water with mild soap, then reshape and lay flat to dry. Store it flat or hanging so the loop and ribs keep their shape.
Final Notes
The size of this ornament comes from one chain of measurements. At 4.5 sts and 4.5 rows per inch, 21 rows make a body 4.7 in (11.9 cm) wide, and an 18-st center row makes it 4 in (10.2 cm) tall. The trunk brings the height to 4.9 in (12.4 cm). The 96-stitch border adds about 0.25 in (0.6 cm) on every side, for a finished ornament of 5.2 x 5.4 in (13.2 x 13.7 cm). The loop adds 1.2 in (3.0 cm) at the top. If you check each number as you go, your tree will come out flat, even, and ready to hang.
Happy crocheting!