

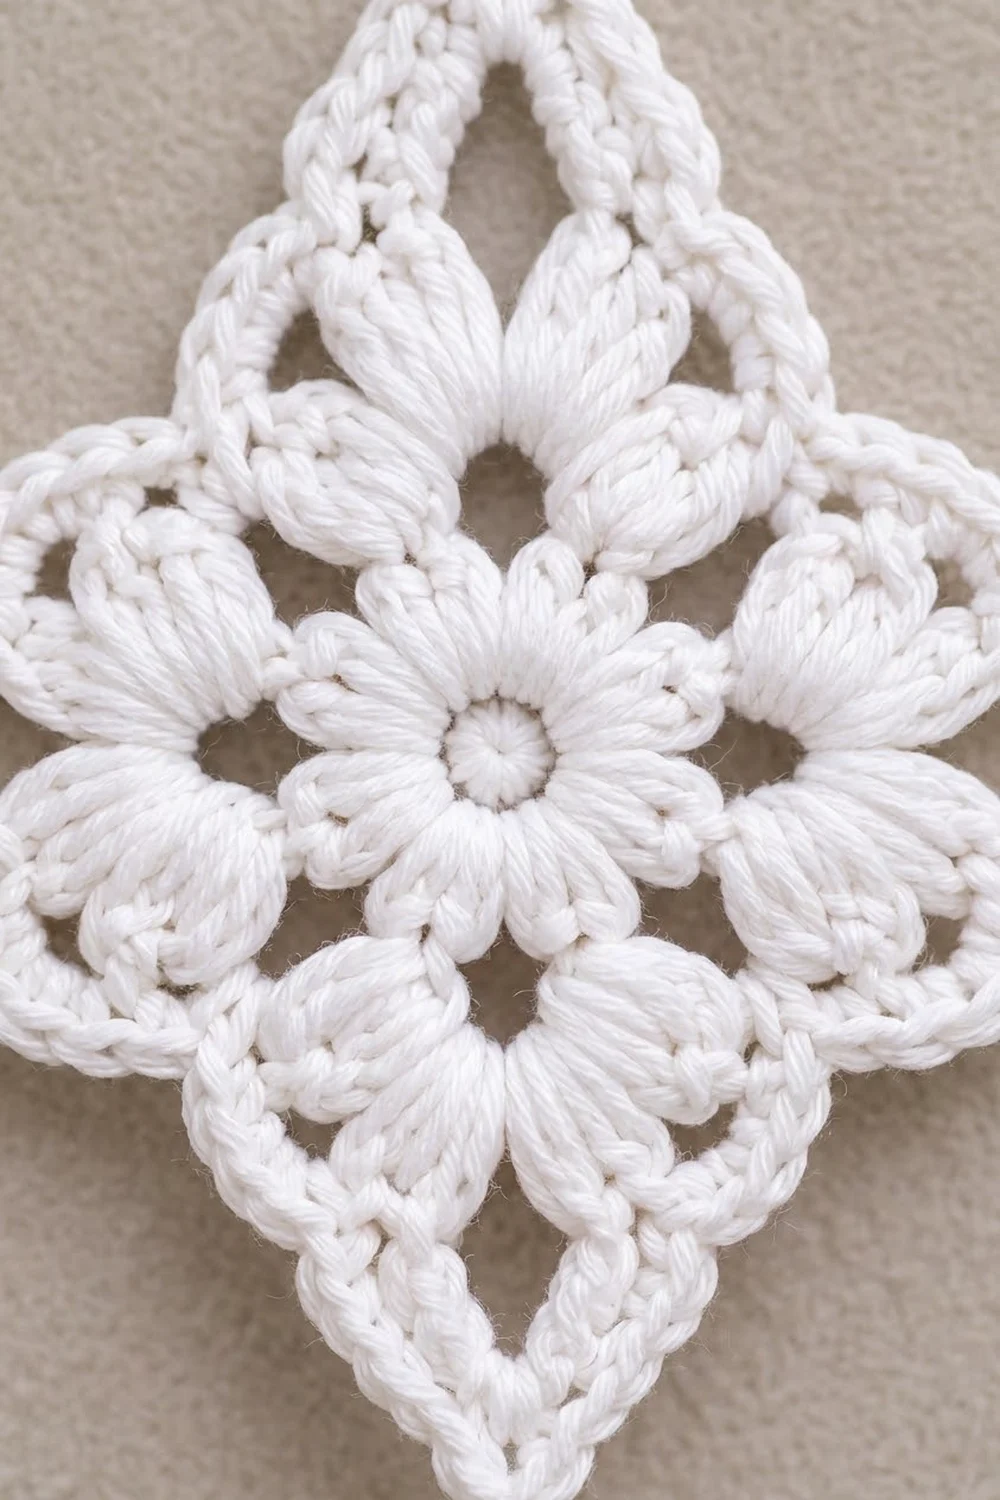
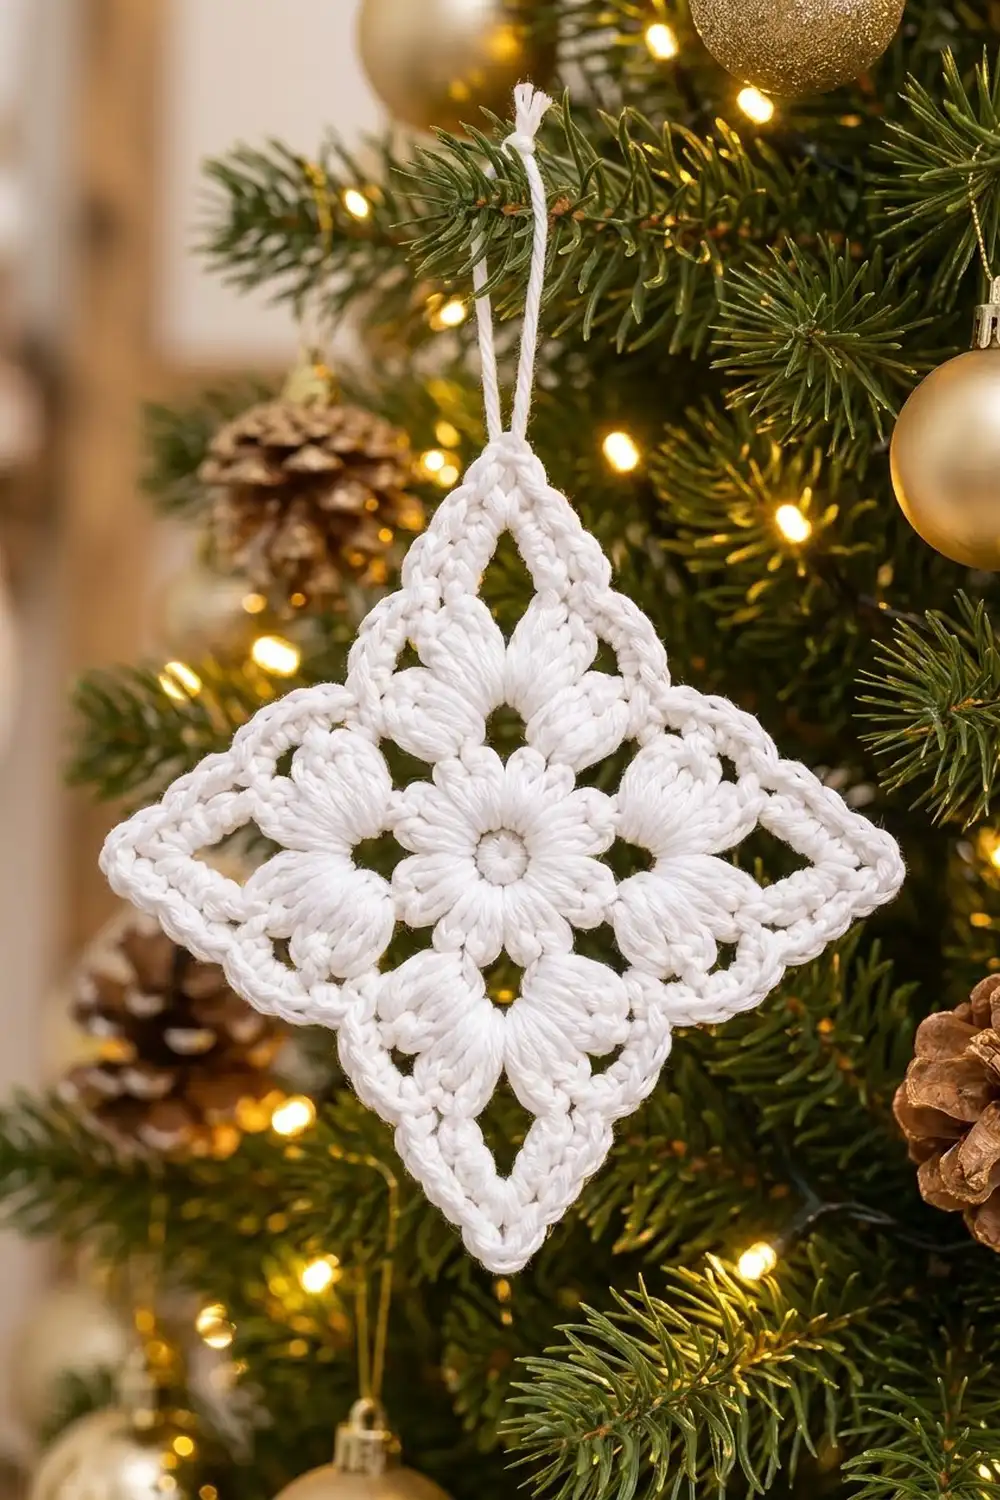
The Snowpetal Diamond is one crocheted motif turned on point, so it looks like a diamond or a four-point star rather than a square. At its center is a small puff-stitch flower around an open ring. Larger puff petals reach toward each of the four tips, framed by open chain windows and a smooth edge that looks like twisted rope.
The motif uses one color, a bright white, which gives it the feel of a snowflake or a lace doily. You can hang it on a tree with a loop of yarn, use it as a gift tag, or lay it flat as a small doily.
This pattern uses US crochet terms. After blocking, the finished motif measures about 4 in (10.2 cm) along each side and about 5.5 in (14.0 cm) from tip to tip.
The construction is simple:
– Start with a magic ring and a round of double crochet.
– Work a ring of small puffs for the center flower.
– Round 3 places pairs of large puffs at the four corners.
– Round 4 adds the open lace frame.
– Round 5 fills everything in to a solid single crochet base.
– Round 6 is a crab-stitch border that gives the rope texture.
Finished Size and Construction
- Finished size: 4 in (10.2 cm) per side; 5.5 in (14.0 cm) tip to tip
- Skill level: Advanced beginner (puff stitch and crab stitch)
- Terminology: US crochet terms
- Yarn weight: DK / light worsted (CYC 3), cotton or cotton blend
- Hook: 3.5 mm (E-4)
- Number of pieces: 1 (single motif, no joining)
- Layout: One square motif turned on point to form a diamond
- Piece size before border (after Round 5): 3.75 in (9.5 cm) per side; 5.25 in (13.3 cm) tip to tip
- Border depth: 1 round of crab stitch, about 1/8 in (0.3 cm)
Materials
Choose a smooth, mercerized cotton or cotton blend in DK weight. Cotton shows the puff stitches clearly, holds its shape after blocking, and stays bright. Avoid fuzzy or very splitty yarns. Each puff pulls up several loops at once, and splitting yarn makes puffs messy.
Yarn:
- White: 12 g, about 30 m (33 yd)
Quantities include a margin of about 20% for yarn tails and a hanging loop. If you plan a set of ornaments, multiply by the number of motifs.
Tools:
- 3.5 mm (E-4) crochet hook
- Tapestry needle
- Scissors
- Stitch marker (optional, for the first stitch of each round)
- Blocking mat and rust-proof pins
- Spray bottle with water
- Ruler or tape measure
Abbreviations (US Terms)
- ch – chain
- sl st – slip stitch
- sc – single crochet
- dc – double crochet
- rsc – reverse single crochet (crab stitch)
- sp – space
- st(s) – stitch(es)
- rep – repeat
- yo – yarn over
Special stitches:
- Small puff: (Yo, insert hook in the stitch or space shown, yo and pull up a loop to about 1/4 in (0.6 cm)) 3 times, then yo and draw through all 7 loops on the hook.
- Large puff: (Yo, insert hook in the space shown, yo and pull up a loop to about 1/4 in (0.6 cm)) 4 times, then yo and draw through all 9 loops on the hook.
- Reverse sc (rsc): Working from left to right (if you are right-handed), insert the hook in the next stitch to the right, yo and pull up a loop, yo and draw through both loops.
Neither puff has a closing chain. The ch-2 or ch-3 that comes after each puff locks it in place.
Gauge and Checkpoints
Because this is a single piece, your first motif is also your gauge test. Work Rounds 1 and 2, then measure before you go on.
- Base gauge: 13 sc = 2 in (5.1 cm) with a 3.5 mm hook.
- After Round 2: the flower measures 1.75 in (4.4 cm) across.
- After Round 3: 3.25 in (8.3 cm) tip to tip.
- After Round 4: 4.75 in (12.1 cm) tip to tip.
- After Round 5: 3.75 in (9.5 cm) per side; 5.25 in (13.3 cm) tip to tip.
- After Round 6 and blocking: 4 in (10.2 cm) per side; 5.5 in (14.0 cm) tip to tip.
If your flower is larger than 1.75 in (4.4 cm), go down to a 3.25 mm (D-3) hook. If it is smaller, go up to a 3.75 mm (F-5) hook. Check again after Round 2 with the new hook. Puffs also grow if you pull the loops too long, so keep each loop at about 1/4 in (0.6 cm).
Pattern
Round 1: Center Ring
Make a magic ring.
Ch 3 (counts as the first dc), then work 15 dc into the ring. Join with a sl st to the top of the beginning ch-3. Pull the ring closed, but leave a small hole showing in the center.
Stitch count: 16 dc.
Round 2: Small Puff Flower
Ch 1 (does not count), small puff in the same st as the join, ch 2, skip next dc, *small puff in next dc, ch 2, skip next dc; rep from * 6 more times. Join with a sl st to the top of the first puff.
Stitch count: 8 small puffs and 8 ch-2 sps.
This round makes the eight-petal center flower. Measure now: it should be 1.75 in (4.4 cm) across.
Round 3: Large Corner Petals
Sl st into the next ch-2 sp. Ch 2 (does not count), large puff in the same sp, ch 3, large puff in the same sp (first corner made), ch 3, sc in next ch-2 sp, ch 3, *(large puff, ch 3, large puff) in next ch-2 sp, ch 3, sc in next ch-2 sp, ch 3; rep from * 2 more times. Join with a sl st to the top of the first puff.
Stitch count: 8 large puffs, 4 sc, and 12 ch-3 sps (4 corner sps and 8 side sps).
The pairs of large puffs are the long petals that point toward the four tips of the diamond. The sc between the pairs anchors each side. Measure: 3.25 in (8.3 cm) tip to tip.
Round 4: Lace Frame
Sl st into the next corner ch-3 sp (between the two puffs of a pair). Ch 3 (counts as dc), (dc, ch 5, 2 dc) in the same sp, ch 4, sc in next ch-3 sp, ch 4, sc in next ch-3 sp, ch 4, *(2 dc, ch 5, 2 dc) in next corner ch-3 sp, ch 4, sc in next ch-3 sp, ch 4, sc in next ch-3 sp, ch 4; rep from * 2 more times. Join with a sl st to the top of the beginning ch-3.
You skip the sc from Round 3; the middle ch-4 on each side passes over it. This round makes the open windows that frame the petals.
Stitch count: 16 dc, 8 sc, 4 corner ch-5 sps, and 12 side ch-4 sps (3 per side).
Measure: 4.75 in (12.1 cm) tip to tip. The ch-5 corners already form the pointed tips.
Round 5: Solid Base Round (Conversion Round)
Ch 1 (does not count), sc in the same st as the join and in the next dc, (3 sc, ch 2, 3 sc) in the corner ch-5 sp, *sc in next 2 dc, [4 sc in next ch-4 sp, sc in next sc] twice, 4 sc in next ch-4 sp, sc in next 2 dc, (3 sc, ch 2, 3 sc) in next corner ch-5 sp; rep from * 2 more times, sc in next 2 dc, [4 sc in next ch-4 sp, sc in next sc] twice, 4 sc in last ch-4 sp. Join with a sl st to the first sc.
Count per side (between corner ch-2 sps): 3 corner sc + 2 + 4 + 1 + 4 + 1 + 4 + 2 + 3 corner sc = 24 sc.
Round total: 24 sc worked 1 per existing stitch (16 dc + 8 sc), plus 72 sc added into spaces (12 ch-4 sps × 4 sc = 48, plus 4 corners × 6 sc = 24) = 96 sc, plus 4 corner ch-2 sps.
Check: 4 sides × 24 sc = 96 sc. Measure: 3.75 in (9.5 cm) per side and 5.25 in (13.3 cm) tip to tip.
Border
Border Gauge
The border is one round of crab stitch. The target is 26 rsc per 4 in (10.2 cm) side, which is 6.5 sts per inch (2.54 cm). Round 5 has 24 sc per 3.75 in (9.5 cm), about 6.4 sts per inch. Because the two rounds match closely, the edge stays flat.
Round 6: Crab-Stitch Rope Edge
Do not turn. Ch 1 (does not count). Working from left to right, rsc in each sc around. In each corner ch-2 sp, work (rsc, ch 2, rsc). Join with a sl st to the first rsc. Fasten off, leaving a 6 in (15.2 cm) tail.
Count per side: 1 corner rsc + 24 rsc + 1 corner rsc = 26 rsc, with a ch-2 point at each tip.
Round total: 96 rsc worked 1 per existing stitch + 8 corner rsc added = 104 rsc.
Check: 4 sides × 26 = 104.
Why the Math Works
Every side has exactly 24 sc before the border. The border adds one stitch at each end of every side, for 26 per side. At 6.5 sts per inch, 26 sts equals 4 in (10.2 cm). The two extra stitches and the ch-2 at each tip let the corner turn sharply without cupping, so the diamond keeps its crisp points.
Hanging Loop (Optional)
Cut a 10 in (25.4 cm) strand of white yarn. Thread it through the ch-2 sp at one tip, even up the ends, and knot them together about 2.5 in (6.4 cm) above the tip. Trim the ends.
Final Blocking
- Weave in all ends along the back of the sc rounds, not through the puffs.
- Lay the motif face up on the blocking mat, turned on point.
- Pin the four ch-2 tips first, setting them 5.5 in (14.0 cm) apart top to bottom and side to side.
- Pin the middle of each side so the side measures 4 in (10.2 cm) and runs straight between the tips.
- If a chain window looks pinched, open it with a pin.
- Gently shape each puff petal with your fingers so it points toward its tip.
- Mist lightly until damp, not soaked.
- Let it dry completely, for at least 6 hours, before you remove the pins.
- For a crisper ornament, spray lightly with fabric stiffener before drying.
Final Quality-Control Checklist
- The center ring is small and closed tight, with 16 dc around it.
- The center flower has 8 small puffs, evenly spaced.
- There are 8 large puffs, two at each of the four tips.
- There are 4 open ch-5 corner windows and 12 ch-4 side windows.
- Round 5 has 24 sc per side, 96 in total.
- Round 6 has 26 rsc per side, 104 in total.
- All four tips are sharp and equal.
- Each side measures 4 in (10.2 cm), and tip to tip measures 5.5 in (14.0 cm).
- The motif lies flat, with no cupping or ruffling.
- Ends are hidden and secure.
Troubleshooting
Puffs look thin or uneven. Pull each loop up to the same height, about 1/4 in (0.6 cm), before you close the puff.
The center hole will not close. Pull the magic ring tail firmly after Round 1, then weave it in a full circle around the ring.
The motif cups like a bowl. Round 5 or the border is too tight. Go up half a hook size for those rounds only.
The edges ruffle. You probably worked extra sc into the ch-4 sps. Recount: 4 sc in each ch-4 sp, 24 per side.
The tips look rounded. Make sure you worked a ch-2 at the Round 5 and Round 6 corners, and pin the tips firmly when blocking.
The crab stitch twists the wrong way. Make sure you are working left to right (if right-handed) and inserting the hook into the next st to the right.
The count is off after Round 4. Check that you skipped the Round 3 sc. The middle ch-4 should pass over it, not attach to it.
Care
Hand wash in cool water with mild soap, press out the water in a towel, and dry flat, pinning the tips again if needed. Spot-clean stiffened ornaments only.
Final Notes
The size checks are short and easy to follow:
– After Round 2, the flower measures 1.75 in (4.4 cm).
– The corner petals bring it to 3.25 in (8.3 cm) tip to tip.
– The lace frame brings it to 4.75 in (12.1 cm).
– Round 5 sets 24 sc per side at 3.75 in (9.5 cm).
– The crab-stitch border brings each side to 26 sts and 4 in (10.2 cm), for a finished diamond of 5.5 in (14.0 cm) tip to tip.
If your center flower is the right size, the rest of the rounds should come out right too. Make one, check your counts, and the next ones will go quickly.
Happy crocheting!