

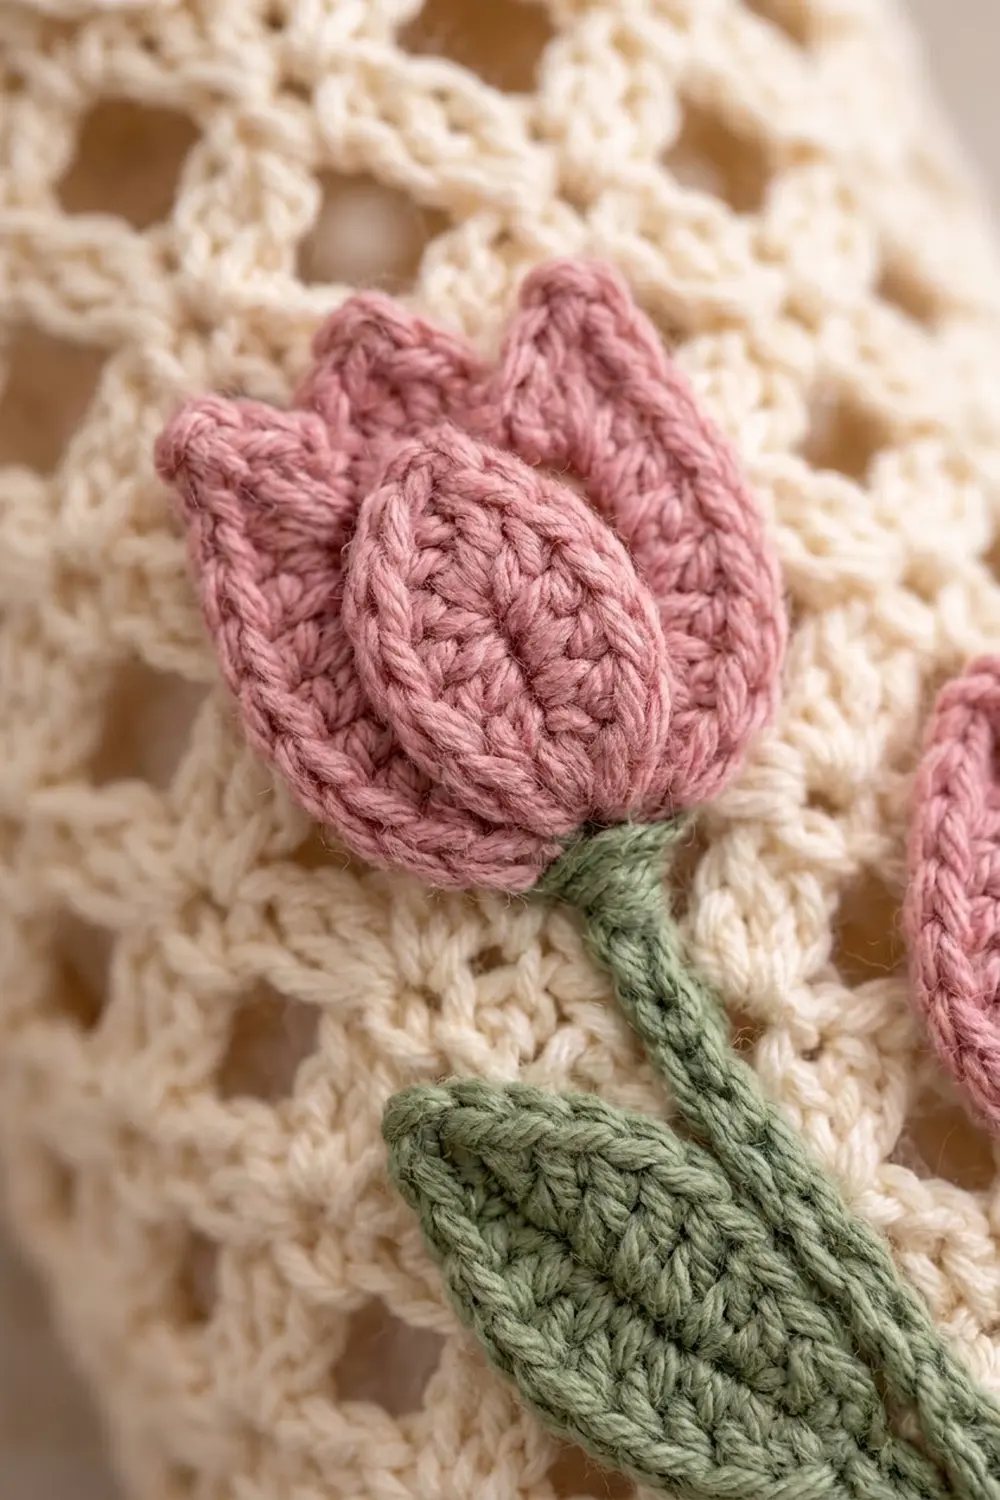
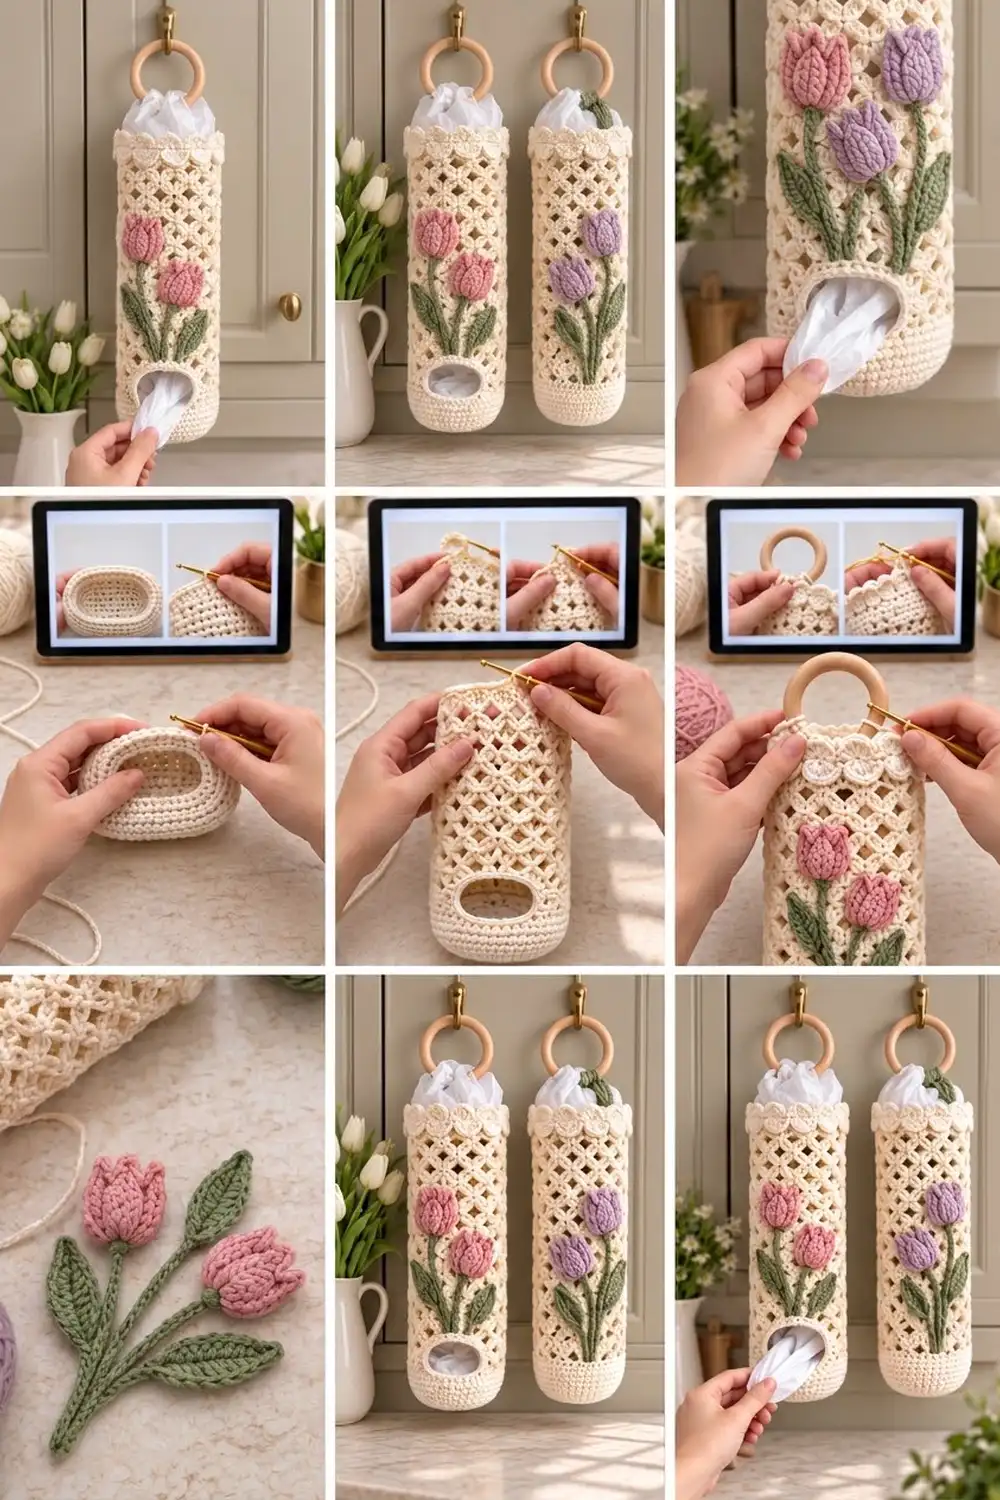
This hanging bag holder keeps grocery bags tidy on a hook or cabinet door. The body is an open diamond lattice that shows the white bags inside. It has a solid bottom band with a dispensing opening and a top band of rounded shells. Two layered tulips are sewn to the front.
The body is cream cotton. The tulip heads are dusty pink or soft lavender, and the stems and leaves are sage green. The holder hangs from a natural wooden ring. Make one in each flower color for a matching pair.
The pattern uses US crochet terms. The finished holder is 5 in (12.7 cm) wide laid flat and 13.5 in (34.3 cm) tall, not counting the ring.
You work the holder from the bottom up. Start with an oval base, then work joined rounds. A few turned rows leave the bag opening. After that come the chain-loop lattice, the shell band and a tab for the ring. You make the petals, stems and leaves separately and sew them on at the end.
Finished Size and Construction
- Finished size: 5 in (12.7 cm) wide flat x 13.5 in (34.3 cm) tall
- Circumference: 10 in (25.4 cm), 40 sts
- Skill level: Intermediate
- Terminology: US crochet terms
- Yarn weight: Worsted (#4) cotton
- Hook: 4.5 mm (US 7)
- Number of pieces: 1 body, plus appliqués (6 petals, 2 stems, 4 leaves)
- Layout: one tube, opening and tulips centered on the front
- Base size: about 4.25 in x 1.75 in (10.8 x 4.4 cm)
- Size before border: opening 2.5 in x 1.33 in (6.4 x 3.4 cm)
- Border depth: opening trim about 0.25 in (0.6 cm)
Materials
Choose a smooth worsted cotton or cotton blend. Cotton keeps the lattice crisp under the weight of the bags. Acrylic works too, but it stretches more. The amounts below assume about 1.7 m per gram (50 g / 85 m).
- Cream (body): 90 g, 153 m
- Dusty pink or lavender (tulip heads): 10 g, 17 m
- Sage green (stems and leaves): 12 g, 20 m
Tools:
- 4.5 mm (US 7) hook
- Wooden ring, 2.75 in (7.0 cm) diameter
- Tapestry needle
- 4 stitch markers
- Rust-proof pins
- Rolled card or a plastic folder (to slip inside while you sew on the appliqués)
- Measuring tape
The quantities include about a 15 percent margin for swatching and differences in tension.
Abbreviations (US Terms)
- ch – chain
- sl st – slip stitch
- sc – single crochet
- hdc – half double crochet
- dc – double crochet
- BLO – back loop only
- st(s) – stitch(es)
- rnd(s) – round(s)
- rep – repeat
- RS / WS – right side / wrong side
Shell: 5 dc in the same stitch.
Ch-5 loop: Ch 5 and skip the stitches given. In later rounds, work each sc around the whole loop.
Gauge and Checkpoints
Gauge: 16 sc x 18 rows = 4 in (10.2 cm).
Mesh gauge: 10 ch-5 loops around = 10 in (25.4 cm). 5 mesh rnds = 3 in (7.6 cm), measured with the holder hanging.
Swatch first. Ch 21 and work 20 sc for 18 rows. The swatch should measure 5 in (12.7 cm) wide, the same as the finished flat width, and 4 in (10.2 cm) tall.
Checkpoints:
- After Rnd 3: The base is 4.25 in x 1.75 in (10.8 x 4.4 cm) with 40 sts.
- After Rnd 16: The solid band is 3 in (7.6 cm) tall and 5 in (12.7 cm) wide flat.
- After Rnd 21: You have 3 in (7.6 cm) of lattice.
- After Rnd 31: The body is 12 in (30.5 cm) tall.
- After Rnd 36: The body is 13.5 in (34.3 cm) tall.
If your swatch is too big, use a hook 0.5 mm smaller. If it is too small, use a hook 0.5 mm larger. If the lattice grows faster than 3 in (7.6 cm) per 5 rnds, work ch 4 instead of ch 5. The stitch counts don’t change.
Body
Work the body in cream.
Oval Base
Rnd 1: Ch 14. Sc in 2nd ch from hook, sc in next 11 ch, 3 sc in last ch. Working along the other side of the chain, sc in next 11 ch, then 2 sc in the last ch (the same ch as the first sc). Join with sl st to first sc. (28 sts)
Rnd 2: Ch 1, 2 sc in first st, sc in next 11 sts, 2 sc in each of next 3 sts, sc in next 11 sts, 2 sc in each of last 2 sts. Join. (34 sts)
Rnd 3: Ch 1, sc in first st, 2 sc in next st, sc in next 11 sts, (sc in next st, 2 sc in next st) 3 times, sc in next 11 sts, (sc in next st, 2 sc in next st) 2 times. Join. (40 sts)
Solid Bottom Band
Rnd 4: Sl st in next 3 sts. This moves the start of the round onto a flat side, which becomes the front. Ch 1. Working in BLO, sc in the same st and in each st around. Join. (40 sts) This round makes the bottom-edge ridge.
Rnds 5–7: Ch 1, sc in each st around. Join. (40 sts)
Dispensing Opening
Set-up: Sl st loosely in next 10 sts. These sl sts form the bottom edge of the opening.
Row 8 (RS): Ch 1, sc in next 30 sts, turn. (30 sts)
Rows 9–13: Ch 1, sc across, turn. (30 sts) Row 13 ends next to the gap.
Rnd 14 (RS): Ch 1, turn, sc in next 30 sts, ch 10 across the gap. Join to first sc. (30 sc + 10 ch = 40 sts)
Rnd 15: Ch 1, sc in each sc and in each ch. Join. (40 sts)
Rnd 16: Ch 1, sc around. Join. (40 sts)
The opening is 10 sts, or 2.5 in (6.4 cm), wide and 6 rows, or 1.33 in (3.4 cm), tall.
Lattice Body
Rnd 17: Ch 1, sc in first st, ch 5, skip next 3 sts, sc in next st; rep from * 8 more times, ch 5, skip last 3 sts. Join to first sc. (10 sc, 10 ch-5 loops)* Each repeat uses 4 sts, and 10 x 4 = 40, so the round works out exactly.
Rnd 18: Sl st in next 3 ch to reach the center of the loop. Ch 1, sc in the same loop, ch 5, sc in next loop; rep from * 8 more times, ch 5. Join. (10 sc, 10 ch-5 loops)*
Rnds 19–31: Rep Rnd 18. (10 sc, 10 loops each)
That makes 15 mesh rounds. Each sc pulls the loop below it into a point, which creates the diamonds.
Shell Top Band
Rnd 32 (conversion): Ch 1, sc in same sc, 3 sc in next loop, sc in next sc, 3 sc in next loop; rep from * 8 more times. Join. (10 sc worked 1 per existing sc + 30 sc worked into loops = 40 sts)*
Rnd 33: Ch 1, sc around. Join. (40 sts)
Rnd 34 (shells): Ch 1, sc in first st, skip next st, 5 dc in next st, skip next st, sc in next st; rep from * 8 more times, skip next st, 5 dc in next st, skip last st. Join. (10 shells + 10 sc = 60 sts)*
Rnd 35 (rim): Ch 3 (counts as dc), skip first dc of shell, sc in next 3 dc, skip 5th dc, dc in next sc; rep from * 8 more times. Skip first dc of the last shell, sc in next 3 dc, skip last dc. Join to top of ch-3. (10 dc worked 1 per existing sc + 30 sc worked 3 per shell = 40 sts)*
Rnd 36: Ch 1, sc around. Join and fasten off. (40 sts)
The top band (Rnds 32–36) is about 1.5 in (3.8 cm) deep.
Hanging Tab
Lay the holder flat with the opening centered on the front. Mark the center 8 sts of Rnd 36 on the back.
Row 1: With RS facing, join cream in the first marked st. Ch 1, sc in the same st and the next 7 sts, turn. (8 sts)
Rows 2–12: Ch 1, sc across, turn. (8 sts)
Fasten off, leaving a 12 in (30.5 cm) tail. The tab measures 2 in (5.1 cm) wide by 2.67 in (6.8 cm) long. Fold it through the ring toward the inside and sew Row 12 to the WS along Rnd 33. The ring should sit about 1 in (2.5 cm) above the rim.
Tulip Appliqués
Make 2 tulips per holder. For the stems, chain gauge is 5 ch = 1 in (2.5 cm).
Petals (make 6, pink or lavender)
Rnd 1: Ch 7. Sc in 2nd ch from hook, hdc in next ch, dc in next 3 ch, (2 dc, ch 2, 2 dc) in last ch. Working along the other side of the chain, dc in next 3 ch, hdc in next ch, sc in last ch. Join. (14 sts + ch-2 tip)
Rnd 2: In BLO, sl st in each st to the tip, (sl st, ch 1, sl st) in the ch-2 tip, then sl st in each st to the end. Fasten off. (16 sl sts + 1 ch)
The sl st outline gives each petal a raised, ridged edge. Each petal measures 1.5 in (3.8 cm) by 0.75 in (1.9 cm).
Assemble: Lay one petal flat as the center petal. Overlap a side petal on each side by 0.25 in (0.6 cm), with the tips angled slightly outward. Sew the three bases together. The head measures 1.75 in (4.4 cm) tall by 1.5 in (3.8 cm) wide.
Stems (green)
Long stem: Ch 25. Sl st in the back bump of 2nd ch from hook and in each ch across. (24 sl sts, about 5 in / 12.7 cm)
Short stem: Ch 18. Sl st in the back bump of 2nd ch from hook and in each ch across. (17 sl sts, about 3.5 in / 8.9 cm)
Leaves (make 4, green)
Rnd 1: Ch 12. Sl st in 2nd ch from hook, sc in next ch, hdc in next 2 ch, dc in next 4 ch, hdc in next ch, sc in next ch, (sc, ch 2, sc) in last ch. Working along the other side of the chain, sc in next ch, hdc in next ch, dc in next 4 ch, hdc in next 2 ch, sc in next ch, sl st in last ch. Fasten off. (22 sts + ch-2 tip)
The chain spine reads as a center vein. Each leaf is about 2.25 in (5.7 cm) long.
Placement
Slide the rolled card inside the holder. Bring the stem ends together 0.5 in (1.3 cm) above Rnd 16, centered over the opening. Angle the long stem up to the left and curve the short stem to the right. Sew a head to the top of each stem, overlapping the stem by 0.25 in (0.6 cm). The upper tulip should end about 2 in (5.1 cm) below Rnd 32. Add 2 leaves to the lower half of each stem, one on each side, with the tips pointing up. Whipstitch around the edges, catching the lattice strands loosely so the mesh doesn’t pucker.
Border: Opening Trim
Border gauge: Work 4 sc per 1 in (2.5 cm) along stitch edges, matching the body. Work 1 sc per row end along row edges, matching the 4.5 rows per 1 in (2.5 cm).
Rnd 1: With RS facing, join cream at the lower right corner of the opening and sc around:
– Bottom: 10 sc, 1 in each sl st
– Left side: 6 sc, 1 per row end
– Top: 10 sc in the free loops of the ch-10
– Right side: 6 sc, 1 per row end
Join. (10 + 6 + 10 + 6 = 32 sts)
Rnd 2: Sl st in each st around. Fasten off. (32 sl sts)
Why the math works: One sc goes into each of the 10 sts on the top and bottom, so those edges stay 2.5 in (6.4 cm) wide. One sc goes into each of the 6 row ends on each side, so the sides stay 1.33 in (3.4 cm) tall. Because there are no extra corner stitches, the corners round off into an oval. The sl st round firms up the edge so it doesn’t stretch. After trimming, the opening relaxes to about 2 in x 1 in (5.1 x 2.5 cm) and stretches to let one bag through at a time.
Final Blocking
- Weave in all ends on the WS.
- Mist the holder lightly with water or steam it gently without touching the yarn.
- Slide a rolled towel inside the tube.
- Pat it to 5 in (12.7 cm) wide and 13.5 in (34.3 cm) tall.
- Pin the top band straight and even out the shells.
- Open up the lattice diamonds so the columns line up.
- Smooth the petals and leaves flat with your fingers.
- Let it dry completely before you remove the towel.
Final Quality-Control Checklist
- Base has 40 sts and a clean Rnd 4 ridge
- Opening is centered on the front, 2.5 in (6.4 cm) wide before trim
- Every lattice round has 10 loops, 15 rounds total
- Rnds 32 and 35 have 40 sts each; Rnd 34 has 10 shells
- Body measures 5 in x 13.5 in (12.7 x 34.3 cm) flat
- Tab is centered on the back and the ring hangs straight
- Each tulip has 3 overlapping petals
- Stems meet 0.5 in (1.3 cm) above the solid band
- No sewing stitches go through the back layer
Troubleshooting
Base cups: Your increases are too tight. Work Rnds 1–3 with a hook 0.5 mm larger.
Base ruffles: Recount against 28, 34 and 40 sts.
Opening is off-center: Redo the 3 sl sts at the start of Rnd 4.
Lattice twists: From Rnd 18 on, work each sc around the loop, not into a chain.
Holder is too long: Leave out 1 or 2 mesh rounds. Each one is about 0.6 in (1.5 cm).
Shells flare: Check that Rnd 35 skips the 1st and 5th dc of every shell.
Appliqués pucker: Take out the stitching and sew it again more loosely, with the card inside.
Care
Hand wash in cool water, reshape and lay flat to dry. Don’t tumble dry, because the lattice will stretch.
Final Notes
Each measurement depends on the one before it. A gauge of 16 sc = 4 in (10.2 cm) gives a 40-st round that is 10 in (25.4 cm) around and 5 in (12.7 cm) wide flat. The solid band adds 3 in (7.6 cm), the lattice 9 in (22.9 cm) and the shell band 1.5 in (3.8 cm), for a total of 13.5 in (34.3 cm). The opening trim uses the same gauge, so it lies flat. Check each checkpoint as you work.
Happy crocheting!