

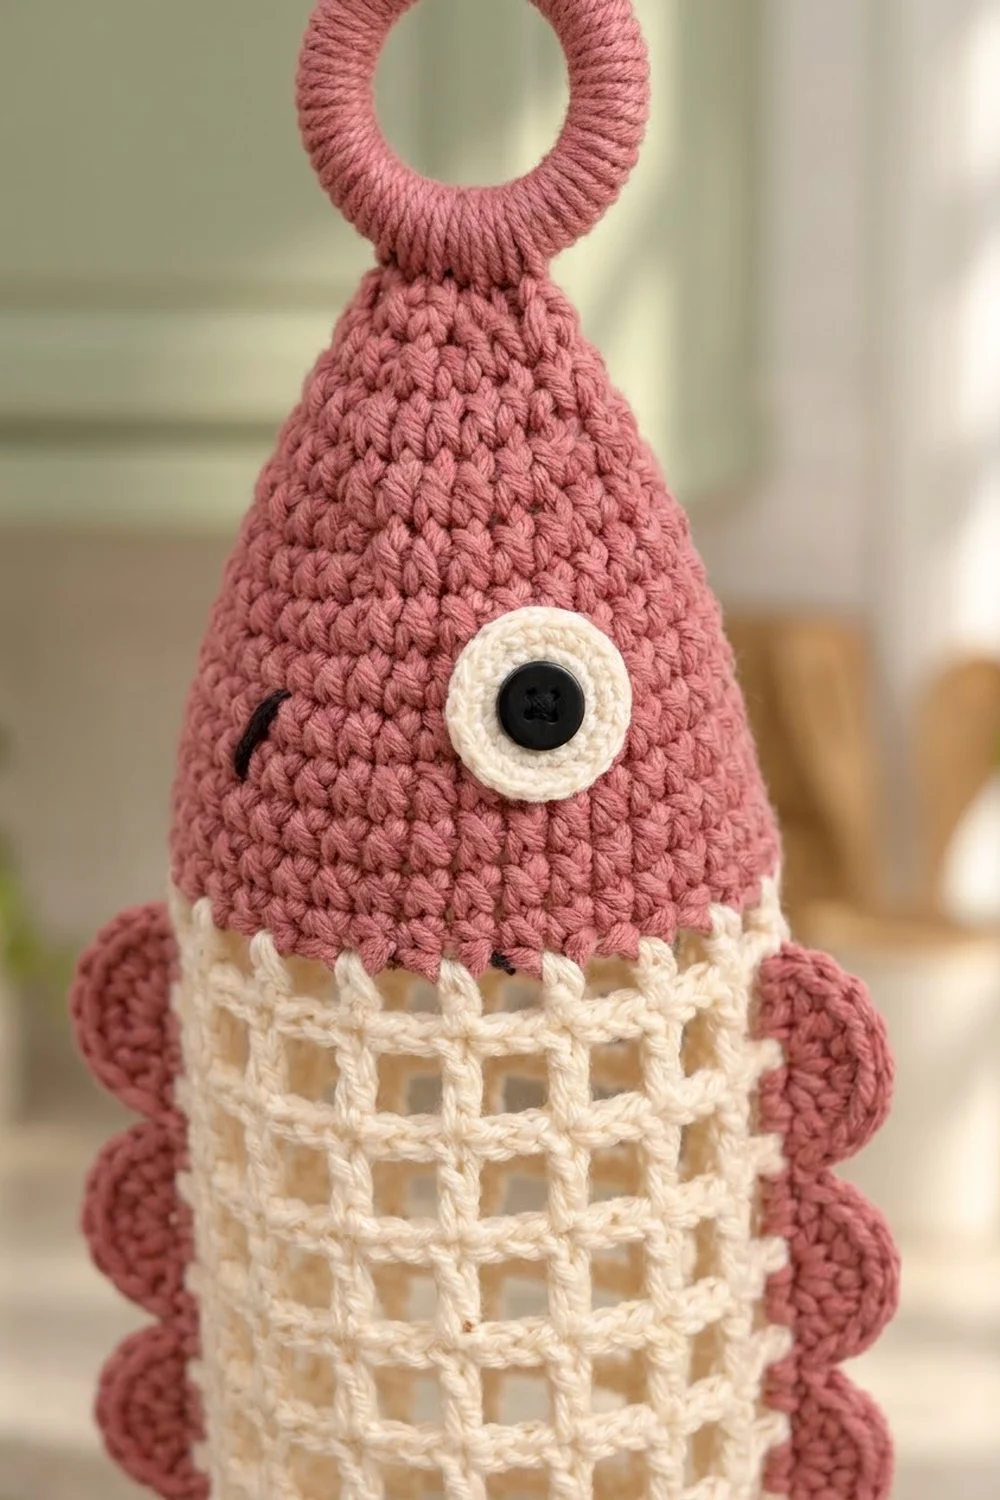
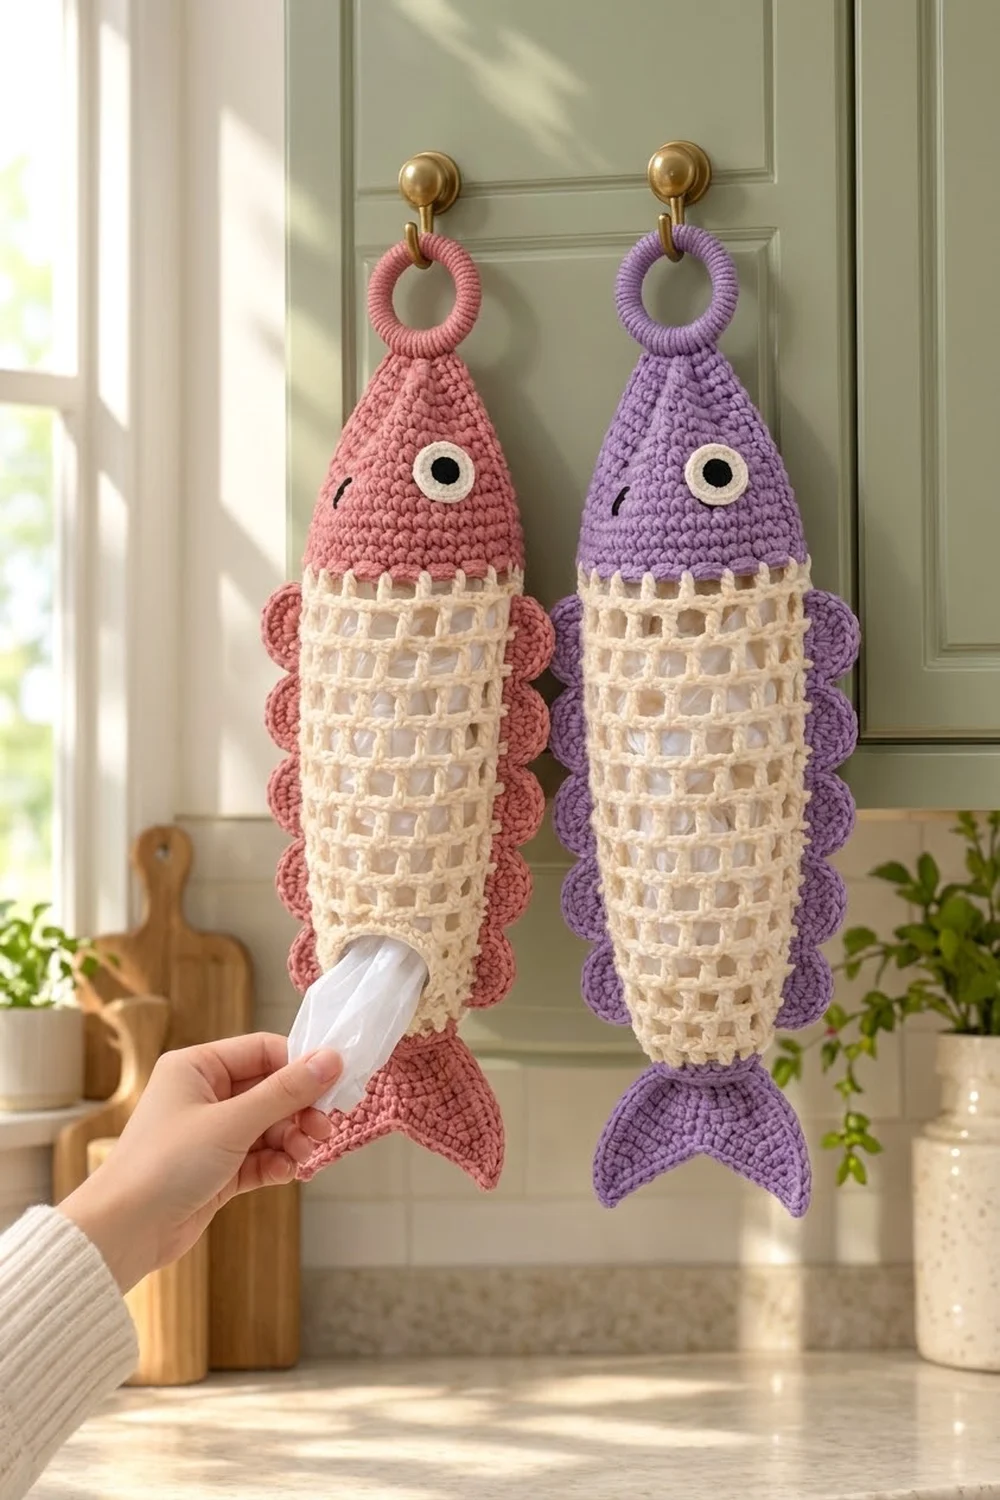
Plastic bags tend to pile up in every kitchen. This fish gives them a cheerful home. The Coral Catch Bag Holder has an airy cream mesh body, a solid rose head with a round two-color eye on each side, and a thick ring for hanging on a hook or cabinet knob.
Scalloped fins run down both sides, and a two-lobed tail finishes the bottom. You push bags in under the front edge of the head and pull them out one at a time through the small opening above the tail. Make it in rose, purple, or any color that suits your kitchen. The body stays cream so the bags show through the mesh.
This pattern uses US crochet terms. The finished holder is about 23 in (58.4 cm) long including the ring and tail. The body is 5.1 in (13.0 cm) wide when flat, or 7.6 in (19.3 cm) including the fins.
The body is one seamless tube worked in rounds from the top down, finishing with a short tapered section. The head is a cone worked in continuous rounds from the tip down. The fins, tail, eyes, and ring are made separately and sewn on.
Finished Size and Construction
- Finished length: about 23 in (58.4 cm) including ring and tail
- Body width (flat): 5.1 in (13.0 cm); 7.6 in (19.3 cm) with fins
- Skill level: Easy–Intermediate
- Terminology: US
- Yarn weight: Worsted (#4) cotton
- Hook: 5.0 mm (H-8)
- Number of pieces: 1 finished holder, built from 8 components (body, head, ring, 2 eyes, 2 fins, tail)
- Layout: head on top, mesh body in the middle, tail at the bottom, one fin on each side
- Body circumference: 36 sts = 10.3 in (26.2 cm)
- Body length before trims: 12 in (30.5 cm) of mesh
- Edging depth: one round of sc, about 0.25 in (0.6 cm)
Materials
Use a smooth worsted-weight cotton or cotton blend at about 1.7 m per gram. Cotton holds its shape when the holder is full and does not stretch out under the weight of bags.
- Cream (body): 65 g / 110 m
- Rose (head, fins, tail, ring): 50 g / 85 m
- White (eyes): 5 g / 9 m
- Black (eye centers, mouth): 3 g / 5 m
All quantities include a margin of about 15% for swatching and joining.
Tools:
- 5.0 mm (H-8) crochet hook
- 1.5 in (3.8 cm) plastic or wooden ring
- Tapestry needle
- 4 locking stitch markers
- Scissors
- Measuring tape
- Pins for placing pieces before sewing
Abbreviations (US Terms)
- ch – chain
- sl st – slip stitch
- sc – single crochet
- dc – double crochet
- inc – 2 sc in the same stitch
- sc2tog – single crochet 2 together
- MR – magic ring
- sk – skip
- sp – space
- st(s) – stitch(es)
- rep – repeat
Special stitch – Mesh: (dc, ch 1, sk 1). Each mesh uses 2 stitches of the round below, so 18 meshes = 36 sts.
Gauge and Checkpoints
Single crochet gauge: 14 sc and 16 rounds = 4 in (10.2 cm).
Mesh gauge: 7 meshes and 8 rounds = 4 in (10.2 cm). Each mesh round is 0.5 in (1.3 cm) tall.
The head and body both have 36 stitches around, so they will only match if your horizontal gauge is the same in sc and in mesh. Before starting, work a flat swatch about 5 in (12.7 cm) wide in sc, then a few rows of mesh on top of it, and measure both sections.
Checkpoints:
- Head after Round 14: 3.5 in (8.9 cm) tall
- Head after Round 18: 4.5 in (11.4 cm) tall, base 10.3 in (26.2 cm) around
- Body after Round 9: 4.25 in (10.8 cm) tall
- Body after Round 30: 13.5 in (34.3 cm) tall
If your pieces come out too big, go down half a hook size. If they come out too small, go up half a size. If only the mesh is off, change hooks for the body alone so it still matches the head’s 36-stitch base.
Body (Cream)
The body is worked in joined rounds without turning. Place a marker at the start of the round; this line becomes the center back.
Foundation: Ch 36 and join with sl st to the first ch, taking care not to twist the chain.
Round 1: Ch 1, sc in each ch around, join. (36 sc)
Round 2 (set-up mesh): Ch 4 (counts as dc + ch 1), sk next sc, dc in next sc, ch 1, sk next sc; rep from * 16 more times, then join to the 3rd ch of the beginning ch-4. (18 dc + 18 ch-1 sps = 18 meshes, 36 sts)
Rounds 3–25: Ch 4 (counts as dc + ch 1), dc in next dc, ch 1; rep from * around, join to the 3rd ch of the beginning ch-4. (18 meshes)
You now have 24 mesh rounds measuring 12 in (30.5 cm), plus Round 1.
Round 26 (conversion): Ch 1, sc in each dc and in each ch-1 sp around, join. (18 sc in dc + 18 sc in sps = 36 sc)
Round 27: Ch 1, (sc 4, sc2tog) 6 times, join. (30 sc)
Round 28: Ch 1, (sc 3, sc2tog) 6 times, join. (24 sc)
Round 29: Ch 1, (sc 2, sc2tog) 6 times, join. (18 sc)
Round 30 (trim): Ch 1, sc in each st around, join. (18 sc)
Fasten off. The bottom opening is 18 sts, about 2.6 in (6.6 cm) across when flat, which lets one bag out at a time. The tapered section (Rounds 26–30) adds 1.25 in (3.2 cm), for a total body length of 13.5 in (34.3 cm).
Head (Rose)
Work in continuous rounds without joining, and move a marker up each round.
- Round 1: 6 sc in MR. (6)
- Round 2: Sc in each st. (6)
- Round 3: (Sc 1, inc) 3 times. (9)
- Round 4: Sc in each st. (9)
- Round 5: (Sc 2, inc) 3 times. (12)
- Round 6: Sc in each st. (12)
- Round 7: (Sc 3, inc) 3 times. (15)
- Round 8: (Sc 4, inc) 3 times. (18)
- Round 9: (Sc 5, inc) 3 times. (21)
- Round 10: (Sc 6, inc) 3 times. (24)
- Round 11: (Sc 7, inc) 3 times. (27)
- Round 12: (Sc 8, inc) 3 times. (30)
- Round 13: (Sc 9, inc) 3 times. (33)
- Round 14: (Sc 10, inc) 3 times. (36)
- Rounds 15–18: Sc in each st. (36)
Sl st in the next st and fasten off, leaving an 18 in (45.7 cm) tail for joining. The head is 4.5 in (11.4 cm) tall. Increasing only 3 times per round gives the long, pointed fish snout seen in the photo instead of a round dome.
Hanging Ring (Rose)
Join rose with a sl st over the 1.5 in (3.8 cm) ring. Ch 1, then work 36 sc over the ring, pushing the stitches together so the ring is completely covered. Join and fasten off, leaving a 12 in (30.5 cm) tail.
The covered ring measures about 2 in (5.1 cm) across. Turn the stitch edges to the inside of the ring for a smooth, rounded look.
Eyes (Make 2)
Round 1 (black): 6 sc in MR, pull the ring tight, and join with white.
Round 2 (white): Ch 1, inc in each st around, join. (12 sc)
Fasten off, leaving a 12 in (30.5 cm) white tail. Each eye is about 1 in (2.5 cm) across.
Fins (Rose, Make 2)
Foundation: Ch 38.
Row 1: Sc in the 2nd ch from the hook and in each ch across, turn. (37 sc)
Row 2: Ch 1, sc in the first st, sk 2, 7 dc in the next st, sk 2, sc in the next st; rep from * 5 more times, turn. (6 shells, 7 sc = 49 sts)
Check the math: 1 sc + (6 repeats × 6 sts used) = 37 sts. That matches Row 1 exactly.
Row 3 (solid scallop edge): Ch 1, sc in the first sc. Sc in each of the next 3 dc, 2 sc in the 4th dc, sc in each of the next 3 dc, sc in the next sc; rep from * 5 more times. (7 sc + 6 × 8 sc = 55 sc)
Fasten off, leaving an 18 in (45.7 cm) tail. Each fin is 10.6 in (26.9 cm) long and about 1.25 in (3.2 cm) deep, with 6 rounded lobes.
Tail (Rose)
The tail is worked flat in rows, starting at the narrow end that attaches to the body.
Foundation: Ch 5.
Row 1: Sc in the 2nd ch from the hook and in each ch across, turn. (4)
Rows 2–9: Ch 1, inc in the first st, sc to the last st, inc in the last st, turn.
Counts are 6, 8, 10, 12, 14, 16, 18, then 20 at Row 9. The tail now measures 2.25 in (5.7 cm).
First lobe:
- Row 10: Ch 1, sc2tog, sc 6, sc2tog, turn. (8) Leave the remaining 10 sts unworked.
- Row 11: Ch 1, sc2tog, sc 4, sc2tog, turn. (6)
- Row 12: Ch 1, sc2tog, sc 2, sc2tog, turn. (4)
- Row 13: Ch 1, (sc2tog) twice, turn. (2)
- Row 14: Ch 1, sc2tog. (1)
Fasten off.
Second lobe: Join yarn in the first unworked st of Row 9 and repeat Rows 10–14.
Edging round: Join rose at the right corner of Row 1 and sc evenly around the tail as follows:
- 4 sc across Row 1
- 9 sc down the right side (1 per row end, Rows 1–9)
- 4 sc along the outer edge of the lobe (Rows 10–13)
- 3 sc in the tip
- 3 sc up the inner edge (Rows 13–11)
- sc2tog across the notch, joining the Row 10 row-ends of both lobes
- 3 sc down the next inner edge
- 3 sc in the tip
- 4 sc along the outer edge
- 9 sc up the left side
Join. (43 sc) Fasten off, leaving a 12 in (30.5 cm) tail.
The tail is 3.5 in (8.9 cm) long and about 6 in (15.2 cm) wide after edging. The sc2tog at the notch keeps the V between the lobes sharp.
Edging and Assembly
On this single piece, the “border” is the set of solid edges that frame the mesh. These are the body’s Round 1 and Round 30 trims, the fin scallop edge, and the tail edging round. All are worked at the sc gauge of 14 sts = 4 in (10.2 cm).
Why the math works: The head’s base (36 sc), the body’s top trim (36 sc), and the mesh (18 meshes × 2 sts) all have the same count. Joining them one-to-one means nothing ruffles and nothing pulls.
1. Attach the head. Flatten the body with the marker at center back. Slip the head’s base over the top of the body so Round 18 lines up with body Round 1, stitch for stitch. Starting 10 sts to the right of center back, sl st through both layers for 20 sts across the back and both sides.
Leave the remaining 16 sts at the front unjoined. This 4.6 in (11.7 cm) gap is the loading slot: the front edge of the head rests over it like a flap.
2. Attach the fins. Find the side folds of the flattened body, 9 sts on each side of center back. Pin the straight edge of each fin (Row 1) along a side fold from mesh Round 3 to Round 23. That is 21 rounds, or 10.5 in (26.7 cm), which matches the 10.6 in (26.9 cm) fin length. Whipstitch the fin to the dc posts along the fold, keeping the scallops facing outward.
3. Attach the tail. Center Row 1 of the tail on the back half of body Round 30. Sew those 4 sts, then sew the edges of tail Rows 1–2 to Rounds 29–30 for stability. Keep the front half of the opening free.
4. Attach the ring. Sew the covered ring to the head tip through the magic ring, going through it several times.
5. Eyes and mouth. Sew one eye to each side of the head, centered over Rounds 12–14, using the white tail. With black, embroider a short 3/8 in (1.0 cm) straight stitch in front of and slightly below each eye.
Final Blocking
- Weave in all ends along solid sc areas, where they won’t show through the mesh.
- Roll up a hand towel and slide it into the body so the tube is evenly round.
- Mist the body or steam it lightly from 1 in (2.5 cm) away. Do not press.
- Gently straighten the mesh columns so the holes are square and the column above the round joins hangs straight.
- Pin the fin scallops and tail lobes flat on a towel and mist them.
- Let everything dry completely, then remove the towel and check the measurements again.
Final Quality-Control Checklist
- [ ] Body is 13.5 in (34.3 cm) long and 5.1 in (13.0 cm) wide when flat
- [ ] Mesh has 18 meshes in every round
- [ ] Head is 4.5 in (11.4 cm) tall and joined across 20 sts, with a 16-st front slot left open
- [ ] Each fin has 6 lobes and is sewn from mesh Round 3 to Round 23
- [ ] Tail has 43 edging sts and a sharp notch
- [ ] Eyes are placed at the same height on both sides
- [ ] Bottom opening is about 2.6 in (6.6 cm) across and the front is not blocked by the tail
- [ ] Ring is secure and can hold a full load
Troubleshooting
Head is looser or tighter than the body. Your sc and mesh gauges differ. Remake the head one hook size up or down instead of adding or removing stitches.
Mesh twists in a spiral. Make sure you join to the 3rd ch of the ch-4 every round, and do not turn.
Fins ruffle. You stretched the body while sewing. Pin first, and sew with the tube flat and relaxed.
Bags fall out of the bottom. Work one more round of (sc 1, sc2tog) to get 12 sts.
Holes look rectangular. Your dc are too tall. Work the dc snug or try a shorter-shanked hook.
Tail lobes curl. Block them flat, and keep the edging round loose.
Care
Hand wash in cool water, press out the water gently, and reshape. Dry flat over a rolled towel.
Final Notes
Everything in this pattern follows from one number: 36. The swatch sets 14 sc and 7 meshes to 4 in (10.2 cm). That makes 36 sts measure 10.3 in (26.2 cm) around, so the head’s 36-stitch base and the 18-mesh body join stitch for stitch.
Twenty-four mesh rounds give 12 in (30.5 cm). With the trims, the body is 13.5 in (34.3 cm), and the 4.5 in (11.4 cm) head, the tail, and the ring bring the holder to about 23 in (58.4 cm). The 37-stitch fins match the 21 rounds they are sewn along, and the tail’s 43 edging stitches outline its shape exactly. Check each of these measurements as you go, and the fish will come out balanced, sturdy, and ready to hold bags.
Happy crocheting!