

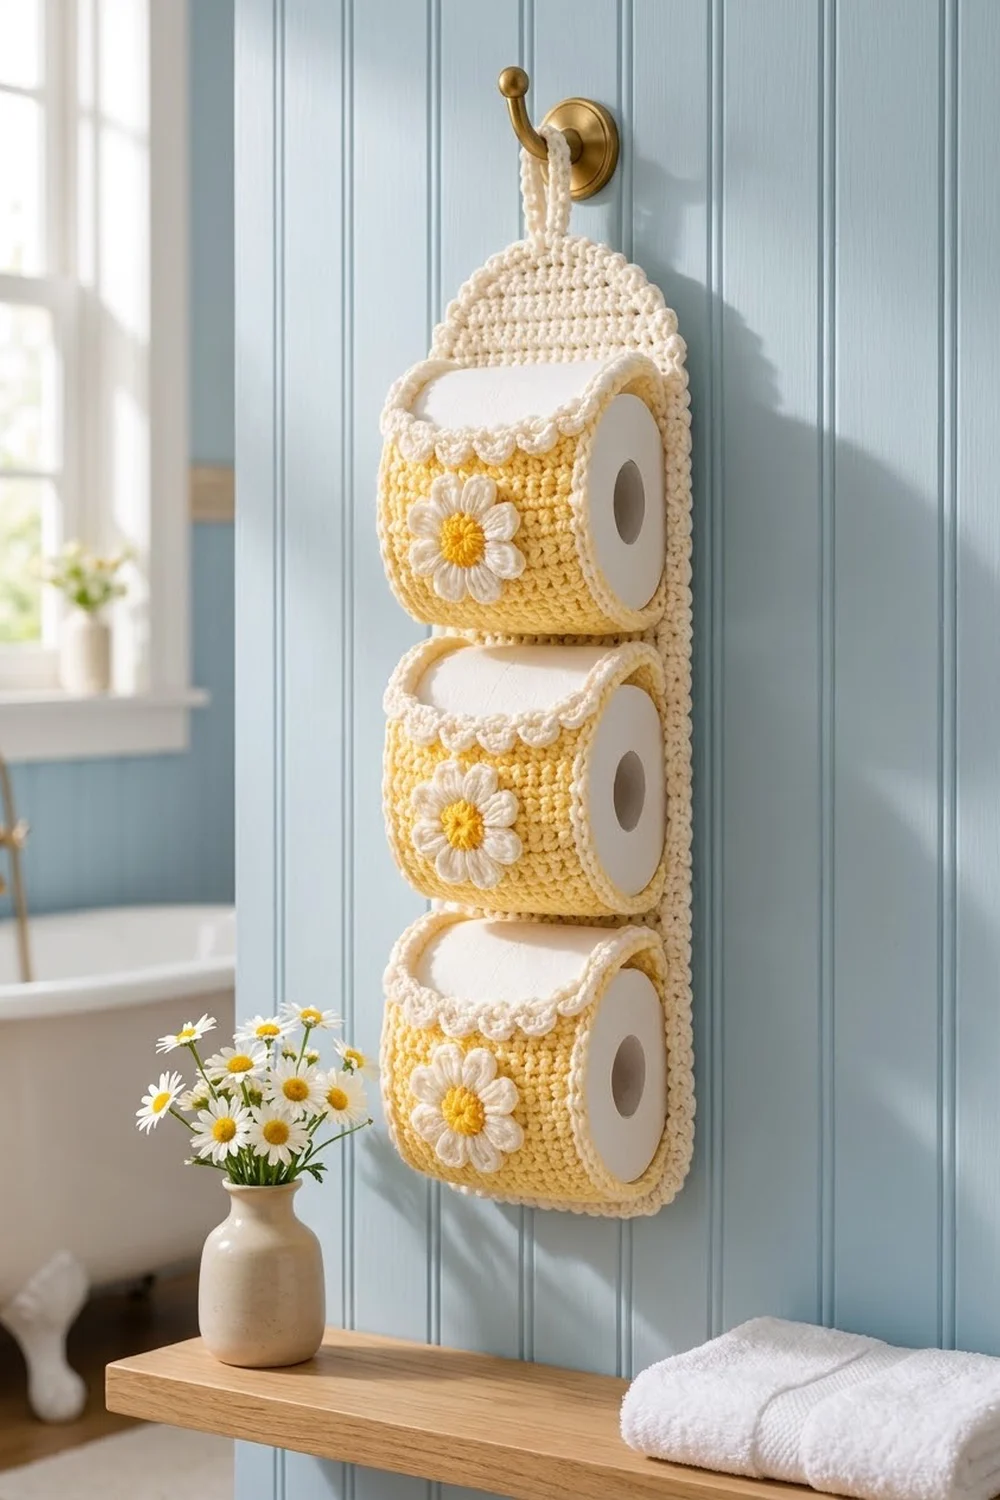
This hanging holder stores three spare rolls in a neat column, so they stay off the floor and close at hand. A tall cream panel with a rounded top hangs from a loop. Three butter-yellow pockets are sewn down its front, and each one has a scalloped cream edge and a sweet daisy.
The colors are soft and cheerful: cream, pale butter yellow and a golden yellow for the flower centers. The style is cottage farmhouse. It’s simple, sturdy and easy to make, with one small decorative detail on each pocket.
This pattern uses US crochet terms. The finished holder measures about 7.25 in (18.4 cm) wide and 20 in (50.8 cm) long, plus a 2 in (5.1 cm) hanging loop. Each pocket fits a standard roll up to about 4.5 in (11.4 cm) long.
You’ll work the panel in single crochet rows from the bottom up, shaping the arch with decreases. Next you’ll make three flat pocket rectangles and three daisies. Finally, you’ll sew the pockets and daisies on, then add the border and hanging loop.
Finished Size and Construction
- Finished size: 7.25 x 20 in (18.4 x 50.8 cm), plus a 2 in (5.1 cm) loop
- Skill level: Easy / advanced beginner
- Terminology: US
- Yarn weight: Worsted (#4) cotton
- Hook: 4.5 mm (US 7)
- Number of pieces: 7 (1 panel, 3 pockets, 3 daisies)
- Layout: 3 pockets stacked in a single column on 1 panel
- Pocket size (flat): 5.75 x 11.1 in (14.6 x 28.2 cm) including the side edging
- Panel size before border: 6.25 x 19.1 in (15.9 x 48.5 cm)
- Border depth: about 0.5 in (1.3 cm), 2 rounds
Materials
Use a smooth worsted cotton or cotton blend. Cotton keeps its shape when it holds weight and copes well with bathroom humidity. The amounts below assume about 85 m (93 yd) per 50 g.
- Color A, Cream: 120 g, about 204 m (223 yd), for the panel, border, pocket trim and petals
- Color B, Butter Yellow: 130 g, about 221 m (242 yd), for the pockets
- Color C, Golden Yellow: 10 g, about 17 m (19 yd), for the daisy centers
Tools
- 4.5 mm (US 7) crochet hook
- Tapestry needle
- Stitch markers (at least 8)
- Scissors
- Measuring tape
- Rust-proof pins and a blocking mat
These quantities include a margin of roughly 15% for your gauge swatch and seaming tails.
Abbreviations (US Terms)
- ch: chain
- sl st: slip stitch
- sc: single crochet
- hdc: half double crochet
- dc: double crochet
- sc2tog: single crochet 2 together
- sk: skip
- st(s): stitch(es)
- MR: magic ring
- RS: right side
Special stitch: Shell scallop. Sk 1 st, work 5 dc in the next st, sk 1 st, then sc in the next st.
Gauge and Checkpoints
Gauge: 16 sc and 18 rows = 4 in (10.2 cm) in sc rows.
Make one pocket first and use it as your swatch. It’s a useful piece either way, and its size tells you everything you need to know.
Checkpoints:
- Pocket after Row 18: 5.25 in (13.3 cm) wide and 4 in (10.2 cm) tall
- Pocket after Row 50: 5.25 x 11.1 in (13.3 x 28.2 cm)
- Daisy: about 3 in (7.6 cm) across
- Panel after Row 18: 6.25 in (15.9 cm) wide
- Panel after Row 72: 16 in (40.6 cm) tall
- Panel after Row 86: about 19.1 in (48.5 cm) tall
If your piece is too big, go down to a 4 mm (US G-6) hook. If it’s too small, go up to a 5 mm (US H-8) hook. Get the width right before anything else, because a pocket that is too wide won’t sit inside the panel’s border.
Backing Panel
Use Color A.
Row 1: Ch 26. Sc in the 2nd ch from the hook and in each ch across. (25 sc)
Rows 2–72: Ch 1, turn. Sc in each st across. (25 sc)
At the end of Row 72, the panel should measure 16 in (40.6 cm).
Arch Shaping
Rows 73–75: Ch 1, turn. Sc in each st across. (25 sc)
Row 76: Ch 1, turn. Sc2tog, sc in next 21 sts, sc2tog. (23 sc)
Row 77: Ch 1, turn. Sc in each st across. (23 sc)
Row 78: Ch 1, turn. Sc2tog, sc in next 19 sts, sc2tog. (21 sc)
Row 79: Ch 1, turn. Sc in each st across. (21 sc)
Row 80: Ch 1, turn. Sc2tog, sc in next 17 sts, sc2tog. (19 sc)
Row 81: Ch 1, turn. Sc in each st across. (19 sc)
Row 82: Ch 1, turn. Sc2tog, sc in next 15 sts, sc2tog. (17 sc)
Row 83: Ch 1, turn. Sc2tog, sc in next 13 sts, sc2tog. (15 sc)
Row 84: Ch 1, turn. Sc2tog, sc in next 11 sts, sc2tog. (13 sc)
Row 85: Ch 1, turn. Sc2tog, sc in next 9 sts, sc2tog. (11 sc)
Row 86: Ch 1, turn. Sc2tog, sc in next 7 sts, sc2tog. (9 sc)
Fasten off. The arch is 14 rows tall, about 3.1 in (7.9 cm). Decreasing every other row and then every row gives it a rounded top instead of a pointed one.
Pockets
Use Color B.
Row 1: Ch 22. Sc in the 2nd ch from the hook and in each ch across. (21 sc)
Rows 2–50: Ch 1, turn. Sc in each st across. (21 sc)
Fasten off. Put a marker at the end of Row 18. Rows 1–18 form the flat back section (4 in / 10.2 cm), and Rows 19–50 form the curved front (about 7.1 in / 18.0 cm).
Side Edging
Use Color A. Join at the Row 1 corner of one long side. Ch 1, then sc into the row-ends up the side, skipping every 9th row-end (row-ends 9, 18, 27, 36 and 45). That’s 50 row-ends minus 5 skipped. (45 sc) Fasten off, then repeat on the other long side. (45 sc)
The pocket is now 23 sts wide, or 5.75 in (14.6 cm).
Scalloped Front Edge
Use Color A, with the RS facing. Join in the first st of Row 50.
Scallop row: Ch 1, sc in the same st. Sk 1, 5 dc in next st, sk 1, sc in next st. Repeat from * to * 4 more times. (5 shells and 6 sc, 31 sts in total, worked across 21 base sts)
Check: 1 starting sc plus 5 repeats of 4 base sts each = 21 base sts, so the last sc lands exactly in the last st. Fasten off and weave in the ends.
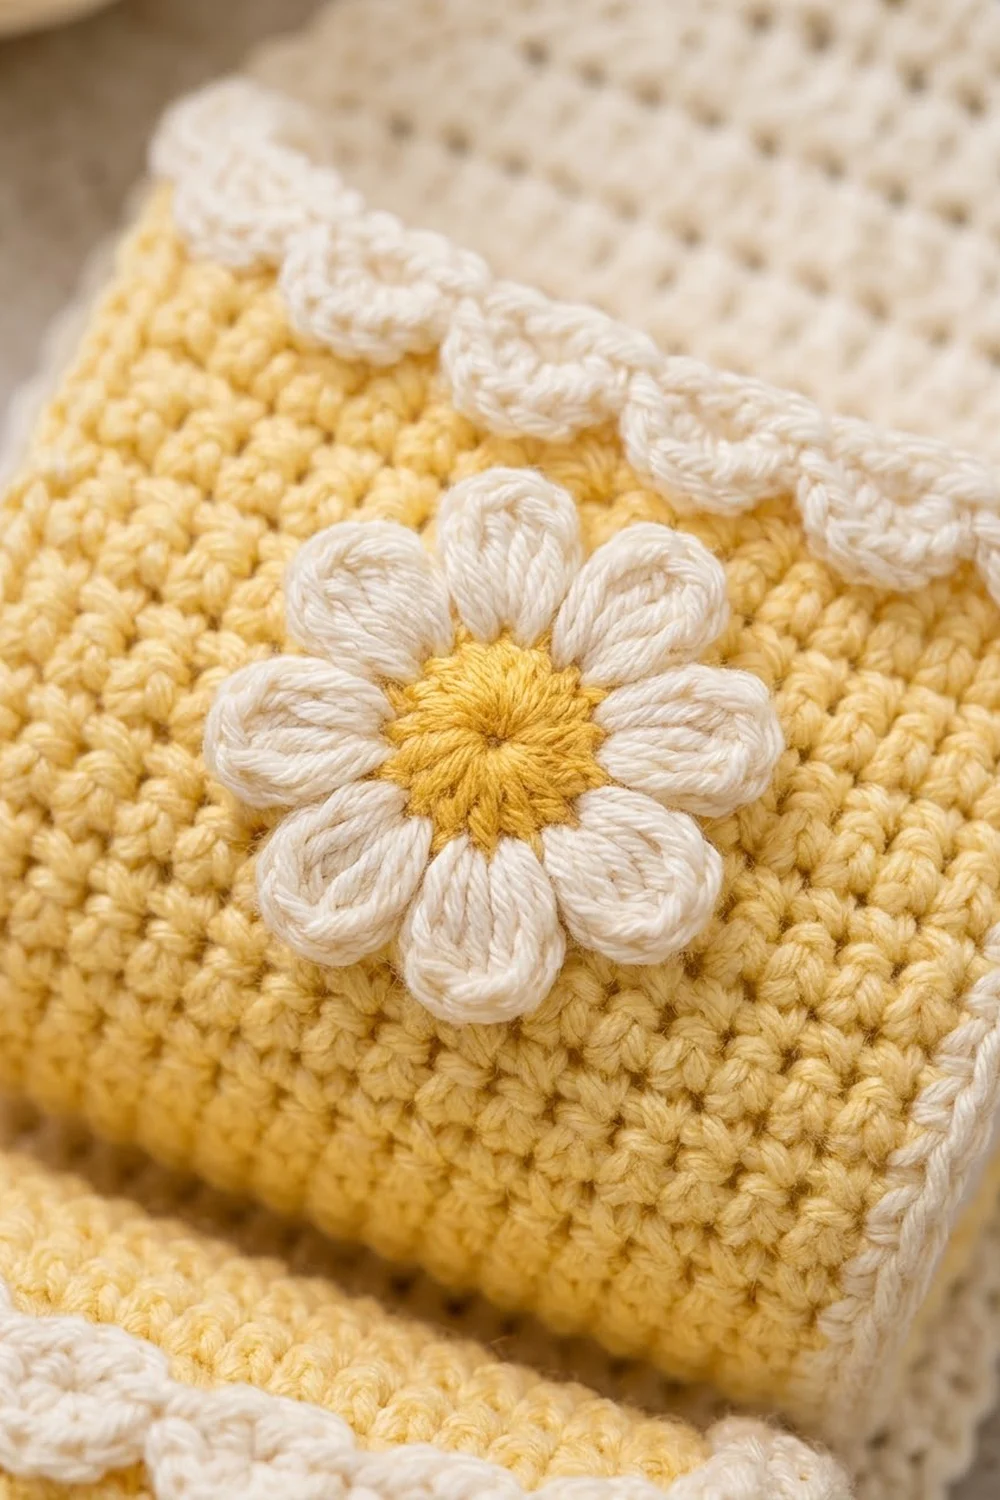
Daisies
Rnd 1: With Color C, make an MR. Ch 1, work 10 sc in the ring, then sl st to the first sc. (10 sc)
Rnd 2: Ch 1, work 2 sc in each st around, then sl st to the first sc. (20 sc) Fasten off Color C. The center is now about 1 in (2.5 cm) across.
Rnd 3 (petals): Join Color A in any st. Ch 6. Working back along the chain from the 2nd ch from the hook, work sc, hdc, dc, hdc, sc. Sl st in the same st as the base of the chain, then sl st in the next st. Repeat from * to * 9 more times. (10 petals)
Each petal uses 2 sts of Rnd 2, so 10 petals use all 20 sts. Fasten off, leaving a 12 in (30.5 cm) tail for sewing.
Make All Pieces
- Color A: 1 panel, plus the side edging and scallop trim on all 3 pockets and the petals on all 3 daisies
- Color B: 3 pockets
- Color C: 3 daisy centers
Layout (front view, top to bottom):
   [ loop ]
  (  arch  )   rows 69–86, panel shows
  [Pocket 1]   back sewn rows 50–68
  [Pocket 2]   back sewn rows 28–46
  [Pocket 3]   back sewn rows 6–24
  [ bottom ]
Joining
Method: Whipstitch with Color A and a tapestry needle, working through the edge sts of the pocket and the matching sts of the panel.
Placement: Lay the panel flat with the RS up and count the rows from the bottom. Each pocket’s back section takes 18 panel rows.
- Pocket 3 (bottom): Pocket Row 18 lines up with panel Row 6, and pocket Row 1 lines up with panel Row 24.
- Pocket 2: Pocket Row 18 at panel Row 28, Row 1 at panel Row 46.
- Pocket 1 (top): Pocket Row 18 at panel Row 50, Row 1 at panel Row 68.
Center each pocket side to side. Its 23 sts sit over the middle of the panel’s 25 sts, leaving 1 panel st, about 0.25 in (0.6 cm), clear at each side.
Stitch-to-stitch logic:
- Top seam: Sew the 21 foundation sts of pocket Row 1 to the 21 middle sts of the panel row, one to one.
- Side seams: Sew both side edges of the back section down to the panel, one edging st to one panel row-end, for 16 edging sts per side over 18 rows.
- Bottom fold seam: Sew a straight line across pocket Row 18 into the panel row underneath, 21 sts to 21 sts. This is the bottom of the trough.
- Front corners: Curve the front up and tack each scalloped corner to the panel 14 rows (about 3.1 in / 7.9 cm) above the bottom fold seam, directly above that side’s seam. Make several firm stitches at each corner.
Tension: Pull each seam snug enough to lie flat, but don’t pucker the panel. Seams that are too tight will make the panel cup.
Daisies: Pin each daisy to the right half of its pocket front, with the center about 2 in (5.1 cm) below the scallops. Sew around the center, then tack down each petal tip, going through the front layer only.
Checkpoint: The panel should still lie flat at 6.25 in (15.9 cm) wide, with the pockets inside its edges.
Border
Use Color A. The border uses the panel gauge: 4 sts per inch across and 4.5 rows per inch up.
Rnd 1: With the RS facing, join at the bottom right corner in the foundation loops. Work around the panel as follows.
- Bottom edge: 3 sc in the first foundation loop, sc in the next 23, 3 sc in the last loop. That’s 25 sts worked one per stitch plus 4 extra. (29 sc)
- Each straight side: 1 sc per row-end, skipping every 9th row-end. That’s 72 row-ends minus 8 skipped. (64 sc per side)
- Each side of the arch: 1 sc per row-end. (14 sc per side)
- Top: 2 sc in the first st, sc in the next 7, 2 sc in the last st. That’s 9 sts worked plus 2 extra. (11 sc)
Rnd 1 total: 29 + 64 + 14 + 11 + 14 + 64 = 196 sc. Sl st to the first sc.
Rnd 2: Ch 1. Sc in each st around, working 3 sc in the center st of each bottom corner.
- Bottom edge: 29 sts worked plus 4 extra. (33 sc)
- Each side, straight section plus arch: 78 sc per side
- Top: Sc in the first 4 sts, ch 16, sk 3, sc in the last 4 sts. (8 sc and a ch-16 loop)
Rnd 2 total: 193 sts worked plus 4 extra = 197 sc, plus the ch-16. Sl st to join and fasten off.
Loop: Join Color A at the base of the ch-16. Work 24 sc over the chain, then sl st to the border and fasten off. The finished loop rises about 2 in (5.1 cm).
Why the math works: At 4.5 rows per inch, 72 rows are 16 in tall. Skipping every 9th row-end leaves 64 sts, and 64 sts at 4 sts per inch is also 16 in. The border length matches the edge exactly, so it won’t ruffle or pull in. Across the bottom, 25 + 4 + 4 = 33 sts at 4 sts per inch gives 8.25 in. That counts the corners twice, though; the true width is 25 sts plus 2 border sts per side = 29 sts, which is 7.25 in (18.4 cm). Top to bottom, 86 rows plus 2 border rounds at each end makes 90 rows, which is 20 in (50.8 cm).
Final Blocking
- Lightly mist the whole holder with water, or steam it from about 1 in (2.5 cm) away. Don’t press the iron down on it.
- Lay it flat with the RS up and pin the panel to 7.25 x 20 in (18.4 x 50.8 cm).
- Pin the arch into a smooth curve.
- Shape each scallop with your fingers.
- Stuff each pocket loosely with a towel or a roll so it dries holding its curve.
- Pin the daisy petals flat and let everything dry completely.
Final Quality-Control Checklist
- The panel measures 7.25 x 20 in (18.4 x 50.8 cm) and lies flat.
- The arch is smooth and even on both sides.
- All three pockets are level, centered and the same height.
- Each pocket has 5 even scallops.
- The front corners are tacked securely at matching heights.
- The daisies sit in the same position on every pocket.
- The loop is firm and centered.
- All ends are woven in and the seams are invisible from the front.
Troubleshooting
- The panel edges wave: Your border has too many row-end sts. Keep skipping every 9th row-end.
- The border pulls in: You skipped too often, or your tension is tight. Use a hook one size larger for the border only.
- The scallops won’t fit: Your pocket doesn’t have exactly 21 sts. Recount the last row.
- The pocket sags forward: Move the corner tacks up 2 rows and add more stitches at each corner.
- The petals curl: Wet-block them flat and pin each tip.
- The roll won’t fit: Make the pocket front longer by 4 rows (Rows 19–54). It will be about 0.9 in (2.3 cm) taller.
Care
Hand wash in cool water with mild soap and press out the water in a towel. Dry the holder flat, reshaping the pockets around a towel.
Final Notes
Here’s how the measurements fit together. The gauge of 16 sc and 18 rows per 4 in (10.2 cm) produces a 6.25 x 19.1 in (15.9 x 48.5 cm) panel and 5.75 x 11.1 in (14.6 x 28.2 cm) pockets. Three pockets are spaced 22 rows apart on the panel, and a two-round border brings the holder to 7.25 x 20 in (18.4 x 50.8 cm). Check your measurements at each stage and every piece will line up.
Happy crocheting!