

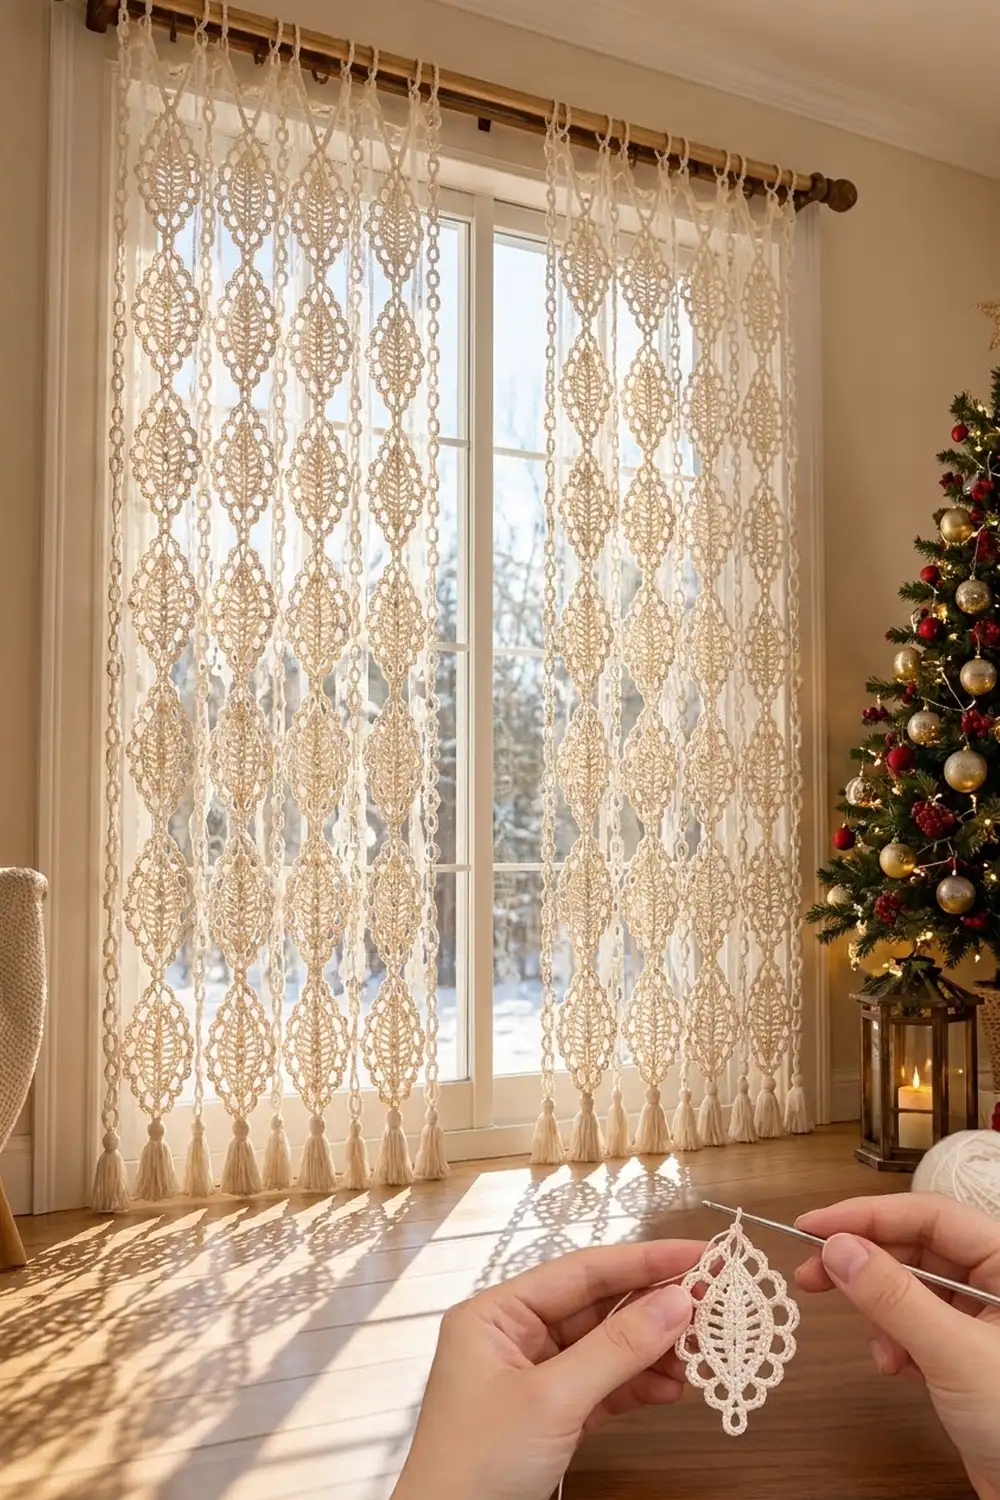
This curtain is made of soft ivory leaf motifs linked tip to tip into long, airy strands. Each leaf has a solid center spine, open vein bars, a smooth outlining band and a frilled edge of rounded scallops. Light comes through every gap, so the panel looks frosted in front of a winter window.
The design uses one color, a warm cream or ivory, which keeps it calm and timeless. It looks festive with garland and fairy lights and still works after the holidays. The pattern is written in US crochet terms.
One finished panel is 28 in (71.1 cm) wide. The plain strands hang 85.5 in (217.2 cm) from the top of the rod pocket to the tassel tips, and the dropped strands hang 88 in (223.5 cm). Each leaf motif measures 3 × 5 in (7.6 × 12.7 cm).
Construction is modular. You crochet each leaf in rounds around a foundation chain and join it to the leaf above with a single slip stitch in the last round. Sixteen leaves make one strand, and eight strands make one panel. Then you work a folded rod-pocket header band, attach the strands to it as you close the header, and add a tassel to the bottom of each strand.
Finished Size and Construction
- Panel size: 28 in (71.1 cm) wide; 85.5 in (217.2 cm) long for plain strands and 88 in (223.5 cm) for dropped strands
- Skill level: Intermediate
- Terminology: US
- Yarn weight: Fingering (#1 super fine) mercerized cotton
- Hook: 2.75 mm
- Number of pieces: 128 leaf motifs per panel (8 strands × 16 motifs), plus 1 header band and 8 tassels
- Layout: 8 vertical strands; strands 2, 4, 6 and 8 hang 2.5 in (6.4 cm) lower
- Motif size: 3 × 5 in (7.6 × 12.7 cm), measured from the outer edge of the top ring to the outer edge of the bottom ring
- Size before border: 8 strands spaced 3.5 in (8.9 cm) apart, for a span of 28 in (71.1 cm); each strand is 80 in (203.2 cm) long
- Border (header) depth: 1.5 in (3.8 cm) once folded
Materials
Yarn: Use a smooth, mercerized fingering-weight cotton. It shows the scallops crisply, keeps its shape when it hangs and washes well. Avoid fuzzy or very stretchy fibers, because long strands will grow under their own weight.
- Ivory/cream: 450 g (1,530 m) per panel; for a pair, 900 g (3,060 m)
These amounts include a margin of about 15% for your gauge swatch, tension differences and the tassels.
Tools:
– 2.75 mm crochet hook
– Tapestry needle
– Stitch markers
– Stiff card 4 in (10.2 cm) wide, for the tassels
– Rust-proof pins and a blocking board
– Spray bottle
– Measuring tape
– Curtain rod up to 0.75 in (1.9 cm) in diameter
Abbreviations (US Terms)
- ch – chain
- sl st – slip stitch
- sc – single crochet
- hdc – half double crochet
- dc – double crochet
- tr – treble crochet
- sk – skip
- sp – space
- st(s) – stitch(es)
- rnd – round
Scallop: 7 sc worked into one ch-5 loop. The 7 stitches crowd the loop into a firm, rounded bump.
Ring join: In the top ring of a new motif, work 6 sc. Then sl st into the 6th sc of the bottom ring of the motif above, and work 6 more sc. The ring still has 12 sc.
Gauge and Checkpoints
Gauge: 24 sc and 28 rows = 4 in (10.2 cm) in rows of sc.
Before you start a strand, make one complete motif and block it. The 128 motifs multiply any error, so this test piece is worth the time.
Checkpoints for one motif:
– After Rnd 1: 3.25 in (8.3 cm) long
– After Rnd 2: 1.5 × 3.75 in (3.8 × 9.5 cm)
– After Rnd 3: 1.75 × 4 in (4.4 × 10.2 cm)
– After Rnd 5, blocked: 3 × 5 in (7.6 × 12.7 cm)
If your motif is too big, go down to a 2.5 mm hook. If it is too small, go up to a 3 mm hook. A difference of 0.25 in (0.6 cm) per motif adds up to 4 in (10.2 cm) over a 16-motif strand. Match the length closely, even if the width ends up slightly off.
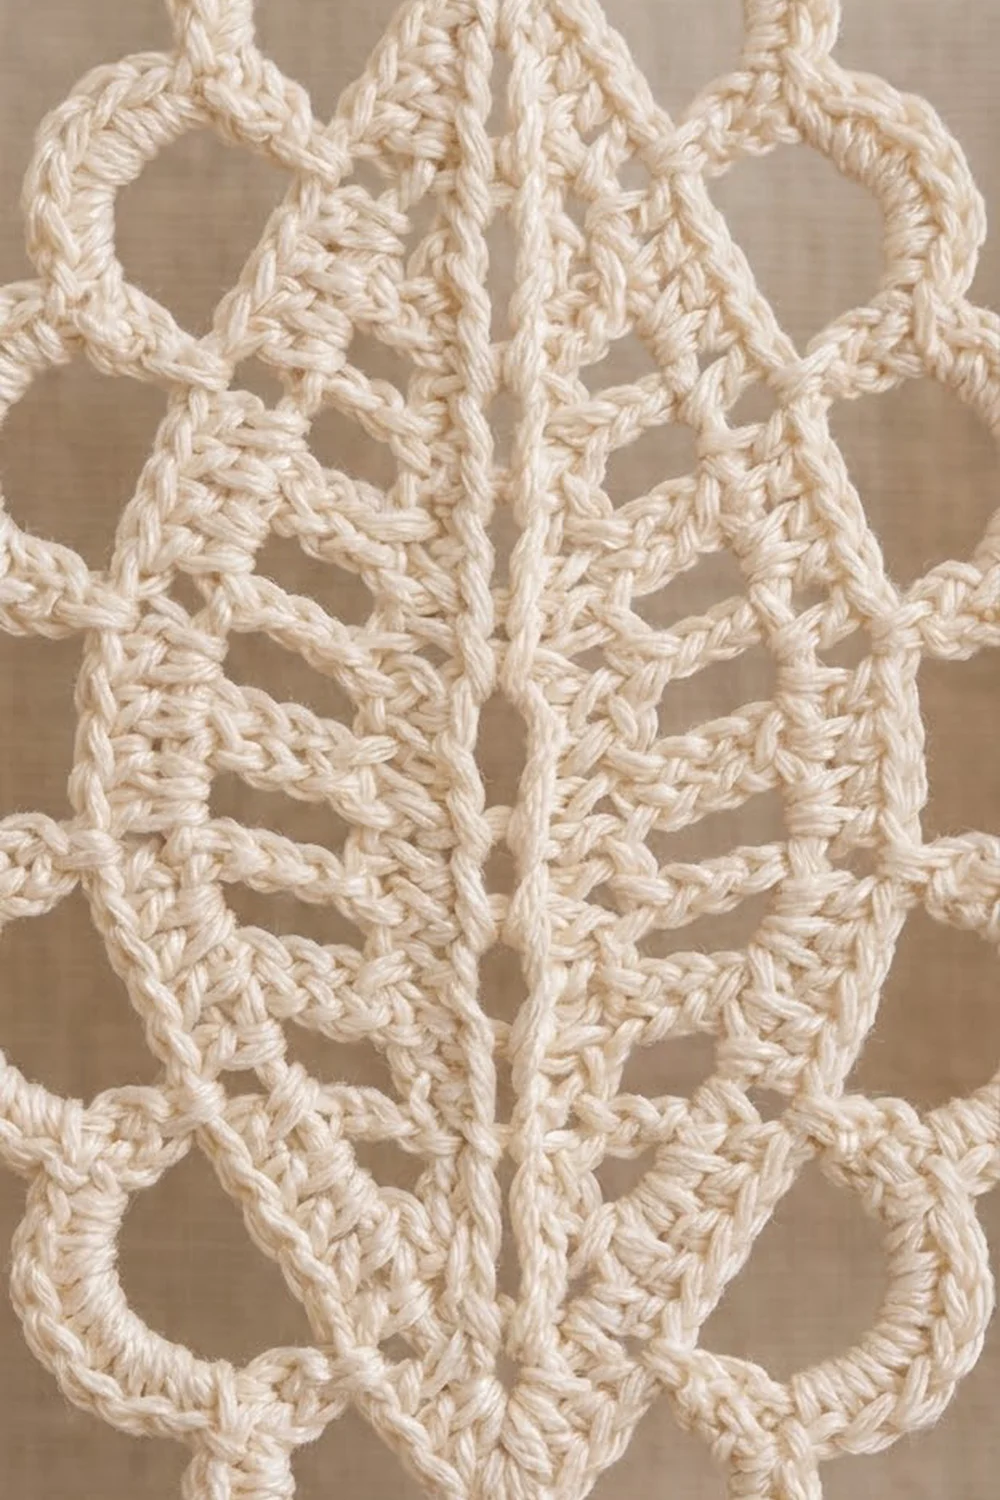
Leaf Motif (make 128 per panel)
The foundation chain becomes the center spine. Its first chain is the bottom tip of the leaf, and its last chain is the top tip.
Foundation: Ch 20.
Rnd 1 (spine): 3 sc in 2nd ch from hook (bottom tip). Sc in next 17 ch. 3 sc in last ch (top tip). Rotate the work and, along the other side of the chain, sc in next 17 ch. Join with sl st to first sc. (40 sc)
Stitch map for Rnd 1:
– Sts 1–3: bottom tip (st 2 is the center)
– Sts 4–20: side A
– Sts 21–23: top tip (st 22 is the center)
– Sts 24–40: side B
Rnd 2 (vein bars): Sl st in next st (st 2). Ch 1, (sc, ch 3, sc) in the same st.
- Side A: [Ch 2, sk next st, work the next bar stitch in the following st] 9 times. Work the bars in this order: hdc, dc, tr, tr, tr, tr, tr, dc, hdc. The bars land in sts 4, 6, 8 and so on up to st 20.
- Top tip: Ch 2, sk st 21, (sc, ch 3, sc) in st 22.
- Side B: Repeat the side A sequence into sts 24 through 40.
- Finish: Ch 2, sk st 1, and join with sl st to first sc.
(9 bars per side, 4 sc, 20 ch-2 sps, 2 ch-3 tip sps)
The bars grow from hdc to tr and back down again, which gives the leaf its pointed almond shape. The ch-2 gaps between the bars are the veins.
Rnd 3 (solid band): Ch 1. Sc in first sc, 3 sc in ch-3 sp, sc in next sc.
- Side A: [2 sc in ch-2 sp, sc in next bar] 9 times, then 2 sc in last ch-2 sp. (29 sc)
- Top tip: Sc in next sc, 3 sc in ch-3 sp, sc in next sc. (5 sc)
- Side B: Repeat side A. (29 sc)
- Join to first sc.
(68 sc: 5 per tip + 29 per side)
Rnd 4 (scallop frame): Sl st in next 2 sts, so you are in the center sc of the bottom tip. Ch 1, (sc, ch 8, sc) in the same st. This makes the bottom ring. Ch 3, sk 2.
- Side A: Sc in next st, then [ch 5, sk 3, sc in next st] 7 times. This uses exactly 1 + (7 × 4) = 29 sts.
- Top tip: Ch 3, sk 2, (sc, ch 8, sc) in center sc of top tip, ch 3, sk 2.
- Side B: Repeat side A.
- Ch 3, sk 2, and join to first sc.
(20 sc, 14 ch-5 loops, 4 ch-3 sps, 2 ch-8 rings)
Rnd 5 (covering): Sl st into bottom ch-8 ring. Ch 1, 12 sc in ring, sl st in next sc. 3 sc in ch-3 sp, sl st in next sc.
- Side A: [Scallop in ch-5 loop, sl st in next sc] 7 times.
- Top tip: 3 sc in ch-3 sp, sl st in next sc. Work 12 sc in the top ring; if this motif needs to be joined, use the ring join here. Sl st in next sc, then 3 sc in ch-3 sp, sl st in next sc.
- Side B: [Scallop, sl st in next sc] 7 times.
- 3 sc in last ch-3 sp, and join with sl st to the first sc of Rnd 4.
(134 sc: 24 in rings + 12 at tips + 98 in scallops; sl sts not counted)
Fasten off and weave in the ends along the spine.
Make All Pieces
Ivory: 128 motifs per panel, or 256 for a pair.
Make the first motif of each strand on its own, with a free top ring. Join every later motif as you go with the ring join (see Joining).
Layout grid (one panel, viewed from the front; S = strand, ↓ = dropped strand):
Header band: 168 sts (8 sections x 21 sts)
S1   S2↓  S3   S4↓  S5   S6↓  S7   S8↓
M1        M1        M1        M1
     M1        M1        M1        M1
M2        M2        M2        M2
     M2        M2        M2        M2
...  (continue to M16 in every strand)
M16       M16       M16       M16
     M16       M16       M16       M16
T         T         T         T
     T         T         T         T
Each M is one motif and each T is a tassel. The dropped strands hang half a motif lower, which creates the staggered diamond look.
Joining
Method: Join as you go in Rnd 5. Work the new motif’s top ring last-round-style: 6 sc, then sl st into the 6th sc of the bottom ring of the motif above, then 6 sc.
Stitch-to-stitch logic: Both rings have 12 sc. The join meets the exact center of each ring, so the two motifs hang in a straight line and the rings just touch. No stitches are added or lost, so every motif keeps its 134 sc and its 5 in (12.7 cm) length. That makes the strand length simply 16 × 5 in = 80 in (203.2 cm).
Tension: Make the joining sl st snug but not tight. If it is too tight, the rings pucker and the strand leans. If it is too loose, the motifs swing apart and the strand grows.
Size checkpoint: After 4 motifs, hang the strand from a pin and measure it. It should be 20 in (50.8 cm). Check again after 8 motifs, when it should be 40 in (101.6 cm).
Tassels (make 8): Wrap the yarn 30 times around the 4 in (10.2 cm) card. Thread a 10 in (25.4 cm) tie through the top of the wraps and knot it. Slide the wraps off the card. Wrap a second strand 0.5 in (1.3 cm) below the top and knot it. Cut the bottom loops and trim the ends evenly. Use the tie to fasten the tassel through the 6th sc of the bottom ring of motif 16. The tassel hangs 4 in (10.2 cm).
Border: Header Band
Border gauge: 6 sc and 7 rows per 1 in (2.5 cm), which is the same as your swatch.
Why 168 stitches: Each strand gets its own section of 21 sts, which is 3.5 in (8.9 cm). The band therefore starts with 8 strands × 21 sts = 168 sts, which is 28 in (71.1 cm). No extra stitches are added between sections.
Row 1: Ch 169. Sc in 2nd ch from hook and in each ch across. Turn. (168 sc)
Rows 2–21: Ch 1, sc in each st across. Turn. (168 sc per row)
The band is now 3 in (7.6 cm) tall.
Joining row: Fold the band in half lengthwise so that Row 21 lies against the foundation chain. Working through both layers, ch 1 and sc in each st across, for 168 sc in total. As you go, attach the strands at the center st of each section: sts 11, 32, 53, 74, 95, 116, 137 and 158 (that is, 11 + 21 per strand).
- Odd strands (1, 3, 5, 7): Sc in the center st. Then sl st into the 6th sc of the strand’s top ring and continue.
- Even strands (2, 4, 6, 8): Sc in the center st. Ch 16, which is about 2.5 in (6.4 cm), and sl st into the 6th sc of the top ring. Then sl st back along each ch to the band and continue.
Side edges: Leave the short ends open for the rod. Work 1 sc in each row end around each opening, for 21 sc per side.
Why the math works: The strand centers are 21 sts, or 3.5 in (8.9 cm), apart. Each 3 in (7.6 cm) motif therefore leaves a 0.5 in (1.3 cm) gap to the next strand. Each outer strand sits 0.25 in (0.6 cm) in from the band edge. The folded header is 1.5 in (3.8 cm) deep.
Final Blocking
- Soak the panel in cool water for 10 minutes, then press the water out gently. Do not wring it.
- Lay the header flat and pin it to 28 in (71.1 cm) wide.
- Lay out each strand in a straight line below its section.
- Pin each motif to 3 × 5 in (7.6 × 12.7 cm), with one pin through the center of each ring.
- Pin out every scallop so the loops stand round.
- If needed, mist the panel with light starch to help the scallops hold their shape.
- Let it dry completely before you unpin it.
Final Quality-Control Checklist
- Every motif has 9 bars per side and 7 scallops per side.
- Every ring is covered with 12 sc.
- Every strand has 16 motifs and measures 80 in (203.2 cm).
- The header has 168 sts, and the strands are attached at sts 11, 32, 53, 74, 95, 116, 137 and 158.
- The even strands hang 2.5 in (6.4 cm) lower.
- All 8 tassels are 4 in (10.2 cm) long and trimmed evenly.
- All ends are woven into solid stitches.
Troubleshooting
- The leaf is round, not pointed: Check the bar order in Rnd 2. The bars nearest the tips must be hdc, not tr.
- The scallops ruffle: Your ch-5 loops are too long. Chain more tightly, or work 6 sc per scallop.
- The scallops look flat or gappy: Your loops are too short. Loosen your chains.
- A strand twists: Make sure every ring join goes into the 6th sc, with all motifs facing the same way.
- The header is narrower than the strands: Your band tension is tighter than your motif tension. Go up half a hook size for the band.
- The strands are uneven in length: Measure each strand and add or remove one hanger chain to even them out.
Care
Hand wash in cool water with a mild soap. Dry flat, reshaping the scallops, and never hang the panel to dry while it is wet, because it will stretch.
Final Notes
The measurement chain is simple. Each motif is 3 × 5 in (7.6 × 12.7 cm), so 16 motifs make an 80 in (203.2 cm) strand. Each strand gets a 21-stitch, 3.5 in (8.9 cm) section of the header, and 8 sections make 168 stitches and a 28 in (71.1 cm) panel. With the 1.5 in (3.8 cm) header and 4 in (10.2 cm) tassels, the panel hangs 85.5 in (217.2 cm), or 88 in (223.5 cm) on the dropped strands. If your test motif matches, every later step will line up.
Happy crocheting!