

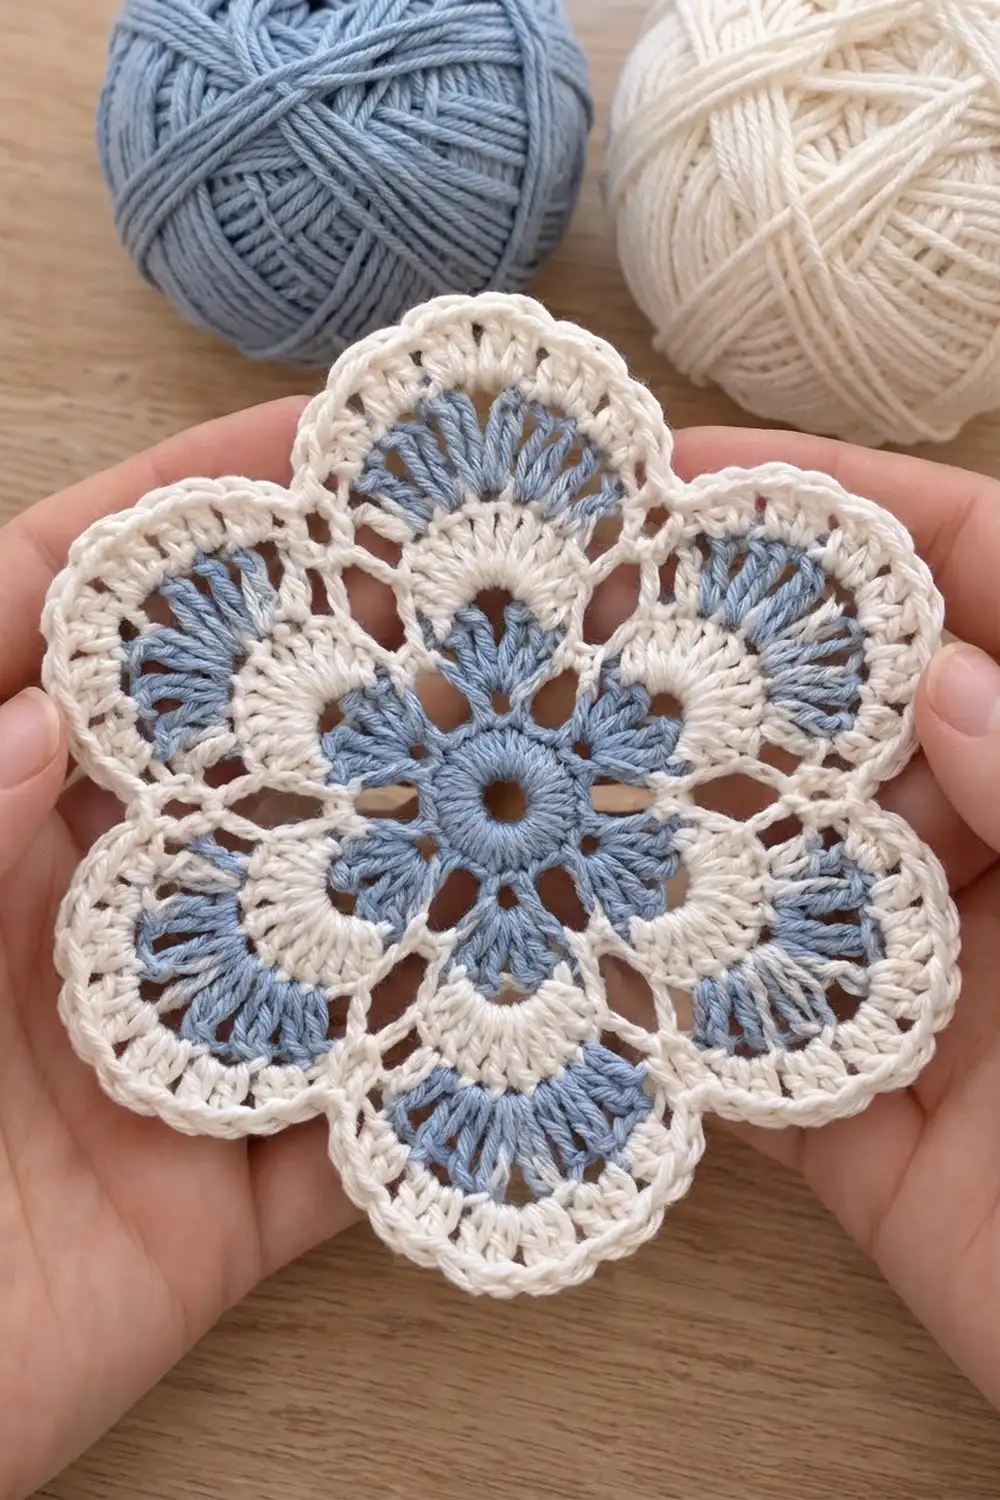
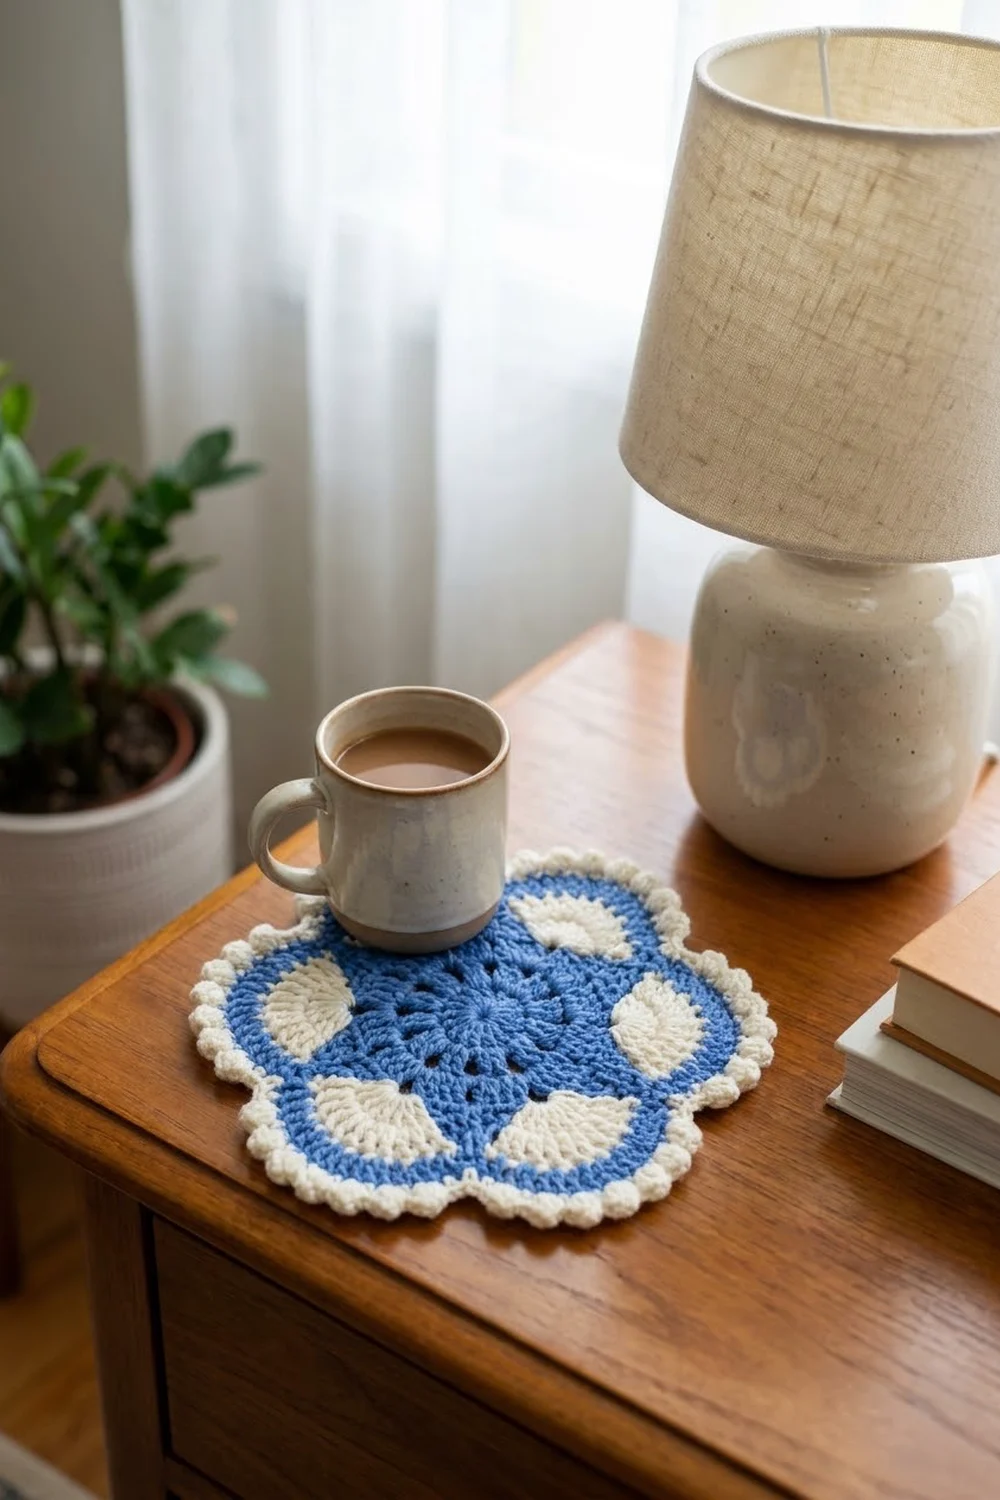
This six-lobed flower motif looks like blue-and-white china. A cornflower-blue star sits in the middle. Small cream fans surround it, and larger blue fans sit on top of them, all framed by a crisp white scalloped edge. It is light and lacy, but solid enough to lie flat.
The design uses only two colors: soft blue and creamy white. The contrast between them does most of the work, so the motif looks detailed even though every stitch is basic. A smooth, matte cotton gives the clearest stitch definition and keeps the edges sharp.
The pattern uses US crochet terms throughout. The finished motif measures 6.5 in (16.5 cm) from lobe tip to lobe tip with DK-weight cotton and a 4 mm hook.
The motif is worked in the round in seven rounds, and you change color between sections. First you make the blue center and petals. Then come the white small fans, the blue large fans, and two white finishing rounds. Those last two rounds form the “border” of this single piece.
Finished Size and Construction
- Finished size: 6.5 in (16.5 cm) tip to tip
- Skill level: Easy to intermediate
- Terminology: US crochet terms
- Yarn weight: DK (light worsted / #3), cotton
- Hook: 4 mm (US G-6)
- Number of pieces: 1 single motif
- Layout: Six-lobed flower, worked in the round
- Piece size after Round 5 (before border): 5 in (12.7 cm) tip to tip
- Border: Rounds 6–7 in white
- Border depth: 0.75 in (1.9 cm) on each lobe, adding 1.5 in (3.8 cm) to the overall width
Materials
Yarn advice: Choose a smooth, mercerized or matte DK cotton, or a cotton blend. Cotton holds the pointed petals and rounded lobes well and blocks crisply. Avoid fuzzy or very stretchy yarns, because they blur the white frame and the fan texture.
Colors:
– Color A, cornflower blue: 10 g, about 23 m (25 yd)
– Color B, creamy white: 15 g, about 35 m (38 yd)
These quantities include about a 25% safety margin. That covers a test swatch, weaving in ends, and small tension differences.
Tools:
– 4 mm (US G-6) crochet hook
– Tapestry needle
– Scissors
– Stitch marker
– Ruler or tape measure
– Blocking mat and rust-proof pins
– Spray bottle with clean water
Abbreviations (US Terms)
- ch – chain
- sl st – slip stitch
- sc – single crochet
- hdc – half double crochet
- dc – double crochet
- tr – treble crochet
- rev sc – reverse single crochet (crab stitch)
- sp(s) – space(s)
- st(s) – stitch(es)
- rep – repeat
- rnd – round
Special stitch – reverse single crochet (rev sc): Work from left to right (right to left if you crochet left-handed). Insert the hook into the next stitch to the right, yarn over, and pull up a loop. Yarn over and pull through both loops on the hook. It makes a twisted, corded edge.
Note: A beginning ch 3 counts as 1 dc. A beginning ch 1 never counts as a stitch.
Gauge and Checkpoints
The motif itself is your swatch. Make Rounds 1–2 first and measure before you continue. Gauge matters here because each round’s stitch count is set to make the next round lie flat.
Checkpoints:
– After Round 1: 1.25 in (3.2 cm) across
– After Round 2: 2.5 in (6.4 cm) from petal tip to opposite petal tip
– After Round 4: 3.75 in (9.5 cm) across the white fans
– After Round 5: 5 in (12.7 cm) tip to tip
– After Round 6: 6 in (15.2 cm) tip to tip
– After Round 7: 6.5 in (16.5 cm) tip to tip
If your motif is too big: Go down to a 3.5 mm hook, or work the chains more tightly.
If your motif is too small: Go up to a 4.5 mm hook.
A difference of 0.25 in (0.6 cm) at Round 2 grows to about 0.5 in (1.3 cm) by the final round, so fix it early.
Pattern
Round 1 – Center Ring (Color A, blue)
With blue, ch 6 and sl st to the first ch to form a ring.
Ch 3 (counts as dc). Work 17 dc into the ring. Sl st to the top of the beginning ch 3.
Stitch count: 18 dc.
Pull the tail gently so the center hole closes to about 0.5 in (1.3 cm). Don’t pull it fully shut. The open hole is part of the look.
Round 2 – Pointed Petals (Color A, blue)
Ch 3 (counts as dc). (2 dc, ch 2, 2 dc) in the next st, dc in the next st. Then dc in the next st (this starts the next repeat).
Here is the full repeat, written out clearly:
Ch 3 (counts as the first dc of repeat 1). (2 dc, ch 2, 2 dc) in the next st, dc in the next st. Dc in the next st, (2 dc, ch 2, 2 dc) in the next st, dc in the next st. Rep from * 4 more times. Sl st to the top of the beginning ch 3.
Each petal uses 3 stitches from Round 1: one dc at its base, the pointed shell in the middle stitch, and one dc at the other side. That gives 6 petals × 3 sts = 18 sts, which uses every stitch from Round 1.
Stitch count: 36 dc (6 per petal) and 6 ch-2 tips.
The ch-2 sp at the top of each shell forms the point of the petal. Fasten off blue.
Round 3 – Arch Foundation (Color B, white)
Join white with a sl st in any ch-2 petal tip. Ch 1, sc in the same sp. Ch 6, sc in the next ch-2 tip. Rep from * 4 more times. Ch 6, sl st to the first sc.
Count: 6 sc and 6 ch-6 sps.
Each ch-6 runs from one petal tip to the next, across the dip between two petals.
Round 4 – Small White Fans (Color B, white)
Sl st into the first ch-6 sp. Ch 3 (counts as dc), 6 dc in the same sp. Sc in the next sc, 7 dc in the next ch-6 sp. Rep from * 4 more times. Sc in the last sc, then sl st to the top of the beginning ch 3.
Stitch count: 48 sts (42 dc in six 7-dc fans and 6 sc).
These are the cream fans that sit between the blue petal points. Each sc anchors a fan’s edge at a petal tip. Fasten off white.
Round 5 – Large Blue Fans (Color A, blue)
Join blue with a sl st in any sc from Round 4 (above a petal tip). Ch 1, sc in the same st. Ch 1, tr in the first dc of the fan, 2 tr in each of the next 5 dc, tr in the last dc of the fan, ch 1, sc in the next sc. Rep from * 5 more times. Work the final sc of the last repeat as a sl st into the first sc.
Per fan: 1 + (5 × 2) + 1 = 12 tr.
Stitch count: 72 tr (6 fans × 12), 6 sc, and 12 ch-1 sps.
Each blue fan sits directly over a cream fan, so the white shows as an arch beneath the blue. The sc at each petal tip pulls in the valley between lobes, which forms the scallops. Fasten off blue.
Checkpoint: The motif should measure 5 in (12.7 cm) tip to tip and lie flat. If the fans cup, check your hook size before you start the white border.
Border (Rounds 6–7, Color B, white)
The two white rounds act as this motif’s border. Since the piece is a flower rather than a square, the counts below are given per lobe (one lobe = one “side”) instead of per straight side.
Border gauge: Rounds 6–7 together add 0.75 in (1.9 cm) of depth to each lobe tip.
Round 6 – Lobe Frame
Join white with a sl st in any valley sc from Round 5. Ch 1, sc in the same st.
Sc in the next ch-1 sp, hdc in the next tr, dc in the next tr, 2 dc in each of the next 8 tr, dc in the next tr, hdc in the next tr, sc in the next ch-1 sp, sc in the next valley sc. Rep from * 5 more times. Skip the final valley sc (it is the sc you started with), and sl st to the first sc.
Count per lobe:
– Over the tr: hdc 1 + dc 1 + 16 dc (8 tr × 2) + dc 1 + hdc 1 = 20 sts, worked over the 12 tr
– Edges: sc in ch-1 sp ×2 = 2 sts
– Valley: sc ×1 = 1 st
– Total: 23 sts per lobe
Stitch count: 23 × 6 = 138 sts.
Why the math works: Each lobe is longer around in Round 6 than in Round 5, so the 12 tr need to become 20 sts to lie flat. Putting 2 dc in each of the 8 middle tr adds exactly 8 stitches (12 + 8 = 20) right at the curved tip, where the lobe needs the most room. The single hdc and dc at each end keep the stitch heights graded, so the curve looks smooth. In each valley, three sc in a row (sc in ch-1, sc in valley, sc in ch-1) keep the frame tight and sharpen the scallop.
Round 7 – Corded Edge
Do not turn. Ch 1. Working from left to right, rev sc in each st around. Sl st to the first rev sc.
Stitch count: 138 rev sc (23 per lobe), worked 1 per existing stitch with 0 added.
Why the math works: Rev sc is a trim round, not a growth round. It is worked 1 per existing stitch, so Round 7 has 138 + 0 = 138 sts. It adds about 0.25 in (0.6 cm) of corded edge without making the lobes ruffle. Fasten off and weave in all ends on the wrong side, inside stitches of the same color.
Size chain for the border: 5 in (12.7 cm) after Round 5 + 0.5 in (1.3 cm) per side from Round 6 → 6 in (15.2 cm). Then + 0.25 in (0.6 cm) per side from Round 7 → 6.5 in (16.5 cm).
Final Blocking
- Weave in all ends securely before blocking. Leave about 0.5 in (1.3 cm) of each tail trimmed until after blocking.
- Spray the motif evenly with water until it is damp, not dripping. You can also wet-block it: soak in cool water for 10 minutes, then gently press the water out in a towel.
- Lay it right side up on the blocking mat.
- Pin the center hole round, about 0.5 in (1.3 cm) across.
- Pin each of the six lobe tips so the motif measures 6.5 in (16.5 cm) from each tip to the opposite tip.
- Pin each of the six valleys at an equal distance from the center, about 2.75 in (7 cm), to keep the scallops even.
- Use extra pins to open each blue petal point and each fan, so the stitches fan out evenly.
- Let it dry completely, usually 12–24 hours.
- Unpin and trim the remaining tails close to the fabric.
Final Quality-Control Checklist
- Round 1 has 18 dc and the center hole is open but neat.
- There are 6 pointed blue petals, each with a ch-2 tip.
- There are 6 white fans of 7 dc each, sitting between the petal tips.
- There are 6 blue fans of 12 tr each, stacked over the white fans.
- Round 6 has 23 sts per lobe, 138 sts in total.
- Round 7 has 138 rev sc with no skipped stitches.
- The motif measures 6.5 in (16.5 cm) tip to tip in all three directions.
- All six lobes match in size and the valleys are equally deep.
- Ends are woven into stitches of the same color and are invisible from the front.
- The motif lies flat without cupping or ruffling.
Troubleshooting
The center bulges or cups after Round 2. Your petal stitches are too tight. Loosen the dc, or go up a hook size for Rounds 1–2 only.
The blue petals look rounded instead of pointed. Make sure the ch 2 is worked between the two pairs of dc in a single stitch. Pin each tip firmly when you block.
The white fans in Round 4 ruffle. Your ch-6 loops are too long. Chain more tightly, or try 7 dc with a ch 5 instead and check that it lies flat.
The blue fans in Round 5 cup. Your trebles are short or tight. Pull up the first loop of each tr to full height.
The lobes flare or wave after Round 6. You may have worked 2 dc into more than 8 tr. Recount: each lobe must have exactly 23 sts.
The rev sc edge looks flat or untwisted. Make sure you work to the right (left for left-handers) and keep the loop on your hook slightly loose.
The valleys are shallow. Pull the valley sc in Rounds 5 and 6 a little more firmly, and pin the valleys deeper when blocking.
The motif is lopsided. One lobe probably has a different stitch count. Check each lobe against the per-lobe counts above.
Care
Hand wash in cool water with a mild detergent, press the water out without wringing, and lay flat to dry. Re-pin to 6.5 in (16.5 cm) if the motif needs reshaping.
Final Notes
The whole motif follows a simple measurement chain:
- Round 1: 1.25 in (3.2 cm) blue ring
- Round 2: 2.5 in (6.4 cm) petal star
- Round 4: 3.75 in (9.5 cm) white fans
- Round 5: 5 in (12.7 cm) blue fans
- Round 6: 6 in (15.2 cm) lobe frame
- Round 7: 6.5 in (16.5 cm) corded edge
The stitch counts that keep it flat are 18, 36, 48, 72 tr, 138, and 138.
Check your size at Round 2 and again at Round 5. If those two numbers are right, the white border will land at the finished size. Keep your tension even through the color changes, block the lobes evenly, and the blue-and-white contrast will do the rest.
Happy crocheting!