

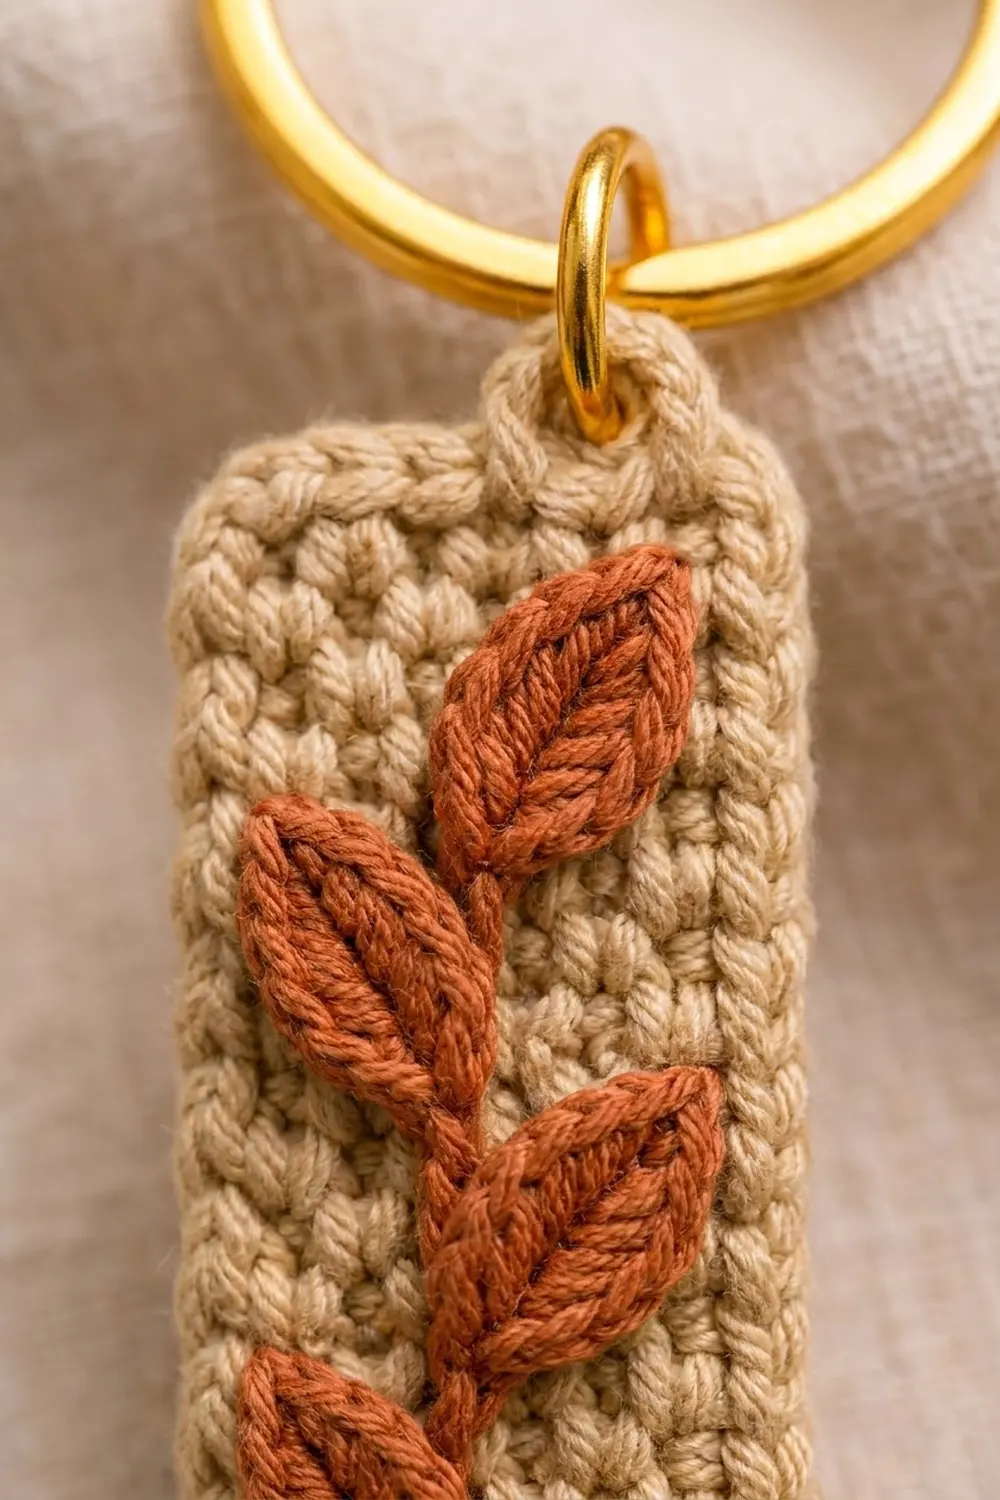
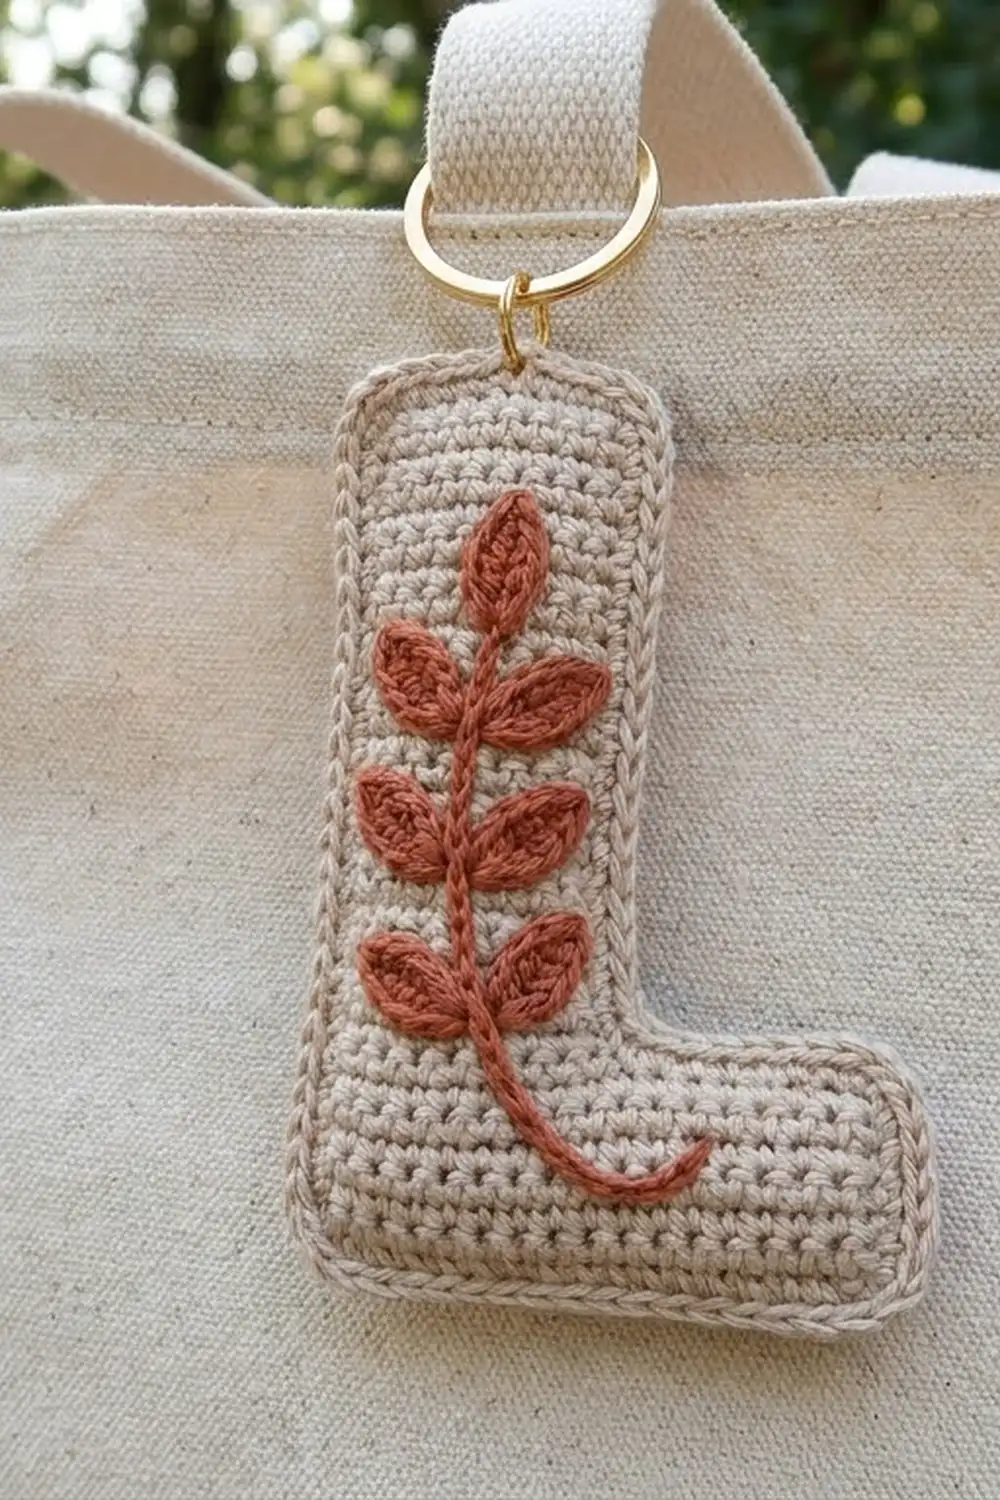
This letter L keychain is a small, warm accessory. The letter is worked in a sand-beige cotton with a dense, pebbly moss-stitch texture. One round of single crochet trims the edge and softens every outer corner. A terracotta leaf sprig, with one slim stem and five small leaves, runs up the tall bar. A gold jump ring and split ring let you clip it to keys, a zipper pull, or a tote bag handle.
The style is natural and calm: two earthy colors, a simple texture, and a botanical detail that looks embroidered from a distance. Up close, the sprig is made of tiny crocheted leaves sewn in place. It makes a good personalized gift, and you can finish it in one evening.
The pattern uses US crochet terms. The finished keychain measures 2.25 in (5.7 cm) wide and 3.25 in (8.3 cm) tall, not counting the hardware.
The letter is one flat piece worked in rows. You start with the full-width foot of the L, then continue over only the first 7 stitches to build the tall bar. One border round goes all the way around. To finish, you crochet the sprig, sew it on, block the piece, and attach the rings.
Finished Size and Construction
- Finished size: 2.25 in (5.7 cm) wide x 3.25 in (8.3 cm) tall, hardware not included
- Skill level: Easy to Intermediate (sewing the small pieces takes patience)
- Terminology: US crochet terms
- Yarn weight: DK (light, #3) cotton
- Hook: 3.0 mm
- Number of pieces: 1 letter piece, plus 6 small appliqué parts (1 stem, 5 leaves) sewn on top
- Layout: One letter L, with the tall bar on the left and the foot extending to the right
- Piece size before border: 2 in (5.1 cm) wide x 3 in (7.6 cm) tall; bar about 1.1 in (2.8 cm) wide; foot 1 in (2.5 cm) tall
- Border depth: about 0.125 in (0.3 cm) on every edge, from one round of single crochet
Materials
Choose a smooth, mercerized or combed DK cotton. Cotton holds the crisp letter shape, keeps the stitches defined, and resists fuzzing on a keychain that gets handled every day. Avoid fluffy or stretchy yarns: they blur the moss texture and soften the letter’s outline.
- Sand beige (main color, MC): 10 g, about 23 m (25 yd)
- Terracotta (contrast color, CC): 3 g, about 7 m (8 yd)
These quantities include a margin for tails, sewing, and a restart if needed.
Tools:
- 3.0 mm crochet hook
- Tapestry needle
- Scissors
- 1 gold split key ring, 1 in (2.5 cm) in diameter
- 1 gold jump ring, 8 mm, plus 2 pairs of flat-nose pliers
- Rustproof pins and a foam blocking mat
- Spray bottle with clean water
- Optional: clear fabric glue
Abbreviations (US Terms)
- ch – chain
- sl st – slip stitch
- sc – single crochet
- hdc – half double crochet
- dc – double crochet
- sc2tog – single crochet 2 together
- sk – skip
- st(s) – stitch(es)
- sp – space
- MC / CC – main color / contrast color
- RS – right side
Special stitch: moss stitch (linen stitch). Every sc and every ch-1 sp counts as 1 stitch. The letter always has an odd number of stitches, and two row types alternate:
- Row type A: Ch 1 (does not count), sc in first st, ch 1, sk next st, sc in next st; repeat from * to the end.
- Row type B: Ch 1 (does not count), sc in first sc, sc in next ch-1 sp, ch 1, sk next sc, sc in next ch-1 sp; repeat from * until 1 st remains, sc in last sc.
Each row places its sc into the ch-1 sps of the row below. This offset creates the pebbly, woven look.
Gauge and Checkpoints
Gauge: 26 sts and 28 rows = 4 in (10.2 cm) in moss stitch after light blocking. That is 6.5 sts and 7 rows per 1 in (2.5 cm).
Because this is a single small piece, the letter itself is your test piece. Measure it at each checkpoint before you move on:
- After Row 7 (the foot): 2 in (5.1 cm) wide x 1 in (2.5 cm) tall.
- After Row 21 (the full letter): 3 in (7.6 cm) tall; the bar is about 1.1 in (2.8 cm) wide.
- After the border: 2.25 in (5.7 cm) wide x 3.25 in (8.3 cm) tall.
If the piece is too big, start again with a 2.75 mm hook. If it is too small, use a 3.25 mm hook. If only the height is off, check your turning chains, because a loose ch 1 makes the edges taller than the middle. Don’t change the stitch or row counts, since the border math depends on them.
Letter L
With MC, ch 14.
Row 1 (type A): Sc in 2nd ch from hook, ch 1, sk next ch, sc in next ch; repeat from * 5 more times. Turn. (13 sts: 7 sc and 6 ch-1 sps)
Row 2 (type B): Ch 1, sc in first sc, sc in next ch-1 sp, ch 1, sk next sc, sc in next ch-1 sp; repeat from * 4 more times, sc in last sc. Turn. (13 sts: 8 sc and 5 ch-1 sps)
Row 3 (type A): Ch 1, sc in first sc, ch 1, sk next st, sc in next st; repeat from * 5 more times. Turn. (13 sts: 7 sc and 6 ch-1 sps)
Rows 4–7: Repeat Rows 2 and 3 twice more. Turn at the end of Row 7. (13 sts in each row)
Checkpoint: The foot measures 2 in (5.1 cm) wide x 1 in (2.5 cm) tall.
Tall Bar
From here, you work over only the first 7 sts. The other 6 sts stay unworked and become the top edge of the foot.
Row 8 (type B): Ch 1, sc in first sc, sc in next ch-1 sp, ch 1, sk next sc, sc in next ch-1 sp; repeat from * once more, sc in next sc. Leave the remaining 6 sts unworked. Turn. (7 sts: 5 sc and 2 ch-1 sps)
Row 9 (type A): Ch 1, sc in first sc, ch 1, sk next st, sc in next st; repeat from * 2 more times. Turn. (7 sts: 4 sc and 3 ch-1 sps)
Rows 10–21: Repeat Rows 8 and 9 six more times. (7 sts in each row) Fasten off.
That gives 7 foot rows plus 14 bar rows, for 21 rows in total.
Checkpoint: The letter is 3 in (7.6 cm) tall and 2 in (5.1 cm) wide at the foot, and the bar is about 1.1 in (2.8 cm) wide.
Choosing the front: Moss stitch looks almost the same on both sides. Lay the letter so the bar is on the left and the foot points right. The side facing you is the RS.
Border
Border gauge: One round of sc adds about 0.125 in (0.3 cm) to every edge, so 0.25 in (0.6 cm) to each overall measurement.
Work 1 sc into each stitch along the top and bottom edges, and 1 sc into each row end along the sides. At the 5 outer corners, work 3 sc into the corner stitch to round it. At the 1 inner corner, work an sc2tog to keep the angle sharp and flat.
Rnd 1: With the RS facing, join MC with a sl st in the top-right stitch of the bar. Ch 1.
- Top of bar: 3 sc in first st, sc in next 5 sts, 3 sc in last st. (11 sc)
- Outer left side: Sc in each of the 21 row ends. (21 sc)
- Bottom edge: Working into the free loops of the foundation chain, 3 sc in first st, sc in next 11 sts, 3 sc in last st. (17 sc)
- End of foot: Sc in each of the 7 row ends (Rows 1–7). (7 sc)
- Top of foot: Working into the 6 unworked sts of Row 7, 3 sc in first st, sc in next 4 sts, sc2tog over the last st and the row end of Row 8. (8 sts: 3 + 4 + 1)
- Inner side of bar: Sc in each row end of Rows 9–21. (13 sc)
Sl st to the first sc to join. Fasten off and weave in the tails. (77 sts total)
Why the math works: The letter has 68 edge positions: 7 + 21 + 13 + 7 + 6 + 14 = 68. The 5 outer corners each add 2 extra sc, for +10. The sc2tog merges 2 positions into 1, for –1. That gives 68 + 10 – 1 = 77, which matches the segment totals: 11 + 21 + 17 + 7 + 8 + 13 = 77.
Moss stitch rows are slightly shorter than its stitches are wide (7 rows vs. 6.5 sts per 1 in). As a result, 1 sc per row end sits a little fuller on the sides. Blocking absorbs that small extra, and it keeps the long edges from pulling in.
Checkpoint: 2.25 in (5.7 cm) wide x 3.25 in (8.3 cm) tall. The bar is about 1.3 in (3.3 cm) wide and the foot is 1.25 in (3.2 cm) tall.
Leaf Sprig Appliqué
Stem (make 1)
With CC, ch 16. Sl st in the back bump of the 2nd ch from hook and in each remaining ch across. (15 sl sts) Fasten off, leaving a 6 in (15.2 cm) tail.
The stem is about 1.75 in (4.4 cm) long.
Leaf (make 5)
With CC, ch 6.
Rnd 1: Starting in the 2nd ch from hook: sc in first ch, hdc in next ch, dc in next ch, hdc in next ch, then (sc, ch 2, sc) in last ch for the tip. Rotate and work along the other side of the chain: hdc in next ch, dc in next ch, hdc in next ch, sc in next ch. Sl st to the first sc. (10 sts plus the ch-2 tip)
Fasten off, leaving a 6 in (15.2 cm) tail.
Each leaf is about 0.6 in (1.5 cm) long and 0.3 in (0.8 cm) wide. The chain spine forms a raised center vein.
Placement
Pin the stem diagonally on the RS of the bar with a gentle curve. Start about 0.3 in (0.8 cm) above the foot near the outer left edge, and end about 0.4 in (1.0 cm) below the top border near the inner edge. Let the bottom end curl slightly past the lowest leaf.
Place the 5 leaves with their bases touching the stem:
- Leaf 1: At the top tip of the stem, pointing up and slightly right.
- Leaf 2: Left of the stem, just below Leaf 1.
- Leaf 3: Right of the stem, below Leaf 2.
- Leaf 4: Left of the stem, below Leaf 3.
- Leaf 5: Right of the stem, lowest on the sprig, angled toward the foot.
The leaves should sit close together and fill most of the bar.
Sewing
Sew the stem first, using small whipstitches that catch only the top layer of MC. Then sew around each leaf’s edge with tiny stitches so nothing shows on the back. Weave the CC tails into the back of the appliqué. For extra security, add a dab of fabric glue under each leaf.
Hardware
Use the pliers to open the jump ring sideways. Pass it through the center sc of the top border and the stitch below it, add the split ring, then close the jump ring flush.
Final Blocking
- Spritz the letter with water until it is damp, not soaked.
- Lay it RS up on the blocking mat.
- Pin the 5 outer corners and the inner corner, keeping the bar straight and square to the foot.
- Check the size: 2.25 in (5.7 cm) x 3.25 in (8.3 cm).
- Smooth the long edges straight with your fingertips. Don’t stretch them.
- Let it dry completely, for at least 2 hours.
- Unpin it. Lightly steam the leaves from above so they stay raised.
Final Quality-Control Checklist
- The foot is 2 in (5.1 cm) x 1 in (2.5 cm) before the border.
- The letter is 3 in (7.6 cm) tall before the border, with 21 rows.
- Each foot row has 13 sts, and each bar row has 7 sts.
- The border round has 77 sts.
- The finished size is 2.25 in (5.7 cm) x 3.25 in (8.3 cm).
- The outer corners are rounded and the inner corner is crisp.
- The stem runs diagonally, with 5 leaves alternating down it.
- No CC stitches show on the back.
- The jump ring is fully closed.
- All tails are woven in.
Troubleshooting
The edges ripple. The border is too full. Rework the long sides, skipping 1 row end in every 7.
The edges pull in. The border is too tight. Rework it with a 3.25 mm hook.
The texture looks like stripes. Your sc are going into sc instead of ch-1 sps. Except at the edges, each sc goes into a ch-1 sp.
The stitch count drifts. Count both sc and ch-1 sps, and end every row with an sc in the last stitch.
The bar leans. Your turning chains are uneven. Keep each ch 1 snug, and pin the full bar when blocking.
The leaves curl. Steam them flat, and add a tiny stitch at each tip.
Care
Spot clean with mild soap and cool water, then press into shape and dry flat. Remove the split ring before a full hand wash.
Final Notes
The measurement chain is short and easy to check. At 6.5 sts and 7 rows per 1 in (2.5 cm), the 13-st, 7-row foot measures 2 in (5.1 cm) x 1 in (2.5 cm). The 7-st bar adds 14 rows, making the letter 3 in (7.6 cm) tall. One 77-st border round adds 0.125 in (0.3 cm) per edge, for a finished 2.25 in (5.7 cm) x 3.25 in (8.3 cm). The terracotta sprig and gold rings complete the look.
Happy crocheting!