

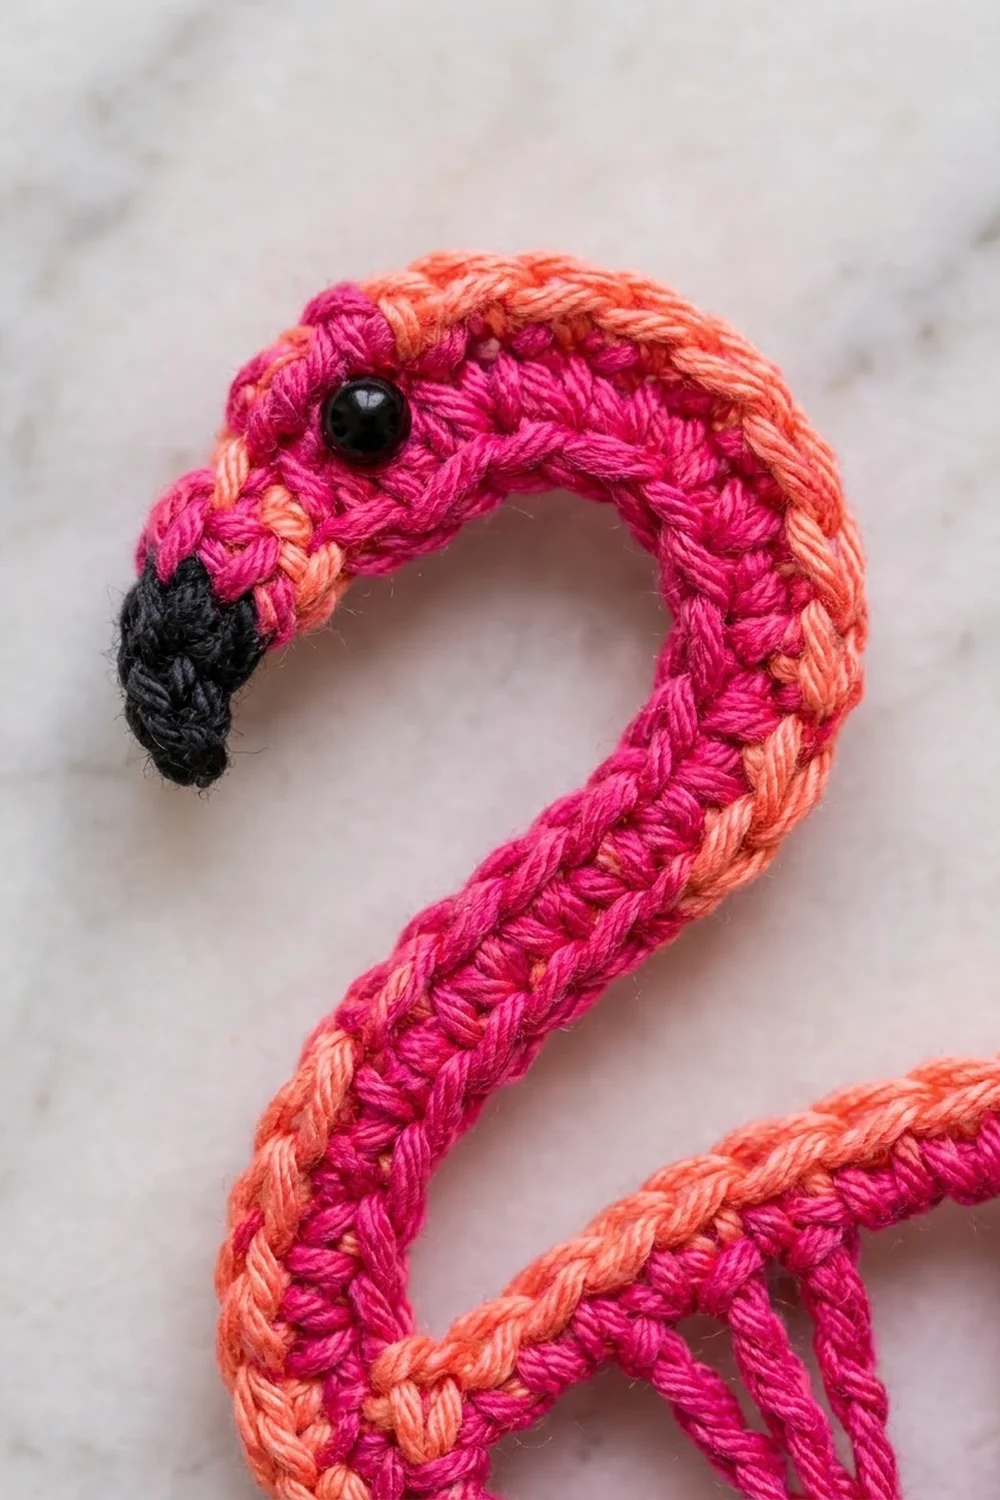
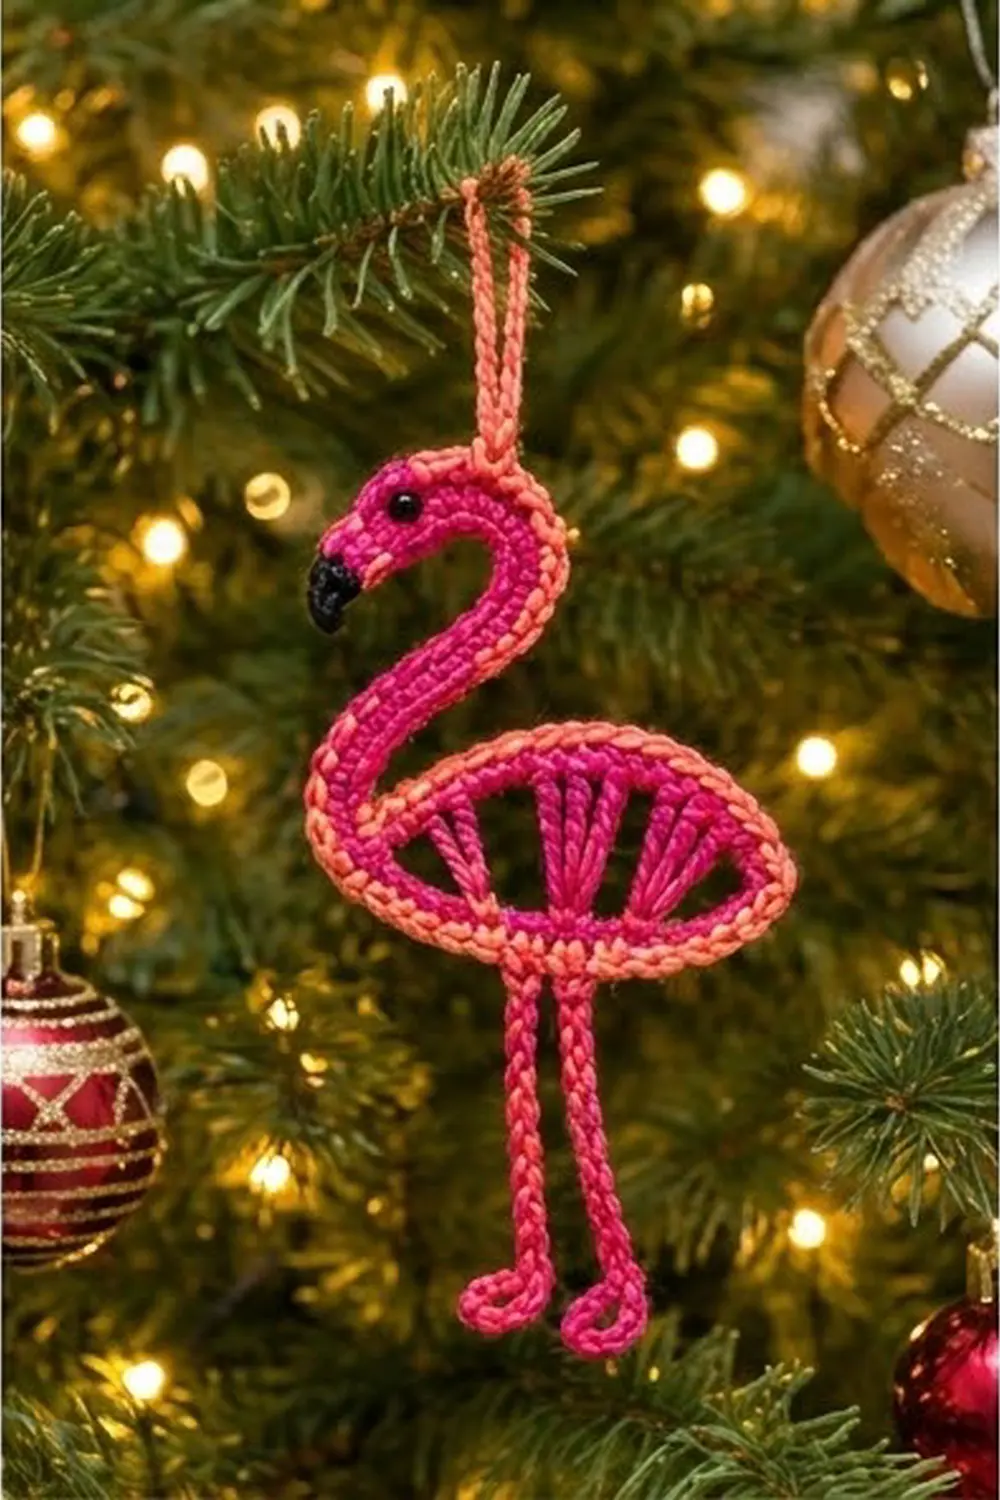
Put a little tropical fun on your tree this year. The Tropical Noel Flamingo is a flat, open-work ornament: an oval body with a fan of spokes inside, an S-curved neck, a small head with a black beak, and two thin legs that end in curled feet.
The main color is a bright hot pink. A coral single-crochet outline makes the shape stand out, and black accents finish the face. The ornament looks graphic and airy, so it shows up well against green branches and twinkle lights.
This pattern uses US crochet terms. The finished ornament measures about 4.4 in (11.2 cm) wide and 9.3 in (23.6 cm) tall, not counting the 2 in (5.1 cm) hanging loop.
Construction is continuous and needs no stuffing. First you make a pink ring of single crochet for the body. Next come the bar and the fan spokes. Then you work the neck and head in short rows straight up from the body and add the chain-and-single-crochet legs. A coral edging round, the beak, the eye, and the hanging loop finish it off. Blocking sets the S-curve.
Finished Size and Construction
- Finished size: 4.4 in (11.2 cm) wide × 9.3 in (23.6 cm) tall
- Skill level: Easy+ (simple stitches, careful placement)
- Terminology: US crochet terms
- Yarn weight: DK / light worsted (#3), cotton or cotton blend
- Hook: 3.5 mm (E-4)
- Number of pieces: 1 ornament, worked as one connected piece (the beak is sewn on)
- Layout: flamingo silhouette: oval body, S-neck on the left, legs below
- Body ring before edging: 4 in (10.2 cm) × 2 in (5.1 cm)
- Whole flamingo before edging: 4 in (10.2 cm) wide × 9.1 in (23.1 cm) tall
- Edging depth: 0.2 in (0.5 cm) on every outer edge
Materials
Yarn: Choose a smooth, tightly plied DK cotton. Cotton holds the spokes crisp and keeps the neck curve after blocking. Fuzzy acrylic hides the open-work.
- Hot pink (main color): 10 g, about 25 m
- Coral (edging and loop): 5 g, about 13 m
- Black (beak): 2 g, about 5 m
These quantities include a margin of roughly 20%, so one set of leftovers will easily make one ornament.
Tools:
– 3.5 mm (E-4) crochet hook
– 4 mm black bead or small black button (eye), or black embroidery floss for a French knot
– Tapestry needle and sewing thread
– 4 locking stitch markers
– Rust-proof pins, a foam blocking mat, and a spray bottle
– Optional: spray starch for extra stiffness
Abbreviations (US Terms)
- ch – chain
- sl st – slip stitch
- sc – single crochet
- hdc – half double crochet
- sc2tog – single crochet 2 together
- st(s) – stitch(es)
- rnd – round
Special technique, the return-slip spoke: Chain the stated number, sl st into the target stitch, then sl st back down into each chain to the base. This doubles the chain into a firm, slightly twisted spoke that stays straight.
Gauge and Checkpoints
Gauge: 18 sc and 20 rows = 4 in (10.2 cm) in sc, worked flat.
The body ring itself is your test piece. Make it first and measure before going on.
- Checkpoint 1 (body ring, Rnd 1): Laid flat in an oval, the 44 sc measure 4 in (10.2 cm) × 2 in (5.1 cm). The total ring length is about 9.8 in (24.9 cm).
- Checkpoint 2 (bar): 2.4 in (6.1 cm) long, sitting 0.5 in (1.3 cm) above the bottom edge.
- Checkpoint 3 (neck and head): The neck strip is about 0.45 in (1.1 cm) wide and 5.2 in (13.2 cm) long. The head adds 1 in (2.5 cm).
- Checkpoint 4 (legs): each about 4 in (10.2 cm) including the foot.
- Checkpoint 5 (finished): 4.4 in (11.2 cm) × 9.3 in (23.6 cm).
Too big? Go down to a 3.25 mm hook. Too small? Go up to a 3.75 mm hook. Don’t change stitch counts: the spoke lengths and edging increases are calculated for this gauge.
Pattern
Part 1: Body Ring (Hot Pink)
Foundation: Ch 44 and join with a sl st to the first ch to form a ring, taking care not to twist.
Rnd 1: Ch 1, sc in each ch around, then sl st to the first sc. (44 sc)
Lay the ring flat as an oval with the joining stitch at the left end. Number the stitches as follows:
– sc 1 is at the left end.
– sc 1–22 run along the bottom edge from left to right.
– sc 22–23 form the pointed tail tip on the right.
– sc 23–44 run back along the top edge from right to left.
Place markers in sc 4, sc 19, sc 43, and sc 9. Fasten off.
Pinch sc 22 and 23 together gently to start the pointed tail. The left end stays rounded.
Part 2: Bar and Fan (Hot Pink)
Bar: Join pink with a sl st in sc 4. Ch 11, then sl st in sc 19.
Bar row: Ch 1, turn, and sc in each of the 11 ch, working back toward sc 4. Sl st in sc 4. (11 sc)
The bar now spans the lower part of the oval, 0.5 in (1.3 cm) above the bottom edge. Number the bar sc 1–11 from left to right.
Fan spokes: Sl st along the bar to bar sc 3. Work 7 return-slip spokes. Make each spoke as follows: ch the stated number, sl st in the stated top-arc sc, sl st back down each ch, then sl st in the next bar sc.
| Spoke | From bar sc | Chains | To top sc |
|---|---|---|---|
| 1 | 3 | 7 | 43 |
| 2 | 4 | 7 | 40 |
| 3 | 5 | 6 | 37 |
| 4 | 6 | 6 | 34 |
| 5 | 7 | 6 | 31 |
| 6 | 8 | 7 | 28 |
| 7 | 9 | 7 | 25 |
The center spokes are about 1.3 in (3.3 cm) long. The outer, diagonal spokes are about 1.6 in (4.1 cm). After spoke 7, fasten off.
Each spoke should be straight and just taut. If one pulls the top arc down, redo it with 1 more ch. If one sags, use 1 fewer.
Part 3: Neck and Head (Hot Pink)
The neck is worked in rows straight up from the top-left of the body.
Row 1: Join pink in sc 43. Ch 1, then sc in sc 43 and sc 44. (2 sc)
Rows 2–26: Ch 1, turn, sc in each st. (2 sc each row)
Checkpoint: The strip is about 5.2 in (13.2 cm) long and 0.45 in (1.1 cm) wide.
Row 27 (head increase): Ch 1, turn, and work 2 sc in each st. (4 sc)
Rows 28–30: Ch 1, turn, sc in each st. (4 sc each row)
Row 31: Ch 1, turn, sc2tog twice. (2 sc) Fasten off.
The head is about 1 in (2.5 cm) long and 0.9 in (2.3 cm) wide. Leave the neck straight for now; blocking makes the S-curve.
Part 4: Legs (Hot Pink, make 2)
Leg 1: Join pink with a sl st in bottom sc 9. Ch 22.
Foot loop: Sl st in the 6th ch from the hook. This closes a small loop of 6 ch, about 0.4 in (1.0 cm) across.
Leg cord: Sc in each of the remaining 16 ch, working back toward the body. (16 sc) Sl st in sc 10 and fasten off.
Leg 2: Join in sc 14 and repeat, finishing with a sl st in sc 15.
The legs sit about 1.1 in (2.8 cm) apart, centered under the body. Each leg is 16 sc ≈ 3.6 in (9.1 cm), plus the 0.4 in (1.0 cm) foot, for 4 in (10.2 cm) total.
Part 5: Coral Edging (the Border)
Border gauge: The edging uses the same 18 sc = 4 in (10.2 cm) gauge, 1 round deep, which adds 0.2 in (0.5 cm) to each outer edge.
Edging round: Join coral in sc 1 at the left end of the body. Ch 1 and work the following sections in order, without turning.
| Section | Instruction | Count |
|---|---|---|
| Left lower curve | 2 sc in sc 1, 2 sc in sc 2 | 4 |
| Bottom edge | sc in sc 3–20 | 18 |
| Tail tip | 2 sc in each of sc 21, 22, 23 | 6 |
| Top edge | sc in sc 24–42 | 19 |
| Body total | 42 sts worked 1-per-stitch + 5 extra | 47 |
| Neck, first edge | 1 sc in each row end, rows 1–26 | 26 |
| Head, first side | 1 sc in each row end, rows 27–31 | 5 |
| Head top | 2 sc in first st, sc in next st (row 31) | 3 |
| Head, second side | 1 sc in each row end, rows 31–27 | 5 |
| Neck, second edge | 1 sc in each row end, rows 26–1 | 26 |
| Round total | 112 sc |
Sl st to the first sc and fasten off.
Where a leg, bar, or spoke is joined, work the edging sc under both top loops of that same stitch. The joins sit on the inner side and stay hidden.
Why the math works:
– Body: The ring has 44 sts. Sc 43 and 44 are covered by the neck base, so the edging works only sc 1–42, one stitch each. Adding 1 round of sc around a 0.2 in (0.5 cm) curve adds about 1.3 in (3.3 cm) to the perimeter. At 4.5 sts per inch, that needs roughly 5–6 extra stitches. Five increases, placed only on the two curved ends, keep the straight edges flat and the body from cupping: 42 + 5 = 47.
– Neck and head: These are rows, so 1 sc per row end is the matching rate. Sc rows are slightly shorter than sc stitches are wide, so working the edges at 1:1 keeps them flat.
– Head top: The 2 stitches of row 31 get 1 extra stitch to round the tip: 2 + 1 = 3.
Part 6: Beak, Eye, and Hanging Loop
Beak (black): Ch 4. Sl st in the 2nd ch from the hook, sc in the next ch, and hdc in the last ch. (3 sts)
Fasten off, leaving a 6 in (15.2 cm) tail. Sew the wide end to the head tip so the beak angles downward.
Eye: Sew the 4 mm bead (or make a French knot) on the head, about 0.3 in (0.8 cm) behind the beak.
Hanging loop (coral): Wait until after blocking so you can find the highest point of the neck curve, which will be around row 22 on the outer edge. Join coral there with a sl st, ch 18, then sl st in the same st.
The finished loop hangs about 2 in (5.1 cm) above the head. Fasten off and weave in all ends.
Final Blocking
- Wet the ornament, or spray it until it is damp all through, and press out the extra water in a towel.
- Pin the body oval to 4.4 in (11.2 cm) × 2.4 in (6.1 cm). Point the tail at sc 22–23 and keep the bar straight.
- Shape the neck into a reversed S:
- Bend the lower third gently to the left above the body.
- Sweep the middle up and to the right.
- Curve the top third over and down to the left, so the head faces left and the beak points down.
- Pin the legs straight down, 1.1 in (2.8 cm) apart. Curl each foot loop slightly outward.
- Check the total height: 9.3 in (23.6 cm).
- Mist with spray starch if you’re using it, and let the piece dry completely before unpinning.
- Add the hanging loop at the highest point of the curve.
Final Quality-Control Checklist
- Body Rnd 1 has 44 sc, and the bar has 11 sc.
- All 7 spokes are straight, and none distort the top arc.
- The neck is 26 rows of 2 sc, and the head follows the 4-4-4-4-2 sequence (rows 27–31).
- Both legs are 16 sc plus a 6-ch foot loop.
- The edging totals 112 sc, with the body section at 47.
- The beak points down, and the eye is secure.
- All ends are woven in on the back.
- The ornament measures 4.4 in (11.2 cm) × 9.3 in (23.6 cm).
Troubleshooting
The body cups or ruffles. If it cups, add a sixth edging increase at the tail. If it ruffles, remove one increase from the left curve.
The spokes bunch at the bar. Make sure each spoke starts in its own bar stitch (sc 3 to sc 9) and doesn’t share a stitch.
The neck won’t hold its curve. Block it again with starch, or work the edging on the inner curve a little tighter.
The legs twist. Pin them straight while damp. Cotton sets well once it is fully dry.
There are gaps where the neck meets the body. Close them with a few small stitches of pink yarn on the back.
Care
Spot clean with cool water and mild soap, then reshape and dry flat. Store it flat between tissue paper so the neck curve keeps its shape.
Final Notes
Each stage of the measurement chain builds on the one before:
– The 44-sc ring sets the 4 in (10.2 cm) × 2 in (5.1 cm) body.
– The 11-sc bar and 7 spokes fill the oval without distorting it.
– The 26-row neck and 5-row head rise about 3.1 in (7.9 cm) above the body.
– The 16-sc legs add 4 in (10.2 cm) below.
– The 112-sc coral edging adds 0.2 in (0.5 cm) to every outer edge.
Together these give a 4.4 in (11.2 cm) × 9.3 in (23.6 cm) flamingo. Measure at each checkpoint and the finished ornament will match.
Happy crocheting!