

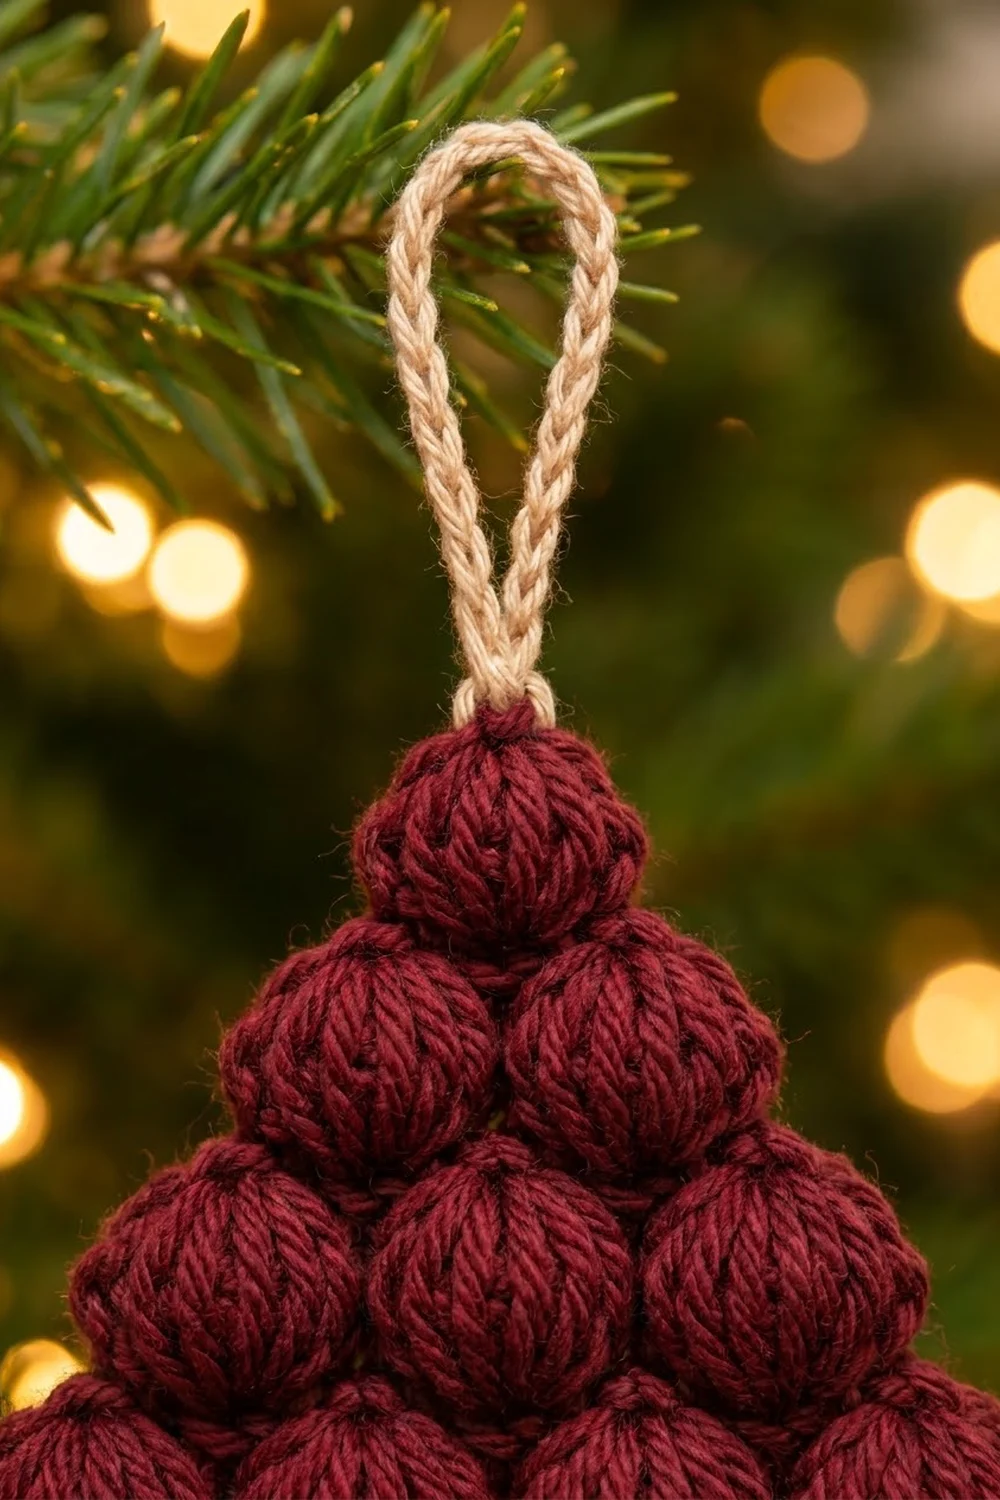
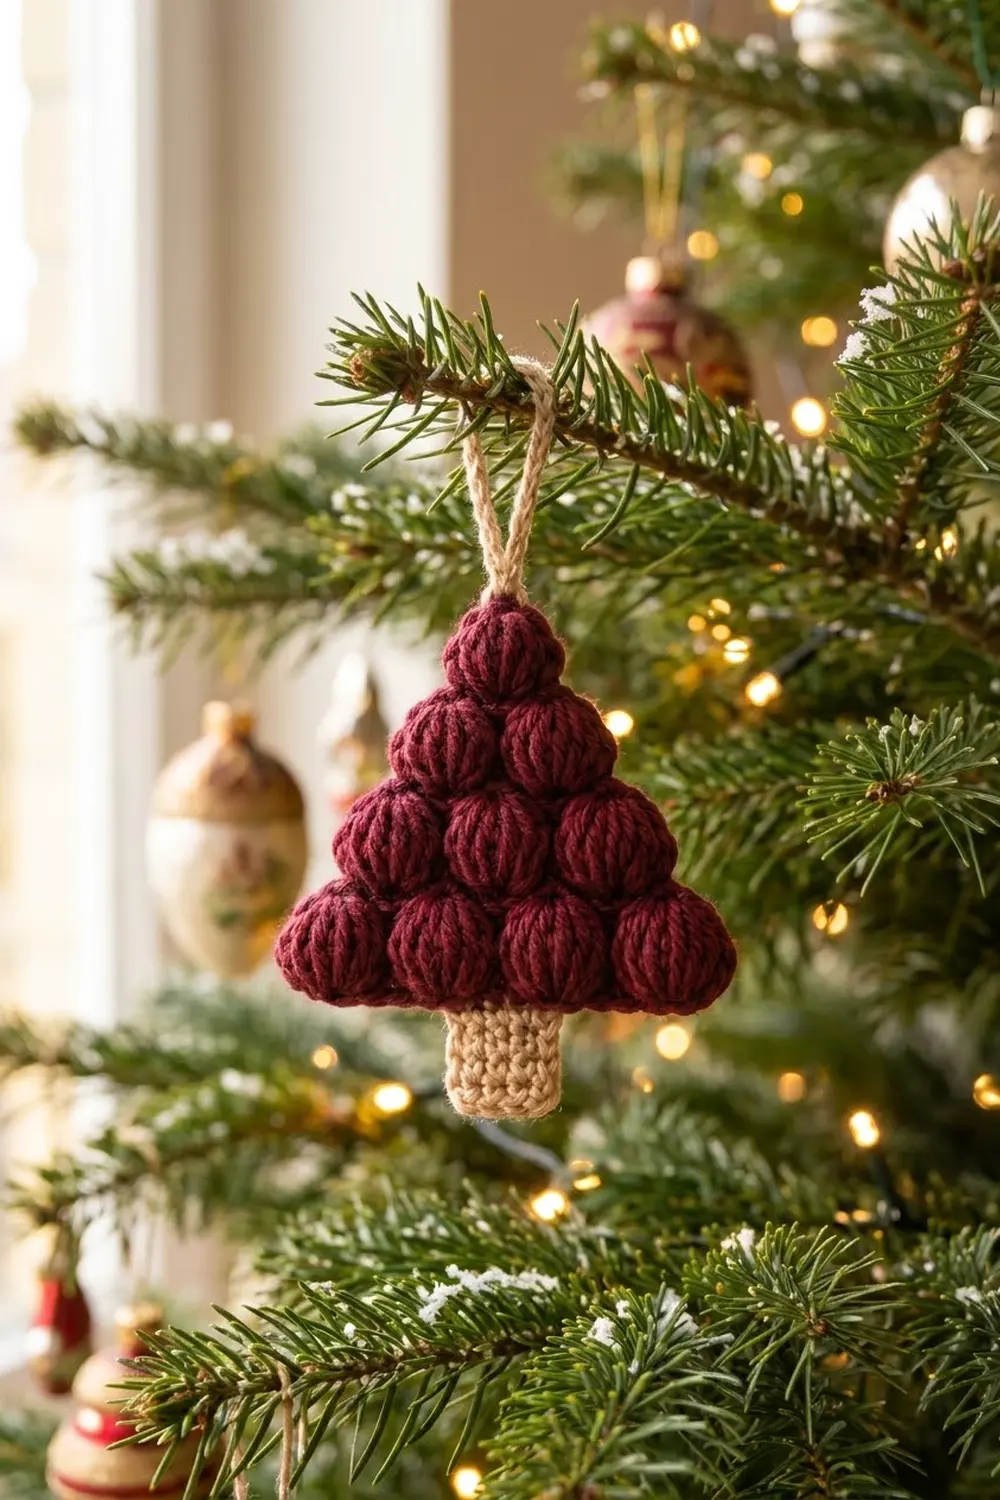
The Berry Puff Pine is a small, squishy Christmas tree ornament made almost entirely of puff stitches. Ten plump burgundy puffs stack into a neat triangle: four on the bottom row, then three, then two, then one at the peak. Each puff nests between the two below it, so the tree has a soft, scalloped outline.
The palette is simple: deep berry red for the tree and warm cream for the trunk and hanging loop. Together they give a cozy, rustic look that suits natural garlands, gift tags, and real evergreen branches.
The finished ornament measures about 3.25 in (8.3 cm) wide and 3.75 in (9.5 cm) tall without the loop, or 5.75 in (14.6 cm) tall with the loop. This pattern uses US crochet terms throughout.
Construction is quick. You work the tree from the bottom up in four short rows of puffs, then add a slip-stitch edge in the same color. Next, you work a small single crochet trunk into the center of the bottom edge and add a chain loop at the top. It’s one piece, with no sewing between parts.
Finished Size and Construction
- Finished size: 3.25 in (8.3 cm) wide × 3.75 in (9.5 cm) tall, excluding the loop
- Height including loop: 5.75 in (14.6 cm)
- Skill level: Easy
- Terminology: US crochet terms
- Yarn weight: Worsted (#4, medium)
- Hook: 4.0 mm (G-6)
- Number of pieces: 1
- Layout: Puff rows of 4, 3, 2, 1 (10 puffs total), trunk centered below, loop at the top
- Tree section before edging: 3.0 in (7.6 cm) wide × 2.75 in (7.0 cm) tall
- Edge (border) depth: about 0.125 in (0.3 cm) per side
- Trunk: 0.75 in (1.9 cm) wide × 1 in (2.5 cm) tall
- Loop: 2 in (5.1 cm) tall when folded
Materials
Choose a smooth worsted-weight yarn with good stitch definition. Cotton or a cotton blend gives the crispest, most rounded puffs. Acrylic works well too and is a little softer. Avoid fuzzy or very splitty yarns, because pulling up several loops for each puff is much easier with a tightly plied strand.
Yarn:
– Color A, burgundy (tree): 8 g, about 16 m (17.5 yd)
– Color B, beige/cream (trunk and loop): 3 g, about 6 m (6.6 yd)
These quantities include a margin for your gauge swatch and weaving in ends.
Tools:
– 4.0 mm (G-6) crochet hook
– Tapestry needle
– Scissors
– Stitch marker (optional)
– Ruler or tape measure
– Pins and a foam mat for blocking
Abbreviations (US Terms)
- ch – chain
- sl st – slip stitch
- sc – single crochet
- sk – skip
- sp – space
- st(s) – stitch(es)
- yo – yarn over
- RS – right side
Special stitch – Puff: [Yo, insert hook in the indicated st or sp, yo, and pull up a loop to about 0.5 in (1.3 cm) tall] 4 times; you’ll have 9 loops on the hook. Yo and pull through all 9 loops, then ch 1 to lock. The locking ch is part of the puff and is never counted as a separate stitch.
Keep every pulled-up loop the same height. Even loops make round, uniform puffs.
Gauge and Checkpoints
This ornament is small, so the piece itself works as your gauge test. Work Row 1 and measure before going on.
- Puff gauge: Row 1 (4 puffs) = 3.0 in (7.6 cm) wide × 0.75 in (1.9 cm) tall
- Single crochet gauge (trunk): 4 sc and 5 rows = 1 in (2.5 cm)
Checkpoints:
1. After Row 1: 3.0 in (7.6 cm) wide.
2. After Row 4: the tree measures 3.0 in (7.6 cm) wide × 2.75 in (7.0 cm) tall.
3. After the edging: 3.25 in (8.3 cm) wide.
4. After the trunk: 3.75 in (9.5 cm) total height.
If Row 1 is too wide (over 3.25 in / 8.3 cm), go down to a 3.75 mm hook or pull up shorter loops. If it’s too narrow (under 2.75 in / 7.0 cm), go up to a 4.5 mm hook. Exact size isn’t critical for an ornament, but staying close keeps the puffs plump rather than loose or stiff.
Tree (Color A)
The tree is worked in turned rows from the bottom up. Each new row of puffs goes into the ch-1 spaces of the row below, which naturally nests each puff between two puffs underneath.
Foundation: With Color A, ch 9.
Row 1 (RS): Puff in the 3rd ch from the hook (the 2 skipped ch form the edge), [ch 1, sk 1 ch, puff in next ch] 3 times. Turn.
Count: 4 puffs and 3 ch-1 sps.
Check: puffs go into ch 3, 5, 7, and 9 counted from the hook, so all 9 chains are used.
Row 2: Ch 2 (does not count as a st), puff in the first ch-1 sp, [ch 1, puff in next ch-1 sp] 2 times. Turn.
Count: 3 puffs and 2 ch-1 sps.
Row 3: Ch 2 (does not count), puff in the first ch-1 sp, ch 1, puff in the next ch-1 sp. Turn.
Count: 2 puffs and 1 ch-1 sp.
Row 4: Ch 2 (does not count), puff in the ch-1 sp.
Count: 1 puff.
Don’t fasten off. Your working loop now sits at the top of the single peak puff.
Checkpoint: The tree measures 3.0 in (7.6 cm) at the base and 2.75 in (7.0 cm) tall. Each row is 0.75 in (1.9 cm) tall, but the rows nest into each other, so four rows come to 2.75 in rather than 3.0 in.
Gently pinch each puff into a round shape and make sure the RS faces you. The RS is the side where the puffs look smoothest and most rounded.
Border (Edge Finish, Color A)
A single round of slip stitches outlines the tree. It closes small gaps at the row ends, firms up the foundation chain, and gives the trunk a stable edge to grow from. Because it’s worked in the same burgundy, it blends in and keeps the puffs as the main feature.
Border gauge: about 3 sl sts per 1 in (2.5 cm) along the bottom, and 2 sl sts per row end along the slanted sides.
Edge Round: Continuing from the top of Row 4, rotate to work down the first slanted side.
- Side 1: Work 2 sl sts in each row end (Rows 4, 3, 2, 1) = 8 sl sts.
- Bottom: Work 1 sl st in the free loop of each foundation ch, corner chains included = 9 sl sts.
- Side 2: Work 2 sl sts in each row end (Rows 1, 2, 3, 4) = 8 sl sts.
- Sl st into the locking ch at the top of the Row 4 puff to join.
Count: 25 sl sts (8 + 9 + 8), plus the joining sl st.
Fasten off and leave a 4 in (10.2 cm) tail.
Why the math works: The bottom has exactly 9 foundation chains, so 1 sl st per chain gives 9 sl sts and adds no width. At about 3 per inch, 9 sl sts span 3.0 in (7.6 cm), which matches Row 1. Each puff row end is about 0.75 in (1.9 cm) tall, and 2 sl sts at that gauge cover it without pulling or rippling. The 4 row ends on each side give 2 × 4 = 8 sl sts per side.
The sl sts add about 0.125 in (0.3 cm) on each side, so the width becomes 3.0 + 0.125 + 0.125 = 3.25 in (8.3 cm). The bottom sl sts sit on the foundation chain itself, so the tree height stays at about 2.75 in (7.0 cm).
Tension tip: Keep the sl sts relaxed. If they’re tight, the bottom will pucker and the outer puffs will curl inward.
Trunk (Color B)
The trunk is centered under the tree. It’s worked into the back loops of the 9 bottom-edge sl sts, using only sl sts 4, 5, and 6 so there are 3 unused sts on each side.
Row 1: With the RS facing and the bottom edge on top, count 4 sl sts in from the right corner. Join Color B with a sl st in the back loop of that st. Ch 1, then sc in the same st and in the back loops of the next 2 sts. Turn.
Count: 3 sc.
Rows 2–5: Ch 1, sc in each sc across. Turn.
Count: 3 sc per row.
Fasten off and leave a 4 in (10.2 cm) tail.
Checkpoint: The trunk measures 0.75 in (1.9 cm) wide (3 sc at 4 per inch) and 1 in (2.5 cm) tall (5 rows at 5 per inch). Total height without the loop is 2.75 in + 1 in = 3.75 in (9.5 cm).
The trunk covers 3 of the 9 bottom sts, which is one-third of the base width. That proportion makes it look like a natural, sturdy little stem.
Hanging Loop (Color B)
Loop: With Color B, join with a sl st in the locking ch at the top of the Row 4 puff, in the same spot as the edge join. Ch 20, then sl st in the same st to close the loop.
Fasten off and leave a 4 in (10.2 cm) tail.
Checkpoint: The 20 chains measure about 4 in (10.2 cm) laid straight, which folds into a 2 in (5.1 cm) loop. Total height with the loop is 3.75 in + 2 in = 5.75 in (14.6 cm).
For a sturdier loop that looks slightly braided, work 1 sl st in the back bump of each chain on the way back down before joining. The loop length stays the same.
Final Blocking
- Weave in all ends. Run each tail through the back of nearby stitches of its own color. Hide the burgundy tails inside the puffs and the beige tails inside the trunk. Trim them close.
- Dampen lightly. Mist the ornament with water until it’s slightly damp. Don’t soak it, because heavy moisture can flatten the puffs.
- Shape the puffs. Pinch each puff gently from the sides so it sits round and full. Nudge each puff so it nests evenly between the two below it.
- Pin the outline. Place the ornament RS up on a foam mat. Pin the two bottom corners 3.25 in (8.3 cm) apart and the peak 2.75 in (7.0 cm) above the base line. Pin through the edge sl sts, not through the puffs.
- Square the trunk. Pin the trunk to 0.75 in (1.9 cm) wide and 1 in (2.5 cm) long, centered under the tree.
- Straighten the loop. Lay the loop straight up from the peak and pin its top 2 in (5.1 cm) above the tree.
- Dry fully. Leave it pinned until completely dry, usually a few hours. Then unpin and re-pinch any puffs that have flattened.
Final Quality-Control Checklist
- [ ] Rows have 4, 3, 2, and 1 puffs (10 total)
- [ ] Each upper puff sits centered between two puffs below
- [ ] All puffs are similar in size and roundness
- [ ] Edge round has 8 + 9 + 8 = 25 sl sts, with no gaps at the row ends
- [ ] Bottom edge lies flat without puckering
- [ ] Trunk is 3 sc wide and 5 rows tall, with exactly 3 sts free on each side
- [ ] Tree measures 3.25 in (8.3 cm) wide
- [ ] Total height is 3.75 in (9.5 cm) without the loop and 5.75 in (14.6 cm) with it
- [ ] Loop is firmly attached at the peak and hangs straight
- [ ] All ends are woven in and invisible from the RS
Troubleshooting
Puffs look flat or skinny. Your loops are too short. Pull each loop up to a full 0.5 in (1.3 cm) before the next yo, or move up half a hook size.
Puffs look loose or gappy. The loops are too tall or uneven. Shorten them slightly and hold the base of the puff with your thumb while pulling through all 9 loops.
Can’t pull through 9 loops. Try a hook with a tapered throat, and loosen your grip on the working yarn as you pull through.
Tree leans to one side. Count your ch-1 spaces. Each row must start in the first space, not at the edge, so the upper row stays centered.
Bottom edge ripples. You may have worked more than 1 sl st per chain. Undo the bottom section and work exactly 9.
Bottom edge puckers. The sl sts are too tight. Rework them more loosely or with a hook one size larger.
Trunk is off-center. Recount the bottom sl sts. Join in the 4th st from the corner so that sts 4, 5, and 6 are used.
Ornament twists when hung. Make sure the loop is attached exactly at the center of the peak puff, then re-block the loop straight.
Care
Hand wash in cool water with mild soap if needed. Press out the water gently in a towel, reshape the puffs, and dry flat. Store flat or hanging so the puffs don’t get crushed.
Final Notes
The measurement chain for this ornament is short and easy to check:
- Row 1 sets the base at 3.0 in (7.6 cm) with 4 puffs.
- Four nested puff rows bring the tree to 2.75 in (7.0 cm) tall.
- The 25-stitch slip-stitch edge adds 0.125 in (0.3 cm) per side, for a 3.25 in (8.3 cm) width.
- The 3 × 5 trunk adds 1 in (2.5 cm), for 3.75 in (9.5 cm) total.
- The 20-chain loop adds 2 in (5.1 cm), for 5.75 in (14.6 cm) overall.
If Row 1 matches gauge, every stage after it will too. One ornament takes well under an hour, so it’s easy to make several to fill a tree or tie onto gifts.
Happy crocheting!