
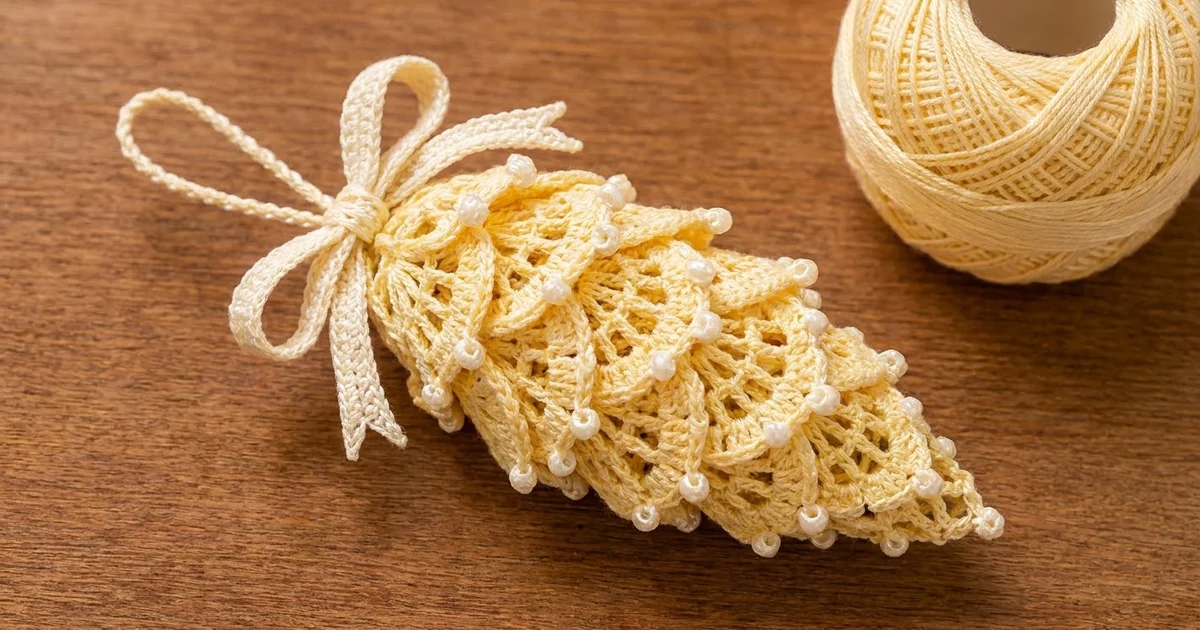
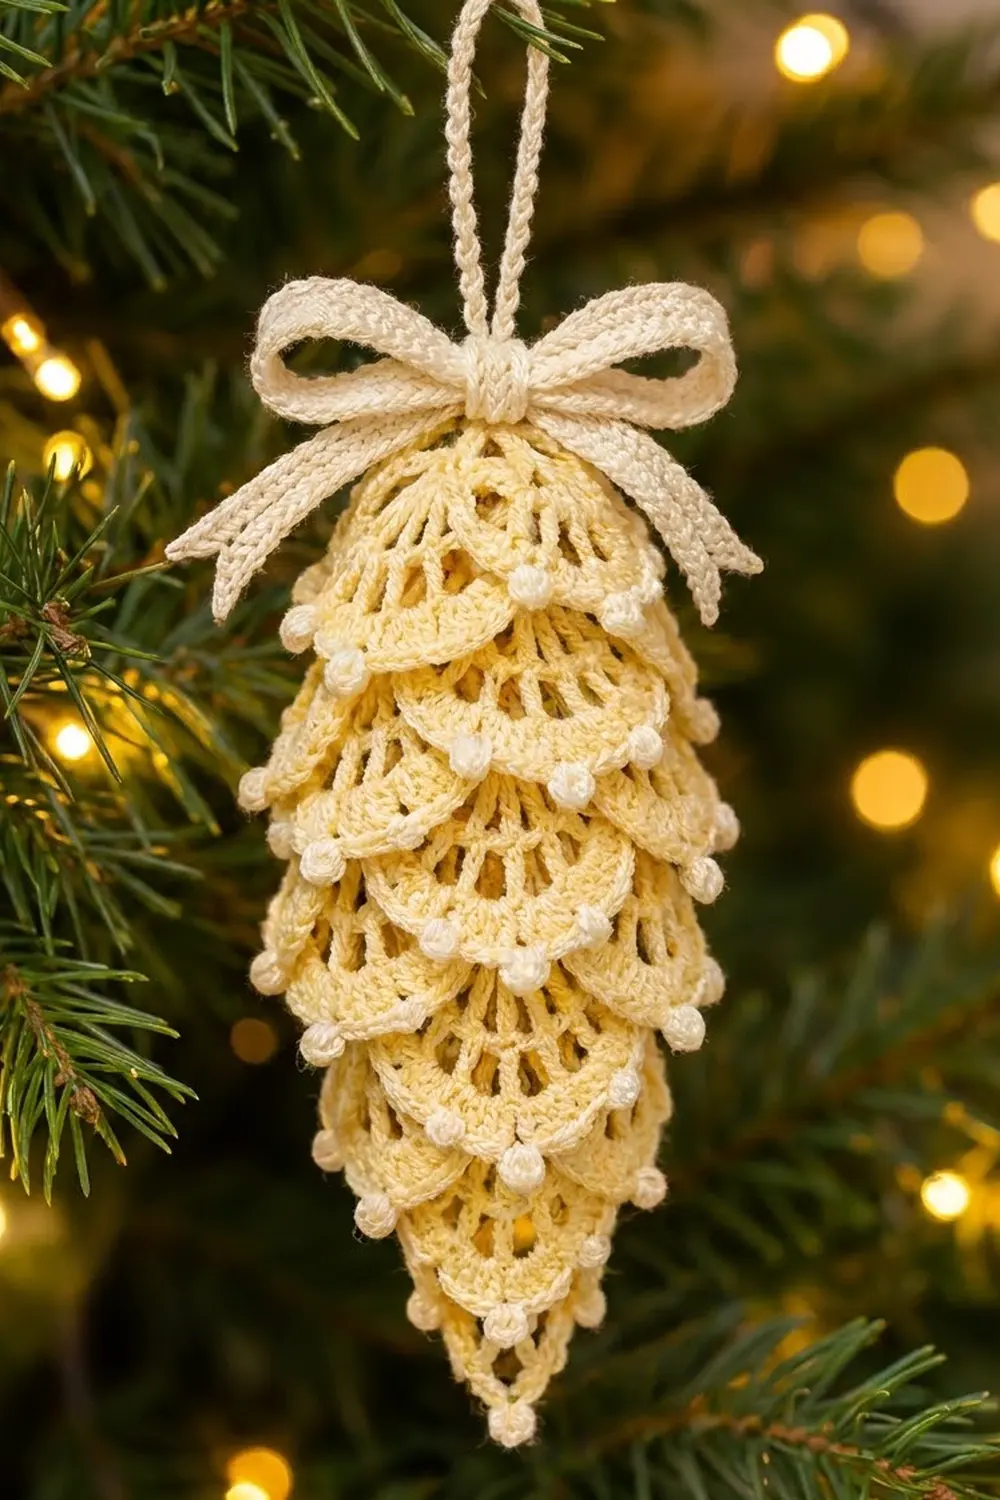
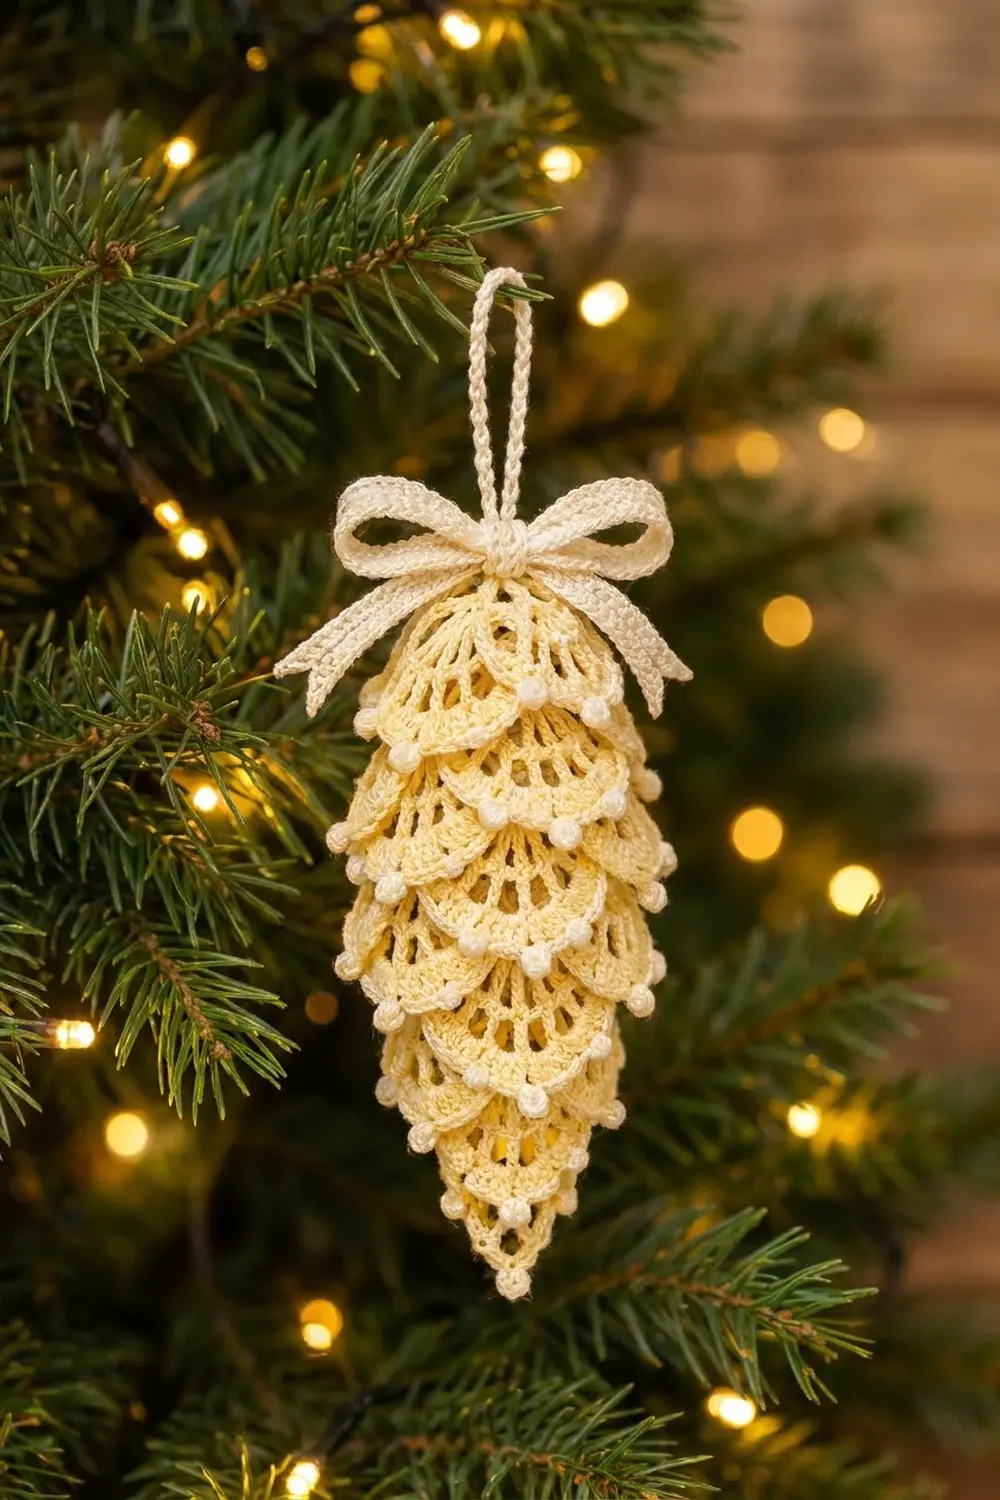
The Buttercream Lace Pinecone is a delicate thread ornament made of layered, fan-shaped lace scales. Each scale has open spokes and an ivory edge of round knob picots. The scales overlap in staggered tiers around a hidden lattice tube, so the ornament looks full and dimensional from both sides.
The colors are soft and wintry. Pale butter yellow is used for the tube and scales. Ivory is used for the knob picots, the ridged bow and the twisted hanging loop. The style is vintage heirloom lace. It suits a neutral tree and also makes a good gift.
This pattern uses US crochet terms. The finished body measures 3 in (7.6 cm) wide and 5.1 in (13.0 cm) long, from the top of the tube to the lowest scale. With the hanging loop, the ornament is 7.35 in (18.7 cm) tall.
The ornament is built from simple separate parts:
– a lattice tube, crocheted in rounds
– 30 small fan scales, crocheted in rows, each edged with ivory knob picots
– a ridged bow and a slip-stitch cord for the top
The scales are sewn to the tube in seven tiers.
Finished Size and Construction
- Finished size: body 3 in (7.6 cm) wide x 5.1 in (13.0 cm) long; 7.35 in (18.7 cm) tall with the loop
- Skill level: Intermediate
- Terminology: US
- Yarn weight: Size 3 crochet thread (CYC 1, super fine)
- Hook: 2.25 mm (B-1)
- Number of pieces: 35 (1 tube, 30 scales, 1 bow loop strip, 1 tail strip, 1 center band, 1 hanging cord)
- Layout: 7 staggered tiers of scales, 15 scales on the front and 15 on the back
- Piece size: each scale is 2 in (5.1 cm) wide x 1.25 in (3.2 cm) tall; the tube is 1.1 in (2.8 cm) wide when flat x 4.4 in (11.2 cm) long
- Scale size before border: 2 in (5.1 cm) wide x 1.1 in (2.8 cm) tall
- Border depth: 0.15 in (0.4 cm), one row of sc with knob picots
Materials
Use a mercerized cotton crochet thread in size 3. Mercerized cotton holds starch well, shows the open spokes clearly and keeps the knob picots round. Avoid fuzzy or very soft threads, because they blur the lattice and spokes.
- Color A, pale butter yellow: 35 g / 98 m (tube and scales)
- Color B, ivory: 25 g / 70 m (knob picot borders, bow, hanging cord)
Tools:
- 2.25 mm (B-1) crochet hook
- Tapestry needle with a small eye
- Scissors
- 4 locking stitch markers
- Blocking mat and rust-proof pins
- Spray starch or a fabric stiffener
- A small ball, about 2 in (5.1 cm) across, for cupping the scales (optional)
The quantities include about 20 percent extra for gauge swatches, sewing tails and one or two practice scales.
Abbreviations (US Terms)
- ch – chain
- sl st – slip stitch
- sc – single crochet
- dc – double crochet
- sp(s) – space(s)
- BLO – back loop only
- tch – turning chain
- RS / WS – right side / wrong side
Special stitch – knob picot (kp):
1. Ch 3.
2. Yarn over, insert the hook in the 3rd ch from the hook, pull up a loop, yarn over and pull through 2 loops. Repeat from * 2 more times. You now have 4 loops on the hook.
3. Yarn over and pull through all 4 loops.
4. Sl st in the top of the last sc made.
This makes a small round bead. A kp is not counted as a stitch.
Standing sc: Start with a slip knot on the hook. Insert the hook in the stitch, pull up a loop, yarn over and pull through both loops.
Gauge and Checkpoints
Gauge: 7 sc and 8 rows = 1 in (2.5 cm); 7 dc and 4 rows = 1 in (2.5 cm).
Before anything else, make one scale and the first 9 rounds of the tube. You make the scale 30 times, so a small error multiplies quickly.
Scale checkpoints:
- After Row 1: about 0.5 in (1.3 cm) across
- After Row 3: about 1.75 in (4.4 cm) across at the widest point
- After Row 4: 2 in (5.1 cm) wide x 1.1 in (2.8 cm) tall
- After the border: 2 in (5.1 cm) wide x 1.25 in (3.2 cm) tall
Tube checkpoints:
- After Rnd 2: 1.1 in (2.8 cm) wide when flattened
- After Rnd 9: 2.35 in (6.0 cm) long
- After Rnd 17: 4.4 in (11.2 cm) long
If your scale is too big, go down to a 2.0 mm hook. If it is too small, go up to a 2.5 mm hook. If only the height is off, change how high you pull up your yarn-overs and keep the same hook. The width at Row 4 matters most for the tier layout.
Lattice Tube
The tube is the hidden core. The scales are sewn to it, so it needs to be firm but not stiff.
With Color A, leave a 6 in (15.2 cm) tail. Ch 16 and sl st in the first ch to form a ring, taking care not to twist.
Rnd 1: Ch 1, sc in each ch around, sl st in the first sc to join. [16 sc]
Rnd 2: Ch 1, sc in each sc around, join. [16 sc]
Rnd 3 (first lattice round): Ch 1, sc in the first sc. Ch 5, skip 3 sc, sc in the next sc. Repeat from * 2 more times. Ch 5, skip 3 sc, sl st in the first sc to join. [4 sc, 4 ch-5 loops]
Rnds 4–15: Sl st in each of the next 3 ch to reach the center of the first loop. Ch 1, sc in the same loop. Ch 5, sc in the next ch-5 loop. Repeat from * 2 more times. Ch 5, join. [4 sc, 4 ch-5 loops each round]
Each round shifts by half a loop, so the chains cross and form the diamond lattice. You now have 13 lattice rounds in total (Rnds 3–15).
Rnd 16 (conversion round): Ch 1, work 4 sc in each ch-5 loop around, join. [16 sc = 4 loops x 4 sc]
Rnd 17: Ch 1, sc in each sc around, join. [16 sc]
Fasten off. Flatten the tube so it is 1.1 in (2.8 cm) wide and 4.4 in (11.2 cm) long, with a column of lattice centered on each face.
Fan Scale
You work the scale in rows, from the narrow top down to the curved edge. Later you sew the narrow end to the tube, and the curved picot edge hangs free.
With Color A, leave a 10 in (25.4 cm) tail for sewing. Ch 4 and sl st in the first ch to form a ring.
Row 1 (RS): Ch 3 (counts as dc), 4 dc in the ring, turn. [5 dc]
Row 2 (WS): Ch 5 (counts as dc + ch 2). Dc in the next dc, ch 2. Repeat from * 2 more times. Dc in the 3rd ch of the tch, turn. [5 dc, 4 ch-2 sps]
Row 3 (RS): Ch 6 (counts as dc + ch 3). Dc in the next dc, ch 3. Repeat from * 2 more times. Dc in the 3rd ch of the tch, turn. [5 dc, 4 ch-3 sps]
Row 4 (WS, conversion row): Ch 3 (counts as dc). 3 dc in the next ch-3 sp, dc in the next dc. Repeat from * 3 more times, working the last dc in the 3rd ch of the tch. [17 dc = 5 dc worked 1 per spoke + 12 dc worked into the spaces]
Fasten off Color A with a short tail and weave it in. The five dc columns form the open spokes, and Row 4 closes them into a solid curved edge.
Make All Pieces
Make 30 scales in Color A and finish each one with the Color B border below. Then make the ivory trims.
- Color A: 1 tube, 30 scales
- Color B: 30 scale borders, 1 bow loop strip, 1 tail strip, 1 center band, 1 hanging cord
Bow loop strip: With Color B, ch 50.
– Row 1: Sc in the 2nd ch from the hook and in each ch across, turn. [49 sc]
– Rows 2–3: Ch 1, sc in the BLO of each sc across, turn. [49 sc]
Fasten off. The strip is 7.0 in (17.8 cm) long and 0.4 in (1.0 cm) wide. The BLO rows give it ridges.
Tail strip: With Color B, ch 31. Work Rows 1–3 as for the bow loop strip. [30 sc each row] The strip is 4.3 in (10.9 cm) long.
Center band: With Color B, ch 9. Work Rows 1–3 as above. [8 sc each row] The band is 1.1 in (2.8 cm) long.
Hanging cord: With Color B, ch 41. Sl st in the back bump of the 2nd ch from the hook and in each ch across. [40 sl st] The cord is 4.5 in (11.4 cm) long and twists naturally.
Tier layout (front face; the back is the same):
Tier 1 (top at 0.25 in / 0.6 cm):     [S][S]
Tier 2 (top at 0.85 in / 2.2 cm):   [S][S][S]
Tier 3 (top at 1.45 in / 3.7 cm):     [S][S]
Tier 4 (top at 2.05 in / 5.2 cm):   [S][S][S]
Tier 5 (top at 2.65 in / 6.7 cm):     [S][S]
Tier 6 (top at 3.25 in / 8.3 cm):      [S][S]
Tier 7 (top at 3.85 in / 9.8 cm):       [S]
Per face: 2 + 3 + 2 + 3 + 2 + 2 + 1 = 15 scales. Both faces: 30 scales. In Tier 6, the two scales overlap by half to start the taper.
Joining
Sew each scale to the tube by its narrow top only. Leave Rows 3–4 and the border free so the scales flare like a real pinecone.
Measure each tier position from the top edge of the tube and mark it with stitch markers. Start with Tier 7 at the bottom and work upward. That way, each new tier covers the sewing of the tier below.
Stitch-to-stitch logic: Use the 10 in (25.4 cm) starting tail to whipstitch the ring and the 5 dc of Row 1 to the tube.
– Tack the center dc of Row 1 to the nearest lattice crossing.
– Tack the outer dc of Row 1 to the lattice bars on either side.
– On 3-scale tiers, place the outer scales 0.5 in (1.3 cm) to each side of center, so they wrap around the edge of the tube.
– On 2-scale tiers, center each scale over the gap between two scales of the tier below.
The tiers are 0.6 in (1.5 cm) apart and each scale is 1.25 in (3.2 cm) tall. Each tier therefore overlaps the next by 0.65 in (1.7 cm), which hides the tube completely.
Tension: Pull each tacking stitch snug enough to lie flat, but don’t pucker the lattice. If the tube starts to bend, loosen your stitches.
Size checkpoint: Once all 30 scales are attached, check these measurements:
– Width: 3 in (7.6 cm) at Tiers 2 and 4. That is a 2 in (5.1 cm) scale plus a 0.5 in (1.3 cm) offset on each side.
– Length: 5.1 in (13.0 cm). That is 3.85 in (9.8 cm) to the top of Tier 7 plus a 1.25 in (3.2 cm) scale.
– Tip: the lowest scale extends 0.7 in (1.8 cm) below the tube.
Finishing the top:
1. Fold the hanging cord in half. Sew both ends inside the top of the tube at Rnds 1–2, so the loop stands 2.25 in (5.7 cm) tall.
2. Sew the short ends of the bow loop strip together to form a ring. Flatten it with the seam at the center back. It is now 3.5 in (8.9 cm) wide.
3. Fold the tail strip into an upside-down V and place it behind the bow.
4. Wrap the center band around both pieces and sew its ends together at the back.
5. Sew the bow to the front of the tube top, over Tier 1.
Border
Work the border on each scale before joining. It adds the ivory knob picots along the curved edge.
Border gauge: 7 sc = 1 in (2.5 cm), the same as the main gauge.
Border Row (RS): With the RS facing, join Color B with a standing sc in the first dc of Row 4 (this is sc 1), kp. Sc in the next 4 dc, kp. Repeat from * 3 more times. [17 sc, 5 kp] Fasten off and weave in both tails.
Why the math works:
– Row 4 has 17 dc. The spoke dc sit at positions 1, 5, 9, 13 and 17, with 3 space dc between each pair.
– The border puts one sc on every dc: 1 + 4 x 4 = 17 sc.
– A kp follows sc 1, 5, 9, 13 and 17, so each picot lands directly above a spoke. That puts one picot on each corner and one at the exact center.
– The border row adds no width, so the scale stays 2 in (5.1 cm) wide.
– It adds 0.15 in (0.4 cm) of depth, for a total height of 1.25 in (3.2 cm).
Final Blocking
- Block the scales before joining. Pin each scale flat, RS up, at 2 in (5.1 cm) x 1.25 in (3.2 cm), with a pin through every kp.
- Spray lightly with starch and let the scales dry completely.
- For extra shape, unpin each scale while it is still slightly damp and press it gently over a small ball so it cups.
- After assembly, hold the ornament by the loop and mist it lightly with starch.
- Use your fingers to lift each scale away from the tube and to round the bow loops.
- Lay the ornament on a towel, front up, to dry. After a few hours, turn it over so the back can dry.
- Check the final size: the body should be 3 in (7.6 cm) x 5.1 in (13.0 cm).
Final Quality-Control Checklist
- The tube has 16 sc in Rnds 1, 2, 16 and 17, and 13 lattice rounds.
- Each scale has 5 dc in Rows 1–3 and 17 dc in Row 4.
- Each border has 17 sc and 5 kp, with a picot on both corners.
- All 30 scales measure 2 in (5.1 cm) x 1.25 in (3.2 cm).
- The front and back each have 15 scales in the 2-3-2-3-2-2-1 layout.
- No lattice shows between the tiers.
- The loop stands 2.25 in (5.7 cm) and the bow is 3.5 in (8.9 cm) wide.
- All tails are woven in and trimmed.
Troubleshooting
Scales curl or ruffle: Row 4 is too tight or too loose. Check that you have 3 dc in each space, then block firmly.
Picots are flat, not round: Make the 3 cluster loops even and snug, and sl st firmly into the last sc.
Picots are off-center: You missed a dc. Recount the border: 1 + 4 x 4 = 17 sc.
Lattice tube twists: You skipped the 3 sl sts at the start of a round. Every round must start at the center of a loop.
Tube shows between tiers: The tiers are too far apart. Keep them 0.6 in (1.5 cm) apart.
Ornament leans: The front and back have different scale counts, or the cord is sewn off-center. Check both faces.
Care
Hand wash in cool water with mild soap, roll in a towel and reshape. Re-starch and dry flat, then store the ornament in a box with tissue paper.
Final Notes
Every measurement follows from the scale. Each scale is 2 in (5.1 cm) wide. It is 1.1 in (2.8 cm) tall before the border and 1.25 in (3.2 cm) tall after it.
Seven tiers spaced 0.6 in (1.5 cm) apart on a 4.4 in (11.2 cm) tube give a 5.1 in (13.0 cm) body. The 0.5 in (1.3 cm) offset on each side of the 3-scale tiers gives a 3 in (7.6 cm) width. The 2.25 in (5.7 cm) loop brings the ornament to 7.35 in (18.7 cm). If your test scale matches the gauge, the rest of the ornament will come out the right size.
Happy crocheting!