

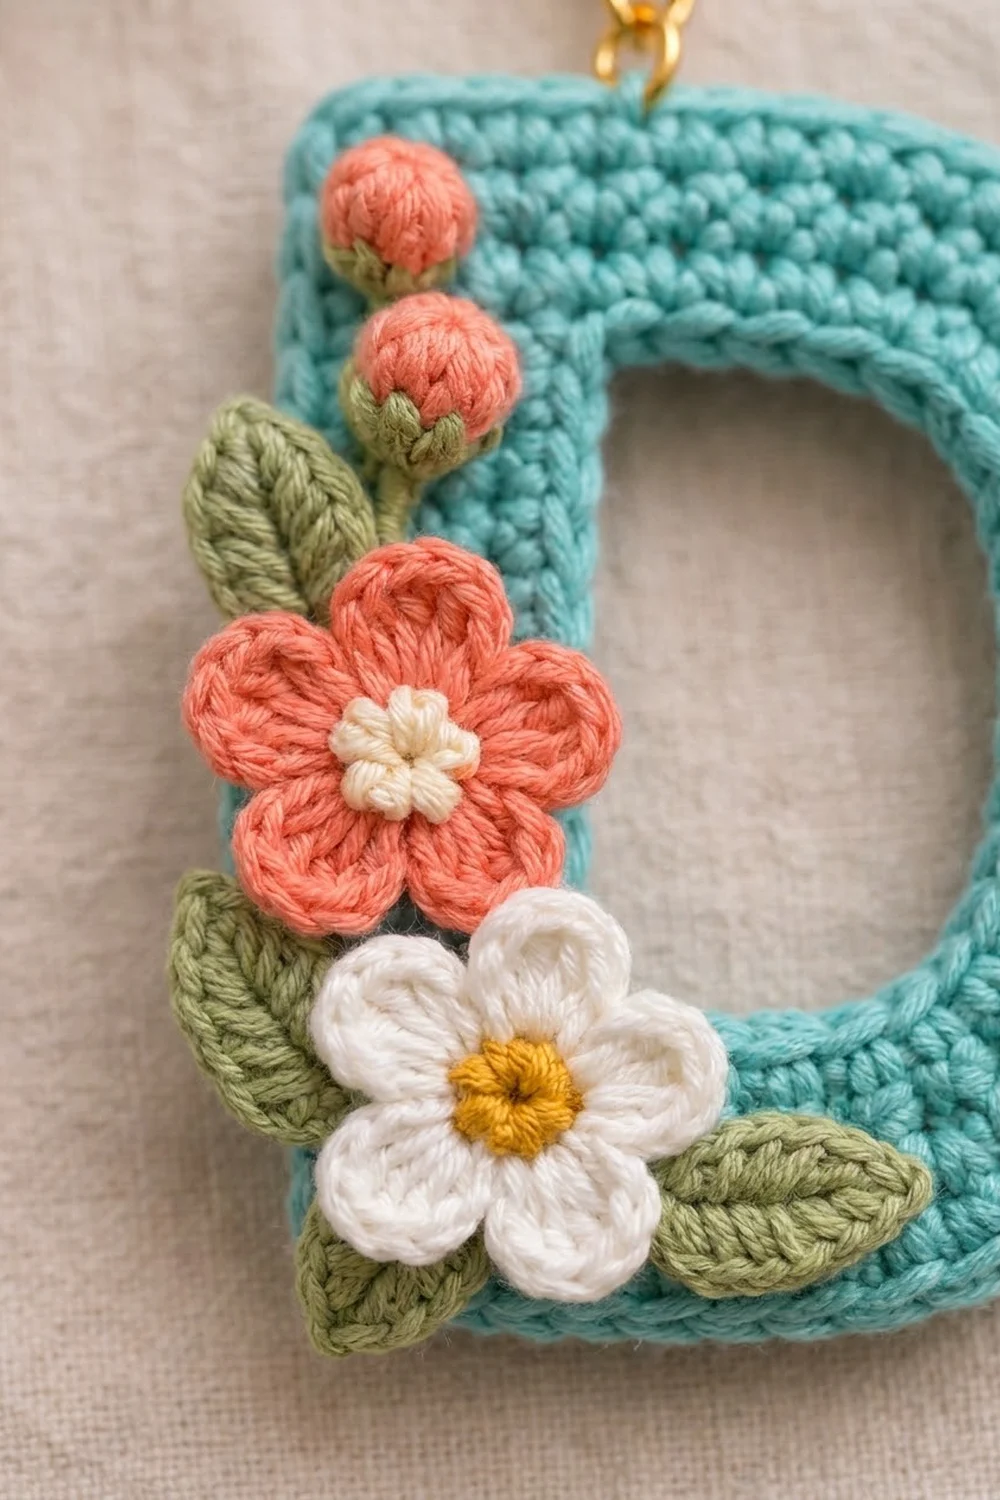
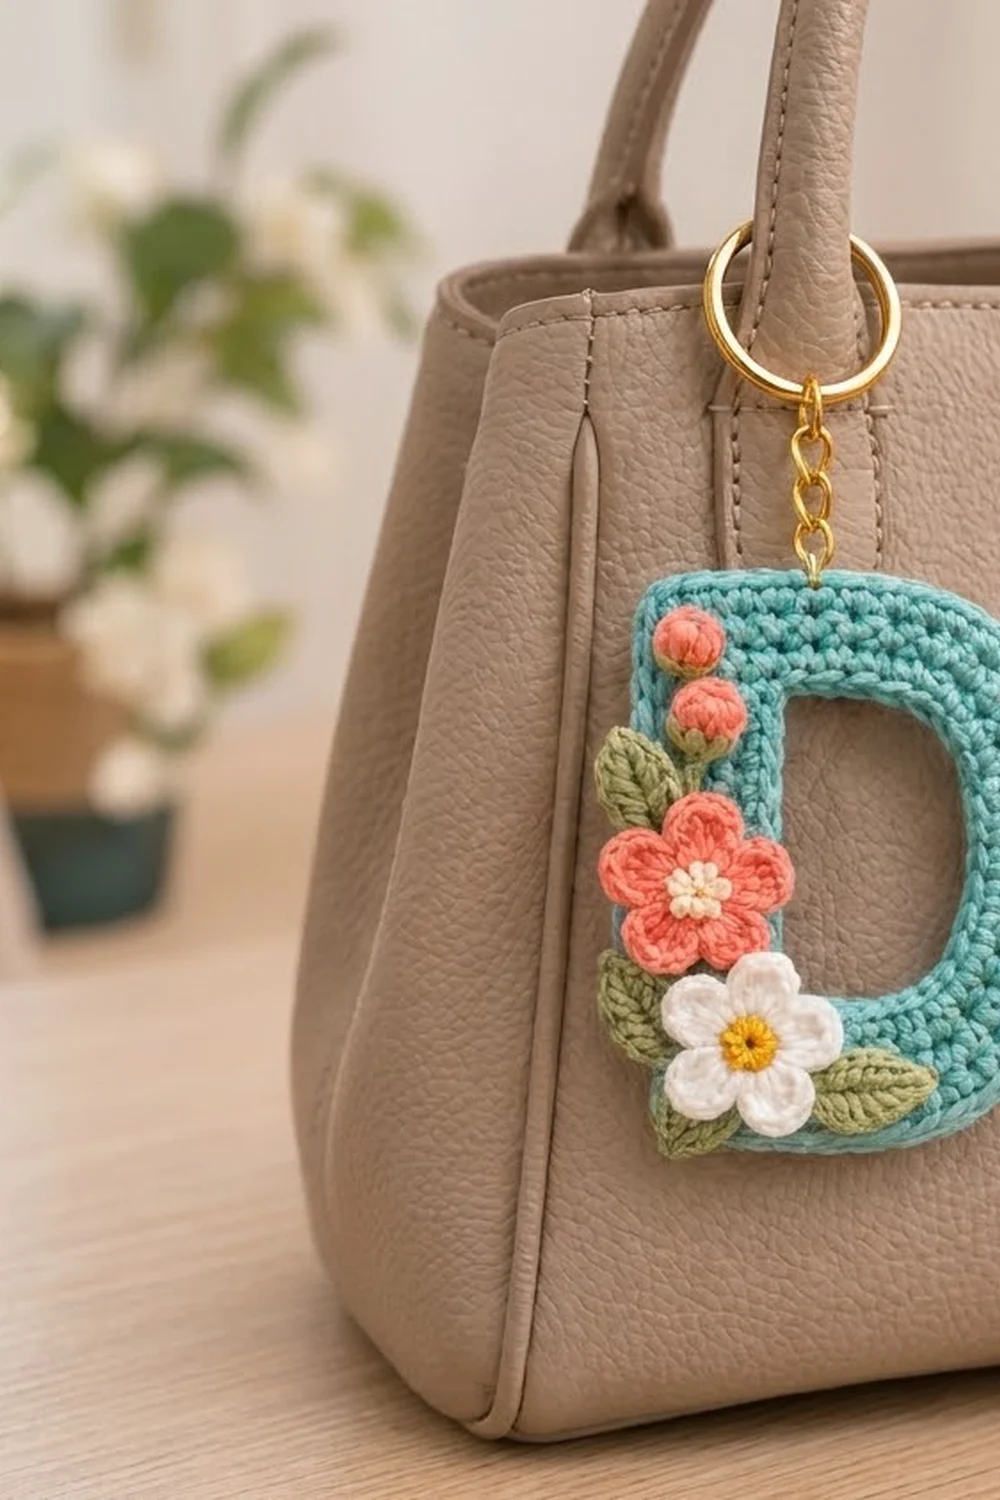
This little keychain is a bright turquoise capital “D” with a small bouquet of flowers down its stem. A coral flower and a white daisy-style flower sit with two round coral buds and three sage-green leaves. The colors are fresh and a little vintage, and the gold key ring and short chain make it look like a finished gift. It looks great clipped to a handbag, a pencil case, or a set of keys.
The pattern uses US crochet terms. The finished keychain measures about 2.75 in (7.0 cm) wide and 3.4 in (8.6 cm) tall, not counting the hardware.
The letter is worked flat in rows of single crochet from the bottom up. Short-row increases and decreases make the rounded bowl. The center splits into two narrow columns to form the opening, and a chain bridge closes it at the top. A single crochet edging goes around the opening and the outer edge. Then you make the flowers, buds, and leaves separately and sew them in layers onto the stem.
It is a quick, satisfying make, and the method works for any initial with a straight stem and a rounded side.
Finished Size and Construction
- Finished size: 2.75 in (7.0 cm) wide x 3.4 in (8.6 cm) tall
- Skill level: Easy / advanced beginner
- Terminology: US crochet terms
- Yarn weight: #2 Fine (sport weight) cotton
- Hook: 2.75 mm (C-2)
- Number of pieces: 1 letter, plus small appliqués sewn on (2 flowers, 2 buds, 3 leaves)
- Layout: Single piece, no joining
- Letter size before edging: 2.5 in (6.4 cm) wide x 3.1 in (7.9 cm) tall
- Edging depth: 0.125 in (0.3 cm) on every side
- Stroke width (stem and bowl): 5 sts = 0.8 in (2.0 cm)
Materials
Use a smooth mercerized or combed cotton in sport weight. Cotton gives crisp stitch definition, keeps its shape on a keychain, and doesn’t fuzz with handling. Avoid fuzzy or very splitty yarns, because the appliqués are tiny.
Yarn (about 3 m per gram):
– Turquoise (letter and edging): 6 g / 18 m
– Coral (flower and buds): 3 g / 9 m
– Cream (coral flower center): 1 g / 3 m
– White (white flower petals): 2 g / 6 m
– Golden yellow (white flower center): 1 g / 3 m
– Sage green (leaves and sepals): 2 g / 6 m
All quantities include a comfortable margin for gauge swatching and sewing tails.
Tools:
– 2.75 mm (C-2) crochet hook
– Tapestry needle
– 2 locking stitch markers
– Gold split key ring, 1 in (2.5 cm), with a short chain
– Gold jump ring, 0.3 in (0.8 cm)
– 2 pairs of flat-nose pliers
– Blocking mat with grid and rust-proof pins
– Spray bottle
– Scissors
Abbreviations (US Terms)
- ch – chain
- sl st – slip stitch
- sc – single crochet
- hdc – half double crochet
- dc – double crochet
- inc – 2 sc in the same stitch
- sc2tog – single crochet 2 together
- st(s) – stitch(es)
- MR – magic ring
- RS / WS – right side / wrong side
Special stitch – standing sc: With a slip knot on your hook, insert the hook into the stitch, yarn over, pull up a loop, yarn over and pull through both loops. It works like a join and first sc in one step.
Gauge and Checkpoints
Gauge: 6 sc x 7 rows = 1 in (2.5 cm) in sc worked in rows.
A 12-sc x 14-row swatch should measure 2 in (5.1 cm) square. The letter itself is so small that it works as the real test piece. Make the letter first, check it against the checkpoints below, and only then start the appliqués.
Checkpoints:
– After Row 1: 2 in (5.1 cm) wide
– After Row 5: 2.5 in (6.4 cm) wide, 0.7 in (1.8 cm) tall
– After Row 17: 2.4 in (6.1 cm) tall
– After Row 22: 2.5 in (6.4 cm) wide x 3.1 in (7.9 cm) tall
– Opening before edging: 0.8 in (2.0 cm) wide x 1.7 in (4.3 cm) tall
– After edging: 2.75 in (7.0 cm) x 3.4 in (8.6 cm)
If your letter is too big, go down 0.25 mm in hook size. If it is too small, go up 0.25 mm. Keep tension firm, because a keychain needs dense fabric with no gaps.
The Letter D
Orientation: Row 1 runs from the curved (right) edge to the straight (left) edge. Place a marker in the first sc of Row 1 to mark the curved edge. The side facing you during Row 1 is the RS: the curve is on the right, so the letter reads correctly.
Bottom Band
Ch 13.
Row 1: Sc in 2nd ch from hook and in each ch across. Turn. (12 sc)
Row 2: Ch 1, sc in each st to the last st, inc in last st (curved edge). Turn. (13 sc)
Row 3: Ch 1, inc in first st (curved edge), sc in each st across. Turn. (14 sc)
Row 4: Ch 1, sc in each st to the last st, inc in last st. Turn. (15 sc)
Row 5: Ch 1, sc in each st across. Turn. (15 sc)
Row 5 ends at the straight edge. Checkpoint: 2.5 in (6.4 cm) wide.
Stem Column (Straight Side)
Row 6: Ch 1, sc in the first 5 sts only. Turn. (5 sc) Leave the remaining 10 sts unworked.
Rows 7–17 (11 rows): Ch 1, sc in each st across. Turn. (5 sc each row)
That makes 12 stem rows in total. Row 17 ends at the outer straight edge. Fasten off and weave in the end.
Bowl Column (Curved Side)
Skip the next 5 unworked sts of Row 5. These form the bottom of the opening.
Row 6: Join turquoise with a standing sc in the last st of Row 5 (the marked curved-edge end). Sc in the next 4 sts toward the opening. Turn. (5 sc)
Rows 7–17 (11 rows): Ch 1, sc in each st across. Turn. (5 sc each row)
Row 17 ends at the curved edge. Do not fasten off. Checkpoint: the piece is 2.4 in (6.1 cm) tall, and both columns are the same height.
Top Band
Row 18 (bridge row): Ch 1, sc in the 5 bowl sts. Ch 5 to bridge the opening. Then sc in the 5 stem sts of Row 17, starting at the stem’s inner edge. Turn. (15 sts: 10 sc + 5 ch)
Row 19 (conversion row): Ch 1, sc in 5 sc, sc in each of the 5 ch, sc in 5 sc. Turn. (15 sc = 10 sc worked 1-per-sc + 5 sc worked into the chains)
Row 20: Ch 1, sc in each st to the last 2 sts, sc2tog (curved edge). Turn. (14 sc)
Row 21: Ch 1, sc2tog (curved edge), sc in each st across. Turn. (13 sc)
Row 22: Ch 1, sc in each st to the last 2 sts, sc2tog. (12 sc)
Fasten off. The top band mirrors the bottom band: 12-13-14-15-15 at the bottom and 15-15-14-13-12 at the top. Checkpoint: 2.5 in (6.4 cm) x 3.1 in (7.9 cm).
Flowers, Buds, and Leaves
Leave 8 in (20.3 cm) tails on every appliqué for sewing.
Coral Flower (make 1)
Rnd 1 (cream): MR, ch 1, 5 sc in ring, sl st to the first sc. (5 sc) Pull the ring closed and fasten off.
Rnd 2 (coral): Join coral in any sc. In each sc: (sl st, ch 2, 3 dc, ch 2, sl st). (5 petals)
Fasten off. Diameter: about 1 in (2.5 cm).
White Flower (make 1)
Work it the same way as the coral flower, using golden yellow for Rnd 1 and white for Rnd 2. (5 petals) Diameter: about 1 in (2.5 cm).
Buds (make 2, coral)
Rnd 1: MR, 6 sc in ring. (6 sc)
Rnd 2: (Sc, inc) 3 times. (9 sc)
Rnd 3: (Sc, sc2tog) 3 times. (6 sc)
Stuff the bud with yarn snippets, then close it by threading the tail through the front loops and pulling tight. Each bud is about 0.4 in (1.0 cm) across.
With green, work 2 lazy-daisy stitches at the base of each bud to make the sepals.
Leaves (make 3, sage green)
Ch 7. Working from the 2nd ch from hook: sc, hdc, dc, dc, hdc, and 3 sc in the last ch. Rotate and work along the underside of the chain: hdc, dc, dc, hdc, sc. Sl st into the base. (13 sts + sl st)
Fasten off. Each leaf is about 1 in (2.5 cm) long and has a pointed tip.
Edging (Border)
Edging gauge: One sc per row-end and one sc per stitch top. Each edging round adds 0.125 in (0.3 cm) on every side. Sc rows are slightly shorter than sc stitches are wide, so 1 sc per row-end packs the edging stitches a little. That gentle packing keeps the curve smooth and keeps the edges from flaring.
Inner Edging (Around the Opening)
With RS facing, join turquoise with a standing sc in the first of the 5 unworked sts of Row 5.
Rnd 1:
– Bottom of opening: sc in the next 4 unworked sts (5 sc in total with the standing sc).
– Side: 12 sc evenly up the row-ends of Rows 6–17.
– Top of opening: 5 sc into the underside of the ch-5 bridge.
– Other side: 12 sc down the row-ends of Rows 6–17.
Sl st to the first sc. (5 + 12 + 5 + 12 = 34 sc)
Fasten off. Don’t add stitches at the corners. The opening’s edge is shorter than the outer edge, so working 1 sc per stitch with no corner increases pulls the four inner corners into soft curves, which gives the rounded opening.
Outer Edging
With RS facing, join with a standing sc in the first st of Row 22 at the top-right (curved) corner.
Rnd 1:
– Top edge: 1 more sc in the same st (2 sc in the corner), sc in the next 10 sts, 3 sc in the last st (top-left corner). (2 + 10 + 3 = 15 sc = 12 sts + 3 extra)
– Left (straight) edge: 22 sc evenly, 1 in each row-end. (22 sc)
– Bottom edge, worked into the underside of the foundation chain: 3 sc in the first st (bottom-left corner), sc in the next 10, 2 sc in the last st (bottom-right corner). (3 + 10 + 2 = 15 sc = 12 sts + 3 extra)
– Curved edge: 22 sc, 1 in each row-end. (22 sc)
Sl st to the first sc. (15 + 22 + 15 + 22 = 74 sc)
Why the math works: Each long side has exactly one sc per row, so 22 rows give 22 sc. Each short edge starts from its own 12 stitches. The square left corners get 3 sc each (2 extra) so they turn cleanly. The rounded right corners get 2 sc each (1 extra) because the stepped increases and decreases have already done most of the turning. That is 68 base sts + 6 corner extras = 74.
Fasten off and weave in all turquoise ends. Checkpoint: 2.75 in (7.0 cm) x 3.4 in (8.6 cm).
Assembly
Sew the pieces in layers from the bottom up, using the tails, a tapestry needle, and small stitches through the RS only.
- Leaves first.
- Leaf 1: to the left of where the buds will go, tip pointing up and to the left.
- Leaf 2: on the left side of the stem at mid-height, behind where the coral flower will sit.
- Leaf 3: along the bottom band to the right of the white flower’s position, tip pointing right.
- Coral flower: Center it on the stem at mid-height, with its left petals sticking out about 0.2 in (0.5 cm) past the left edge. Tack it down through the center and each petal tip.
- White flower: Place it over the bottom-left corner so its upper petal overlaps the coral flower’s lower petal. Tack it the same way.
- Buds: Sew the first bud 0.7 in (1.8 cm) below the top edge, centered on the stem. Sew the second bud just below it, touching the coral flower.
- Hardware: Open the jump ring with the pliers and pass it through the middle sc of the top-left corner group. Add the chain and split ring, then close the jump ring flush.
Final Blocking
- Before adding the hardware, mist the letter evenly with water until it is damp but not dripping.
- Lay it RS up on the grid mat.
- Pin the four outer corners to 2.75 in (7.0 cm) x 3.4 in (8.6 cm).
- Add pins along the curved edge to smooth the curve, and one pin inside the opening if needed.
- Lift the appliqués gently with your fingertip so they keep their texture rather than going flat.
- Let it dry completely, then remove the pins.
Final Quality-Control Checklist
- Letter measures 2.75 in (7.0 cm) x 3.4 in (8.6 cm)
- Both columns are 12 rows tall and the opening is centered
- Inner edging has 34 sc and outer edging has 74 sc
- Curved edge is smooth, with no steps or ruffles
- Every appliqué is tacked at its center and tips, with no loose petals
- Back is tidy, with ends woven in through the stitches
- Jump ring is fully closed and the ring hangs straight from the top-left corner
Troubleshooting
Curved edge looks stepped: Pull the increases and decreases snug, and block with extra pins along the curve.
Edging ruffles: Your edging tension is looser than your rows. Go down 0.25 mm in hook size for the edging only.
Edging pulls or cups: Go up 0.25 mm in hook size, or loosen up as you work into the row-ends.
Opening looks square: Tighten the inner edging. Don’t add stitches at the inner corners.
Gaps at the bridge row: Work the Row 19 sc under both loops of each chain.
Petals are floppy: Tack each petal tip, and use a firmer tension on the dc.
Keychain twists: Attach the jump ring through the center sc of the corner group, not off to one side.
Care
Hand wash in cool water with mild soap, press out the water in a towel, and dry flat. Keep metal hardware dry to protect the gold finish.
Final Notes
The measurement chain is simple:
– Gauge: 6 sc x 7 rows = 1 in (2.5 cm)
– 15 sts and 22 rows give a letter of 2.5 in (6.4 cm) x 3.1 in (7.9 cm)
– 5-stitch strokes around a 5-stitch opening
– Edging adds 0.125 in (0.3 cm) on every side, for a finished keychain of 2.75 in (7.0 cm) x 3.4 in (8.6 cm)
Check each stage, sew the flowers in layers, and you’ll have a personal little gift.
Happy crocheting!