

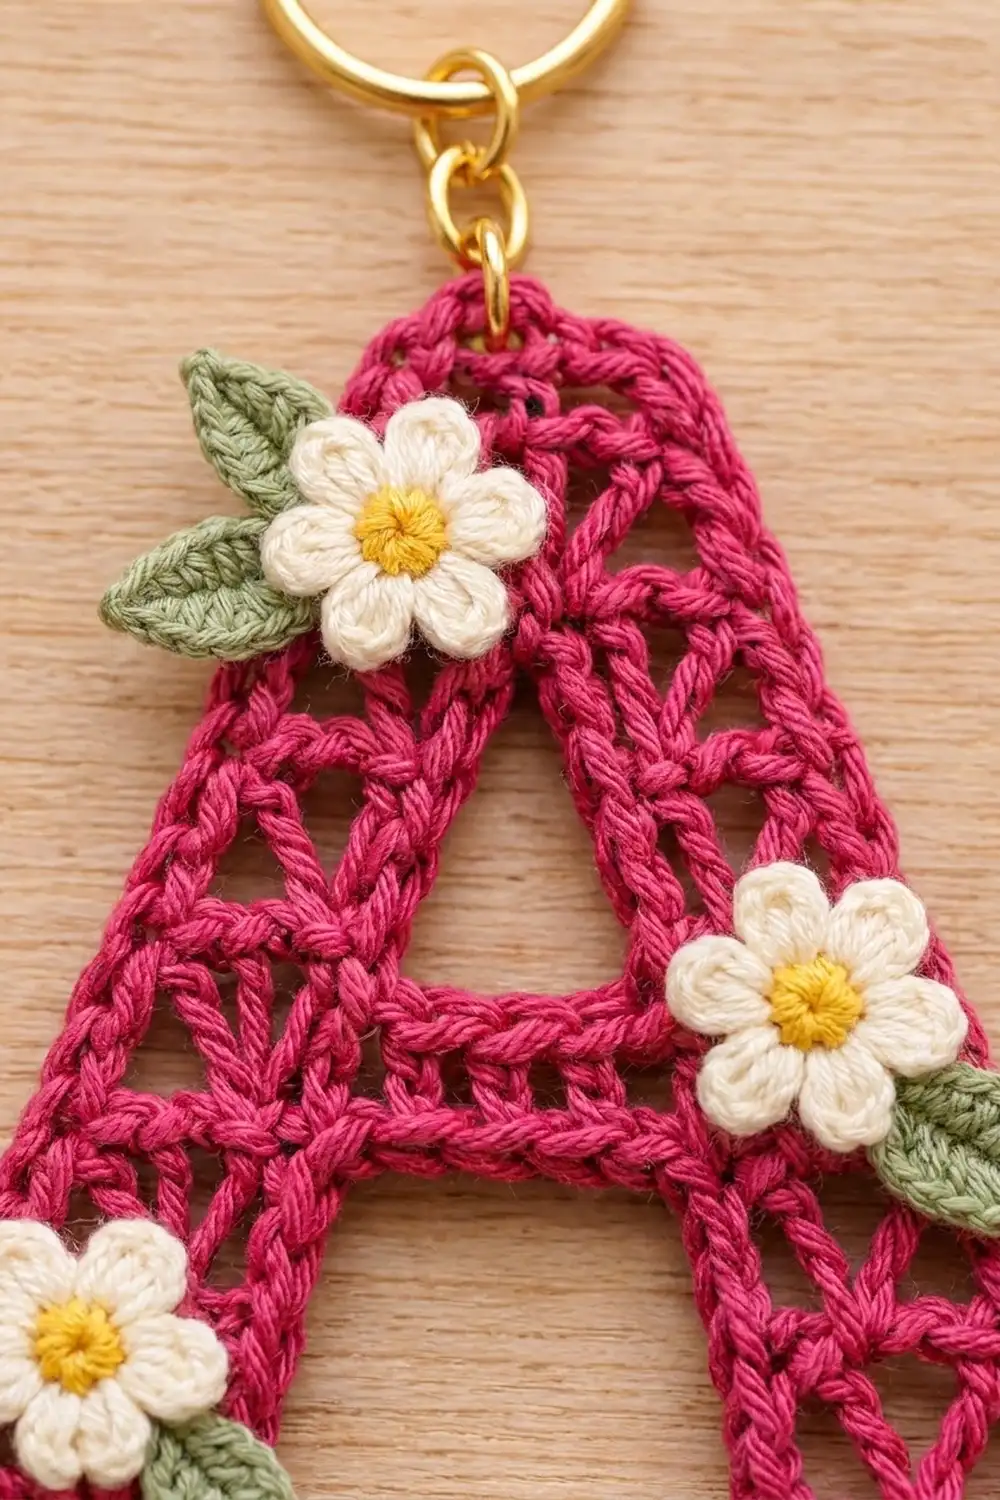
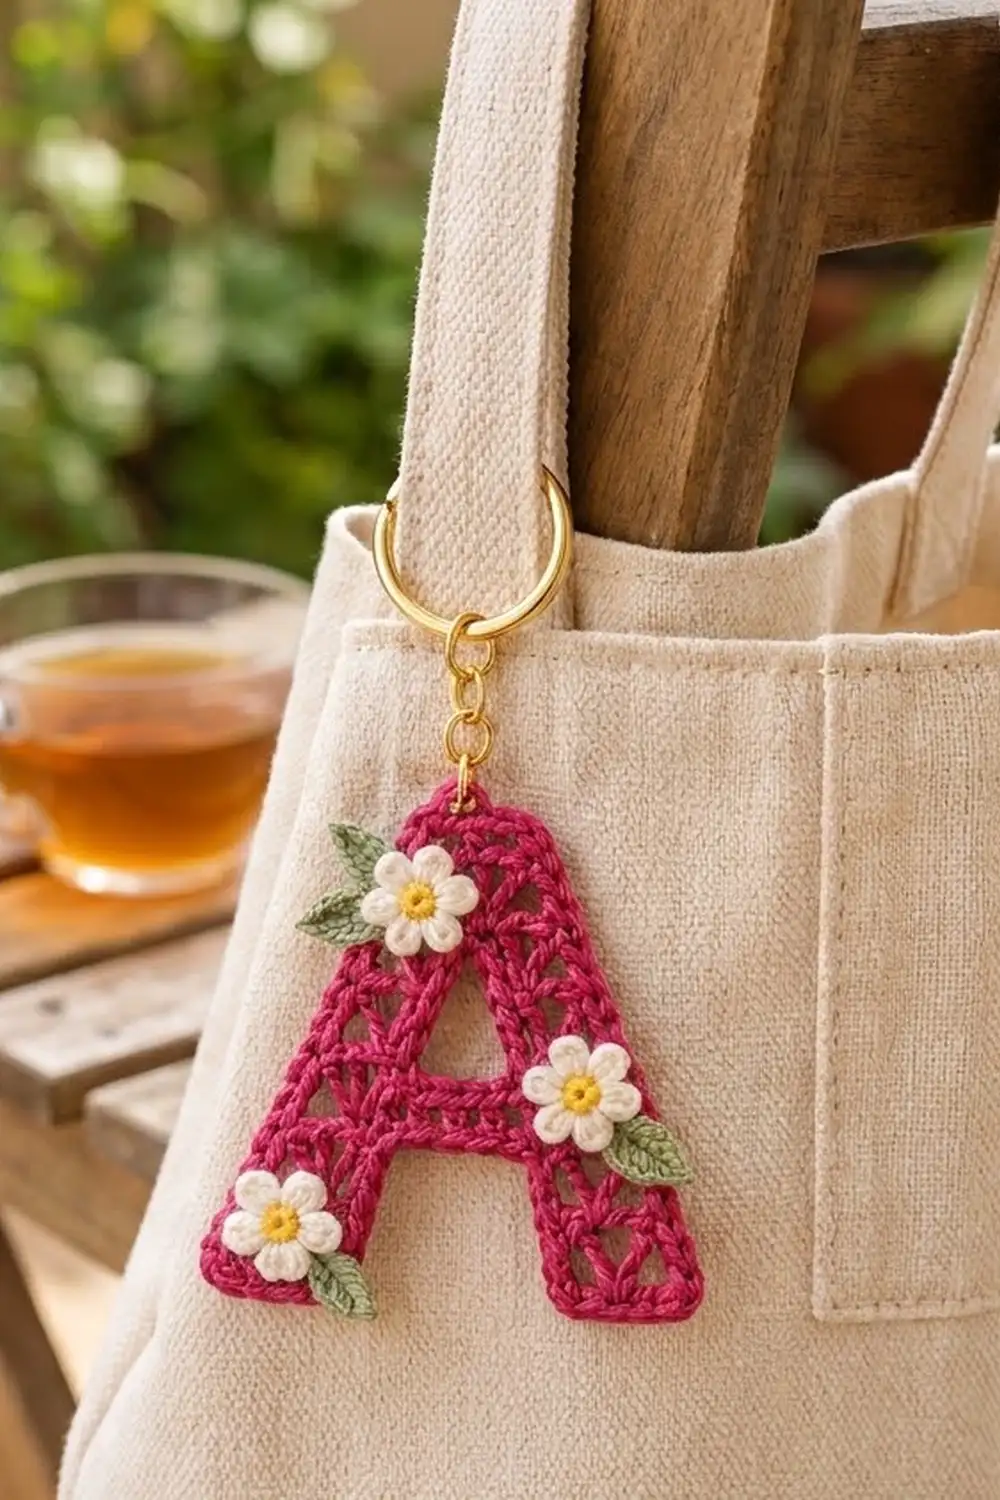
This little letter A is a lacy initial charm. Rows of tiny fans sit between crisp single crochet rows, and a raised raspberry outline frames the whole letter. Three cream daisies with sunny yellow centers and sage leaves give it a soft, cottage-garden look.
The palette is simple: raspberry for the letter, cream and yellow for the flowers, and sage green for the leaves. Clip it to a tote, a backpack zipper or a set of keys.
The pattern uses US crochet terms. The finished letter measures about 3.7 in (9.4 cm) wide by 4.1 in (10.4 cm) tall without the hardware.
The construction is simple. You crochet each leg separately in rows from the bottom up, then join both legs with a crossbar row. Next you work each upper arm on its own until the arms meet at the top. The top is a short section of fans. A two-round outline goes around the outside, one more round edges the inner triangle, and then you sew the flowers on and add the key ring.
Finished Size and Construction
- Finished size: 3.7 in (9.4 cm) wide × 4.1 in (10.4 cm) tall
- Skill level: Easy-intermediate
- Terminology: US crochet terms
- Yarn weight: Sport (#2) cotton
- Hook: 2.5 mm
- Number of pieces: 1 letter worked in one piece, plus 3 flower and 4 leaf appliqués
- Layout: One single letter. Nothing else is assembled.
- Piece size before border: 3.4 in (8.6 cm) wide × 3.8 in (9.7 cm) tall
- Border depth: about 0.15 in (0.4 cm) on each side
Materials
Use a smooth mercerized or combed cotton in sport weight, about 170 m per 50 g. Cotton keeps the fans crisp, and it holds its shape on a bag that gets handled every day.
- Raspberry (letter): 10 g / 34 m
- Cream (petals): 3 g / 10 m
- Yellow (flower centers): 1 g / 3 m
- Sage green (leaves): 2 g / 7 m
All quantities include a margin for your gauge swatch and weaving in ends.
Tools:
– 2.5 mm crochet hook
– Tapestry needle
– Scissors
– 2 stitch markers
– Gold split key ring, 1 in (2.5 cm), with a short chain and a 6 mm jump ring
– 2 pairs of flat-nose pliers
– Rustproof pins and a blocking mat
– Optional: fabric stiffener
Abbreviations (US Terms)
- ch – chain
- sl st – slip stitch
- sc – single crochet
- hdc – half double crochet
- dc – double crochet
- sc2tog – single crochet 2 together
- sk – skip
- sp – space
- st(s) – stitch(es)
- RS / WS – right side / wrong side
Special stitch – Fan: (dc, ch 1, dc, ch 1, dc) all in the same stitch. A fan has 3 dc and 2 ch-1 spaces, so it counts as 5 stitches for the next row.
Turning chains: In fan rows, the beginning ch 3 counts as a dc. In sc rows, the ch 1 does not count as a stitch.
Gauge and Checkpoints
- 13 sc = 2 in (5.1 cm)
- 6 sc rows = 1 in (2.5 cm)
- 1 fan row is as tall as 2 sc rows, which is about 0.33 in (0.8 cm)
Test one piece first. Make one leg (Rows 1–4 below) as your swatch. It should measure 1.1 in (2.8 cm) wide and 1 in (2.5 cm) tall. If it matches, keep it and continue it as the right leg.
Checkpoints:
– Each leg after Row 7: 1.1 in (2.8 cm) wide × 1.7 in (4.3 cm) tall
– After Row 9 (crossbar): 2.8 in (7.1 cm) across the top edge, 2 in (5.1 cm) tall
– After Row 17: 3.4 in (8.6 cm) wide at the bottom × 3.8 in (9.7 cm) tall. The top edge is 1.7 in (4.3 cm) wide.
– After the border: 3.7 in (9.4 cm) × 4.1 in (10.4 cm)
If your piece is too big, go down 0.25 mm in hook size. If it is too small, go up 0.25 mm. Fan rows grow quickly when your dc are loose, so check the height first.
Letter Body
Use raspberry. On RS rows (the odd rows) you work from right to left as you look at the RS. On WS rows you work from left to right as you look at the RS.
Right Leg
Row 1 (RS): Ch 8. Sc in the 2nd ch from the hook and in each ch across. Turn. (7 sc)
Row 2 (WS, fan row): Ch 3, sk 2 sts, Fan in the next st, sk 2 sts, dc in the last st. Turn. (7 sts: 2 edge dc + 5 fan sts)
Skipping 2 stitches on each side of the fan opens the small triangular gaps.
Row 3 (RS): Ch 1. Sc in the first dc, sc in each dc and ch-1 sp across, sc in the top of the ch-3. Turn. (7 sc)
Row 4: Repeat Row 2. (7 sts)
Row 5 (RS, shift row): Ch 1. Sc2tog over the first 2 sts, sc in the next 4 sts, 2 sc in the last st. Turn. (7 sc)
This row decreases on the outer edge and increases on the inner edge. That moves the whole leg 1 stitch toward the center.
Row 6: Repeat Row 2. (7 sts)
Row 7: Repeat Row 5. (7 sc)
Fasten off and leave a 6 in (15.2 cm) tail. Check the measurement: 1.1 in × 1.7 in (2.8 × 4.3 cm).
Left Leg
Work Rows 1–4 the same as for the right leg.
Row 5 (RS, shift row): Ch 1. 2 sc in the first st, sc in the next 4 sts, sc2tog over the last 2 sts. Turn. (7 sc)
On the left leg, the inner edge is where each RS row starts.
Row 6: Fan row. (7 sts)
Row 7: Repeat Row 5 of the left leg. (7 sc)
Turn, but do not fasten off.
Crossbar
Row 8 (WS): Ch 1, sc in each of the 7 sts of the left leg, then ch 4. Make sure the RS of the right leg faces the same way as the left leg. Sc in each of the 7 sts of Row 7 on the right leg, starting at its inner edge. Turn. (18 sts: 7 sc + 4 ch + 7 sc)
Row 9 (RS): Ch 1, sc in each sc and each ch across. Turn. (18 sc)
Checkpoint: the top edge measures 2.8 in (7.1 cm).
Left Arm
Row 10 (WS): Ch 3, sk 2 sts, Fan in the next st, sk 2 sts, dc in the next st. Leave the remaining sts unworked. Turn. (7 sts, worked over sts 1–7)
Row 11 (RS): Ch 1, 2 sc in the first st, sc in the next 4 sts, sc2tog over the last 2 sts. Turn. (7 sc)
Row 12: Fan row. (7 sts)
Row 13: Repeat Row 11. (7 sc)
Remove your hook and place a marker in the live loop.
Right Arm
Row 10 (WS): Hold the piece with the WS facing you. Skip the next 4 sts of Row 9 (sts 8–11); these are the bottom of the triangle opening. Join yarn in st 12. Ch 3, sk 2, Fan in the next st, sk 2, dc in the last st. Turn. (7 sts, worked over sts 12–18)
Row 11 (RS): Ch 1, sc2tog, sc in the next 4 sts, 2 sc in the last st. Turn. (7 sc)
Row 12: Fan row. (7 sts)
Row 13: Repeat Row 11. (7 sc)
Fasten off.
The gap between the arms was 4 stitches. Each shift row brings each arm 1 stitch closer, so after two shifts the arms touch.
Apex
Row 14 (WS): Put the marked loop back on your hook. Ch 1, sc in the first 6 sts of the left arm. Sc2tog over the last st of the left arm and the first st of the right arm. Sc in the remaining 6 sts. Turn. (13 sc)
Row 15 (RS): Ch 3, sk 2, Fan in the next st, sk 2, dc in the next st, sk 2, Fan in the next st, sk 2, dc in the last st. Turn. (13 sts: 3 dc + 2 fans of 5)
Row 16 (WS): Ch 1, sc in each dc and ch-1 sp across, sc in the top of the ch-3. Turn. (13 sc)
Row 17 (RS): Ch 1, sc2tog, sc in the next 9 sts, sc2tog. (11 sc)
Do not fasten off. Checkpoint: 3.4 in (8.6 cm) wide × 3.8 in (9.7 cm) tall, with a top edge of 1.7 in (4.3 cm).
Flowers and Leaves
Flower (make 3)
Round 1: With yellow, make a magic ring. Work 5 sc into the ring and join with a sl st. Fasten off. (5 sc)
Round 2: Join cream with a sl st in any sc. Work (ch 2, 3 dc, ch 2, sl st) in the same st, then sl st in the next sc. Repeat from * to * 4 more times. The final sl st goes into the joining st. (5 petals)
Each flower is about 1 in (2.5 cm) across.
Leaf (make 4)
With sage green, ch 6.
– Starting in the 2nd ch from the hook, work sc, hdc, dc, hdc in the next 4 ch.
– Work 3 sc in the last ch for the tip.
– Working along the other side of the chain, work hdc, dc, hdc, sc in the next 4 ch.
– Sl st to the first sc. (11 sts)
Each leaf is about 0.75 in (1.9 cm) long. Leave 6 in (15.2 cm) tails on all appliqués for sewing.
Border
Use raspberry. Border gauge: along row-end edges, work 6 sc per 1 in (2.5 cm); along stitch edges, work 6.5 sc per 1 in (2.5 cm).
Outer Round 1
Continue from the end of Row 17 at the top-left corner, with the RS facing you. Work the sections in this order:
- Left outer edge, working down: 1 sc in each sc-row end and 2 sc in each fan-row end over Rows 17–1. (23 sc)
- Bottom of the left leg: 3 sc in the first foundation ch, sc in the next 5 ch, 3 sc in the last ch. (11 sc)
- Inner edge of the left leg, working up Rows 1–7: (10 sc)
- Underside of the crossbar: 1 sc in each of the 4 ch. (4 sc)
- Inner edge of the right leg, working down: (10 sc)
- Bottom of the right leg: Work as for the left leg. (11 sc)
- Right outer edge, working up Rows 1–17: (23 sc)
- Top edge: 2 sc in the first st of Row 17, sc in the next 9 sts, 2 sc in the last st. (13 sc)
Join with a sl st to the first sc. Total: 105 sc. Do not add stitches at the two inside corners under the crossbar.
Outer Round 2
Ch 1. Sl st loosely in each sc around and join. (105 sl st)
This round makes the raised, corded outline. Fasten off.
Inner Triangle Round
With the RS facing you, join raspberry in st 8 of Row 9. Work:
– sc in sts 8–11 (4 sc)
– 6 sc along the inner edge of the right arm, 2 per fan-row end and 1 per sc-row end
– 6 sc along the inner edge of the left arm
Join. (16 sc)
Then work 1 sl st in each st and join. (16 sl st) Fasten off.
Why the Math Works
Each outer side covers 11 sc rows and 6 fan rows. 11 rows × 1 sc + 6 rows × 2 sc = 23 sc. That height is 3.8 in (9.7 cm), and 23 sc ÷ 6 per inch also gives about 3.8 in. Each leg bottom is 7 stitches with 2 extra stitches in each 3-sc corner, for 11. The top is 11 stitches plus 2, for 13.
The full round adds up like this: 23 + 11 + 10 + 4 + 10 + 11 + 23 + 13 = 105. One sc round adds about 0.15 in (0.4 cm) to each side. That brings the letter to 3.7 × 4.1 in (9.4 × 10.4 cm).
Final Blocking
- Wet the letter and the appliqués, then roll them in a towel to press out the water.
- Pin the letter to 3.7 in (9.4 cm) × 4.1 in (10.4 cm). Keep the outer edges straight.
- Open each fan with your fingertip and pin the tips of the inner triangle.
- Pin each flower flat and shape the petals into rounded points. Pin the leaf tips.
- Optional: brush a thin coat of fabric stiffener over the letter.
- Let everything dry completely, then take out the pins.
Assembly and Hardware
- Sew one flower over the top-left edge of the apex. Tuck two leaves behind it, one pointing left and one pointing down-left.
- Sew one flower on the right arm at crossbar height, with a leaf angled down-right.
- Sew one flower near the bottom of the left leg, with a leaf angled down-right.
- Stitch through the yellow center and the base of each petal. Weave in all tails on the WS.
- Open the jump ring with pliers and pass it through 2 stitches of Outer Round 1 at the top center. Hook on the chain and the split ring, then close the jump ring.
Final Quality-Control Checklist
- Outer Round 1 has 105 sc, and the inner round has 16 sc.
- Both legs slant inward evenly, with no step at the crossbar.
- All fans stand upright, with open gaps on both sides.
- The inner triangle closes neatly at the apex.
- The letter measures 3.7 × 4.1 in (9.4 × 10.4 cm).
- The flowers are secure and no tails show on the RS.
- The jump ring is fully closed.
Troubleshooting
- The legs slant outward: You worked the shift row from the wrong edge. On RS rows, the left leg increases first and the right leg decreases first.
- The arms don’t meet: Check that you skipped exactly 4 sts in the right arm’s Row 10.
- The border ruffles: Work 1 sc per fan-row end instead of 2 on the slanted sides, or use a smaller hook.
- The border cups: Use a larger hook for Round 1.
- The fans collapse: Block with stiffener, and check that your dc are not loose.
- The petals curl: Re-wet the flowers and pin each petal flat.
Care
Hand wash in cool water and lay flat to dry. If you used stiffener, spot clean only.
Final Notes
The measurement chain is simple. Each leg is 1.1 × 1.7 in (2.8 × 4.3 cm). After the crossbar, the top edge is 2.8 in (7.1 cm). Before the border, the letter is 3.4 × 3.8 in (8.6 × 9.7 cm). With the border, it is 3.7 × 4.1 in (9.4 × 10.4 cm). If each checkpoint matches, the border counts will match too. Happy crocheting!