

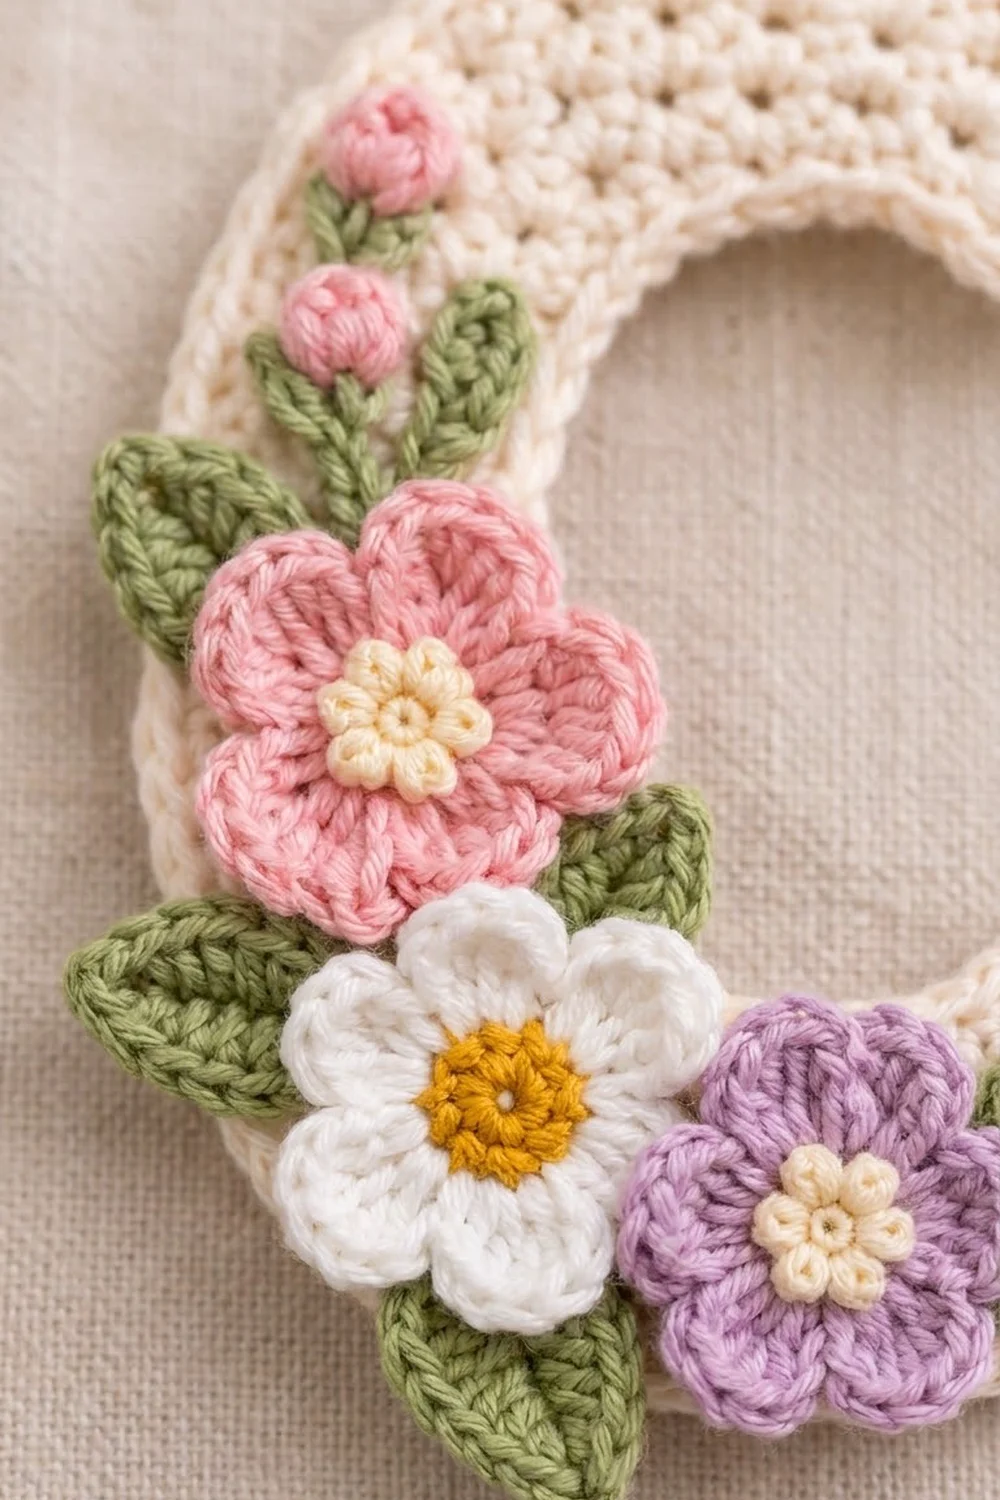
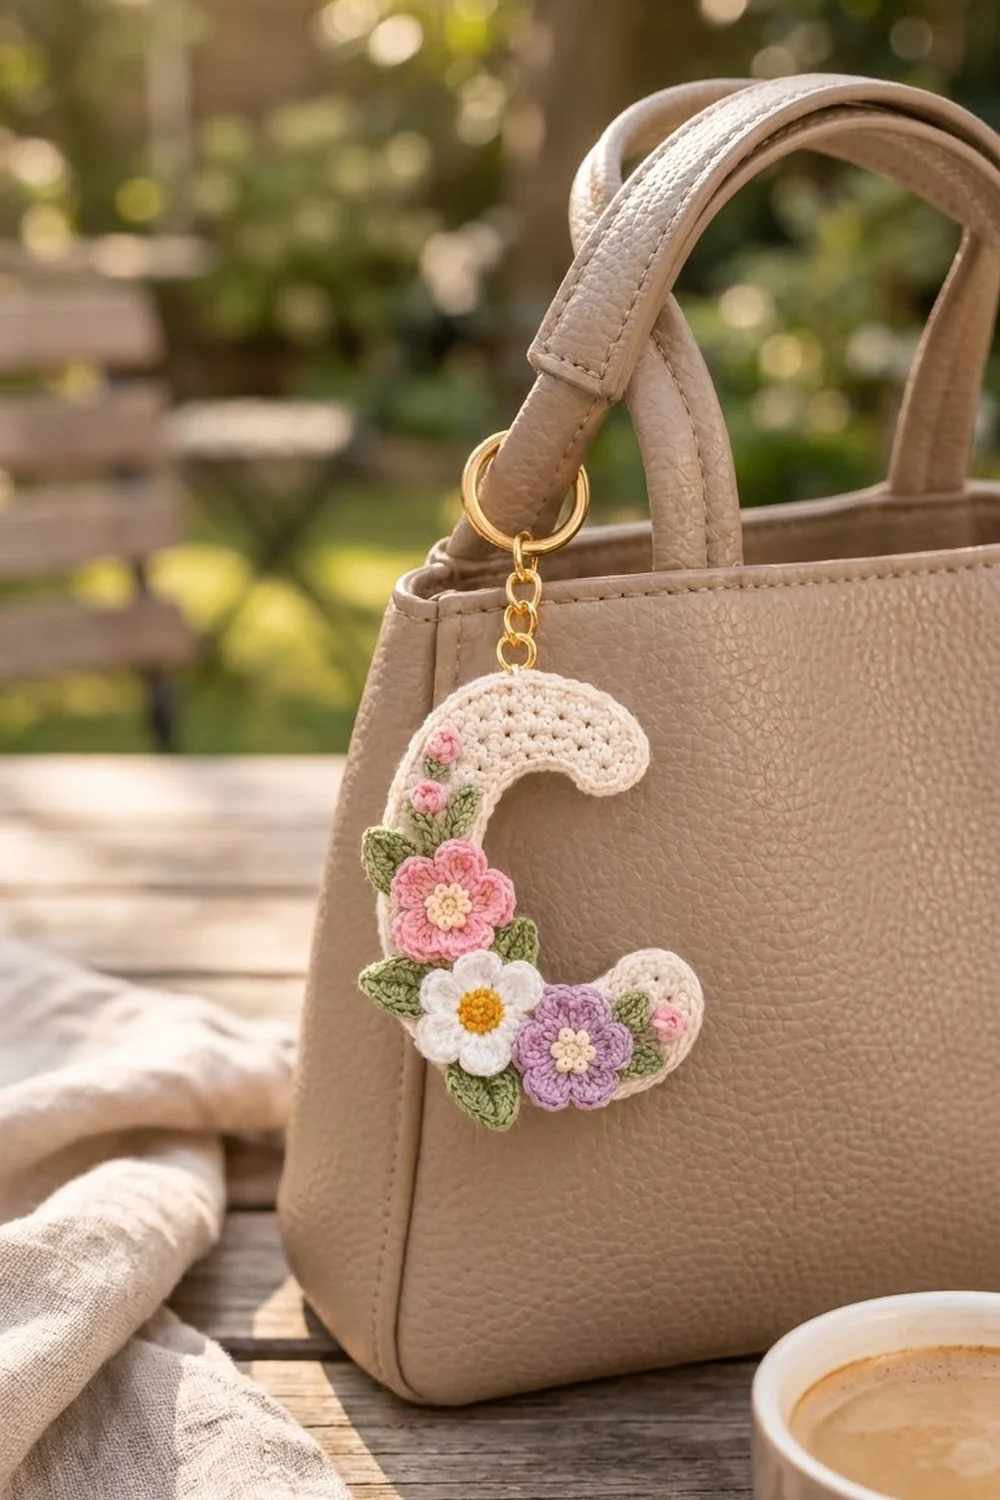
This keychain is a single cream letter C with a small spring bouquet sewn across its lower curve. A pink flower, a white daisy with a golden center, and a lilac flower sit together in a cluster. Sage-green leaves are tucked behind them, and small pink buds climb the left side.
The letter is worked flat in tight single crochet. The surface looks neat and slightly dotted, and the shape holds up well on a bag or a set of keys. A gold split ring on a short chain is attached at the top of the curve.
The finished letter is about 3 3/4 in tall x 3 1/4 in wide (9.5 x 8.3 cm), and the band of the letter is 1 1/2 in (3.8 cm) wide. All instructions use US crochet terms.
The construction is simple. You crochet the C as one curved band, worked in rows. Each row adds 4 stitches, which makes the strip bend into an arc. Next you work one border round that rounds off both tips, then a slip-stitch outline. The flowers, leaves, and buds are made separately and sewn on after blocking.
Finished Size and Construction
- Finished size: about 3 3/4 in tall x 3 1/4 in wide (9.5 x 8.3 cm)
- Skill level: Easy to Intermediate
- Terminology: US crochet terms
- Yarn weight: Sport weight (#2 fine) cotton
- Hook: 2.75 mm (US C-2)
- Number of pieces: 1 letter, plus small sewn-on appliqués (3 flowers, 7 leaves, 3 buds)
- Layout: a single letter C with the bouquet across the lower-left curve
- Band width before border: 1 1/8 in (2.9 cm), 8 rows
- Size before border: about 3 3/8 in tall x 2 7/8 in wide (8.6 x 7.3 cm)
- Border depth: about 3/16 in (0.5 cm) on each edge
Materials
Choose a smooth, mercerized cotton in sport weight. It gives crisp stitches, keeps the letter firm, and holds up when it rubs against keys. Soft acrylic will also work, but the letter may need light stiffening.
Pick a warm cream for the letter instead of bright white. That way the white daisy still stands out against it. Muted pastels for the flowers keep the bouquet soft and vintage-looking.
- Cream: 10 g / 30 m (letter, border, flower centers)
- Pink: 3 g / 9 m (pink flower, buds)
- White: 2 g / 6 m (daisy petals)
- Lilac: 2 g / 6 m (lilac flower)
- Sage green: 3 g / 9 m (leaves, bud stems)
- Mustard yellow: 1 g / 3 m (daisy center)
These amounts include a margin of about 25% for a gauge swatch and sewing tails.
Tools:
- 2.75 mm (US C-2) crochet hook
- Sharp-pointed tapestry needle for sewing on the appliqués
- Stitch markers (2)
- Scissors
- Gold split key ring, 1 in (2.5 cm), with a 1 1/4 in (3.2 cm) chain
- 1 gold jump ring, 5/16 in (0.8 cm)
- 2 pairs of flat-nose pliers
- Blocking mat and rust-proof pins
Abbreviations (US Terms)
- ch: chain
- sl st: slip stitch
- sc: single crochet
- hdc: half double crochet
- dc: double crochet
- st(s): stitch(es)
- sk: skip
- sp: space
- RS: right side
Special stitch: bud bobble (bob). [Yarn over, insert hook in ring, yarn over and pull up a loop, yarn over and pull through 2 loops] 4 times, then yarn over and pull through all 5 loops on the hook.
Gauge and Checkpoints
Gauge: 6 sc and 7 rows = 1 in (2.5 cm). A swatch of 12 sts x 14 rows measures 2 x 2 in (5.1 x 5.1 cm).
The letter body is small, so it works as its own swatch. Make the body first, check the measurements below, and only then start the flowers.
- Row 1: 14 sc measure 2 3/8 in (6.0 cm) when laid straight.
- After Row 4: the band is 9/16 in (1.4 cm) wide, and the outer edge is about 4 3/8 in (11.1 cm).
- After Row 8: the band is 1 1/8 in (2.9 cm) wide. The outer edge is 7 in (17.8 cm) and the inner edge is 2 3/8 in (6.0 cm).
- After the border: 3 3/4 x 3 1/4 in (9.5 x 8.3 cm).
If Row 1 is longer than 2 3/8 in (6.0 cm), switch to a 2.5 mm hook. If it is shorter, switch to a 3.0 mm hook.
Row height matters as much as stitch width. If 8 rows measure more than 1 1/8 in (2.9 cm), the C will open too wide. In that case, tighten your tension on each yarn-over pull.
Letter C Body
You work the band from the inner edge outward. Each row adds 4 sts, and that extra length along the outer edge is what curls the strip into a C. The ch 1 at the start of each row does not count as a stitch.
With cream, ch 15.
Row 1 (RS): Sc in 2nd ch from hook and in each ch across, turn. (14 sts)
Row 2: Ch 1, sc in first st, [2 sc in next st, sc in next 2 sts] 4 times, sc in last st, turn. (18 sts)
Row 3: Ch 1, sc in first st, [sc in next 3 sts, 2 sc in next st] 4 times, sc in last st, turn. (22 sts)
Row 4: Ch 1, sc in first st, [2 sc in next st, sc in next 4 sts] 4 times, sc in last st, turn. (26 sts)
Row 5: Ch 1, sc in first st, [sc in next 5 sts, 2 sc in next st] 4 times, sc in last st, turn. (30 sts)
Row 6: Ch 1, sc in first st, [2 sc in next st, sc in next 6 sts] 4 times, sc in last st, turn. (34 sts)
Row 7: Ch 1, sc in first st, [sc in next 7 sts, 2 sc in next st] 4 times, sc in last st, turn. (38 sts)
Row 8: Ch 1, sc in first st, [2 sc in next st, sc in next 8 sts] 4 times, sc in last st. (42 sts) Do not fasten off.
Every row follows the same formula. In each repeat, 1 stitch gets 2 sc and the k stitches beside it get 1 sc each, where k is 2 in Row 2 and goes up by 1 every row. That means you work into 1 + 4 x (k + 1) + 1 stitches and end each row with 4 more than the row before.
The increase moves between the start and the end of the repeat from row to row, so the increases never stack into corners. When Row 8 is done, the band lies as an open arc of about 234 degrees with straight row-end edges at both tips. The rounded end caps in the border close the curve into a full C.
Border
Border gauge: the border uses the body gauge of 6 sts per 1 in (2.5 cm). Keep the RS facing for both rounds.
Rnd 1: Ch 1 and turn so the RS faces you.
- Outer edge: 2 sc in first st of Row 8, sc in next 40 sts, 2 sc in last st. (44 sts)
- First end cap (work into the row ends, Row 8 down to Row 1): sc, hdc, 2 dc, 2 dc, 2 dc, 2 dc, hdc, sc. (12 sts)
- Inner edge: sc in each free loop of the foundation ch. (14 sts)
- Second end cap (row ends, Row 1 up to Row 8): sc, hdc, 2 dc, 2 dc, 2 dc, 2 dc, hdc, sc. (12 sts)
Sl st to the first sc to join. (82 sts: 44 + 12 + 14 + 12)
Rnd 2: Ch 1, sl st in each st around. Keep the sl sts loose enough that the edge stays flat. Join to the first sl st. (82 sl sts) Fasten off and weave in the ends.
Why the math works:
- Outer edge: 42 sts are worked 1 per st, plus 2 increases at the tips (42 + 2 = 44). The extra 2 sts ease the outer corners into the end caps.
- End caps: each tip is 8 rows, or 1 1/8 in (2.9 cm), across. A half-round cap over that width is about 1 3/4 in (4.4 cm) around, which is about 11 sts at 6 sts per inch. Using 12 gives a gentle dome without ruffling.
- Inner edge: this edge curves inward, so it gets exactly 1 sc per ch (14 + 0 = 14). Extra sts here would make the inside of the C wave.
- Slip-stitch round: worked 1 per st, so it adds an outline but no length (82 + 0 = 82).
Block the Letter Before Adding Flowers
Block the letter by itself first, so the appliqués are sewn onto a flat, correct shape.
- Pin the letter to the mat RS up, with both tips pointing right.
- Pin the outer curve first and check that it measures 3 3/4 in (9.5 cm) from top to bottom.
- Pin each end cap into a smooth half-round.
- Mist with water and let it dry completely.
Appliqués
Pink Flower (make 1)
Rnd 1: With cream, make a magic ring, ch 1, 10 sc in ring. Pull tight and sl st to the first sc. Fasten off. (10 sts)
Rnd 2: Join pink in any sc, [ch 3, sk next st, sl st in next st] 5 times, ending in the joining st. (5 ch-3 sps)
Rnd 3: In each ch-3 sp, work (sc, hdc, 3 dc, hdc, sc). Sl st to join. (35 sts: 5 petals of 7 sts)
Fasten off, leaving a 10 in (25.4 cm) tail for sewing. The flower measures about 1 1/8 in (2.9 cm) across. The tops of the cream sc in the center give it the dotted look.
Daisy (make 1)
Work as for the pink flower, using mustard for Rnd 1 and white for Rnds 2–3. (10 sts, then 5 ch-3 sps, then 35 sts) The daisy is about 1 1/8 in (2.9 cm) across.
Lilac Flower (make 1)
Rnd 1: With cream, make a magic ring, ch 1, 10 sc in ring, join. Fasten off. (10 sts)
Rnd 2: Join lilac, [ch 2, sk next st, sl st in next st] 5 times. (5 ch-2 sps)
Rnd 3: In each ch-2 sp, work (sc, hdc, dc, hdc, sc). Join. (25 sts: 5 petals of 5 sts)
The lilac flower is about 7/8 in (2.2 cm) across.
Large Leaf (make 4)
With sage green, ch 6.
Rnd 1: Sc in 2nd ch from hook, hdc in next ch, dc in next ch, hdc in next ch, sc in last ch, then ch 2 for the tip. Working along the other side of the ch: sc, hdc, dc, hdc, sc. Sl st to the first sc. (10 sts + ch-2 tip)
Each large leaf is about 7/8 in (2.2 cm) long. A raised center vein forms where the two sides meet.
Small Leaf (make 3)
With sage green, ch 4.
Rnd 1: Sc in 2nd ch from hook, hdc in next ch, sc in last ch, ch 1. Along the other side: sc, hdc, sc. Sl st to the first sc. (6 sts + ch-1 tip)
Each small leaf is about 5/8 in (1.6 cm) long.
Bud (make 3)
With pink, make a magic ring, ch 2, work 1 bob in the ring, ch 1. Pull the ring tight and fasten off. Each bud is about 1/4 in (0.6 cm) tall.
Assembly
Lay out the whole bouquet before you sew anything. Treat the letter like a clock face.
- Pink flower: at about 9 o’clock, overlapping the outer edge of the left side by 1/8 in (0.3 cm).
- Daisy: just below and to the right of the pink flower, at about 7 o’clock, slightly overlapping the pink petals.
- Lilac flower: to the right of the daisy on the lower part of the C, at about 5 o’clock.
- Large leaves: one to the left of the pink flower, one below the daisy, one between the pink flower and the daisy on the inner side, and one above the lilac flower. Tuck the base of each leaf under a flower.
- Buds and small leaves: stack two buds up the left side above the pink flower, with two small leaves beside them. Put the third bud and the last small leaf on the lower tip, to the right of the lilac flower.
- Stems: with sage green, backstitch a 3/4 in (1.9 cm) stem from the pink flower up to the buds.
Sew each piece on with its own tail, using small stitches through the back loops of its edge round. Sew the leaves first and the flowers on top, so the layers stack cleanly. Take a photo of your layout before you start sewing so you can recheck the placement.
Hardware: Open the jump ring by twisting it sideways with the two pliers. Pass it through the outer border at about 11 o’clock, catching both Rnd 1 and Row 8 for strength. Add the key ring’s chain and close the jump ring completely.
Final Blocking
- Lay the finished keychain RS up on the mat.
- Mist the flowers lightly. Do not soak them.
- Shape each petal and leaf tip with your fingers.
- Pin only the edges of the letter, not the appliqués.
- Let it dry flat for several hours.
Final Quality-Control Checklist
- The letter measures 3 3/4 x 3 1/4 in (9.5 x 8.3 cm).
- The band is 1 1/2 in (3.8 cm) wide all the way around.
- Both end caps are smooth half-rounds.
- The inner curve lies flat with no waves.
- Rnd 1 has 82 sts, and Rnd 2 has 82 sl sts.
- Every appliqué is sewn down, and no petal lifts when you brush it.
- The jump ring is completely closed.
- All ends are woven in on the back.
Troubleshooting
- The C opens too wide: your rows are too tall. Tighten your tension, or work Row 8 with 5 increases instead of 4.
- The C closes into a ring: your stitches are too tight compared to the row height. Go up one hook size.
- The outer edge ruffles: you added extra sts in Rnd 1. Recount; the outer edge should have 44.
- The inner edge waves: work exactly 1 sc in each foundation ch.
- The end caps are pointed: check that each of the 4 middle row ends got 2 dc.
- A flower curls up: block it flat before sewing, or work Rnd 3 a little looser.
- The ring pulls the edge: move the jump ring so it catches both Rnd 1 and Row 8.
- The bouquet looks crowded: spread the leaves outward so each tip shows past the flowers.
Care
Spot clean with a damp cloth and mild soap. Reshape and dry flat, and do not machine wash or tumble dry.
Final Notes
The measurements build in a short chain that is easy to check:
- Row 1 sets the inner edge at 2 3/8 in (6.0 cm).
- Eight rows make a band 1 1/8 in (2.9 cm) wide with a 7 in (17.8 cm) outer edge. The body is then 3 3/8 x 2 7/8 in (8.6 x 7.3 cm).
- The 82-stitch border adds 3/16 in (0.5 cm) all around, so the finished letter is 3 3/4 x 3 1/4 in (9.5 x 8.3 cm).
If you check each stage, the bouquet will sit exactly where it should.
Happy crocheting!