

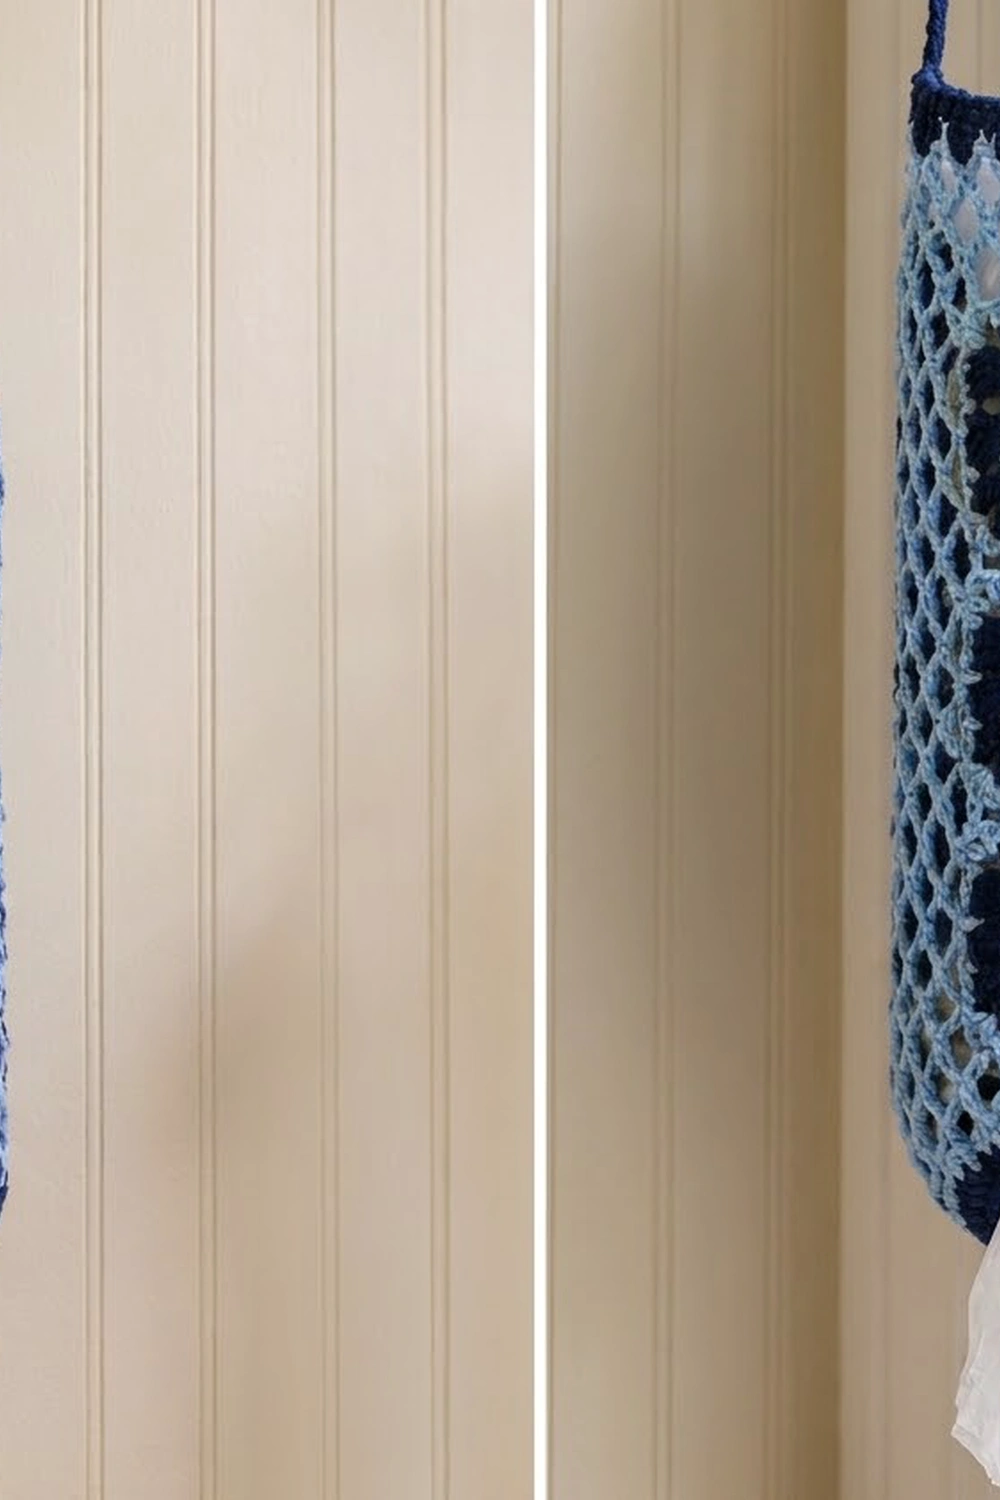
The Blue Lattice Bloom Bag Holder is a hanging tube for plastic grocery bags. You push bags in at the top and pull them out one at a time through a round opening at the bottom. Three flower granny squares are stacked down the front, and a two-tone diamond mesh wraps around the back and sides.
It uses two blues, deep navy and soft light blue. Each square has a navy flower on a light blue background with a navy outline. Solid navy bands finish both ends, and a navy strap makes the hanging loop. The style is classic cottage and suits a kitchen, pantry or laundry room.
This pattern uses US terms. The body is about 6.5 in (16.5 cm) wide laid flat and 14.5 in (36.8 cm) long. With the handle, it hangs about 19.5 in (49.5 cm) long.
To make it, you join three squares into a strip. Then you work the mesh in rows off one long edge of the strip and seam the last row to the other long edge to form a tube. A top band, a bottom band that narrows to the opening, and a sewn-on handle finish it.
Finished Size and Construction
- Finished size: body 6.5 in (16.5 cm) wide flat × 14.5 in (36.8 cm) long; 19.5 in (49.5 cm) hanging length
- Skill level: Easy to Intermediate
- Terminology: US
- Yarn weight: Worsted (#4) cotton
- Hook: 4.5 mm (US 7)
- Number of pieces: 3 flower squares + 1 handle strap; the mesh and bands are worked directly onto the strip
- Layout: 1 square wide × 3 squares tall, on the front
- Square size: 4 in (10.2 cm)
- Size before bands: 13.25 in (33.7 cm) around × 12 in (30.5 cm) long
- Band depth: 1.25 in (3.2 cm) at each end
Materials
Choose a smooth worsted cotton or cotton blend. Cotton holds its shape under the weight of the bags and washes well. Acrylic also works, but the mesh will stretch more.
- Navy (A): 100 g, approximately 170 m (186 yd)
- Light Blue (B): 60 g, approximately 102 m (112 yd)
Tools:
– 4.5 mm (US 7) crochet hook
– Tapestry needle
– Scissors
– Stitch markers
– Measuring tape
– Pins and a rolled towel or cardboard tube for blocking
These quantities include a margin of about 15%.
Abbreviations (US Terms)
- ch – chain
- sl st – slip stitch
- sc – single crochet
- dc – double crochet
- sc2tog – single crochet 2 together
- sp – space
- st(s) – stitch(es)
- BLO – back loop only
- rnd – round
3-dc cluster (cl): *Yarn over, insert hook in st, pull up a loop, yarn over, pull through 2 loops; repeat from * 2 more times in the same st. Yarn over and pull through all 4 loops on hook.
Beginning cluster (beg cl): Ch 2, then work a 2-dc cluster in the same st.
Gauge and Checkpoints
Make one square first. Every later stitch count comes from the square edges.
- Square: 4 in (10.2 cm) after Rnd 5
- Band: 14 sc and 16 rnds = 4 in (10.2 cm)
- Mesh: 2 rows = 1 in (2.5 cm); each ch-5 loop spans about 1.5 in (3.8 cm)
Square checkpoints:
– Rnd 1: 1.25 in (3.2 cm)
– Rnd 2: 2 in (5.1 cm)
– Rnd 3: 3 in (7.6 cm)
– Rnd 4: 3.75 in (9.5 cm)
– Rnd 5: 4 in (10.2 cm)
If the square is more than 0.25 in (0.6 cm) too big, go down half a hook size. If it is too small, go up half a size. Never change the stitch counts, because everything depends on 11 sts per side.
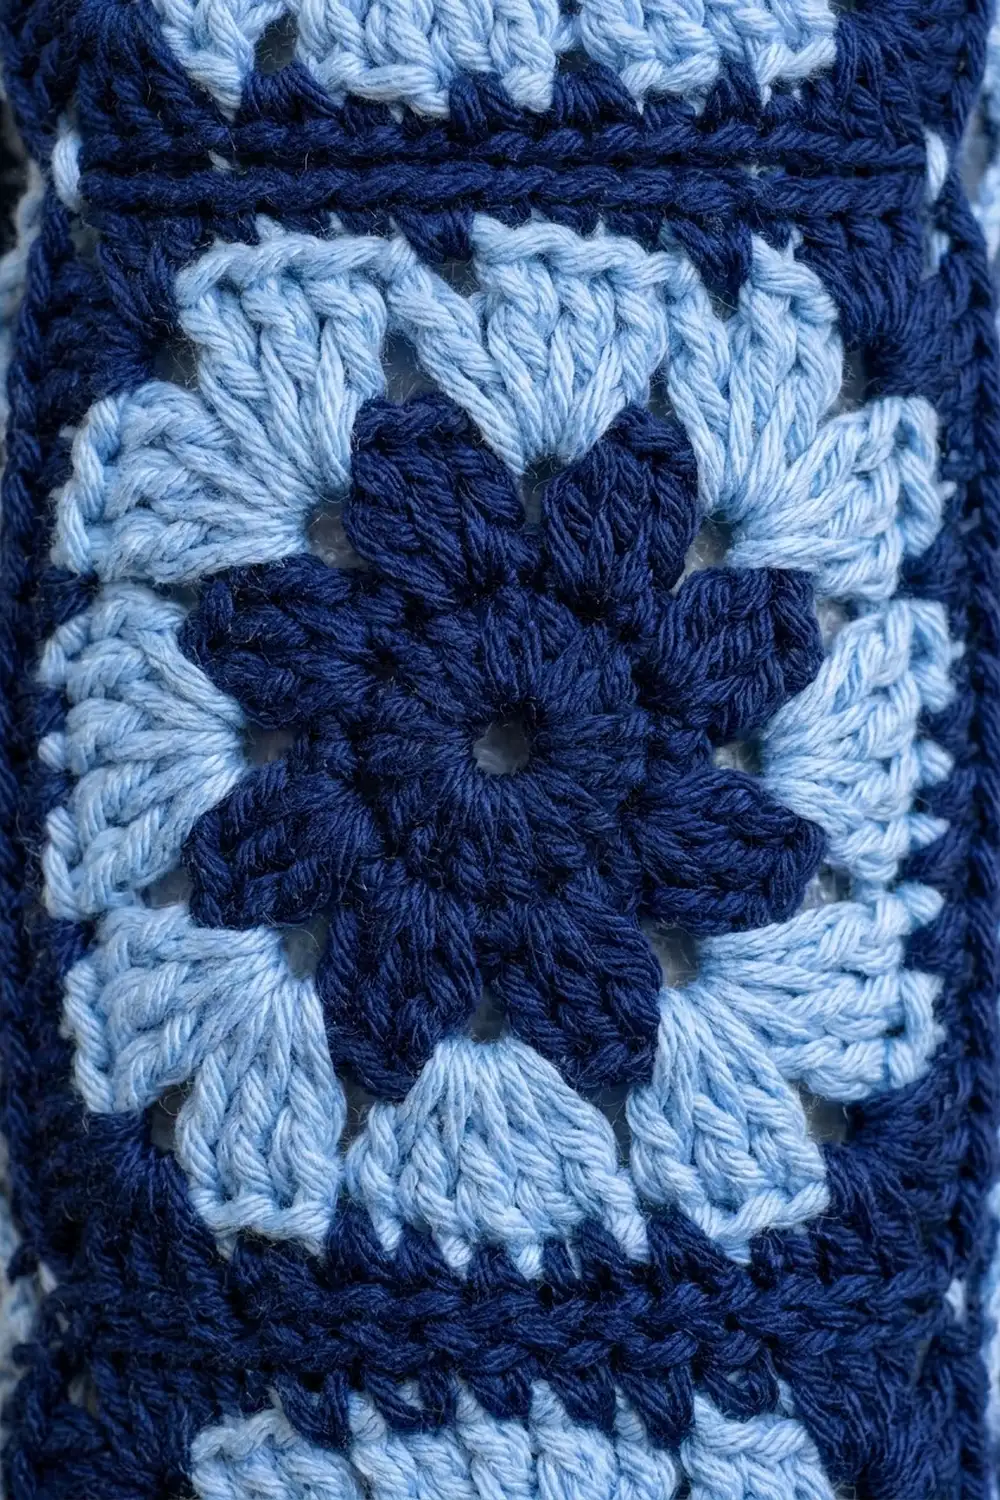
Flower Square (Make 3)
Rnd 1 (Navy): Make a magic ring. Ch 3 (counts as dc), 15 dc in ring. Join with sl st to top of ch-3. (16 dc)
Rnd 2 (Navy): Beg cl in same st, ch 2, skip next st, cl in next st, ch 2, skip next st; repeat from * 6 more times. Join to top of beg cl. (8 clusters, 8 ch-2 sps) Fasten off.
The 8 clusters are the petals. Pull the ring tight.
Rnd 3 (Light Blue): Join in any ch-2 sp. Ch 3 (counts as dc), 2 dc in same sp, ch 1, 3 dc in next ch-2 sp, ch 1; repeat from * 6 more times. Join. (24 dc in 8 groups, 8 ch-1 sps)
Rnd 4 (Light Blue): Sl st to next ch-1 sp. Ch 3, (2 dc, ch 2, 3 dc) in same sp, 3 dc in next ch-1 sp, (3 dc, ch 2, 3 dc) in next ch-1 sp; repeat from * 2 more times, 3 dc in last ch-1 sp. Join. (36 dc, 4 corner ch-2 sps; 9 dc per side) Fasten off.
Rnd 5 (Navy): Join in any corner sp. Ch 1, (sc, ch 1, sc) in same sp, sc in next 9 dc, (sc, ch 1, sc) in next corner sp; repeat from * 2 more times, sc in last 9 dc. Join. (44 sc, 4 corner ch-1 sps)
Per side: 11 sc = 1 corner sc + 9 sc + 1 corner sc. You never work into the corner ch-1 sps later. Fasten off.
Make All Pieces
- Squares: 3, each with Navy for Rnds 1, 2 and 5 and Light Blue for Rnds 3 and 4
- Handle strap: 1, in Navy
Front layout, top to bottom:
[ Square 1 ]
[ Square 2 ]
[ Square 3 ]
Turn all the squares the same way.
Joining the Squares
With Navy, hold Squares 1 and 2 right sides together. Start at matching corner sc. Work 1 sl st through the back loops of both layers in each of the 11 sc, from corner sc to corner sc, skipping the corner ch-1 sps. (11 sl sts per seam) Join Square 3 to Square 2 the same way.
Match sc 1 to sc 1 and sc 11 to sc 11. If a stitch is left over, pull the seam out and recount rather than stretching it to fit. Keep the slip stitches slightly loose so the strip doesn’t pucker.
Checkpoint: The strip is 4 in × 12 in (10.2 cm × 30.5 cm). Each long edge has 33 sc (3 squares × 11). The seams add no stitches.
Mesh Body
The rows run the length of the strip, parallel to the square column. The light blue and navy stripes overlap to make the diamond lattice. Work 2 rows in each color and carry the unused color loosely up the top edge, where the top band will cover it.
Row 1 (Light Blue): With the right side facing, join in the top corner sc of a long edge. Ch 1, sc in same sc, ch 5, skip 3 sc, sc in next sc; repeat from * 7 more times, ending in the 33rd sc. (9 sc, 8 ch-5 loops)
Row 2 (Light Blue): Ch 5, turn (counts as dc + a ch-2 half loop), sc in first loop, ch 5, sc in next loop; repeat from * 6 more times, ch 2, dc in last sc. (8 sc, 7 loops, 2 half loops) Change to Navy.
Row 3 (Navy): Ch 1, turn, sc in dc, skip ch-2 sp, ch 5, sc in next loop; repeat from * 6 more times, ch 5, sc in 3rd ch of turning ch. (9 sc, 8 loops)
Row 4 (Navy): Repeat Row 2. Change to Light Blue.
Rows 5–18: Work Row 3 for the odd rows and Row 2 for the even rows. Colors:
– Rows 5–6: Light Blue
– Rows 7–8: Navy
– Rows 9–10: Light Blue
– Rows 11–12: Navy
– Rows 13–14: Light Blue
– Rows 15–16: Navy
– Rows 17–18: Light Blue
Checkpoint: The mesh is 5 in (12.7 cm) deep after Row 10 and 9 in (22.9 cm) after Row 18. Keep each sc centered in its loop so the diamonds stay even.
Row 19 (Navy, conversion row): Ch 1, turn, sc in dc, sc in ch-2 sp, sc in next sc, 3 sc in next loop, sc in next sc; repeat from * 6 more times, sc in ch-2 sp of turning ch, sc in 3rd ch of turning ch. (33 sc)
Count: (8 sc worked 1 per sc + 2 edge sts) + (21 sc in full loops + 2 sc in half loops) = 33. This matches the 33 sc on the free edge of the strip.
Close the tube: Place right sides together and line Row 19 up with the free long edge of the strip. With Navy, sl st through both layers stitch to stitch, using the same relaxed tension as the square seams. (33 sl sts) Turn right side out.
Checkpoint: The mesh is 9.25 in (23.5 cm) deep. The tube is 13.25 in (33.7 cm) around and 12 in (30.5 cm) long.
Border: Top and Bottom Bands
Band gauge is 14 sc = 4 in (10.2 cm). Both bands start with the same Rnd 1:
- Square edge: 11 sc worked 1 per st + 3 increases = 14 sc
- Mesh edge: 28 sc: 1 sc in each of the 9 odd-row ends, 2 sc in each of the 9 taller even-row ends, and 1 sc in the end of Row 19
- Total: 14 + 28 = 42 sc
Why the math works: At 14 sc per 4 in (10.2 cm), 42 sc make a 12 in (30.5 cm) round. That is slightly smaller than the 13.25 in (33.7 cm) tube, so the band draws in a little and holds the bags in. The 14 sc over the square equal its 4 in (10.2 cm) width. Only the stretchy mesh gets gathered, so the squares stay flat.
Top Band (Navy)
Rnd 1: Join in the top corner sc of Square 1. Ch 1, sc in same sc and next sc, 2 sc in next sc, sc in next 3 sc; repeat from * once more, 2 sc in last sc (14 sc). Work 28 sc along the mesh as described above, covering the carried yarns. Join. (42 sc)
Rnds 2–4: Ch 1, sc in each st. Join. (42 sc)
Rnd 5: Sl st loosely in each st. (42 sl sts) Fasten off.
Checkpoint: The band is 1.25 in (3.2 cm) deep and 12 in (30.5 cm) around.
Bottom Band (Navy)
Rnd 1: Join in the bottom corner sc of Square 3 and work as for the top band Rnd 1. (42 sc)
Rnd 2: Sc in each st. (42 sc)
Rnd 3: Sc in next 5, sc2tog; repeat from * 6 times total. (36 sc)
Rnd 4: Sc in next 4, sc2tog; repeat from * 6 times total. (30 sc)
Rnd 5: Sc in next 3, sc2tog; repeat from * 6 times total. (24 sc)
Rnd 6: Sc in each st. (24 sc)
Rnd 7: Sl st in each st for a firm rim. (24 sl sts) Fasten off.
Checkpoint: The opening is about 2.25 in (5.7 cm) across. The band is 1.25 in (3.2 cm) deep, measured straight down as it curves in. It holds a full stack of bags but still lets one slide out.
Handle Strap (Navy)
Ch 43.
Row 1: Sc in 2nd ch from hook and in each ch across. (42 sc)
Rows 2–4: Ch 1, turn, sc across. (42 sc)
The strap measures 12 in (30.5 cm) × 1 in (2.5 cm). Fold it lengthwise and sl st the long edges together to make a cord about 0.5 in (1.3 cm) wide.
Flatten the tube with the squares centered on the front. Sew 1 in (2.5 cm) of each strap end inside the top band, one at each side fold. Stitch through both band rounds so the weight is spread out. The loop rises about 5 in (12.7 cm) above the band.
Final Blocking
- Weave in all ends, hiding the mesh ends inside the bands.
- Soak the holder for 10 minutes in cool water. Press the water out in a towel without wringing.
- Slide a rolled towel or a 4 in (10.2 cm) cardboard tube inside.
- Center the squares on the front and pin each one to 4 in (10.2 cm) with straight edges.
- Open the mesh evenly so the diamonds match and the body is 12 in (30.5 cm) between the bands.
- Shape the bottom opening into a 2.25 in (5.7 cm) circle.
- Let it dry fully, then hang it by the handle to check that it falls straight.
Final Quality-Control Checklist
- Each square is 4 in (10.2 cm) with 11 sc per side
- The strip is 4 in × 12 in (10.2 cm × 30.5 cm) with 33 sc on each long edge
- The mesh has 19 rows, with colors changing every 2 rows
- The tube seam runs straight along one edge of the square column
- Both bands start at 42 sc, and the bottom band ends at 24
- The handle is sewn securely at both side folds
- No ends or carried yarns show
Troubleshooting
Squares cup: Your tension is tight. Go up half a hook size.
Squares ruffle: Go down half a hook size.
Row 1 doesn’t reach the 33rd sc: Recount. You need exactly 8 skip-3 repeats.
Mesh edges slant: Each even row must start with ch 5 and end with ch 2, dc.
Tube seam puckers: Loosen the slip stitches or use a larger hook.
Top band flares: Work 1 sc instead of 2 into a few of the even-row ends. Don’t go below 38 sc.
Bags slip out: Add one more round of sc 2, sc2tog to make an 18-st opening.
Handle stretches: Fold the strap again or line it with ribbon.
Care
Machine wash on a gentle cycle in cool water, or hand wash. Dry it flat or hanging, and reshape the bottom opening while it is still damp.
Final Notes
Each measurement builds on the one before:
– A 4 in (10.2 cm) square with 11 sc per side builds a 4 in × 12 in (10.2 cm × 30.5 cm) strip with 33 sc on each long edge.
– Nineteen mesh rows wrap the strip into a 13.25 in (33.7 cm) tube.
– The 42-st bands gather the tube to 12 in (30.5 cm).
– The bottom band closes to a 24-st, 2.25 in (5.7 cm) opening.
Check each stage before you move on, and the holder will hang straight and give out one bag at a time.
Happy crocheting!