

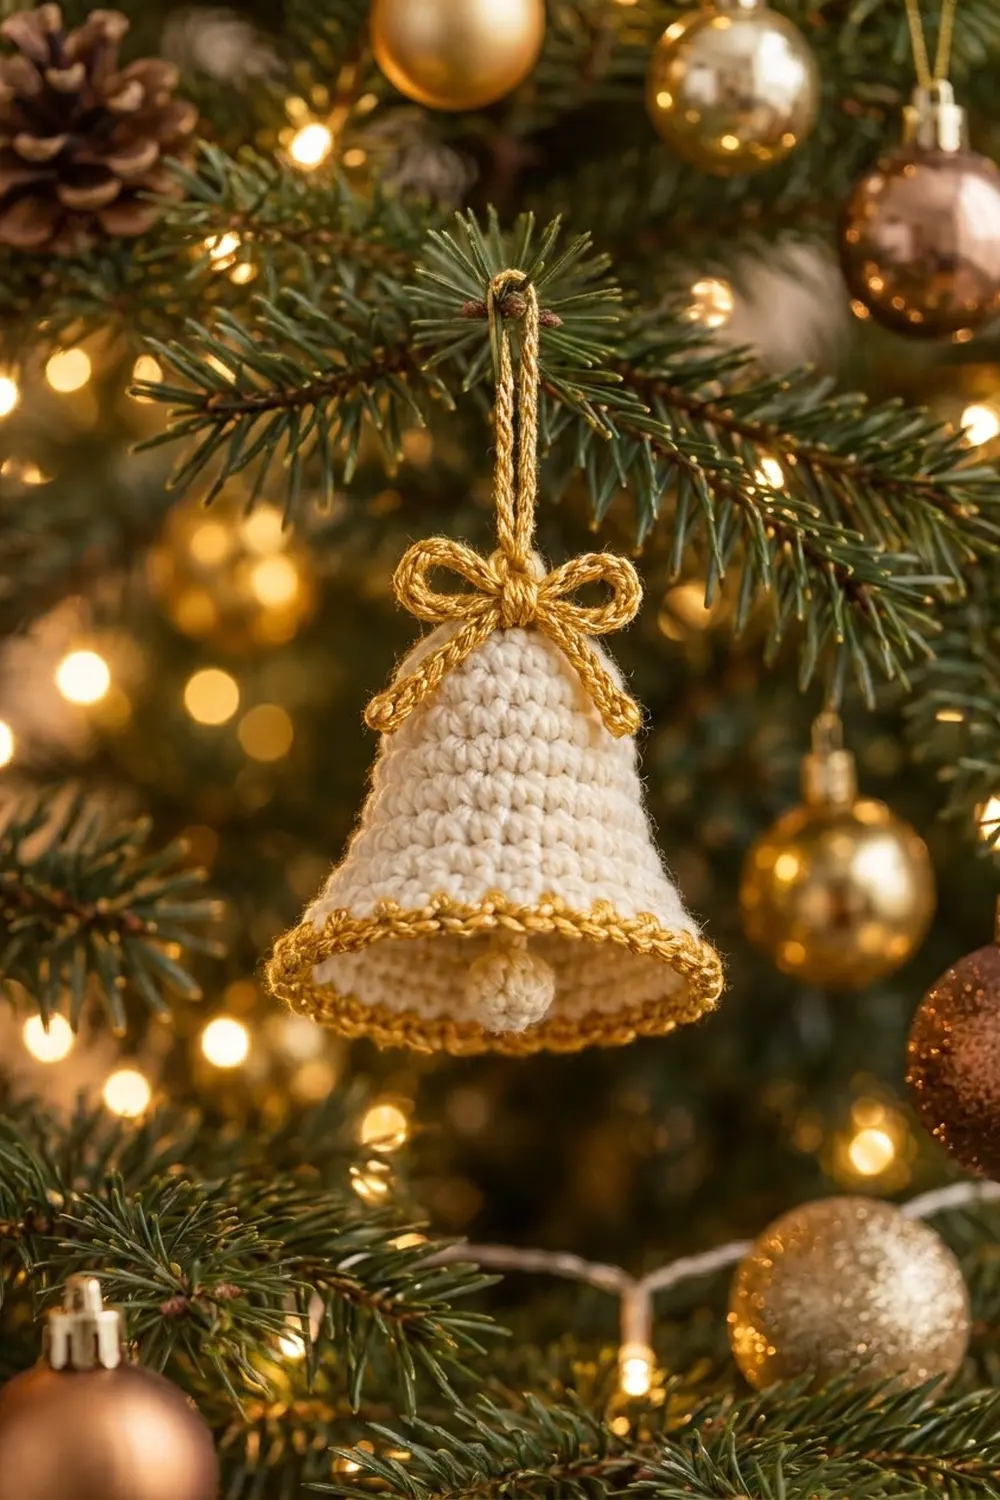
This little bell is made for the tree. The cream body is worked in tight single crochet. A gold rope edge finishes the flared rim, a gold bow sits at the crown, and a matching gold loop holds it up. A small cream ball hangs inside as the clapper, so it looks like a real bell.
The bell uses just two colors, warm cream and metallic gold. That keeps the look soft and classic, and it suits natural greenery, gold baubles and warm white lights. The style is traditional and a little vintage. The texture is dense and even, so the bell holds its shape without stiffener.
This pattern uses US crochet terms. The finished bell is 3 in (7.6 cm) tall from crown to rim and 3.25 in (8.3 cm) across the rim. With the hanging loop it is about 5 in (12.7 cm) tall overall.
Construction is simple. You work the bell from the top down in joined rounds, starting from a magic ring. You add increases in stages to make the bell shape and the flare. A two-round gold edging finishes the rim. Then you make a small stuffed clapper and two slip-stitch cords, one for the bow and one for the loop, and attach them all at the crown.
Finished Size and Construction
- Finished size: 3 in (7.6 cm) tall x 3.25 in (8.3 cm) rim diameter; about 5 in (12.7 cm) tall with the loop
- Skill level: Easy
- Terminology: US crochet terms
- Yarn weight: DK (light worsted, category 3)
- Hook: 3.5 mm (E-4)
- Number of pieces: 1 bell ornament made from 4 parts (bell body, clapper, bow cord, hanging cord)
- Layout: Single ornament, no joining of motifs
- Piece size (bell body): 2.75 in (7.0 cm) tall x 3 in (7.6 cm) rim diameter
- Size before border: 2.75 in (7.0 cm) tall x 3 in (7.6 cm) rim diameter
- Border depth: 0.25 in (0.6 cm), adding about 0.25 in (0.6 cm) to the height and to the rim diameter
Materials
Choose a smooth, tightly plied DK yarn. Cotton or a cotton blend gives crisp stitch definition and holds the bell shape well. For the gold, use a metallic DK. A sport-weight metallic held together with a strand of gold sewing thread also works. Avoid fluffy or brushed yarns, because they blur the stitches and soften the rim.
- Cream (Color A): 10 g, about 25 m (27 yd), for the bell body and clapper
- Metallic gold (Color B): 6 g, about 22 m (24 yd), for the rim edging, bow and hanging loop
Tools and notions:
- 3.5 mm (E-4) crochet hook
- Tapestry needle
- 1 stitch marker
- Small pinch of fiberfill, for the clapper
- Scissors
- Optional: rust-proof pins and a small foam ball or rolled towel for blocking
All yarn quantities include a margin of about 20% for gauge testing and weaving in ends.
Abbreviations (US Terms)
- ch: chain
- sl st: slip stitch
- sc: single crochet
- inc: 2 sc in the same stitch
- dec: single crochet 2 together
- st(s): stitch(es)
- MR: magic ring
- rev sc: reverse single crochet (crab stitch)
- ( ) x6: repeat the stitches in parentheses 6 times in total
Special stitch: reverse single crochet (rev sc). Work from left to right (right to left if you are left-handed). Insert the hook into the next stitch to the right, yarn over and pull up a loop. Yarn over again and draw through both loops on the hook. This stitch makes the twisted, rope-like gold edge on the rim.
Gauge and Checkpoints
Gauge: 11 sc and 12 rounds = 2 in (5.1 cm), worked in sc in rounds with Color A and a 3.5 mm hook. That is 5.5 sc and 6 rounds per 1 in (2.5 cm).
Make the bell body first, before the other parts. It is the only part where gauge really changes the result. Measure at these points:
- After Round 3: The flat circle measures 1 in (2.5 cm) across.
- After Round 9: The body measures 1.5 in (3.8 cm) tall from the magic ring.
- After Round 17: The body measures 2.75 in (7.0 cm) tall and 3 in (7.6 cm) across the rim.
- After the border: The bell measures 3 in (7.6 cm) tall and 3.25 in (8.3 cm) across the rim.
If your bell is too big, change to a 3.25 mm (D-3) hook. If it is too small, change to a 3.75 mm (F-5) hook. If the fabric looks loose or you can see through it, go down a hook size even if the measurements are close. The bell needs dense fabric to stand on its rim.
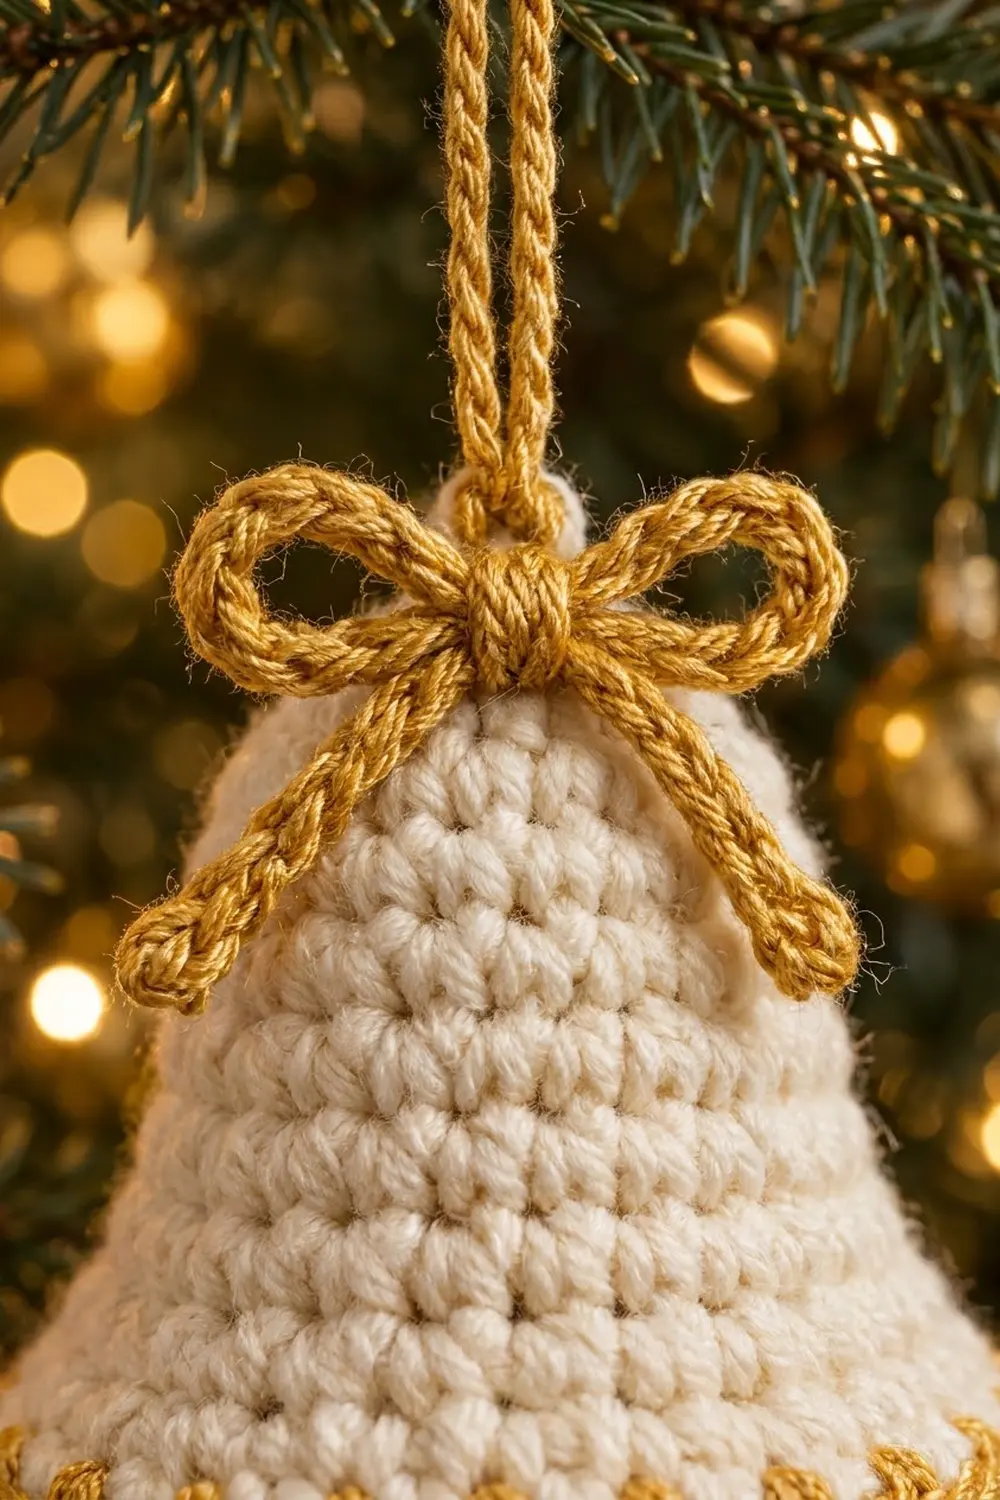
Bell Body
Use Color A. Join each round with a sl st to the first sc. The ch 1 at the start of each round does not count as a stitch. Place the marker in the first sc of each round.
Round 1: MR, 6 sc in ring, sl st to first sc. (6 sts)
Round 2: Ch 1, inc in each st around, sl st to first sc. (12 sts)
Round 3: Ch 1, (sc in next st, inc) x6, sl st to first sc. (18 sts)
Checkpoint: the circle is 1 in (2.5 cm) across.
Rounds 4–6: Ch 1, sc in each st around, sl st to first sc. (18 sts each round)
These three straight rounds turn the flat circle into the rounded crown of the bell. The sides start to curve down here.
Round 7: Ch 1, (sc in next 2 sts, inc) x6, sl st to first sc. (24 sts)
Rounds 8–9: Ch 1, sc in each st around, sl st to first sc. (24 sts each round)
Checkpoint: the body is 1.5 in (3.8 cm) tall.
Round 10: Ch 1, (sc in next 3 sts, inc) x6, sl st to first sc. (30 sts)
Rounds 11–12: Ch 1, sc in each st around, sl st to first sc. (30 sts each round)
Round 13: Ch 1, (sc in next 4 sts, inc) x6, sl st to first sc. (36 sts)
Round 14: Ch 1, sc in each st around, sl st to first sc. (36 sts)
Up to this point, the increases come every two or three rounds. That spacing gives the bell its smooth, slightly curved-in waist. From Round 15 on, you increase every round to make the flare.
Round 15: Ch 1, (sc in next 5 sts, inc) x6, sl st to first sc. (42 sts)
Round 16: Ch 1, (sc in next 6 sts, inc) x6, sl st to first sc. (48 sts)
Round 17: Ch 1, (sc in next 7 sts, inc) x6, sl st to first sc. (54 sts)
Fasten off Color A, leaving a 6 in (15.2 cm) tail to weave in.
Checkpoint: set the body on a table. It is 2.75 in (7.0 cm) tall and 3 in (7.6 cm) across the rim. The last three rounds should flare outward to form the lip of the bell.
If the increases stack into visible corners, stagger them on Rounds 13–17. For example, on Round 15 work (2 sc, inc, 3 sc) x6 instead. The stitch count stays the same.
Rim Border
The gold border has two rounds. In both rounds you work 1 stitch into each existing stitch, so the rim stays at 54 stitches the whole way.
Border gauge: The 54 rim stitches measure about 9.8 in (24.9 cm) around. That is 5.5 sts per 1 in (2.5 cm), the same as the body gauge.
Border Round 1 (conversion round): Join Color B with a sl st in any st of Round 17. Ch 1, sc in each st around, sl st to first sc. Count: 54 sts worked 1 per existing st + 0 extra = 54 sts.
Border Round 2 (trim round): Ch 1 and do not turn. Rev sc in each st around, working to the right. Sl st to first rev sc. Count: 54 sts worked 1 per existing st + 0 extra = 54 sts.
Fasten off and weave in the tail on the inside of the bell.
Why the math works: The flare is already built into Round 17. Adding stitches in the border would make the rim ruffle, and skipping stitches would pull it in so it cups. Working exactly 1 stitch per stitch keeps the gold edge in line with the cream lip. Reverse sc is slightly thicker than sc, so it adds about 0.25 in (0.6 cm) to the rim diameter and to the height. The bell grows from 3 in (7.6 cm) to 3.25 in (8.3 cm) across, and from 2.75 in (7.0 cm) to 3 in (7.6 cm) tall.
Clapper
Use Color A. Work in a continuous spiral without joining. Mark the first stitch of each round.
Round 1: MR, 6 sc in ring. (6 sts)
Round 2: Inc in each st around. (12 sts)
Rounds 3–4: Sc in each st around. (12 sts each round)
Round 5: Dec around. (6 sts)
Stuff lightly with fiberfill. Fasten off with an 8 in (20.3 cm) tail. Weave the tail through the front loops of the last 6 sts and pull tight to close. The finished ball is about 0.6 in (1.5 cm) across.
Bow and Hanging Loop
Both cords are slip-stitch cords in Color B. Work each sl st into the back bump of the chain. This gives a round, rope-like cord.
Hanging cord: Ch 33. Sl st in the 2nd ch from the hook and in each ch across. (32 sl sts) Fasten off, leaving a 6 in (15.2 cm) tail at each end. The cord is about 4 in (10.2 cm) long.
Bow cord: Ch 51. Sl st in the 2nd ch from the hook and in each ch across. (50 sl sts) Fasten off with short tails. The cord is about 6.25 in (15.9 cm) long.
Assembly
- Clapper: Thread the clapper tail onto the needle. From inside the bell, push the needle up through the center of the magic ring. Adjust the strand so the bottom of the ball sits about level with the cream lip. That is about 1.75 in (4.4 cm) of strand between the crown and the top of the ball. Knot the tail securely on the outside of the crown and leave the ends for the next step.
- Hanging loop: Fold the hanging cord in half to make a 2 in (5.1 cm) loop. Thread both cord tails down through the crown, 1 st on each side of the center. Knot them inside the bell together with the clapper strand, then weave in.
- Bow: Tie the bow cord into a bow with two loops about 0.75 in (1.9 cm) long and two tails about 0.75 in (1.9 cm) long. The bow is about 2 in (5.1 cm) wide. Sew the bow knot to the front of the crown, just below the base of the hanging loop, with a few stitches of Color B. Tack the tip of each bow loop down with one small stitch so it holds its shape.
Final Blocking
- Mist the bell lightly with cool water until it is damp, not soaked. If you used metallic yarn, mist only the cream part and keep the gold dry.
- Slip the bell over a small foam ball, an egg cup, or a hand towel rolled to the bell’s shape.
- Gently shape the crown into a smooth dome and ease the last three rounds outward to form the flare.
- Check the size: 3 in (7.6 cm) tall and 3.25 in (8.3 cm) across the rim.
- If the gold rim does not sit level, pin it at four evenly spaced points.
- Let the bell dry completely, at least 6 hours.
- Once it is dry, shape the bow loops with your fingers.
Final Quality-Control Checklist
- Round 17 has exactly 54 sts, and both border rounds have 54 sts.
- The bell measures 3 in (7.6 cm) tall and 3.25 in (8.3 cm) across the rim.
- The crown is rounded, the waist is smooth, and the lip flares evenly all around.
- The gold rope edge lies flat with no ruffles or puckers.
- The clapper hangs centered, with its bottom about level with the cream lip.
- The hanging loop is about 2 in (5.1 cm) tall and centered at the crown.
- The bow is about 2 in (5.1 cm) wide and centered on the front.
- All ends are woven in on the inside.
Troubleshooting
The rim ruffles. Your tension may be loose in the last rounds, or extra stitches crept in. Count Round 17 and both border rounds; each must be 54.
The rim cups inward. You may have skipped an increase, or the border is too tight. Recount, and work the rev sc a little looser.
The increases look like corners. Stagger the increases on Rounds 13–17 as described above.
The join line drifts sideways. This is normal with joined rounds. Turn the join to the back before you attach the bow.
There are holes in the fabric. Go down a hook size. Dense fabric matters for this shape.
The clapper shows below the rim. Shorten the strand until the ball sits level with the cream lip.
The bell will not stand on its rim. Block it again over a form and let it dry fully.
Care
Spot clean with a damp cloth and mild soap, then reshape the bell and let it dry. Store it in a box with tissue paper tucked inside so the flare keeps its shape.
Final Notes
The measurements are short and easy to check:
- Gauge: 11 sc and 12 rounds in 2 in (5.1 cm).
- Round 3: a circle 1 in (2.5 cm) across.
- Round 9: a body 1.5 in (3.8 cm) tall.
- Round 17: the 54-stitch rim gives a body 2.75 in (7.0 cm) tall and 3 in (7.6 cm) across.
- Border: the two 54-stitch rounds add 0.25 in (0.6 cm), for a finished bell 3 in (7.6 cm) tall and 3.25 in (8.3 cm) wide.
- With the loop: the 2 in (5.1 cm) loop brings the ornament to about 5 in (12.7 cm) tall.
Make one bell, check it against these numbers, and the rest will be easy.
Happy crocheting!