

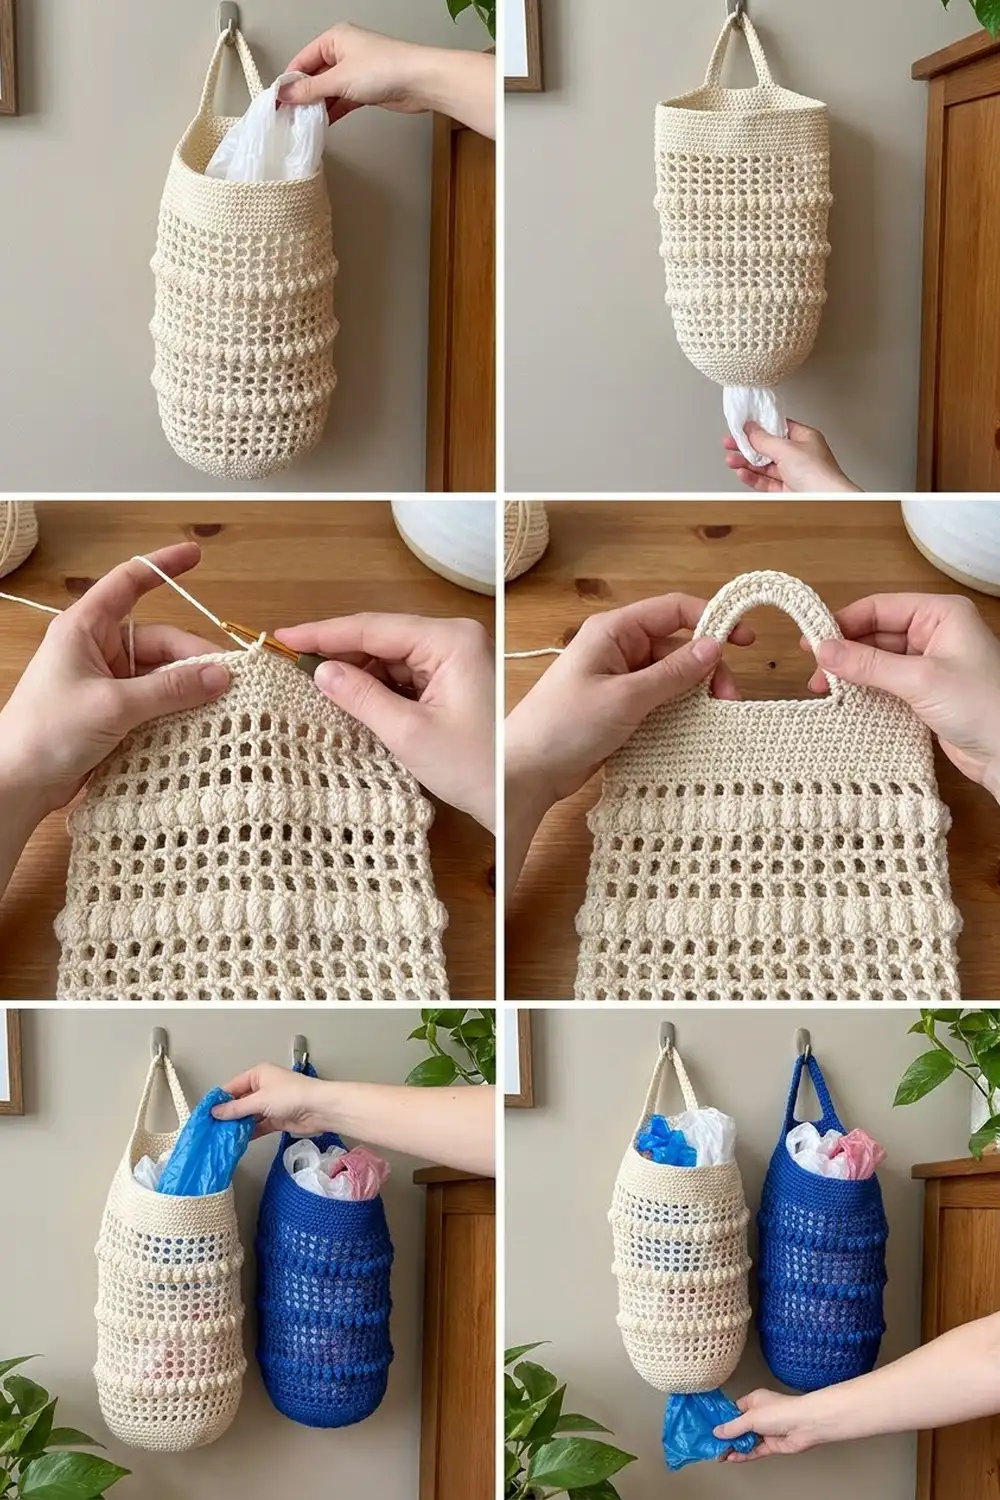
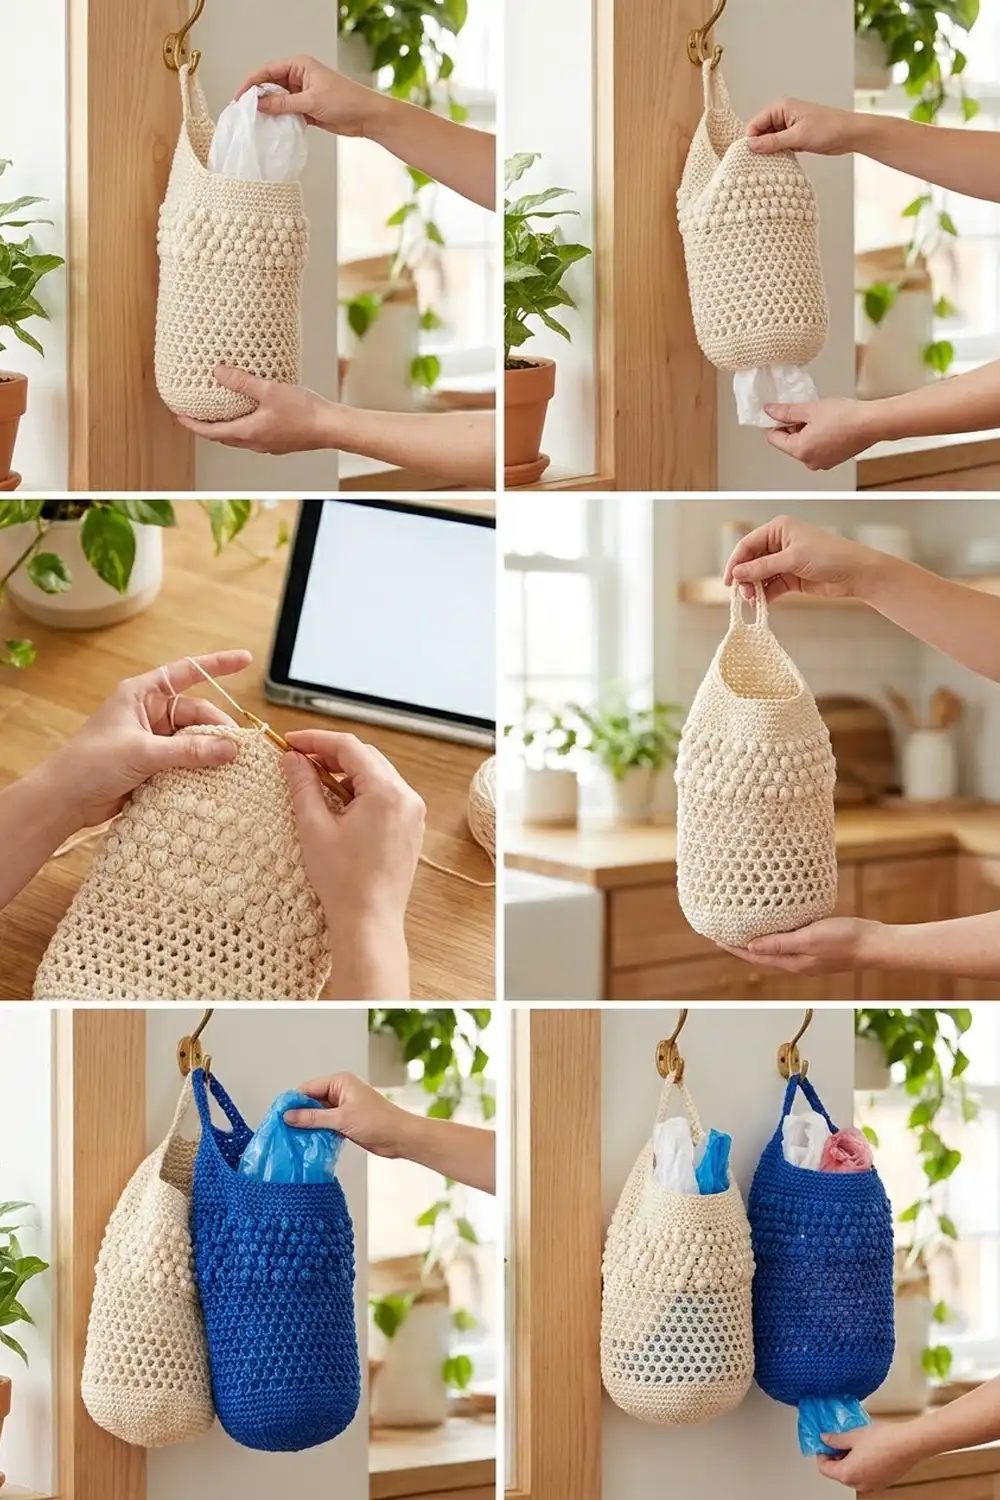
The Bobble Lattice Plastic Bag Holder is a soft, hanging tube for storing plastic grocery bags. You stuff bags in through the wide top and pull them out one at a time through the narrow bottom. The body is an airy double-crochet mesh with a row of round bobbles every third round, so it looks textured but stays light.
The sample is cream cotton, and the same pattern looks great in royal blue or any bold kitchen color. Each holder uses one color only. The piece is worked in US crochet terms throughout.
The finished holder is 7.5 in (19.1 cm) wide when flat and 16 in (40.6 cm) tall. The hanging loop adds about 2 in (5.1 cm), for a total of 18 in (45.7 cm).
It is made in one piece, top down, in joined rounds. You start with a solid rim band, work the mesh-and-bobble body, then decrease to the bottom opening. Last, you add a border around the starting edge that includes the hanging loop. There is no sewing.
Finished Size and Construction
- Finished size: 7.5 in (19.1 cm) wide flat × 16 in (40.6 cm) tall, plus a 2 in (5.1 cm) loop
- Circumference: 15 in (38.1 cm)
- Bottom opening: 4 in (10.2 cm) flat, 8 in (20.3 cm) around
- Skill level: Easy+ (confident beginner)
- Terminology: US crochet terms
- Yarn weight: Worsted (#4), cotton or cotton blend
- Hook: 5.0 mm (H-8)
- Number of pieces: 1
- Layout: Single seamless tube, worked top down in joined rounds
- Piece size before border: 7.5 in × 15.25 in (19.1 cm × 38.7 cm)
- Border depth: 0.75 in (1.9 cm), plus the hanging loop
Materials
Yarn: Use worsted-weight cotton or a cotton blend. Cotton holds its shape when the holder is full of bags and it pops the bobbles nicely. Acrylic also works but stretches more over time. The sample used a yarn with about 78 m (85 yd) per 50 g.
- Main color (cream, or royal blue for the second colorway): 130 g, about 203 m (222 yd)
The sample used about 110 g. The quantity above includes a margin for a gauge swatch and your own tension. The bobbles use a lot of yarn, so don’t cut it close.
Tools:
– 5.0 mm (H-8) crochet hook
– 2 locking stitch markers
– Tapestry needle
– Scissors
– Measuring tape
– Spray bottle and pins for blocking
Abbreviations (US Terms)
- ch – chain
- sl st – slip stitch
- sc – single crochet
- sc2tog – single crochet 2 together
- dc – double crochet
- sp – space
- st(s) – stitch(es)
- rnd(s) – round(s)
- RS / WS – right side / wrong side
Special stitch – Bobble: (Yarn over, insert hook in the stitch or space, pull up a loop, yarn over and pull through 2 loops) 5 times; you now have 6 loops on your hook. Yarn over and pull through all 6 loops. A bobble counts as 1 stitch.
Bobbles push out toward the back of the work. That’s why the bobble rounds are worked with the WS facing you, so the bobbles pop to the outside of the tube.
Gauge and Checkpoints
Single crochet: 16 sts × 16 rnds = 4 in (10.2 cm), so each sc rnd is 0.25 in (0.6 cm).
Mesh pattern: 16 sts (8 dc + 8 ch-1 sp) × 8 rnds = 4 in (10.2 cm), so each mesh or bobble rnd is 0.5 in (1.3 cm).
Treat the first 3 rnds as your swatch. After Rnd 3, flatten the tube and measure: it should be 7.5 in (19.1 cm) wide and 0.75 in (1.9 cm) tall.
Checkpoints (height measured from the foundation chain):
– After Rnd 3: 0.75 in (1.9 cm)
– After Rnd 15: 6.75 in (17.1 cm)
– After Rnd 29: 13.75 in (34.9 cm)
– After Rnd 35: 15.25 in (38.7 cm)
– After the border: 16 in (40.6 cm)
Too big? Go down to a 4.5 mm hook and start again. Too small? Go up to a 5.5 mm hook. If only the mesh rounds are tall, pull up each dc loop a little lower. The height doesn’t need to be exact, but the width matters because it controls how many bags fit.
Pattern
Top Rim Band
Foundation: Ch 60. Join with a sl st to the first ch to form a ring, taking care not to twist the chain.
Rnd 1 (RS): Ch 1, sc in each ch around. Join with a sl st to the first sc. (60 sc)
Rnds 2–3: Ch 1, sc in each st around. Join. (60 sc)
Checkpoint: the band is 0.75 in (1.9 cm) tall and 7.5 in (19.1 cm) wide flat.
Mesh and Bobble Body
Rnd 4 (Mesh rnd, RS): Ch 4 (counts as dc + ch 1), skip next st. Dc in next st, ch 1, skip next st; repeat from * 28 more times. Join with a sl st to the 3rd ch of the beginning ch-4. (30 dc + 30 ch-1 sp = 60 sts)
Rnd 5 (Mesh rnd, RS): Ch 4 (counts as dc + ch 1), skip ch-1 sp. Dc in next dc, ch 1, skip ch-1 sp; repeat from * 28 more times. Join to the 3rd ch of the beginning ch-4. (30 dc + 30 ch-1 sp = 60 sts)
Rnd 6 (Bobble rnd, WS): Ch 3 (counts as dc) and turn so the WS faces you. Bobble in next ch-1 sp, dc in next dc; repeat from * 28 more times, then bobble in the last ch-1 sp. Join with a sl st to the top of the beginning ch-3, then turn so the RS faces you again. (30 dc + 30 bobbles = 60 sts)
Turning reverses your direction, but each bobble still lands in a ch-1 sp and each dc lands on a dc, so the columns stay straight.
Rnd 7 (Mesh rnd, RS): Ch 4 (counts as dc + ch 1), skip bobble. Dc in next dc, ch 1, skip next bobble; repeat from * 28 more times. Join to the 3rd ch of the beginning ch-4. (30 dc + 30 ch-1 sp = 60 sts)
Rnd 8: Repeat Rnd 5. (60 sts)
Rnd 9: Repeat Rnd 6. (60 sts, including 30 bobbles)
Rnds 10–27: Keep repeating the 3-round sequence (Rnd 7, Rnd 5, Rnd 6) 6 more times. You now have 8 bobble rnds: Rnds 6, 9, 12, 15, 18, 21, 24 and 27. (60 sts every rnd)
Checkpoint after Rnd 15: 6.75 in (17.1 cm) tall.
Rnd 28: Repeat Rnd 7. (30 dc + 30 ch-1 sp = 60 sts)
Rnd 29: Repeat Rnd 5. (30 dc + 30 ch-1 sp = 60 sts)
Checkpoint: 13.75 in (34.9 cm) tall. The body (Rnds 4–29) is 26 rnds × 0.5 in = 13 in (33.0 cm).
Bottom Taper and Opening
Rnd 30 (Conversion rnd, RS): Ch 1. Sc in each dc and in each ch-1 sp around. Join. (30 sc in dc + 30 sc in ch-1 sp + 0 added = 60 sc)
Rnd 31: Ch 1. Sc in next 3 sts, sc2tog; repeat from * 11 more times. Join. (48 sc)
Rnd 32: Ch 1. Sc in next 4 sts, sc2tog; repeat from * 7 more times. Join. (40 sc)
Rnd 33: Ch 1. Sc in next 3 sts, sc2tog; repeat from * 7 more times. Join. (32 sc)
Rnds 34–35: Ch 1, sc in each st around. Join. (32 sc)
Fasten off and weave in the end. The opening is 8 in (20.3 cm) around, or 4 in (10.2 cm) flat. The bottom section (Rnds 30–35) is 6 rnds × 0.25 in = 1.5 in (3.8 cm).
Checkpoint: 15.25 in (38.7 cm) tall × 7.5 in (19.1 cm) wide.
Border (Top Rim and Hanging Loop)
The border is worked around the foundation chain at the top. It strengthens the rim and makes the hanging loop in the same step.
Border gauge: Same as the sc gauge, 16 sts and 16 rnds = 4 in (10.2 cm).
Setup: Turn the tube so the foundation edge is at the top and the RS faces out. Flatten it so the original joining point sits at one side fold. Counting from the join, foundation chains 1–30 are the front and chains 31–60 are the back. Place a marker in ch 44 and another in ch 47. These mark the center 4 sts of the back.
Border Rnd 1: Join yarn in ch 1. Ch 1, sc in the free loop of each foundation ch around. Join. (Front 30 + back 30 = 60 sc)
Border Rnd 2: Ch 1. Sc in sts 1–43, ch 18, skip sts 44–47, then sc in sts 48–60. Join. (Front 30 sc; back 13 sc + ch-18 loop + 13 sc; 56 sc total + ch-18)
Border Rnd 3: Ch 1. Sc in the next 43 sc, work 24 sc into the ch-18 sp, then sc in the last 13 sc. Join, fasten off and weave in. (Front 30 + back 50 [13 + 24 + 13] = 80 sc)
Why the math works: Border Rnd 1 works exactly one sc into each of the 60 foundation chains, which matches the rim band. Nothing is added, so the rim lies flat without ruffling or pulling in.
In Border Rnd 2, the ch 18 replaces 4 skipped stitches. That leaves the loop a 1 in (2.5 cm) base centered on the back. The 18 chains measure about 4.5 in (11.4 cm), so the loop rises about 2 in (5.1 cm).
In Border Rnd 3, the 24 sc packed over 18 chains (4 for every 3) make the loop solid and keep it from stretching. The front stays at 30 sts, so it hangs as a clean, even edge.
The three border rnds add 3 × 0.25 in = 0.75 in (1.9 cm), so the total height is 15.25 + 0.75 = 16 in (40.6 cm).
Final Blocking
- Weave in all ends on the inside of the tube.
- Turn the holder RS out and push each bobble outward with a fingertip.
- Lightly spray the whole piece with water until it’s damp but not soaked.
- Stuff the tube loosely with a rolled towel or a few plastic bags so it takes a round shape.
- Lay it flat and pin it to 7.5 in (19.1 cm) wide and 15.25 in (38.7 cm) tall from the foundation to the bottom edge.
- Shape the loop into a neat arch and pin it at 2 in (5.1 cm) tall.
- Let it dry completely, then remove the towel.
Final Quality-Control Checklist
- 60 sts in every rnd from Rnd 1 to Rnd 30
- 30 bobbles in each of the 8 bobble rnds (240 total)
- All bobbles face the outside of the tube
- The dc columns line up vertically and the joins stack along one side
- The bottom opening has 32 sc and measures 4 in (10.2 cm) flat
- The border front has 30 sc and the loop is centered on the back
- Size: 7.5 in × 16 in (19.1 cm × 40.6 cm), plus a 2 in (5.1 cm) loop
- All ends are woven in securely on the inside
Troubleshooting
Bobbles are on the inside. You didn’t turn for a bobble rnd. Rip back and work bobble rnds with the WS facing you.
Bobbles look flat. Make sure all 5 partial dc go into the same space, and close the bobble firmly.
The tube is twisting. Check that the foundation ring wasn’t twisted, and always join into the top of the beginning chain.
Stitch count is off in a mesh rnd. You probably skipped a dc or worked into a bobble. Count 30 dc after every rnd.
The bottom opening is too tight. Bags will be hard to pull out. Leave off Rnd 33 and work Rnds 34–35 on 40 sc instead.
The loop stretches. Work Border Rnd 3 tightly, or add a rnd of sl sts around the loop.
Care
Hand wash in cool water with mild soap, press out the water in a towel and dry flat. Reshape the bobbles while the holder is damp.
Final Notes
Everything depends on gauge. A 60-stitch round at 4 sts per inch gives 15 in (38.1 cm) around and 7.5 in (19.1 cm) flat. The height adds up like this:
- Rim band: 0.75 in (1.9 cm)
- Mesh body: 13 in (33.0 cm)
- Bottom taper: 1.5 in (3.8 cm)
- Border: 0.75 in (1.9 cm)
That totals 16 in (40.6 cm), plus the 2 in (5.1 cm) loop. Check each stage against the checkpoints and your holder will match. Once you’ve made one, try a second colorway, like royal blue, to hang beside it.
Happy crocheting!