
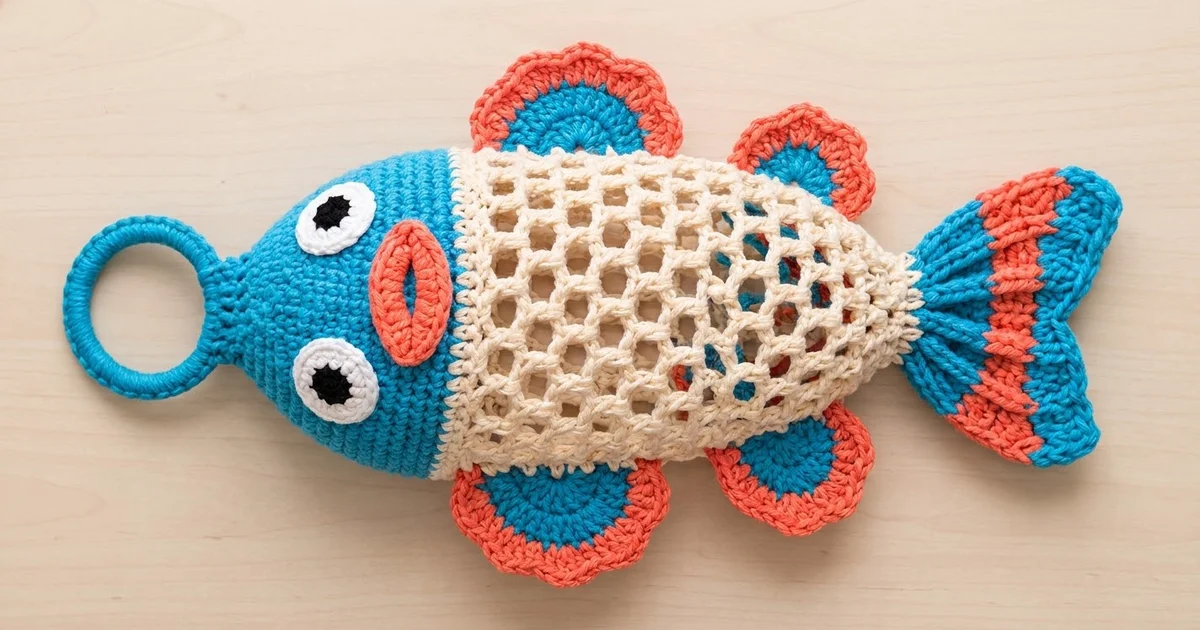
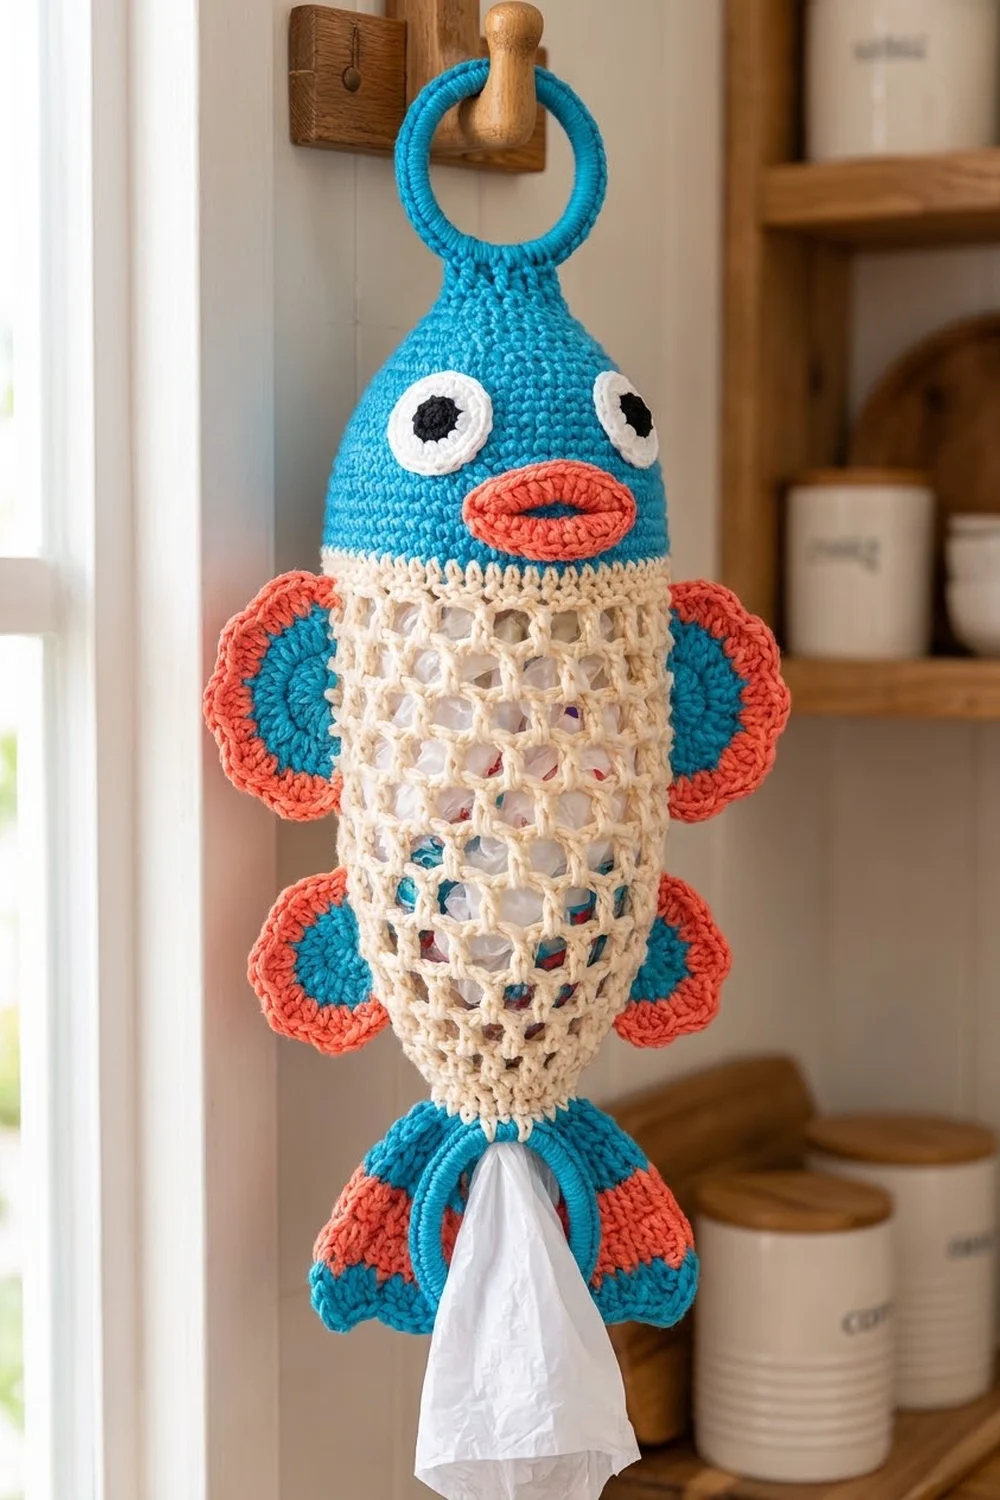
Bubbles is a playful fish that keeps your kitchen tidy. You push used plastic bags in through the open top of the head and pull them out one at a time through the ring at the bottom. The open mesh body lets you see at a glance when the holder needs refilling.
The color scheme is bright: a turquoise blue head and tail, a cream mesh body, coral lips and fin edges, and white-and-black eyes. Fins with ruffled edges and a striped tail give it a cheerful, cottage-kitchen look.
This pattern uses US crochet terms. The finished holder is about 21 in (53.3 cm) long including the hanging ring and tail. The body is 6 in (15.2 cm) wide at the head and 8 in (20.3 cm) at its widest point.
The head and body are worked as one piece in continuous rounds, from the top opening down. You switch to cream mesh after the head and finish with a blue edging worked over a plastic ring. Then you make the fins, tail lobes, eyes, lips, and covered hanging ring separately and sew them on.
Finished Size and Construction
- Finished size: about 21 in (53.3 cm) long; 8 in (20.3 cm) wide at the widest part of the body; about 11 in (27.9 cm) across the upper fins
- Skill level: Intermediate
- Terminology: US
- Yarn weight: Worsted (#4), cotton
- Hook: 4.0 mm (US G-6)
- Number of pieces: 11 (body, hanging ring, 2 large fins, 2 small fins, 2 tail lobes, 2 eyes, lips)
- Layout: vertical fish, hanging ring at top, bag opening at bottom
- Body piece size: 15.4 in (39.1 cm) long
- Size before border: 14.7 in (37.3 cm), head plus mesh
- Border depth: 0.7 in (1.8 cm), bottom edging
Materials
Use a smooth worsted-weight cotton or cotton blend. Cotton holds its shape and stops the mesh from sagging under the weight of the bags. These amounts assume about 85 m (93 yd) per 50 g.
- Blue: 70 g, 119 m (head, bottom edging, fin centers, tail, ring cover)
- Cream: 60 g, 102 m (ridge round and mesh body)
- Coral: 30 g, 51 m (lips, fin edges, tail stripes)
- White: 5 g, 9 m (eyes)
- Black: 3 g, 5 m (eye centers)
Tools:
– 4.0 mm (US G-6) hook
– One plastic or wooden ring, 3 in (7.6 cm), for hanging
– One plastic ring, 2.5 in (6.4 cm), for the bag opening
– Stitch marker
– Tapestry needle
– Scissors
– Pins
All quantities include a margin of about 15%.
Abbreviations (US Terms)
- ch: chain
- sl st: slip stitch
- sc: single crochet
- dc: double crochet
- inc: 2 sc in the same stitch
- sc2tog: single crochet 2 together
- BLO: back loop only
- MR: magic ring
- sk: skip
- sp: space
- st(s): stitch(es)
Scallop: sk 1, 5 dc in the next st, sk 1, sc in the next st. Each scallop uses 4 stitches.
Gauge and Checkpoints
- Sc gauge: 16 sc and 18 rounds = 4 in (10.2 cm).
- Mesh gauge: a dc + ch-2 mesh is 0.75 in (1.9 cm) wide, and 5 mesh rounds = 3 in (7.6 cm), so each round is 0.6 in (1.5 cm) tall.
Test piece first: Make the head (Rounds 1–11) before anything else. Round 11 (48 sts) should measure 12 in (30.5 cm) around, or 6 in (15.2 cm) laid flat.
Checkpoints:
– Head finished (Round 23): 5.1 in (13.0 cm) tall
– Mesh Round 3: 1.8 in (4.6 cm) of mesh
– Mesh Round 10: 6 in (15.2 cm) of mesh; 8 in (20.3 cm) wide flat
– Mesh Round 16: 9.6 in (24.4 cm) of mesh; 4 in (10.2 cm) wide flat
If your piece is too big: go down to a 3.5 mm hook. If it is too small: go up to 4.5 mm. Don’t change stitch counts, because the fins, ring, and edging are sized to match them.
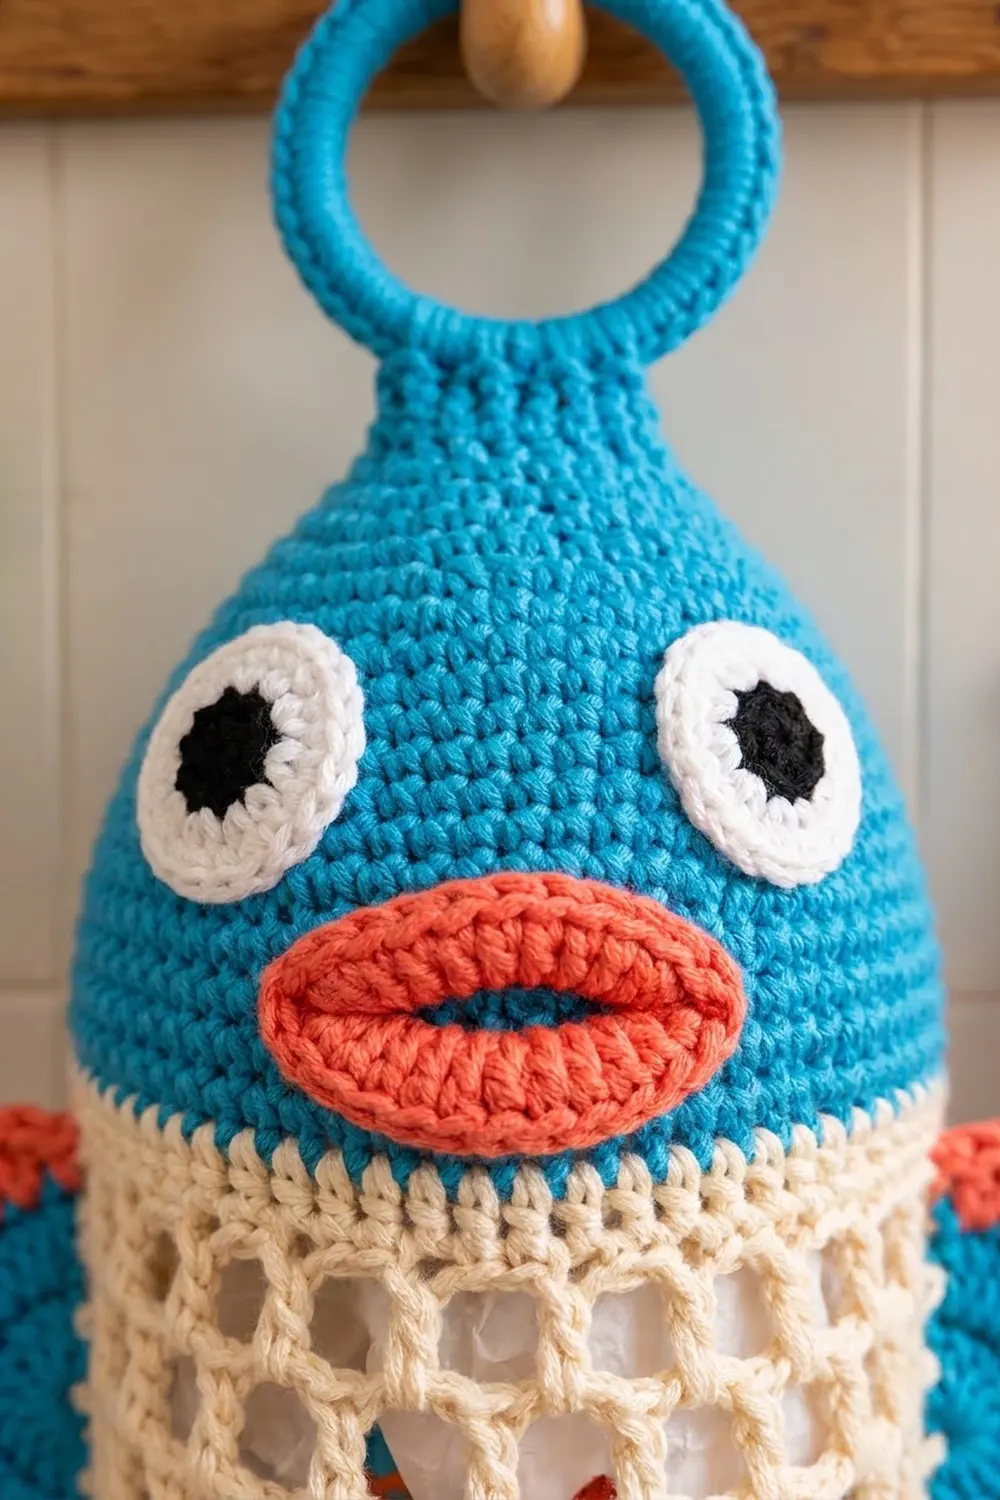
Head and Body (Worked in One Piece)
Work in continuous spiral rounds for the head. Move your marker up each round.
Head (Blue)
Foundation: Ch 18 and sl st to the first ch to form a ring. Don’t twist it.
Rnd 1: Sc in each ch around. (18 sts) The opening is 4.5 in (11.4 cm) around.
Rnd 2: Sc in each st around. (18)
Rnd 3: (Sc 2, inc) 6 times. (24)
Rnd 4: Sc around. (24)
Rnd 5: (Sc 3, inc) 6 times. (30)
Rnd 6: Sc around. (30)
Rnd 7: (Sc 4, inc) 6 times. (36)
Rnd 8: Sc around. (36)
Rnd 9: (Sc 5, inc) 6 times. (42)
Rnd 10: Sc around. (42)
Rnd 11: (Sc 6, inc) 6 times. (48)
Rnds 12–22: Sc around. (48 each round, 11 rounds)
Sl st in the next st to even out the step. Fasten off blue.
Rnd 23 (cream ridge): Join cream. Ch 1, then sc in BLO of each st around. Sl st to the first sc. (48)
Working in BLO leaves the front loops showing as a narrow ridge where the head meets the body.
Mesh Body (Cream)
Each round is joined with a sl st and is not turned. Every dc goes into the dc of the round below, so the mesh posts line up vertically.
Mesh Rnd 1: Ch 5 (counts as dc + ch 2), sk 2. Dc in next st, ch 2, sk 2; repeat from * 14 more times. Sl st to the 3rd ch of the beginning ch-5. (16 dc + 16 ch-2 sps = 48 sts)
Mesh Rnds 2–3: Ch 5 (counts as dc + ch 2). Dc in next dc, ch 2; repeat 14 more times. Sl st to the 3rd ch. (16 meshes, 48 sts)
Mesh Rnds 4–10 (bulge): Ch 6 (counts as dc + ch 3). Dc in next dc, ch 3; repeat 14 more times. Sl st to the 3rd ch. (16 dc + 48 ch = 64 sts each round)
This is a growth round: the circumference becomes 16 in (40.6 cm) and each mesh is 1 in (2.5 cm) wide.
Mesh Rnds 11–13: Work as Rnd 2. (48 sts each round)
Mesh Rnds 14–16 (taper): Ch 4 (counts as dc + ch 1). Dc in next dc, ch 1; repeat 14 more times. Sl st to the 3rd ch. (16 dc + 16 ch = 32 sts each round)
The circumference is now 8 in (20.3 cm).
Don’t fasten off. Continue straight into the bottom edging (see Border).
Hanging Tab
Join blue at the center back of head Rnd 1, with the opening facing up.
Rows 1–8: Ch 1, sc in the next 6 sts, turn. (6 sts per row, 8 rows)
The tab is 1.8 in (4.6 cm) long. You’ll fold it over the ring during assembly. Fasten off, leaving a 12 in (30.5 cm) tail.
Small Pieces
Covered Hanging Ring (Blue)
Join blue around the 3 in (7.6 cm) ring. Work 46 sc around the ring, pushing the stitches together as you go. If any plastic still shows, add 2–4 more sc. Sl st to the first sc and fasten off.
Large Fin (make 2)
Rnd 1 (blue): In MR, ch 3 (counts as dc), then 9 dc. Sl st to the top of ch-3. (10)
Rnd 2: Ch 3, dc in the same st, then 2 dc in each st around. Sl st to join. (20)
Rnd 3: Ch 3, 2 dc in next st, dc in next, 2 dc in next; repeat around. Sl st to join. (30) Fasten off blue.
Rnd 4 (coral): Join coral. Ch 3, dc in next st, 2 dc in next st, dc in next 2, 2 dc in next; repeat around. Sl st to join. (40)
Rnd 5: Ch 1, then work 10 scallops around. Sl st to the first st. (10 scallops)
The scallops ruffle slightly. The fin measures about 4.25 in (10.8 cm) across.
Small Fin (make 2)
Rnd 1 (blue): In MR, ch 3 (counts as dc), then 7 dc. Sl st to join. (8)
Rnd 2: 2 dc in each st around. (16) Fasten off blue.
Rnd 3 (coral): Dc in next, 2 dc in next; repeat around. (24)
Rnd 4: Work 6 scallops around. (6 scallops)
The fin measures about 3.25 in (8.3 cm) across.
Tail Lobe (make 2)
Work flat in rows, all in BLO after Row 1, so ridges form across the lobe. Ch 1 at the start of each row does not count as a stitch.
Row 1 (blue): Ch 5. Sc in the 2nd ch from the hook and in each ch across, turn. (4)
Row 2: 2 sc in first st, sc 2, 2 sc in last st, turn. (6)
Row 3: Sc across. (6)
Rows 4–12: Repeat Rows 2–3: increase on even rows and work odd rows even. Totals:
– Row 4: 8
– Row 5: 8
– Row 6: 10
– Row 7: 10
– Row 8: 12
– Row 9: 12
– Row 10: 14
– Row 11: 14
– Row 12: 16
Stripes:
– Rows 1–5: blue
– Rows 6–7: coral
– Rows 8–10: blue
– Rows 11–12: coral
The lobe is 2.7 in (6.9 cm) tall and 4 in (10.2 cm) wide across Row 12.
Eye (make 2)
Rnd 1 (black): 6 sc in MR. (6) Fasten off black.
Rnd 2 (white): Join white. 2 sc in each st. (12)
Rnd 3: (Sc, inc) 6 times. (18) Sl st to join.
The eye is 1.25 in (3.2 cm) across.
Lips (Coral)
Foundation: Ch 8.
Rnd 1: Sc in the 2nd ch from the hook, sc in the next 5 ch, 3 sc in the last ch. Working along the other side of the chain, sc in the next 5 ch, then 2 sc in the same ch as the first sc. (16)
Rnd 2: 2 sc in the first st, sc 5, 2 sc in each of the next 3 sts, sc 5, 2 sc in each of the last 2 sts. (22)
Sl st to join and fasten off. The lips measure 2.5 × 1.25 in (6.4 × 3.2 cm).
To make the mouth crease, backstitch along the foundation chain with coral and pull it snug.
Make All Pieces
| Color | Pieces |
|---|---|
| Blue | head (part of body), hanging ring cover, 4 fin centers, tail lobe stripes, bottom edging |
| Cream | ridge round and mesh |
| Coral | lips, 4 fin edges, tail lobe stripes |
| White and black | 2 eyes |
Layout, top to bottom:
        [ hanging ring ]
             [tab]
      [  eye        eye  ]
      [     lips         ]   <- head
      [ cream ridge      ]
 [L fin] [ mesh rnds 2-6 ] [L fin]
         [ mesh bulge    ]
 [s fin] [ mesh rnds 11-14] [s fin]
         [ bottom ring   ]
     [tail lobe]  [tail lobe]
Joining (Assembly)
Use whipstitch with matching yarn. Pin every piece before you sew it.
- Hanging ring: Slide the tab through the covered ring and fold it down inside the head opening. Sew Row 8 to the inside of head Rnd 2, catching one loop per stitch: 6 stitches to 6 stitches.
- Eyes: Center them over head Rnds 9–13, with 7 stitches (1.75 in / 4.4 cm) between them. Sew around Rnd 3, stitch for stitch.
- Lips: Center them over Rnds 15–20, directly below the gap between the eyes, and sew around the edge.
- Large fins: Flatten the body so the side folds line up with the first mesh post of the round and the 9th post. Sew each large fin behind a side fold, over mesh Rnds 2–6. Stitch about 2 in (5.1 cm) of the blue center to the dc posts, so the coral edge sticks out past the body.
- Small fins: Sew them the same way over mesh Rnds 11–14.
- Tail lobes: Sew Row 1 of each lobe to the back of bottom edging Rnd 2, one at each side fold. Angle the lobes about 30° outward so they make a V around the ring.
Tension: Sew snugly but don’t pull hard enough to pucker the mesh.
Size checkpoint: Hang the holder up. It should measure about 21 in (53.3 cm) from the top of the ring to the tip of the tail.
Border (Bottom Edging)
Border gauge: 16 sc = 4 in (10.2 cm), the same as the head.
“Per side” here means one half of the tube when it’s laid flat, front or back.
Rnd 1 (cream): Continuing from Mesh Rnd 16, ch 1. Sc in each dc and in each ch-1 sp around. Sl st to the first sc. (16 dc + 16 sps = 32 sts, 16 per side) Fasten off cream.
Rnd 2 (blue): Join blue. (Sc 2, sc2tog) 8 times. (24 sts, 12 per side)
Rnd 3 (blue, over the ring): Hold the 2.5 in (6.4 cm) ring against the edge. Work every stitch through the next st and around the ring at the same time: (sc 3, 2 sc in next) 6 times. That’s 24 sts worked once each plus 6 added = 30 sts, 15 per side. Sl st to join and fasten off.
Top opening edging: Join blue at head Rnd 1 and sl st loosely in each st around. (18 sts, 9 per side) This firms up the opening for pushing bags in.
Why the math works:
– The ch-1 mesh has 2 stitches per mesh: 16 × 2 = 32 sts. At 4 sts per in that’s 8 in (20.3 cm), the same as the mesh circumference, so Rnd 1 neither flares nor gathers.
– Rnd 2 narrows the edge to 6 in (15.2 cm) to form the dispenser neck.
– The 6 increases in Rnd 3 give enough stitches to cover the ring completely.
Final Blocking
- Lightly spray the mesh body and fins with water.
- Stuff the body loosely with plastic bags or a rolled towel to shape the bulge.
- Pin each fin flat and ease the scallops open.
- Pin the tail lobes flat in a V shape.
- Leave everything until completely dry, about 12 hours.
- Remove the stuffing and check that the mesh posts run straight.
Final Quality-Control Checklist
- Head 48 sts, 5.1 in (13.0 cm) tall
- 16 mesh posts in every round, posts lined up
- Bulge 8 in (20.3 cm) wide flat
- Bottom edge 30 sc and the ring fully covered
- Fins placed symmetrically on both sides
- Eyes level and lips centered below them
- Hanging tab secure and the ring sits upright
- All ends woven in
Troubleshooting
- Mesh posts slant: You’re working into the ch-sp instead of into the dc. Put each dc into the top of the dc below.
- Head cone is lumpy: Stagger the increases on alternate increase rounds.
- Plastic shows on the ring: Add sc and push them together.
- Fins curl: Block them again with pins, or go down half a hook size for Rnd 5.
- Bags fall out the bottom: Work Rnd 2 of the edging with a smaller hook.
Care
Hand-wash in cool water and reshape while damp. Dry flat, with a rolled towel inside the body to keep its shape.
Final Notes
Bubbles relies on a chain of matching measurements:
– The head’s 48 stitches measure 12 in (30.5 cm) around.
– The mesh keeps the same 48 stitches, swells to 64 stitches (16 in / 40.6 cm), then tapers to 32 stitches (8 in / 20.3 cm).
– The edging matches those 32 stitches exactly, then narrows to 24 and covers the 2.5 in (6.4 cm) ring with 30 stitches.
If you check your gauge on the head, everything below it falls into place.
Happy crocheting!