

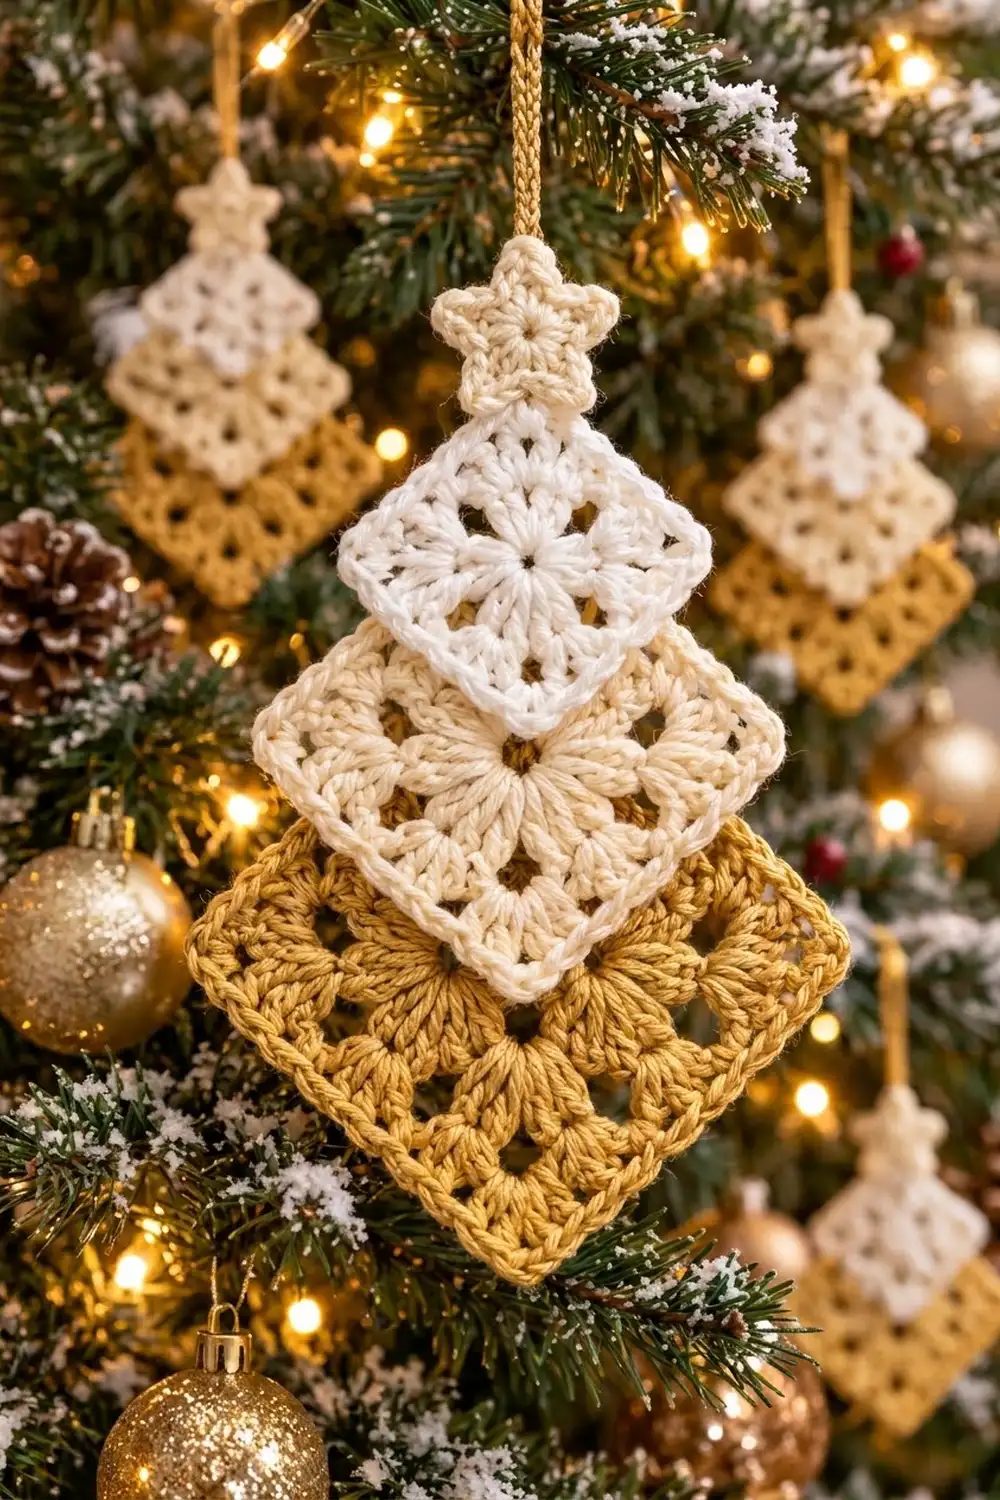
The Golden Glow Tree is a small Christmas ornament made from three granny squares turned on point and stacked into a tree shape. Each square starts with a flower-like center of eight clusters. It then squares off with lacy double crochet groups and ends with a neat single crochet edge. A little five-point star sits on top, and a firm gold cord makes the hanging loop.
The colors go from light at the top to warm at the bottom: bright white for the smallest square, soft cream for the middle square and the star, and mustard gold for the largest square and the loop. The look is classic and cozy. It works on a tree, on a gift package, or hung from a door knob.
This pattern uses US crochet terms. The finished ornament is 5.7 in (14.5 cm) wide at the gold square and 10.3 in (26.2 cm) tall from the star tip to the bottom point. The hanging loop adds about 2.5 in (6.4 cm).
Construction is simple. You make three squares from the same motif, stopping at a different round for each size, and finish each one with a single crochet edge. Then you make the star and the cord, layer the squares so each one overlaps the one below, and tack everything together.
Finished Size and Construction
- Finished size: 5.7 in (14.5 cm) wide x 10.3 in (26.2 cm) tall, plus a 2.5 in (6.4 cm) loop
- Skill level: Easy
- Terminology: US crochet terms
- Yarn weight: Sport (#2), cotton or cotton blend
- Hook: 3.0 mm
- Number of pieces: 5 (3 squares, 1 star, 1 cord)
- Layout: 3 squares stacked vertically on point, with the star on top
- Piece sizes: white 2.5 in (6.4 cm), cream 3.25 in (8.3 cm), gold 4.0 in (10.2 cm) square
- Size before edge round: white 2.25 in (5.7 cm), cream 3.0 in (7.6 cm), gold 3.75 in (9.5 cm)
- Edge depth: 1 round of sc, about 0.125 in (0.3 cm) per side
Materials
Choose a smooth, mercerized sport-weight cotton. It shows the stitches clearly and keeps the square corners crisp. The amounts below assume about 2 m per gram (roughly 100 m per 50 g).
- White: 6 g, about 12 m (white square)
- Cream: 10 g, about 20 m (cream square and star)
- Gold: 14 g, about 28 m (gold square and cord)
These amounts include a margin for swatching, tails, and sewing.
Tools:
- 3.0 mm crochet hook
- Tapestry needle
- Scissors
- Stitch markers (2-3)
- Ruler or tape measure
- Blocking mat and rust-proof pins
- Spray bottle with water
Abbreviations (US Terms)
- ch – chain
- sl st – slip stitch
- sc – single crochet
- hdc – half double crochet
- dc – double crochet
- sp(s) – space(s)
- st(s) – stitch(es)
- rep – repeat
- 3-dc cl – 3 double crochet cluster
Special stitches:
- 3-dc cl: [Yarn over, insert hook in ring, yarn over and pull up a loop, yarn over and pull through 2 loops] 3 times, then yarn over and pull through all 4 loops on the hook.
- Beginning cluster (beg cl): Ch 2, then work a 2-dc cluster the same way (2 partial dc closed together). The ch 2 and the 2-dc cluster together count as the first cluster.
Gauge and Checkpoints
Gauge matters because the three squares must step up evenly in size. Make the white square first and use it as your test piece.
- After Round 1: the flower center is about 1.25 in (3.2 cm) across.
- After Round 2: the square is 2.25 in (5.7 cm) from side to side.
- After Round 3: 3.0 in (7.6 cm).
- After Round 4: 3.75 in (9.5 cm).
- Edge Round: adds about 0.25 in (0.6 cm) to the total width, giving 2.5 in (6.4 cm), 3.25 in (8.3 cm), and 4.0 in (10.2 cm).
Measure flat, straight across the middle of the square from edge to edge, not from corner to corner.
If your Round 2 square is larger than 2.25 in (5.7 cm), switch to a 2.75 mm hook. If it is smaller, switch to a 3.25 mm hook. A difference of 0.25 in (0.6 cm) at Round 2 grows to almost 0.5 in (1.3 cm) by the gold square, so fix it early.
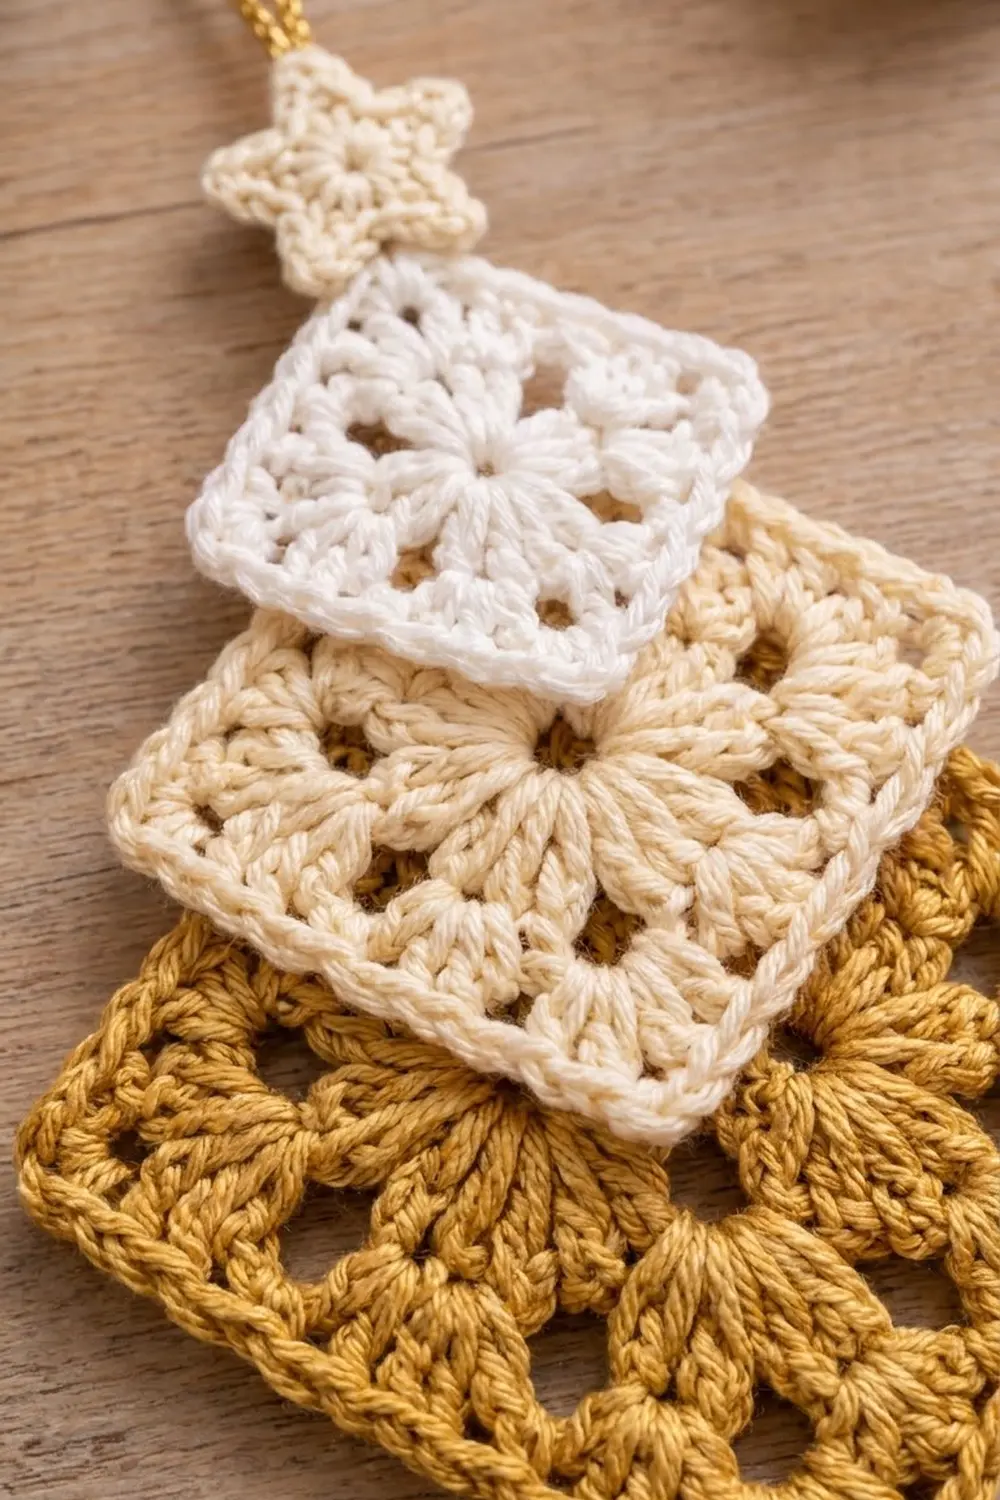
Granny Square Motif
All three squares use the same rounds. Work the white square through Round 2, the cream square through Round 3, and the gold square through Round 4. Then work the Edge Round on each one.
Round 1: Make a magic ring. Work a beg cl in the ring, ch 2, [3-dc cl in ring, ch 2] 7 times. Join with sl st to the top of the beg cl. Pull the ring closed. (8 clusters, 8 ch-2 sps)
Round 2: Sl st into the next ch-2 sp. Ch 3 (counts as dc). Work (2 dc, ch 2, 3 dc) in the same sp for the first corner, ch 1, 3 dc in the next ch-2 sp, ch 1. (3 dc, ch 2, 3 dc) in the next ch-2 sp, ch 1, 3 dc in the next ch-2 sp, ch 1; rep from * 2 more times. Join with sl st to the top of the ch 3. (36 dc: 9 dc per side; 4 ch-2 corner sps; 8 ch-1 sps)*
The cluster petals now point out between the dc groups, which gives the center its flower shape.
White square: stop here. Do not fasten off; go to the Edge Round.
Round 3 (cream and gold only): Sl st in the next 2 dc, then sl st into the corner ch-2 sp. Ch 3, (2 dc, ch 2, 3 dc) in the same sp, ch 1, [3 dc in next ch-1 sp, ch 1] 2 times. (3 dc, ch 2, 3 dc) in next corner sp, ch 1, [3 dc in next ch-1 sp, ch 1] 2 times; rep from * 2 more times. Join. (48 dc: 12 dc per side; 4 ch-2 corner sps; 12 ch-1 sps)*
Cream square: stop here and go to the Edge Round.
Round 4 (gold only): Sl st in the next 2 dc, then sl st into the corner ch-2 sp. Ch 3, (2 dc, ch 2, 3 dc) in the same sp, ch 1, [3 dc in next ch-1 sp, ch 1] 3 times. (3 dc, ch 2, 3 dc) in next corner sp, ch 1, [3 dc in next ch-1 sp, ch 1] 3 times; rep from * 2 more times. Join. (60 dc: 15 dc per side; 4 ch-2 corner sps; 16 ch-1 sps)*
Each growth round adds one 3-dc group and one ch-1 sp per side, so the dc count per side goes from 9 to 12 to 15.
Star Topper
Use cream.
Round 1: Make a magic ring, ch 1, work 10 sc in the ring. Join with sl st to the first sc. (10 sc)
Round 2 (points): Ch 4, sl st in 2nd ch from hook, sc in next ch, hdc in next ch, skip next sc, sl st in next sc; rep from * 4 more times, working the last sl st into the joining st. (5 points)*
Fasten off, leaving a 12 in (30.5 cm) tail for sewing. The star is about 1.5 in (3.8 cm) from point to point.
Hanging Cord
Use gold.
Ch 26. Sl st in the back bump of the 2nd ch from the hook and in the back bump of each ch across. (25 sl sts)
The slip stitches twist the chain slightly and give it a firm, braided look. The cord is about 5 in (12.7 cm) long. Fasten off, leaving a 6 in (15.2 cm) tail at each end.
Make All Pieces
- White: 1 square (Rounds 1-2 + Edge Round)
- Cream: 1 square (Rounds 1-3 + Edge Round) and 1 star
- Gold: 1 square (Rounds 1-4 + Edge Round) and 1 cord
Layout from top to bottom, with all squares on point and centered on one vertical line:
      [ gold loop ]
        [ star ]
       < white >
     <   cream   >
   <     gold      >
Border (Edge Round on Each Square)
The finished tree has no outer border. Instead, each square gets its own single crochet edge before joining. Because the squares are layered rather than sewn side by side, no seam stitches are added, and no square’s count depends on another square.
Edge gauge: about 5.2 sc per 1 in (2.5 cm).
Edge Round: Sl st in the next 2 dc, then sl st into the corner ch-2 sp. Ch 1, (sc, ch 2, sc) in the same corner sp. *Sc in each dc and in each ch-1 sp across to the next corner, (sc, ch 2, sc) in corner sp; rep from * around, skipping the last corner (it was worked at the start). Join with sl st to the first sc. Fasten off and weave in the ends.
The counts per side include both corner sc on that side (one from each corner group):
- White (after Round 2): 9 dc + 2 ch-1 sps = 11 sc, + 2 corner sc = 13 sc per side; 4 x 13 = 52 sc total, plus 4 ch-2 corners.
- Cream (after Round 3): 12 dc + 3 ch-1 sps = 15 sc, + 2 corner sc = 17 sc per side; 4 x 17 = 68 sc total, plus 4 ch-2 corners.
- Gold (after Round 4): 15 dc + 4 ch-1 sps = 19 sc, + 2 corner sc = 21 sc per side; 4 x 21 = 84 sc total, plus 4 ch-2 corners.
Why the math works: each growth round adds 0.75 in (1.9 cm) of width and 4 sc to each side’s edge (3 dc + 1 ch-1 sp). Four sc in 0.75 in is about 5.3 sc per inch, which is close to the 5.2 sc per inch edge gauge. Check it: 13 sc in 2.5 in, 17 sc in 3.25 in, and 21 sc in 4.0 in all work out to 5.2-5.25 sc per inch. So the edge stays flat on every size.
Joining
The pieces are joined by layering and tacking them, not by seaming edge to edge.
- Block the squares first (see Final Blocking) so the corners are sharp before you layer them.
- Place the gold square on point, right side up.
- Add the cream square. Center it on point over the gold so its bottom corner sits 2.5 in (6.4 cm) below the gold’s top corner. The gold’s top corner now lands just below the cream’s center ring. Pin.
- Add the white square. Center it over the cream so its bottom corner sits 2.0 in (5.1 cm) below the cream’s top corner. The cream’s top corner now lands just above the white’s center ring. Pin.
- Tack the layers. With matching yarn and a tapestry needle, make small running stitches through the back loops along the upper square’s two lower sides, catching only the fabric of the square underneath. Make one stitch every 2 sc. Add a firm tack at the upper square’s bottom ch-2 corner. Add another tack through the center of the upper square into the lower square’s top ch-2 corner.
- Add the star. Center it over the white square’s top corner, overlapping by 0.5 in (1.3 cm), with one point straight up. Sew the two lower points and the star’s center to the white square.
- Add the cord. Fold it in half and sew both ends to the back of the star and to the white square’s top ch-2 corner.
Tension advice: keep the sewing stitches snug but not tight. If the upper square ripples or the lower one puckers, your stitches are too tight. Keep the stitches on the back so they don’t show.
Size checkpoint: star 1.5 in + white diagonal 3.5 in + cream diagonal 4.6 in + gold diagonal 5.7 in = 15.3 in (38.9 cm). Subtract the overlaps: 0.5 in + 2.0 in + 2.5 in = 5.0 in (12.7 cm). The result is 10.3 in (26.2 cm) tall. The width is the gold square’s diagonal, 5.7 in (14.5 cm).
Final Blocking
- Mist the joined ornament lightly with water until it is damp but not soaked.
- Lay it face up on a blocking mat.
- Pin the side corners of each square first, checking that all three squares share the same vertical center line.
- Pin the bottom gold corner and the star’s top point so they are 10.3 in (26.2 cm) apart.
- Pin each star point outward.
- Gently press the cluster petals flat with your fingers.
- Let it dry completely, about 6-8 hours.
- Unpin and check the measurements once more.
Final Quality-Control Checklist
- White square: 13 sc per side, 2.5 in (6.4 cm)
- Cream square: 17 sc per side, 3.25 in (8.3 cm)
- Gold square: 21 sc per side, 4.0 in (10.2 cm)
- Every corner has a ch-2 sp and lies sharp
- The squares are centered on one vertical line
- The overlaps measure 2.0 in (5.1 cm) and 2.5 in (6.4 cm)
- The star has 5 even points, with one pointing straight up
- The cord is secure and the ornament hangs straight
- Total height is 10.3 in (26.2 cm) and width is 5.7 in (14.5 cm)
- All ends are woven in on the back
Troubleshooting
The center ring has a hole. Pull the magic ring tighter before joining Round 1, then weave the tail in a circle to lock it.
The square cups. Your dc groups are too tight. Go up one hook size or loosen your ch-1s.
The square ruffles. Check that you worked only 3 dc in each ch-1 sp, not 4.
The corners are rounded. Make sure every corner has ch 2 in both the dc rounds and the Edge Round, and pin the corners sharply when blocking.
The edge round waves. Recount: you should have exactly one sc per dc and one sc per ch-1 sp.
The ornament hangs crooked. Re-center the cord on the star and check that the squares share one center line.
The star points curl. Block with a pin in each point, or work the ch 4 a little more loosely.
Care
Hand wash in cool water with mild soap and lay flat to dry, reshaping the corners. Store the ornament flat or hanging so the corners don’t crease.
Final Notes
The measurement chain is short and easy to check. Round 2 sets the gauge at 2.25 in (5.7 cm). Each growth round adds 0.75 in (1.9 cm), and the Edge Round adds 0.25 in (0.6 cm). That gives squares of 2.5 in (6.4 cm), 3.25 in (8.3 cm), and 4.0 in (10.2 cm), with 13, 17, and 21 sc per side. Stacked with overlaps of 2.0 in (5.1 cm) and 2.5 in (6.4 cm) and topped with a 1.5 in (3.8 cm) star, they make a tree 10.3 in (26.2 cm) tall and 5.7 in (14.5 cm) wide.
Make one, then make a few more in your own color mix for a matching set.
Happy crocheting!