

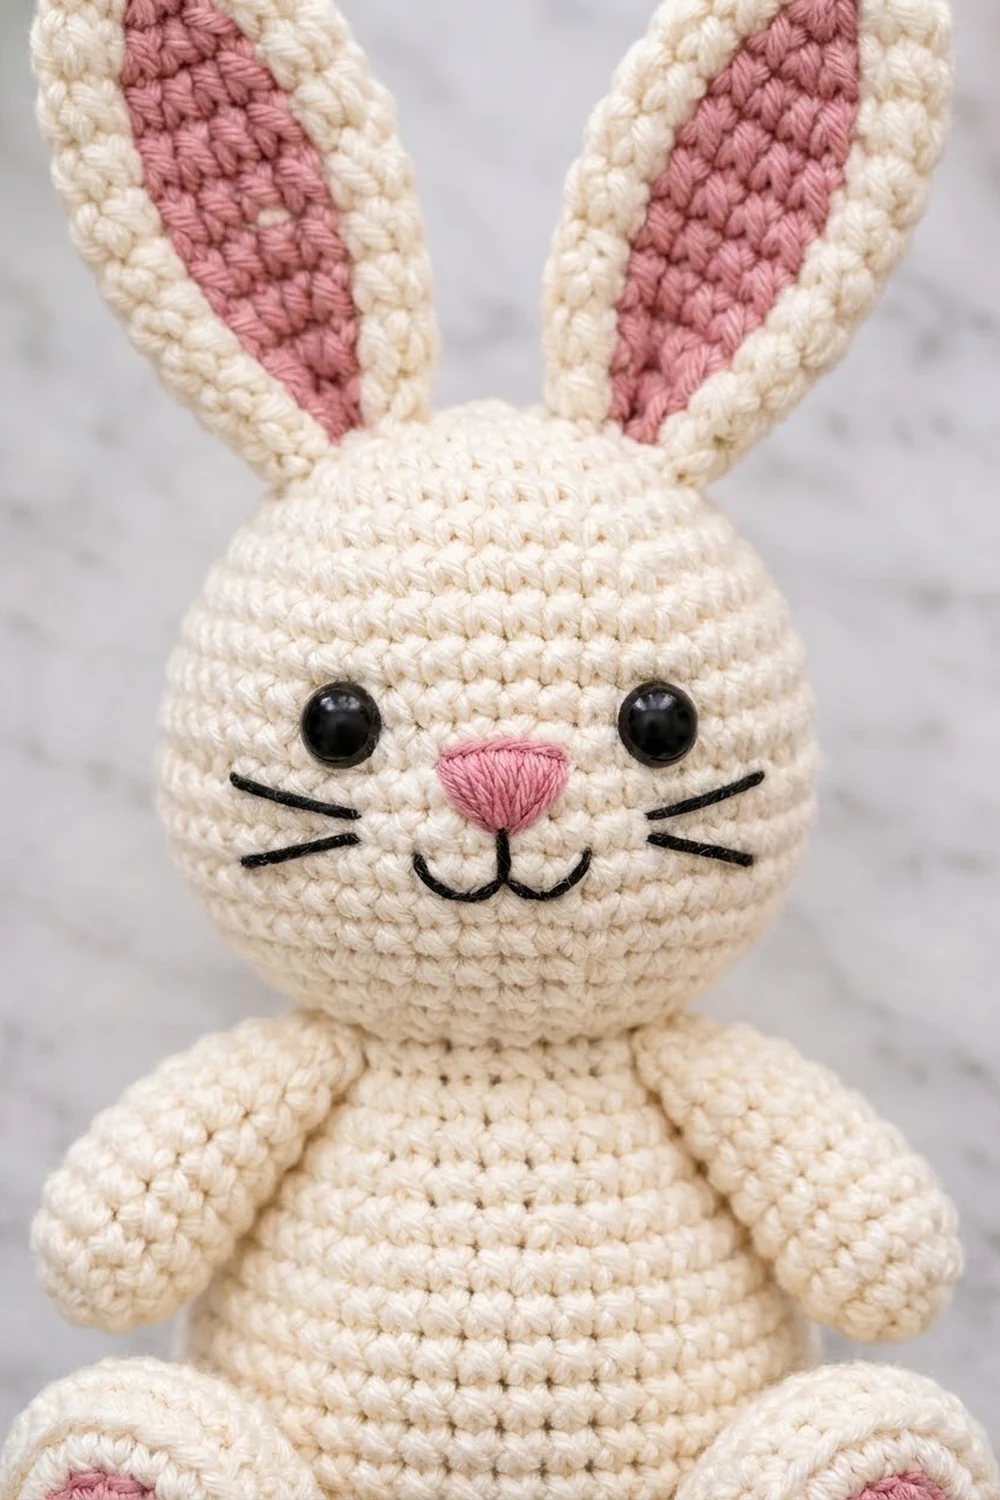
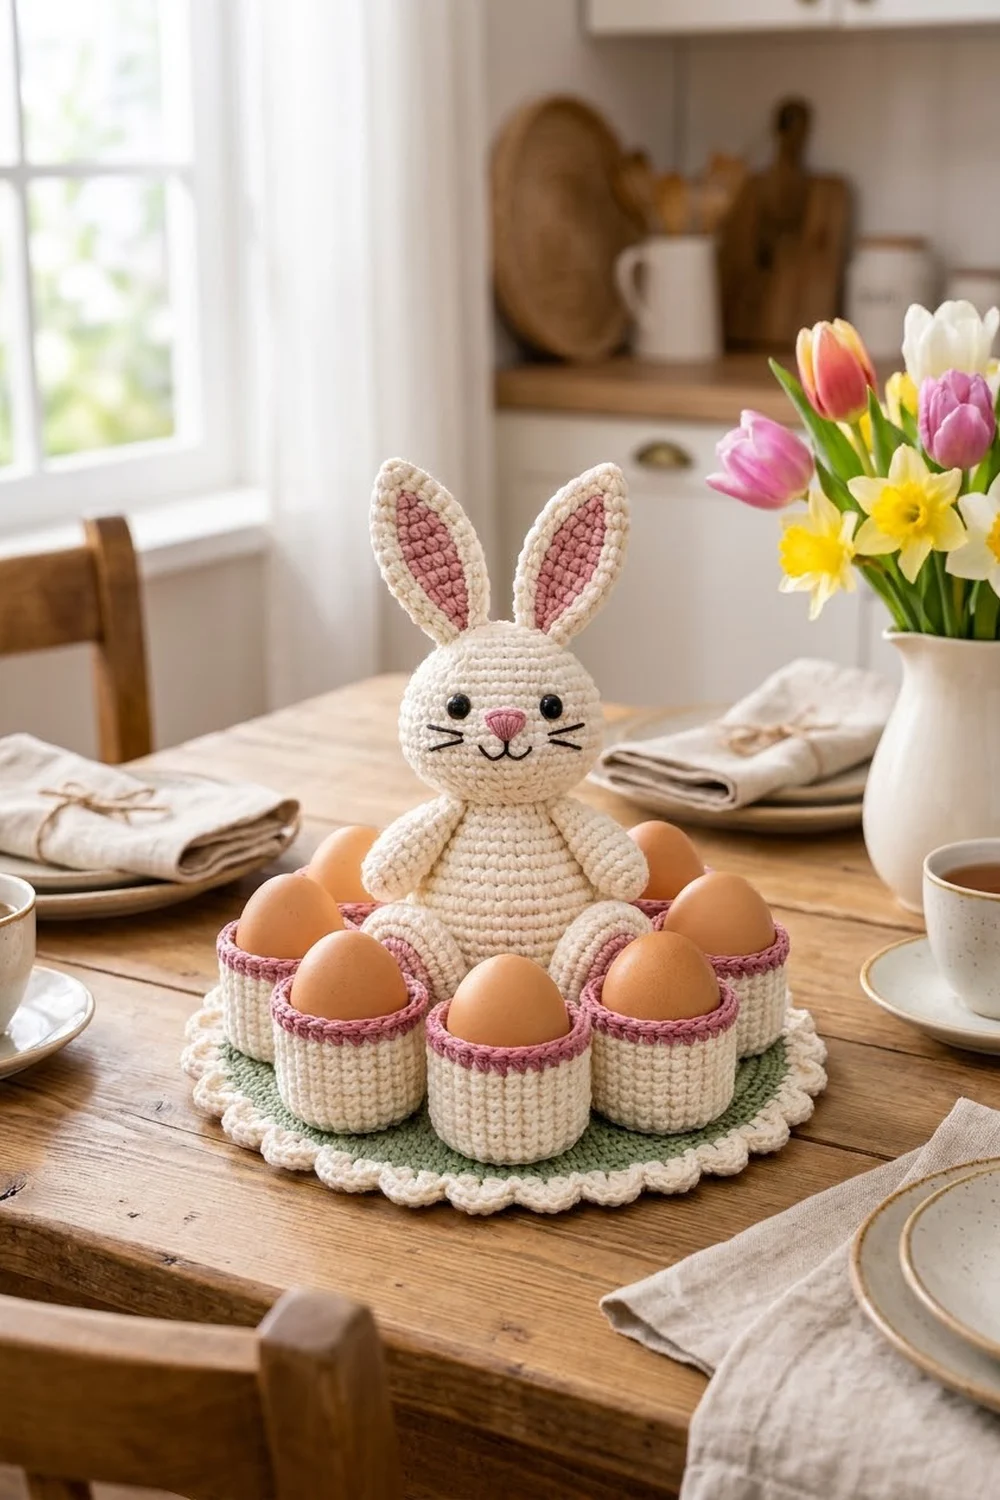
This Bunny Meadow Easter Egg Holder is a table centerpiece. A cream amigurumi bunny sits in the middle of a sage-green round base, with six cream egg cups in a ring around her. Each cup has a rose-pink rope rim. The bunny has pink inner ears, pink foot pads, and an embroidered face.
The colors are sage green, warm cream, and dusty rose, with black for the face details. A cream scalloped border edges the green base, so it looks like a small meadow with a lace trim. The style is soft cottage Easter, and the holder is sturdy enough for real eggs.
This pattern uses US crochet terms. The finished base is 10.3 in (26.2 cm) across. Each cup is 2 in (5.1 cm) wide and 1.9 in (4.8 cm) tall, and the seated bunny is about 7 in (17.8 cm) tall to the ear tips.
Everything is worked in single crochet. You make the flat base in joined rounds and add a two-round scalloped border. Each cup is worked bottom-up in one piece. The bunny is stuffed amigurumi with flat ears. To finish, you sew the bunny to the center of the base and the six cups around her.
Finished Size and Construction
- Finished size: 10.3 in (26.2 cm) diameter base; bunny about 7 in (17.8 cm) tall
- Skill level: Intermediate
- Terminology: US
- Yarn weight: Worsted (#4) cotton
- Hook: 3.5 mm (E-4)
- Number of pieces: 16 (1 base, 6 cups, 9 bunny pieces)
- Layout: Bunny in the center; 6 cups evenly spaced in a ring
- Cup size: 2 in (5.1 cm) wide x 1.9 in (4.8 cm) tall
- Base before border: 8.8 in (22.4 cm)
- Border depth: 0.75 in (1.9 cm)
Materials
Use a smooth worsted cotton of about 190 m per 100 g. Cotton keeps the cups standing upright and stops the base from stretching.
- Sage green (base): 35 g, 67 m
- Cream (bunny, cups, border): 110 g, 209 m
- Dusty rose (ears, soles, rims, nose): 20 g, 38 m
- Black (whiskers, mouth): about 2 m of yarn or embroidery floss
Tools:
- 3.5 mm (E-4) hook
- Two 8 mm black safety eyes
- About 40 g polyester fiberfill
- Optional: 1 tbsp poly pellets in a small nylon pouch
- Tapestry needle, stitch markers, and pins
- Scissors
The quantities above include about 20% extra to allow for gauge differences and a test piece.
Abbreviations (US Terms)
- ch: chain
- sl st: slip stitch
- sc: single crochet
- dc: double crochet
- inc: 2 sc in the same stitch
- dec: single crochet two together (invisible decrease recommended)
- BLO: back loop only
- MR: magic ring
- st(s): stitch(es)
- Rnd: round
Special stitch: reverse sc (crab stitch). Work from left to right. Insert the hook into the next stitch to the right, yarn over, and pull up a loop. Yarn over again and pull through both loops. This makes a twisted, rope-like edge.
Gauge and Checkpoints
Gauge: 18 sc and 20 rounds = 4 in (10.2 cm). In a flat circle, each round adds 0.2 in (0.5 cm) to the radius. That means the diameter is 0.4 in (1.0 cm) times the round number.
Make one egg cup first. It is a quick, complete gauge test. Check these measurements:
- Cup after Rnd 5: 2 in (5.1 cm) across
- Cup after Rnd 13: sides 1.6 in (4.1 cm) tall
- Base after Rnd 7: 2.8 in (7.1 cm)
- Base after Rnd 14: 5.6 in (14.2 cm)
- Base after Rnd 22: 8.8 in (22.4 cm)
If your pieces come out too big, go down 0.25 mm. If they are too small, go up 0.25 mm. The bunny’s body has to match the base at Rnd 7, so use the same hook for every piece.
Base (Sage Green)
Work in joined rounds. At the end of each round, sl st to the first sc. Start each round with ch 1, which does not count as a stitch.
Rnd 1: In a MR, work 6 sc and join. (6)
Rnd 2: Inc in each st. (12)
Rnd 3: (sc 1, inc) x 6. (18)
Odd Rnds 5–21: (sc [rnd number − 2], inc) x 6. Each round’s total is 6 times its round number.
Even Rnds 4–22: Stagger the increases so the edge stays round. Work sc [(rnd number − 2) ÷ 2], inc, then (sc [rnd number − 2], inc) x 5, then sc [(rnd number − 2) ÷ 2]. Each round’s total is 6 times its round number.
Key counts: Rnd 4 (24), Rnd 7 (42), Rnd 10 (60), Rnd 14 (84), Rnd 18 (108), Rnd 22 (132).
Fasten off. The base now measures 8.8 in (22.4 cm) across, with 132 sts.
Egg Cups (Make 6)
Work each cup in a continuous spiral. Mark the first st of each round.
With cream:
Rnd 1: In a MR, work 6 sc. (6)
Rnd 2: Inc x 6. (12)
Rnd 3: (sc 1, inc) x 6. (18)
Rnd 4: (sc 2, inc) x 6. (24)
Rnd 5: (sc 3, inc) x 6. (30) The bottom should measure 2 in (5.1 cm) across.
Rnd 6: BLO sc in each st. (30) This turns the wall upright and leaves a ring of free front loops for sewing.
Rnds 7–13: Sc in each st. (30)
Change to rose:
Rnd 14: Sc in each st, then sl st to join. (30)
Rnd 15: Ch 1, then reverse sc in each st. Join. (30)
Fasten off and weave in the ends. The cup should be 1.9 in (4.8 cm) tall.
Bunny
Work all bunny pieces in continuous spirals unless the pattern says otherwise. Leave long tails for sewing.
Head (Cream)
Rnd 1: 6 sc in a MR. (6)
Rnd 2: Inc x 6. (12)
Rnd 3: (sc 1, inc) x 6. (18)
Rnd 4: (sc 2, inc) x 6. (24)
Rnd 5: (sc 3, inc) x 6. (30)
Rnd 6: (sc 4, inc) x 6. (36)
Rnds 7–14: Sc in each st. (36)
Insert the safety eyes between Rnds 10 and 11, with 6 sts between them.
Rnd 15: (sc 4, dec) x 6. (30)
Rnd 16: (sc 3, dec) x 6. (24)
Rnd 17: (sc 2, dec) x 6. (18) Stuff firmly.
Rnd 18: (sc 1, dec) x 6. (12)
Rnd 19: Dec x 6. (6)
Close the opening and fasten off. The head is about 2.5 in (6.4 cm) across.
Body (Cream)
Rnds 1–7: Increase the same way as Rnds 1–7 of the base: 6, 12, 18, 24, 30, 36, 42. The flat bottom is 2.8 in (7.1 cm) across.
Rnds 8–15: Sc in each st. (42)
Rnd 16: (sc 5, dec) x 6. (36)
Rnds 17–18: Sc in each st. (36)
Rnd 19: (sc 4, dec) x 6. (30)
Rnds 20–21: Sc in each st. (30)
Rnd 22: (sc 3, dec) x 6. (24)
Rnd 23: Sc in each st. (24)
If you are using pellets, place the pouch in the bottom. Stuff firmly and keep the bottom flat. Leave the top open. The body is about 3 in (7.6 cm) wide and 3.3 in (8.4 cm) tall.
Arms (Make 2, Cream)
Rnd 1: 6 sc in a MR. (6)
Rnd 2: (sc 1, inc) x 3. (9)
Rnd 3: (sc 2, inc) x 3. (12)
Rnds 4–12: Sc in each st. (12)
Stuff the lower half only. Flatten the opening and work 6 sc through both layers to close it. Each arm is about 2.6 in (6.6 cm) long.
Legs with Pink Soles (Make 2)
With rose:
Rnd 1: Ch 6. Sc in the 2nd ch from the hook and in the next 3 ch, then work 3 sc in the last ch. Working along the other side of the chain, sc in the next 3 ch, then work 2 sc in the first ch. (12)
Rnd 2: 2 sc in the first st, sc 3, 2 sc in each of the next 3 sts, sc 3, then 2 sc in each of the last 2 sts. (18)
Change to cream:
Rnd 3: (sc 2, inc) x 6. (24) This makes the cream ring around the pink pad.
Rnd 4: BLO sc in each st. (24)
Rnds 5–8: Sc in each st. (24)
Rnd 9: (sc 2, dec) x 6. (18)
Rnd 10: (sc 1, dec) x 6. (12)
Stuff, flatten the opening, and sew it closed. Each sole is about 1.7 in (4.3 cm) long.
Ears (Make 2)
With rose:
Rnd 1: Ch 10. Sc in the 2nd ch from the hook and in the next 7 ch, then work 3 sc in the last ch (this is the tip). Working along the other side, sc in the next 7 ch, then work 2 sc in the first ch (this is the ear base). Join. (20)
Change to cream:
Rnd 2: Ch 1. Sc 8, 2 sc in each of the next 3 sts, sc 7, then 2 sc in each of the last 2 sts. Join. (25)
Rnd 3: Ch 1. Sc 11, then work (sc, ch 1, sc) in the next st for a pointed tip. Sc 9, then 2 sc in each of the last 4 sts. Join. (30 sc plus a ch-1 tip)
The ears are flat, single-layer pieces. Each one is about 2.6 in (6.6 cm) long and 1.2 in (3.0 cm) wide.
Tail (Cream)
Rnd 1: 6 sc in a MR. (6)
Rnd 2: Inc x 6. (12)
Rnds 3–4: Sc in each st. (12)
Rnd 5: Dec x 6. (6)
Stuff and close. The tail is about 0.9 in (2.3 cm) across.
Face and Bunny Assembly
With rose, satin-stitch a small triangle nose one round below the eyes, centered between them. With black, backstitch a small “w” mouth below the nose and three whiskers on each side.
Then sew the pieces together:
- Sew the open top of the body to the head around Rnds 15–17.
- Sew the arms to the sides of the body at Rnd 18, so they curve forward.
- Sew the legs to the lower front of the body at Rnds 8–10, with the soles facing forward.
- Fold the base of each ear in half. Sew the ears to the top of the head at Rnds 3–4, about 4 sts apart.
- Sew the tail to the back at Rnd 6.
Make All Pieces
- Sage green: 1 base
- Cream: 1 head, 1 body, 2 arms, 1 tail, 6 cups, border
- Rose: 2 ear centers, 2 soles, 6 cup rims, nose
Layout (seen from above, with the bunny facing 6 o’clock):
            [11]   [1]
      [9]      BUNNY      [3]
            [7]    [5]
             (feet)
The cups sit at 1, 3, 5, 7, 9, and 11 o’clock. The bunny’s feet rest over the gap at 6 o’clock.
Joining
Bunny to base: The body and the base both have 42 sts at Rnd 7, so you can sew them stitch for stitch. Pin the bottom edge of the body over base Rnd 7, with the face toward 6 o’clock. Whipstitch once into each of the 42 stitch pairs.
Cups to base: Place 6 markers on base Rnd 14 (84 sts), 14 sts apart, starting at 1 o’clock. Center a cup over each marker. Whipstitch through each of the 30 free front loops of cup Rnd 5 and into the base underneath. That is 30 stitches per cup.
Tension: Pull the stitches just snug. If you pull too hard, the base will pucker. If you sew too loosely, the cups will tilt.
Size checkpoint: The center of each cup sits 2.8 in (7.1 cm) from the middle of the base. The ring of cups spans 7.6 in (19.3 cm). There is 0.8 in (2.0 cm) between neighboring cups and 0.6 in (1.5 cm) of green outside the ring.
Border
Border gauge: The same as the base, 0.2 in (0.5 cm) per sc round. Each scallop is about 0.55 in (1.4 cm) deep.
Work the border before you sew anything to the base, while it still lies flat.
Rnd 1 (cream): Join cream in any st of Rnd 22 and ch 1. Work (sc 21, inc) x 6 and join. That is 132 sts worked 1 into each existing st, plus 6 increases, for 138 sts.
Rnd 2 (cream): Ch 1. Sc in the first st, then skip 2, 7 dc in the next st, skip 2, sc in the next st. Repeat from * around. End with skip 2, 7 dc, skip 2, and join to the first sc. You will have 23 scallops and 184 sts (23 sc + 161 dc).
Why the math works: Rnd 1 keeps the base’s pattern of 6 increases per round, so it lies flat. Each scallop uses 6 sts, and 138 ÷ 6 = 23 exactly, so no scallop is cut short at the join. The border adds 0.75 in (1.9 cm) on each side: 8.8 + 0.75 + 0.75 = 10.3 in (26.2 cm).
Final Blocking
- Before you assemble anything, mist the base until it is damp.
- Pin it to a 10.3 in (26.2 cm) circle on a blocking mat.
- Pin out the tip of each scallop.
- Fill the cups with rolled paper so they dry as straight cylinders.
- Let everything dry completely, then remove the pins and paper.
- Assemble the pieces as described in Joining.
Final Quality-Control Checklist
- [ ] Base lies flat: 8.8 in (22.4 cm) before the border, 10.3 in (26.2 cm) after
- [ ] 23 even scallops
- [ ] Six cups, each 2 in (5.1 cm) wide and 1.9 in (4.8 cm) tall
- [ ] Rose rims are rope-twisted all the way around
- [ ] Bunny sits upright
- [ ] Eyes are level and whiskers are symmetrical
- [ ] Cups are 14 sts apart on Rnd 14
- [ ] All ends are woven in
Troubleshooting
- Base ruffles: Your tension loosened. Use a hook 0.25 mm smaller for the outer rounds.
- Base curls up: You missed some increases. Recount Rnd 14 (84) and Rnd 22 (132).
- Cup walls flare out: Rnd 6 must be worked in the BLO.
- Eggs wobble in the cups: Make the cups one hook size smaller.
- Bunny tips forward: Add pellets, or flatten the bottom before sewing.
- Ears flop: Steam-block them flat.
Care
Spot clean with mild soap and cool water, then air-dry flat. Use hard-boiled eggs only, never raw.
Final Notes
Each measurement builds on the one before. The gauge is 0.2 in (0.5 cm) per round. Rnd 7 is 2.8 in (7.1 cm), which matches the bunny’s bottom. Rnd 14 has 84 sts, giving 6 cup positions 14 sts apart. Rnd 22 is 8.8 in (22.4 cm), and the border adds 0.75 in (1.9 cm) per side for a finished size of 10.3 in (26.2 cm).
Happy crocheting!