

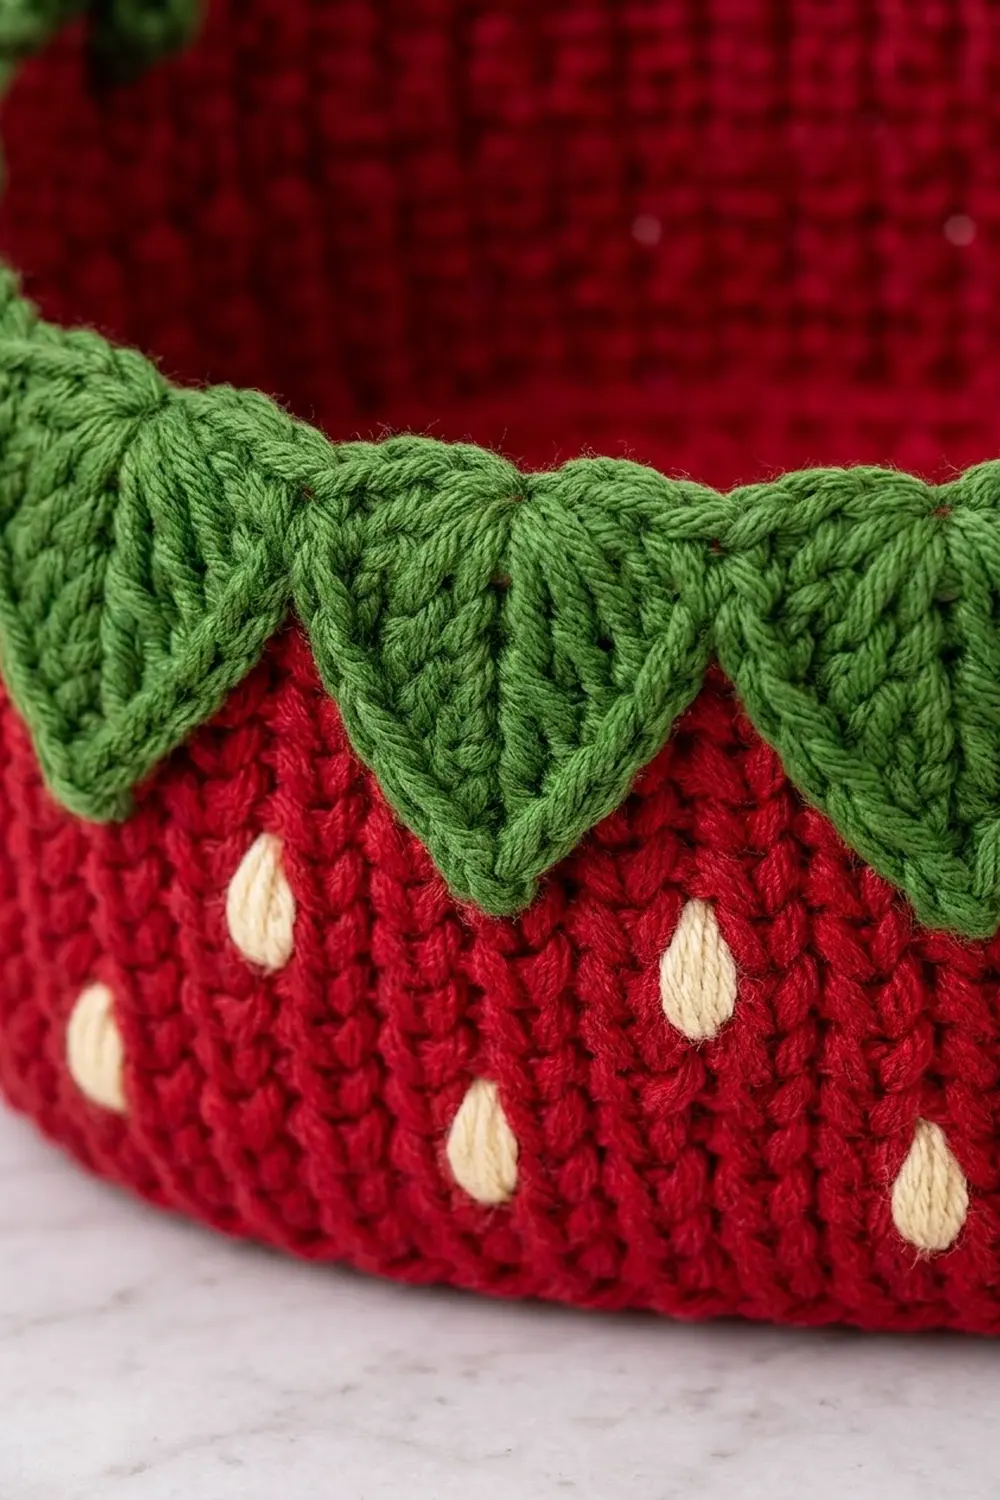
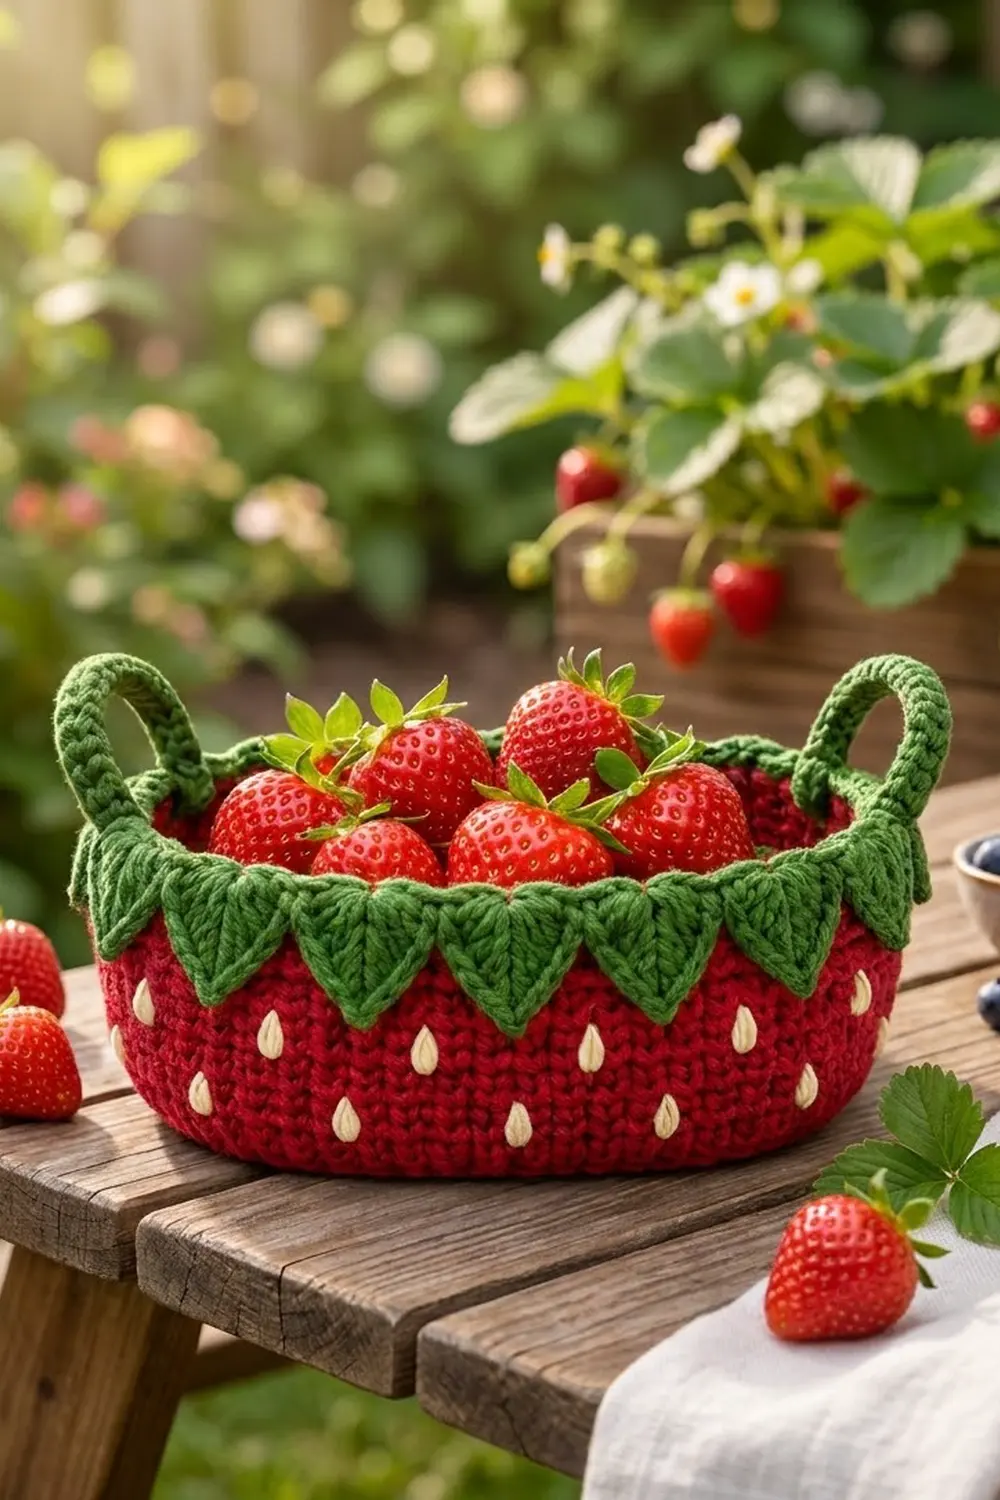
This little oval basket looks just like a ripe strawberry. The body is worked in deep berry red with a knit-look texture. Small cream seeds are scattered across the walls, and a ring of green pointed leaves hangs over the rim like a strawberry cap. Two green rope-style handles stand up at the curved ends.
The style is cottage-kitchen and playful, but the basket is sturdy. It holds fruit, yarn, small toys, or bathroom bits. The colors are red, leaf green, and cream.
This pattern uses US crochet terms. The finished basket measures about 10.25 in (26.0 cm) long, 5 in (12.7 cm) wide, and 4.5 in (11.4 cm) tall at the rim. The handles rise about 3 in (7.6 cm) above the rim.
Construction is simple. You crochet an oval single crochet base, turn up the walls in waistcoat stitch, and finish with a red rim round. Then you make 16 leaves, join them into one leaf band, crochet that band onto the rim, and add a crab stitch edge. You sew the two handles on last and embroider the seeds.
Finished Size and Construction
- Finished size: about 10.25 in x 5 in (26.0 x 12.7 cm) base, 4.5 in (11.4 cm) tall
- Skill level: Intermediate
- Terminology: US crochet terms
- Yarn weight: Bulky (#5)
- Hook: 6 mm (US J-10)
- Number of pieces: 19 (1 basket body, 16 leaves, 2 handles)
- Layout: 16 leaves in one ring around the rim, 1 handle centered on each curved end
- Piece size: body as above; each leaf about 1.7 in (4.3 cm) wide x 2 in (5.1 cm) long; each handle about 4 in x 1.25 in (10.2 x 3.2 cm) when flattened
- Size before border: 4 in (10.2 cm) wall height after Rnd 21
- Border depth: about 0.5 in (1.3 cm) for the joining round plus the crab stitch edge
Materials
Choose a firm bulky cotton or cotton-blend yarn with about 85 m per 100 g. Cotton holds the basket shape better than acrylic. A smooth, tightly plied yarn shows the waistcoat stitch V-columns most clearly.
- Red: 150 g, about 125 m
- Green: 70 g, about 60 m
- Cream: 5 g, about 5 m
These amounts include a margin of roughly 15 percent for swatching and differences in tension.
Tools:
- 6 mm (US J-10) crochet hook
- Tapestry needle
- 4 stitch markers
- Scissors
- Measuring tape
- Pins and a spray bottle for blocking
Abbreviations (US Terms)
- ch – chain
- sl st – slip stitch
- sc – single crochet
- sc2tog – single crochet 2 together
- sc3tog – single crochet 3 together
- inc – 2 sc in the same stitch
- BLO – back loop only
- st(s) – stitch(es)
- rnd(s) – round(s)
- rep – repeat
Waistcoat stitch (wst): Insert the hook through the center of the V of the stitch below, between its two vertical legs (not under the top loops). Yarn over, pull up a loop, yarn over, pull through both loops on the hook. This makes the knit-look columns.
Crab stitch (reverse sc): Working from left to right, insert the hook into the next stitch to the right, pull up a loop, yarn over, pull through both loops.
Lazy daisy: A single detached chain stitch in embroidery, held down at the tip with a small straight stitch. It makes a teardrop seed.
Gauge and Checkpoints
Gauge: 12 sts and 13 rnds = 4 in (10.2 cm) in sc or waistcoat stitch, worked in joined rounds.
Use the base as your test piece. Work Rnds 1–8, lay it flat, and measure it before you start the walls.
- After Rnd 1: about 6 in (15.2 cm) long
- After Rnd 5: about 8.25 in x 3 in (21.0 x 7.6 cm)
- After Rnd 8: about 10.25 in x 5 in (26.0 x 12.7 cm)
- After Rnd 15: walls just over 2 in (5.1 cm) tall
- After Rnd 21: walls 4 in (10.2 cm) tall
- Finished rim: 4.5 in (11.4 cm) tall
If your base is too big, go down one hook size. If it is too small, go up one hook size. If the base ruffles, your stitches are too loose. If it cups up before Rnd 9, they are too tight. Fix the base before you move on, because every later count depends on its 80 stitches.
Basket Body
Work in joined rounds. The ch 1 at the start of each round does not count as a stitch. Join each round with a sl st to the first sc.
Each round has four sections: curved end A, side 1, curved end B, side 2.
Base (red)
Rnd 1: Ch 19. Work 3 sc in 2nd ch from hook (end A), sc in next 16 ch (side 1), 3 sc in last ch (end B). Rotate and work along the free loops of the chain: sc in next 16 ch (side 2). Join. (38 sts: 3 / 16 / 3 / 16)
Rnd 2: Ch 1, inc in each of next 3 sts, sc in next 16 sts, inc in each of next 3 sts, sc in next 16 sts. Join. (44 sts: 6 / 16 / 6 / 16)
Rnd 3: Ch 1, (sc in next st, inc) 3 times, sc in next 16 sts, (sc in next st, inc) 3 times, sc in next 16 sts. Join. (50 sts: 9 / 16 / 9 / 16)
Rnd 4: Ch 1, (sc in next 2 sts, inc) 3 times, sc in next 16 sts, rep once more. Join. (56 sts: 12 / 16 / 12 / 16)
Rnd 5: Ch 1, (sc in next 3 sts, inc) 3 times, sc in next 16 sts, rep once more. Join. (62 sts: 15 / 16 / 15 / 16)
Rnd 6: Ch 1, (sc in next 4 sts, inc) 3 times, sc in next 16 sts, rep once more. Join. (68 sts: 18 / 16 / 18 / 16)
Rnd 7: Ch 1, (sc in next 5 sts, inc) 3 times, sc in next 16 sts, rep once more. Join. (74 sts: 21 / 16 / 21 / 16)
Rnd 8: Ch 1, (sc in next 6 sts, inc) 3 times, sc in next 16 sts, rep once more. Join. (80 sts: 24 / 16 / 24 / 16)
Each growth round adds 6 stitches, 3 at each curved end. The straight sides stay at 16.
Place a marker in the first stitch of each section: st 1 (end A), st 25 (side 1), st 41 (end B), st 65 (side 2).
Walls (red)
Rnd 9: Ch 1, sc in BLO of each st around. Join. (80 sts) The unused front loops form a neat ridge where the base turns into the wall.
Rnds 10–20: Ch 1, wst in each st around. Join. (80 sts each round)
Keep the count at exactly 80. The walls should rise straight up without flaring.
Rnd 21 (rim): Ch 1, sc in each st around, working under both top loops. Join. (80 sts: 24 / 16 / 24 / 16) Fasten off.
The walls now measure 4 in (10.2 cm) from the base ridge to the top of Rnd 21.
Leaves (make 16, green)
Row 1: Ch 6, sc in 2nd ch from hook and in each ch across. (5 sts)
Rows 2–3: Ch 1, turn, sc in each st across. (5 sts)
Row 4: Ch 1, turn, sc2tog, sc in next st, sc2tog. (3 sts)
Row 5: Ch 1, turn, sc in each st across. (3 sts)
Row 6: Ch 1, turn, sc3tog, ch 2, sl st in 2nd ch from hook to form the point. (1 st plus point) Fasten off and weave in ends.
Vein: With the right side facing, work surface sl sts down the center column, from the middle of the foundation edge to the tip. This raised line makes the leaf vein.
Each leaf is about 1.7 in (4.3 cm) wide across the top and 2 in (5.1 cm) long to the tip.
Make All Pieces
- Red: 1 basket body
- Green: 16 leaves, 2 handles
- Cream: 20 embroidered seeds (stitched onto the body, not separate pieces)
Rim layout (one leaf per 5 rim stitches):
Rim sts:   1-24 (End A)  | 25-40 (Side 1) | 41-64 (End B)  | 65-80 (Side 2)
Leaves:    L1-L5*        | L6-L8          | L9-L13*        | L14-L16
Handles:   H1 on L3      | --             | H2 on L11      | --
* L5 covers sts 21-25 and L13 covers sts 61-65, straddling the turn.
Leaf 1 covers rim sts 1–5, leaf 2 covers sts 6–10, and so on. Leaves 1–8 cover sts 1–40, and leaves 9–16 cover sts 41–80.
Joining
Leaf band: Lay the 16 leaves in a row, right sides facing you, points down. Join green to the foundation edge of leaf 1. Sc in each of the 5 free loops of the foundation chain of leaf 1. Then continue directly into leaf 2 and work 5 sc. Continue across all 16 leaves. (80 sts) Check that the band is not twisted, then sl st to the first sc to form a ring.
That gives 5 sts x 16 leaves = 80 sts, which matches the 80 rim stitches exactly. You add no stitches between leaves.
Keep the tension firm but even. If the band is too tight, the leaves will bunch together. If it is too loose, the band will ripple above the rim.
Size checkpoint: The band ring should measure about 26.75 in (67.9 cm) around, the same as the rim.
Border
Border gauge: Same as the body, 12 sts = 4 in (10.2 cm). The border works 1 stitch into each rim stitch and adds no stitches.
Rnd 22 (joining round, green): Slip the leaf band over the outside of the basket, with the band’s sc row level with Rnd 21 and the leaves hanging down over the wall. Line leaf 1 up with rim st 1. Join green through both layers. Ch 1, then sc through the next band st and the next rim st together, all the way around. Join. (80 sts: 24 end A / 16 side 1 / 24 end B / 16 side 2)
Rnd 23 (green): Ch 1, crab stitch in each st around. Join. (80 sts: 24 / 16 / 24 / 16) Fasten off.
Why the math works: The base finishes at 80 stitches, and the walls never change that count. The leaf band is 16 leaves x 5 sts = 80. Both border rounds are worked 1 stitch into 1 stitch. So every count stays 24 / 16 / 24 / 16 from Rnd 8 to the final edge, and the leaves sit evenly with no gathering.
Handles (make 2, green): Ch 26, then sl st in the first ch to form a ring, taking care not to twist it.
Rnd 1: Ch 1, sc in each ch around. Join. (26 sts)
Rnd 2: Sl st in each sc around. (26 sts) Fasten off, leaving a 12 in (30.5 cm) tail.
Flatten each ring into an oval about 4 in x 1.25 in (10.2 x 3.2 cm). Center one handle on each curved end, at rim sts 12–13 and rim sts 52–53. Tuck the lower 1 in (2.5 cm) inside the basket against the wall and sew it firmly through Rnds 19–21. About 3 in (7.6 cm) stands above the rim.
Seeds (cream): Work each seed as one lazy daisy stitch about 0.3 in (0.8 cm) long, pointing up and one round tall.
- Lower row: on Rnd 11, in sts 4, 12, 20, 28, 36, 44, 52, 60, 68, 76 (10 seeds)
- Upper row: on Rnd 15, in sts 8, 16, 24, 32, 40, 48, 56, 64, 72, 80 (10 seeds)
The two rows are offset by 4 sts, so the seeds stagger like those on a real strawberry. Secure all yarn tails on the inside.
Final Blocking
- Lightly spray the whole basket with water until it is damp but not soaked.
- Stuff the basket firmly with a folded towel or a box of the right size.
- Shape the base into an even oval, 10.25 in x 5 in (26.0 x 12.7 cm).
- Push the walls straight up and check that they are 4.5 in (11.4 cm) tall at the rim.
- Pin each leaf flat against the wall so its point faces straight down.
- Shape each handle into a smooth upright oval.
- Let the basket dry completely, at least 24 hours, before removing the towel.
Final Quality-Control Checklist
- Base measures 10.25 in x 5 in (26.0 x 12.7 cm) and lies flat.
- The Rnd 9 ridge runs evenly around the bottom edge.
- Walls hold exactly 80 sts on every round.
- Rim height is 4.5 in (11.4 cm).
- All 16 leaves are evenly spaced, each over 5 rim stitches.
- The crab stitch edge is smooth with no gaps.
- Both handles are centered on the curved ends and stand upright.
- The 20 seeds are staggered in two rows of 10.
- All yarn ends are woven in on the inside.
Troubleshooting
Base ruffles: Your increases are too loose. Go down a hook size or tighten the inc stitches.
Base cups up early: Your stitches are too tight. Go up a hook size for the base only.
Walls lean outward: Your waistcoat stitches may be too loose. Pull each loop snug and check that the count stays at 80.
Walls lean inward: You may have missed a stitch at a join. Count the round and fix it.
Leaf band too long or short: Recount to 80 sts. If the count is right, redo the band with tighter or looser tension.
Leaves curl: Pin them flat and steam them lightly.
Handles flop: Sew the lower 1 in (2.5 cm) through more wall stitches, or add a second round of sl sts to the handle.
Care
Hand wash in cool water with mild soap, then reshape the basket over a towel and let it dry. Do not tumble dry.
Final Notes
This whole pattern builds on one number: 80. The base grows by 6 stitches per round to reach 80 stitches and 10.25 in x 5 in (26.0 x 12.7 cm). The walls keep that count for 13 rounds to reach 4 in (10.2 cm). The 16 leaves give 5 x 16 = 80 stitches, which join 1 to 1 onto the rim. The crab stitch edge brings the basket to 4.5 in (11.4 cm), and the handles add 3 in (7.6 cm) above that. Measure at each checkpoint and your basket will come out the right size.
Happy crocheting!