

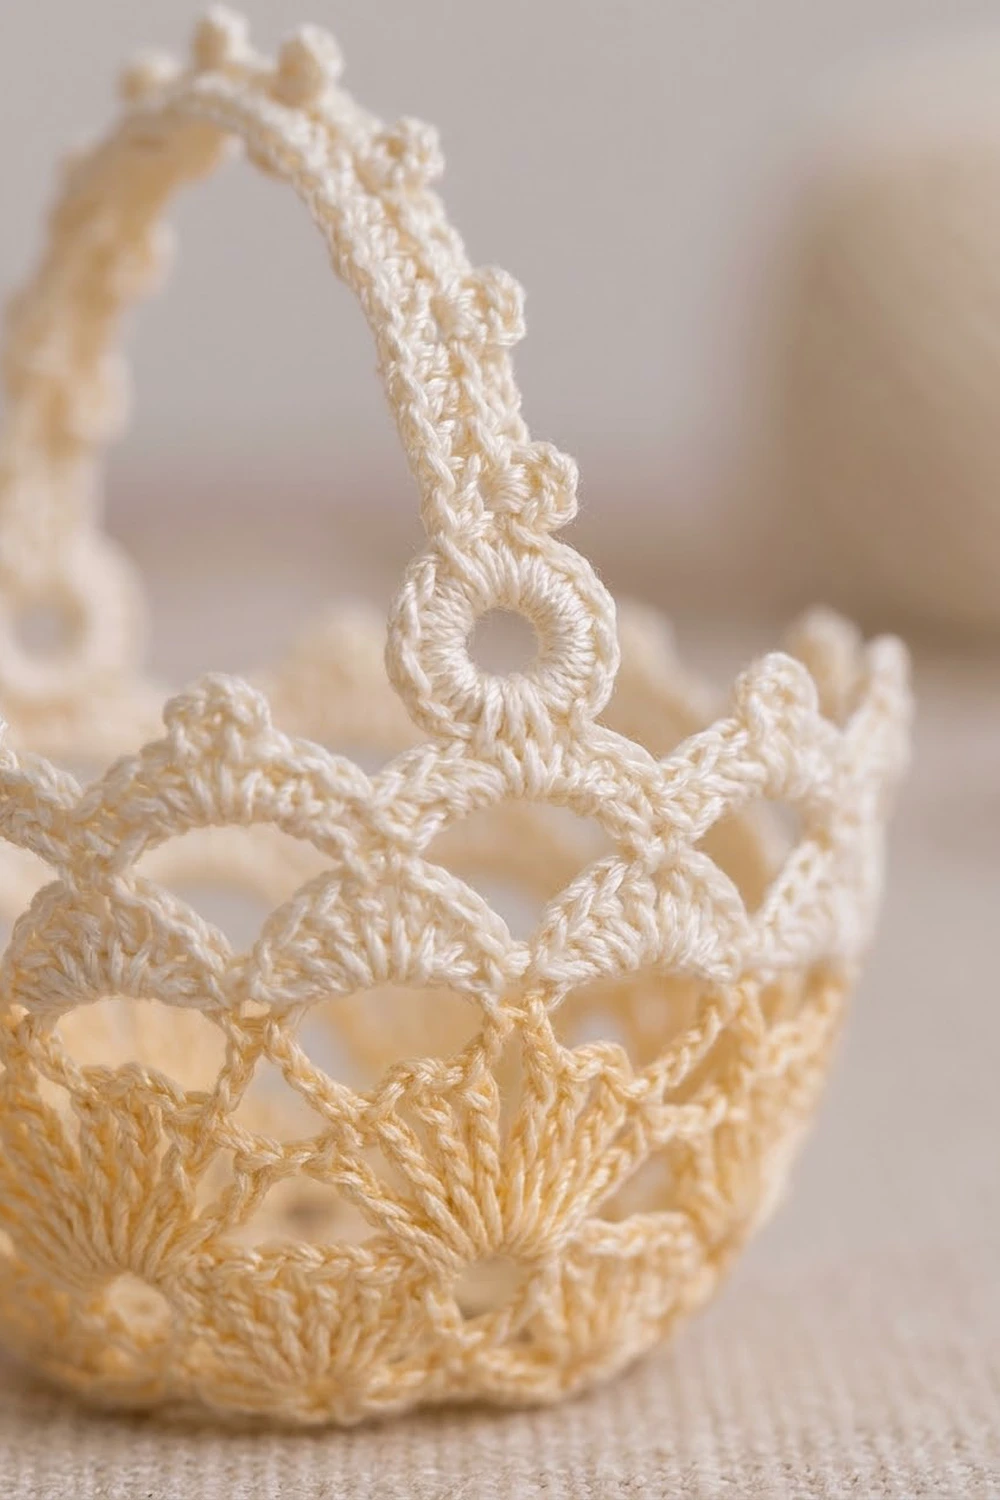
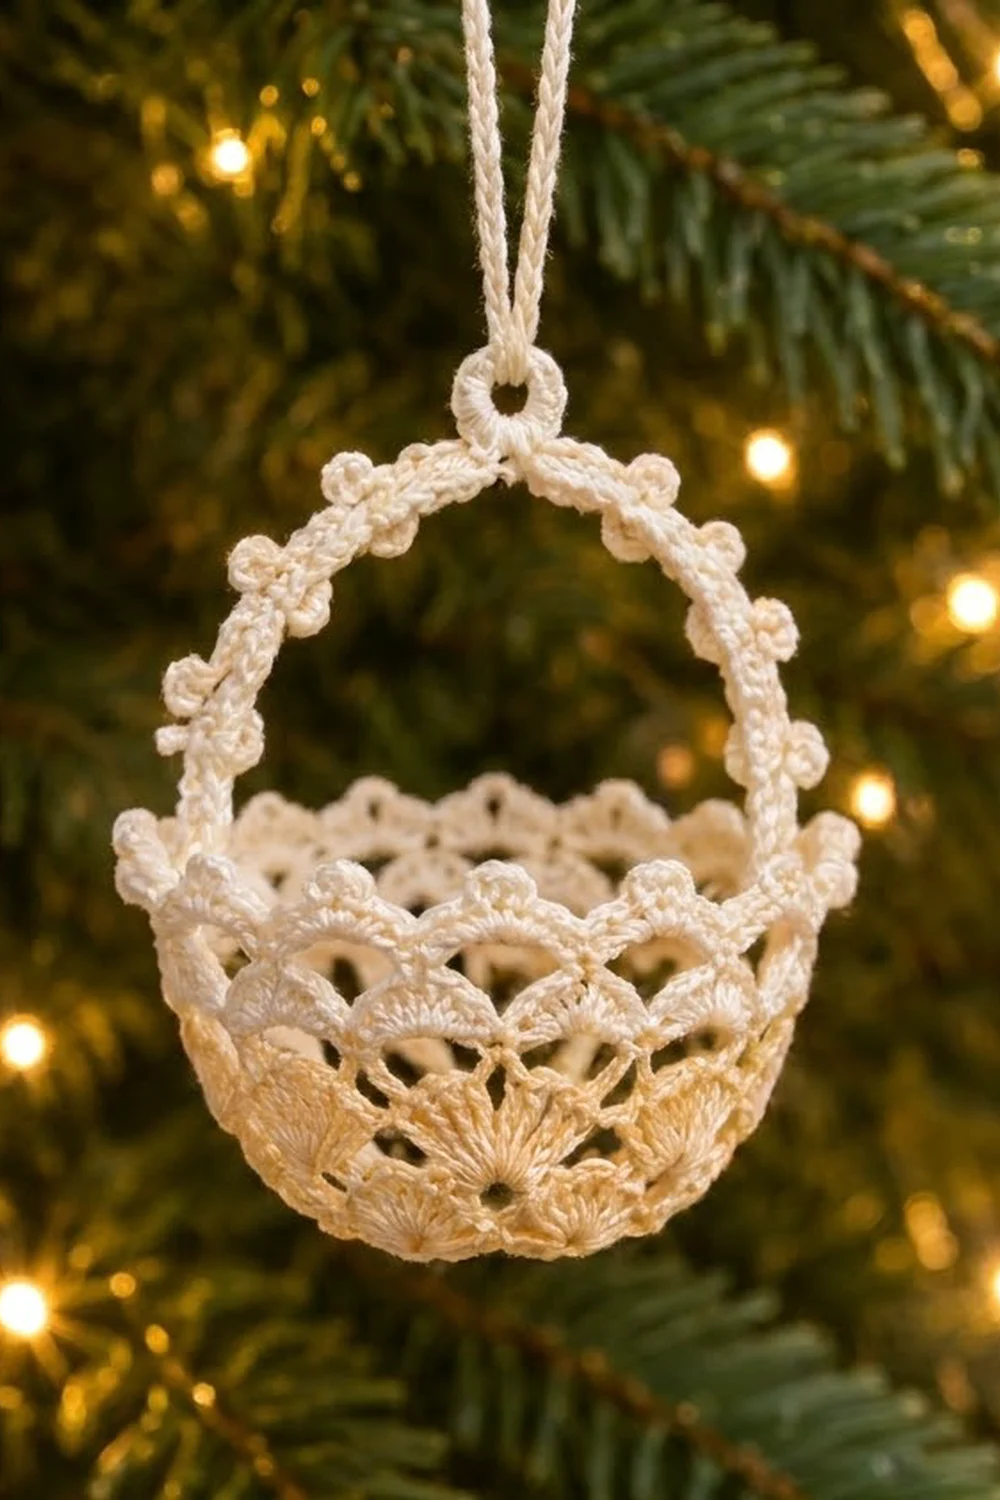
This little lace basket is a single thread-crochet ornament with a deep bowl and a picot handle. Ribbed fans fill the base, an open arch mesh runs up the sides, shell scallops form the rim, and a small hanging ring sits at the top of the handle.
It uses two soft colors. The base fans are pale butter yellow, and everything from the mesh upward is ivory, so the basket looks warm at the bottom and lighter toward the rim. It suits a heirloom Christmas tree, an Easter display, or a small gift tie-on.
The pattern uses US crochet terms. The finished basket is 2.5 in (6.4 cm) across the rim and 3 in (7.6 cm) tall to the top of the handle, plus a 1.25 in (3.2 cm) hanging loop. Before shaping, the body blocks flat to a 4 in (10.2 cm) lace circle.
Construction is simple. You work the body flat in the round as a small doily, add the picot rim, then work the handle straight onto that rim. A hanging ring goes at the center of the handle. Last, you stiffen the piece over a ball so it holds its bowl shape. There is nothing to sew or join.
Finished Size and Construction
- Finished size (shaped): 2.5 in (6.4 cm) rim diameter, 1.5 in (3.8 cm) body depth, 3 in (7.6 cm) total height with handle
- Hanging loop: 1.25 in (3.2 cm) above the ring
- Skill level: Intermediate (thread crochet, simple lace)
- Terminology: US
- Yarn weight: Size 10 cotton crochet thread (lace weight, 0)
- Hook: 1.5 mm steel hook (US steel 8)
- Number of pieces: 1 (body, handle, and loop are worked as one)
- Layout: one round motif shaped into a bowl, with the handle worked across the rim
- Flat piece size before border: 3.5 in (8.9 cm) diameter after Round 7
- Flat piece size after border: 4 in (10.2 cm) diameter after Round 8
- Border depth: 0.25 in (0.6 cm) all the way around
Materials
Use a mercerized cotton thread in size 10. Mercerized cotton has a slight sheen, keeps its stitch definition after stiffening, and does not fuzz. Avoid acrylic thread, because it does not hold stiffener well.
- Color A, pale butter yellow: 4 g, about 20 m (base fans, Rounds 1–4)
- Color B, ivory: 8 g, about 40 m (mesh, rim, handle, loop, Rounds 5–8 and finishing)
These quantities include a generous margin. One basket uses roughly half of each amount, so a single ball of each color will make a whole set of ornaments.
Tools:
- 1.5 mm (US steel 8) steel crochet hook
- Fine tapestry needle
- Small sharp scissors
- 2 stitch markers
- Fabric stiffener (or a thick sugar or starch solution)
- A ball, egg, or small round form about 2.5 in (6.4 cm) across
- Plastic wrap
- Rustproof pins and a foam blocking board
- Ruler or tape measure
Abbreviations (US Terms)
- ch – chain
- sl st – slip stitch
- sc – single crochet
- hdc – half double crochet
- dc – double crochet
- sp – space
- sk – skip
- st(s) – stitch(es)
- [ ] – repeat the instructions inside the brackets as directed
Special stitch – picot: Ch 3, sl st in the 3rd ch from the hook. A picot does not count as a stitch. You never work into it later, except once when you attach the hanging ring.
Gauge and Checkpoints
Gauge is not critical for a decoration, but it decides whether the basket fits your form. Work Rounds 1–3 first and measure them before you go on.
- Gauge: Rounds 1–3 = 1.25 in (3.2 cm) diameter, laid flat
- Chain gauge: 12 ch = 1 in (2.5 cm), unstretched
Checkpoints (flat, lightly pressed):
- After Round 1: 0.6 in (1.5 cm)
- After Round 3: 1.25 in (3.2 cm)
- After Round 4: 1.75 in (4.4 cm)
- After Round 6: 3 in (7.6 cm)
- After Round 7: 3.5 in (8.9 cm)
- After Round 8: 4 in (10.2 cm)
If your circle is too big, go down to a 1.25 mm hook or tighten your chains. If it is too small, go up to a 1.75 mm hook. A difference of 0.125 in (0.3 cm) at Round 3 grows to about 0.5 in (1.3 cm) by Round 8, so correct it early.
Body Pattern
Work in joined rounds with the right side always facing. Do not turn.
Round 1 (Color A)
Ch 6, sl st in the first ch to form a ring.
Ch 3 (counts as dc), 15 dc in the ring. Sl st in the top of the beginning ch-3.
Count: 16 dc.
Round 2 (Color A)
Ch 1, sc in the same st, ch 3, sk next dc, [sc in next dc, ch 3, sk next dc] 7 times. Sl st in the first sc.
Count: 8 sc and 8 ch-3 sps.
Round 3 (Color A) – small fans
Sl st in the first ch-3 sp. Ch 3 (counts as dc), 5 dc in the same sp, ch 1, [6 dc in next ch-3 sp, ch 1] 7 times. Sl st in the top of the beginning ch-3.
Count: 48 dc (8 fans of 6 dc) and 8 ch-1 sps.
Measure now. The piece should be 1.25 in (3.2 cm) across.
Round 4 (Color A) – ribbed fans
This round opens each fan into the ribbed shape at the bottom of the basket.
Ch 4 (counts as dc and ch 1), [dc in next dc, ch 1] 4 times, dc in next dc, sc in next ch-1 sp. *[Dc in next dc, ch 1] 5 times, dc in next dc, sc in next ch-1 sp. Repeat from * 6 more times. Sl st in the 3rd ch of the beginning ch-4.
Count: 48 dc, 40 ch-1 sps, and 8 sc. Each fan has 6 dc and 5 ch-1 sps.
Fasten off Color A and weave in the tail.
Round 5 (Color B) – first arch round
Join Color B with a sl st in any sc between two fans.
Ch 1, sc in the same sc, ch 5, sc in the 3rd (center) ch-1 sp of the next fan, ch 5. [Sc in next sc, ch 5, sc in center ch-1 sp of next fan, ch 5] 7 times. Sl st in the first sc.
Count: 16 sc and 16 ch-5 arches.
Keep the chains relaxed but even. All 16 arches should be the same length, because they stretch down the sides of the bowl when you shape it.
Round 6 (Color B) – second arch round
Sl st in each of the next 3 ch to reach the center of the first arch. Ch 1, sc in the same arch, ch 6, [sc in next ch-5 arch, ch 6] 15 times. Sl st in the first sc.
Count: 16 sc and 16 ch-6 arches.
Check that the piece is about 3 in (7.6 cm) across. These arches make the open sides of the basket.
Round 7 (Color B) – shell scallops
Sl st in each of the next 3 ch to reach the center of the first arch. Ch 1, sc in the same arch, 7 dc in the next arch. [Sc in next arch, 7 dc in next arch] 7 times. Sl st in the first sc.
Count: 64 sts (8 sc and 56 dc), forming 8 shells.
This is the size before the border: 3.5 in (8.9 cm). Do not fasten off.
Border: Picot Rim, Handle, and Hanging Ring
Border gauge
Each shell repeat runs about 1.4 in (3.6 cm) along the flat outer edge. Round 8 adds 0.25 in (0.6 cm) all the way around, so the diameter grows by 0.5 in (1.3 cm) to 4 in (10.2 cm).
Round 8 (Color B) – picot rim (conversion round)
Work one stitch into every stitch of Round 7 and add 3 picots to each shell.
*Hdc in next dc, dc in next dc, dc in next dc, picot, dc in next dc, picot, dc in next dc, picot, dc in next dc, hdc in next dc, sl st in next sc. Repeat from * 7 more times. The last sl st goes into the joining sc of Round 7.
Per repeat: 8 sts (2 hdc, 5 dc, 1 sl st) + 3 picots.
Count: 64 sts (worked 1 per existing st) + 24 picots added.
Why the math works: each shell had 7 dc and 1 sc, for 8 stitches. Round 8 replaces those 8 stitches with exactly 8 new ones, so the edge neither ruffles nor cups. The 3 picots sit on the center 3 dc of each shell, so they stay at the high point of every scallop.
Do not fasten off yet. Place a marker in the sl st of the last repeat; this is Point 1. Count 4 repeats around and mark that sl st, directly opposite; this is Point 2.
Handle
The handle is worked across the rim, from Point 1 to Point 2.
Row 1: From Point 1, ch 54. Without twisting the chain, sl st in Point 2.
Row 2: Ch 1, turn, sc in each ch across, sl st in Point 1.
Count: 54 sc.
Row 3: Ch 1, turn, [sc in next 3 sc, picot] 17 times, sc in last 3 sc, sl st in Point 2.
Count: 54 sc + 17 picots.
The handle is 4.5 in (11.4 cm) long. The 9th picot sits exactly at the center, right after the 27th sc. Keep Rows 2 and 3 at an even tension so the handle does not twist when it dries. Fasten off and weave in the ends.
Hanging ring and loop
Join Color B with a sl st in the 9th (center) picot of the handle.
Ch 6, sl st in the first of these ch to form a small ring. Ch 1, 12 sc in the ring, sl st in the first sc.
Count: 12 sc.
For the loop, ch 30 (about 2.5 in / 6.4 cm), then sl st in the 7th sc of the ring, directly opposite the handle. The loop folds to 1.25 in (3.2 cm).
Fasten off and weave in all tails. Hide them in dense stitches so they do not show through the mesh.
Final Blocking
- Soak the finished basket in fabric stiffener and squeeze out the extra. Do not wring it.
- Lay it flat on the blocking board, right side up, with the handle folded over the body.
- Pin the 8 center fans open so the ribs radiate evenly.
- Pin the tip of each of the 8 shells so the flat circle measures 4 in (10.2 cm). Let it dry partway, about 30 minutes.
- Cover your 2.5 in (6.4 cm) ball or egg with plastic wrap. Center the basket on top of the form, wrong side against the form, and ease the mesh down the sides. The arches gather in so the rim settles at 2.5 in (6.4 cm) across.
- Turn the form so the basket is right side up. Raise the handle and prop it with a crumpled ball of plastic wrap so it rises 1.5 in (3.8 cm) above the rim.
- Keep the hanging ring flat and centered at the top of the handle.
- Let it dry fully, at least 24 hours, before taking it off the form.
Final Quality-Control Checklist
- 8 yellow fans, each with 6 dc and 5 ch-1 sps
- 16 ivory arches in each of Rounds 5 and 6
- 8 shells, each with 3 picots on top
- Rim 2.5 in (6.4 cm) across, body 1.5 in (3.8 cm) deep
- Handle attached at two opposite points, 4 repeats apart
- 17 picots on the handle, with the 9th at the center under the ring
- Ring has 12 sc, and the loop hangs straight
- All tails hidden, and the basket stands level on a table
Troubleshooting
Center fans cup before shaping: Round 3 is too tight. Go up one hook size for Rounds 1–4.
Rim ruffles: Round 8 has extra stitches. Recount to 8 stitches per shell.
Handle leans to one side: Points 1 and 2 are not opposite. Check that there are exactly 4 shells between them on each side.
Handle sags after drying: Put a second coat of stiffener on the handle only, and prop it up again to dry.
Basket is too shallow: Your form is too wide. Use a smaller ball so the arches can stretch downward.
Mesh looks uneven: Re-wet it and pin each arch center before shaping it again.
Care
Dust gently with a soft brush. If it gets dirty, hand-wash it in cool water, then stiffen and shape it again over the same form.
Final Notes
Every size in this basket follows one measurement chain. Rounds 1–3 set the gauge at 1.25 in (3.2 cm). The ribbed fans grow the circle to 1.75 in (4.4 cm), the arch mesh to 3 in (7.6 cm), and the shells to 3.5 in (8.9 cm). The picot rim brings the flat circle to 4 in (10.2 cm). A 54-ch handle spans 4.5 in (11.4 cm), and shaping over a 2.5 in (6.4 cm) form gives a basket 3 in (7.6 cm) tall to the top of the handle.
If you match the Round 3 checkpoint, every later measurement will follow. Make one in yellow and ivory, then try other pairs of soft colors for a whole tree of tiny baskets.
Happy crocheting!