

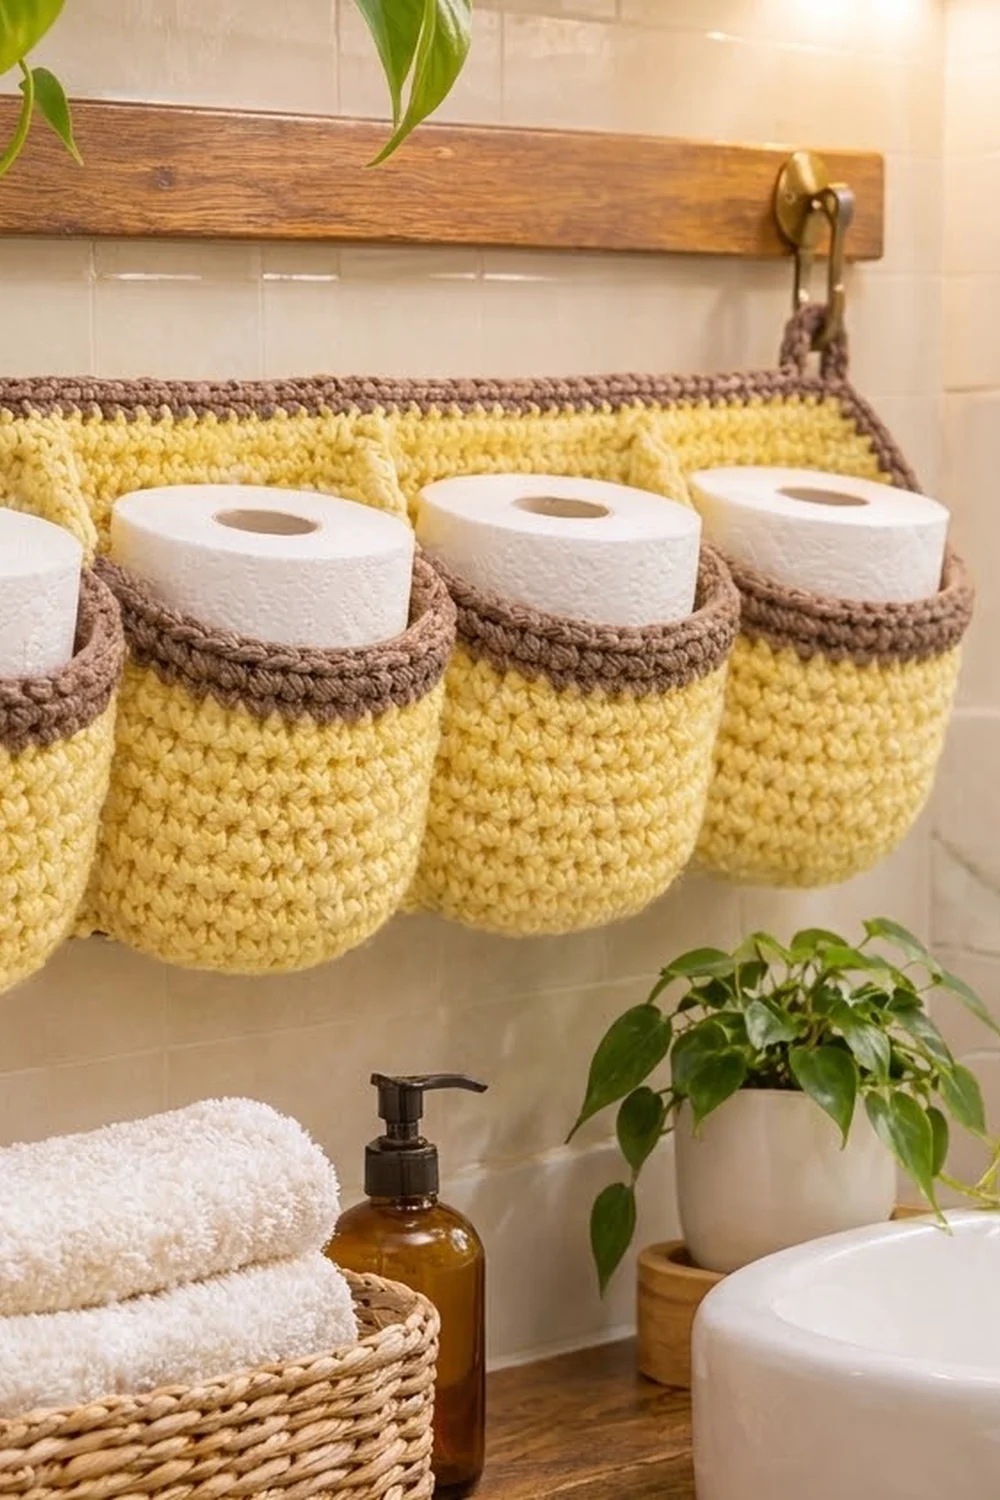
This wall-hanging holder keeps four spare rolls in plain sight and within reach. A flat back panel carries four round cups in a neat row, and two loops at the top let it hang from hooks, a rail, or the back of a door.
The color scheme is soft and warm: butter yellow for the panel and pocket bodies, mocha brown for the pocket rims, the panel border, and the hanging loops. Everything is dense single crochet, so the fabric is firm, has a fine texture, and holds its shape when loaded.
This pattern uses US crochet terms. The finished panel measures 22 x 7 in (55.9 x 17.8 cm), and each pocket is about 4.75 in (12.1 cm) across and 3.25 in (8.3 cm) tall.
The construction is simple. You work the panel in rows with shaped corners, add a two-round brown border, crochet four cups from the bottom up, sew them to the panel along marked stitch columns, and finish with two folded tabs for hanging.
Finished Size and Construction
- Finished panel size: 22 x 7 in (55.9 x 17.8 cm)
- Skill level: Advanced beginner
- Terminology: US
- Yarn weight: Medium / worsted (#4) cotton
- Hook: 4.0 mm (US G-6)
- Number of pieces: 7 (1 panel, 4 pockets, 2 hanging tabs)
- Layout: 4 pockets in a single horizontal row
- Panel size before border: 21 x 6 in (53.3 x 15.2 cm)
- Border depth: 0.5 in (1.3 cm) on every side
- Pocket size: 4.75 in (12.1 cm) diameter, 3.25 in (8.3 cm) tall
- Hanging tab size: 4 x 1 in (10.2 x 2.5 cm) before folding
Materials
Use a smooth, firm worsted cotton or cotton blend. Cotton keeps the cups upright and handles bathroom humidity well. Avoid fuzzy or very stretchy acrylics, which let the pockets sag under the weight of the rolls.
- Color A, butter yellow: about 160 g / 300 m (328 yd)
- Color B, mocha brown: about 50 g / 95 m (104 yd)
These quantities include a safety margin of roughly 25 percent for gauge swatches, sewing, and small tension differences.
Tools:
- 4.0 mm (US G-6) crochet hook
- Tapestry needle
- About 20 locking stitch markers
- Rigid ruler or tape measure
- Scissors
- Rustproof pins and a blocking mat or folded towel
Abbreviations (US Terms)
- ch – chain
- sc – single crochet
- sc2tog – single crochet 2 together
- sl st – slip stitch
- st(s) – stitch(es)
- BLO – back loop only
- MR – magic ring
- inc – 2 sc in the same stitch
- rnd(s) – round(s)
Special stitch – sc2tog: Insert hook in the next st, yarn over and pull up a loop, insert hook in the following st, yarn over and pull up a loop, yarn over and draw through all 3 loops on the hook.
Gauge and Checkpoints
Gauge: 16 sc and 16 rows = 4 in (10.2 cm) in sc worked firmly with a 4.0 mm hook.
This square gauge matters. It lets one sc per row end lie flat along the panel sides, and it makes each pocket round line up with one panel row during sewing.
Test one piece first. Make a single pocket before anything else. It is small, uses every technique except the border, and tells you quickly whether your gauge is right.
Checkpoints:
- Pocket base after Rnd 10: about 4.75 in (12.1 cm) across
- Finished pocket: 3.25 in (8.3 cm) tall from the base ridge to the top of the rim
- Panel after Row 4: 21 in (53.3 cm) wide
- Panel after Row 24: 6 in (15.2 cm) tall
- Panel after border: 22 x 7 in (55.9 x 17.8 cm)
If your pieces are too big, go down 0.5 mm in hook size. If they are too small, go up 0.5 mm. If only the row height is off, adjust your yarn tension rather than the hook. A pocket smaller than 4.5 in (11.4 cm) across will be tight on standard rolls.
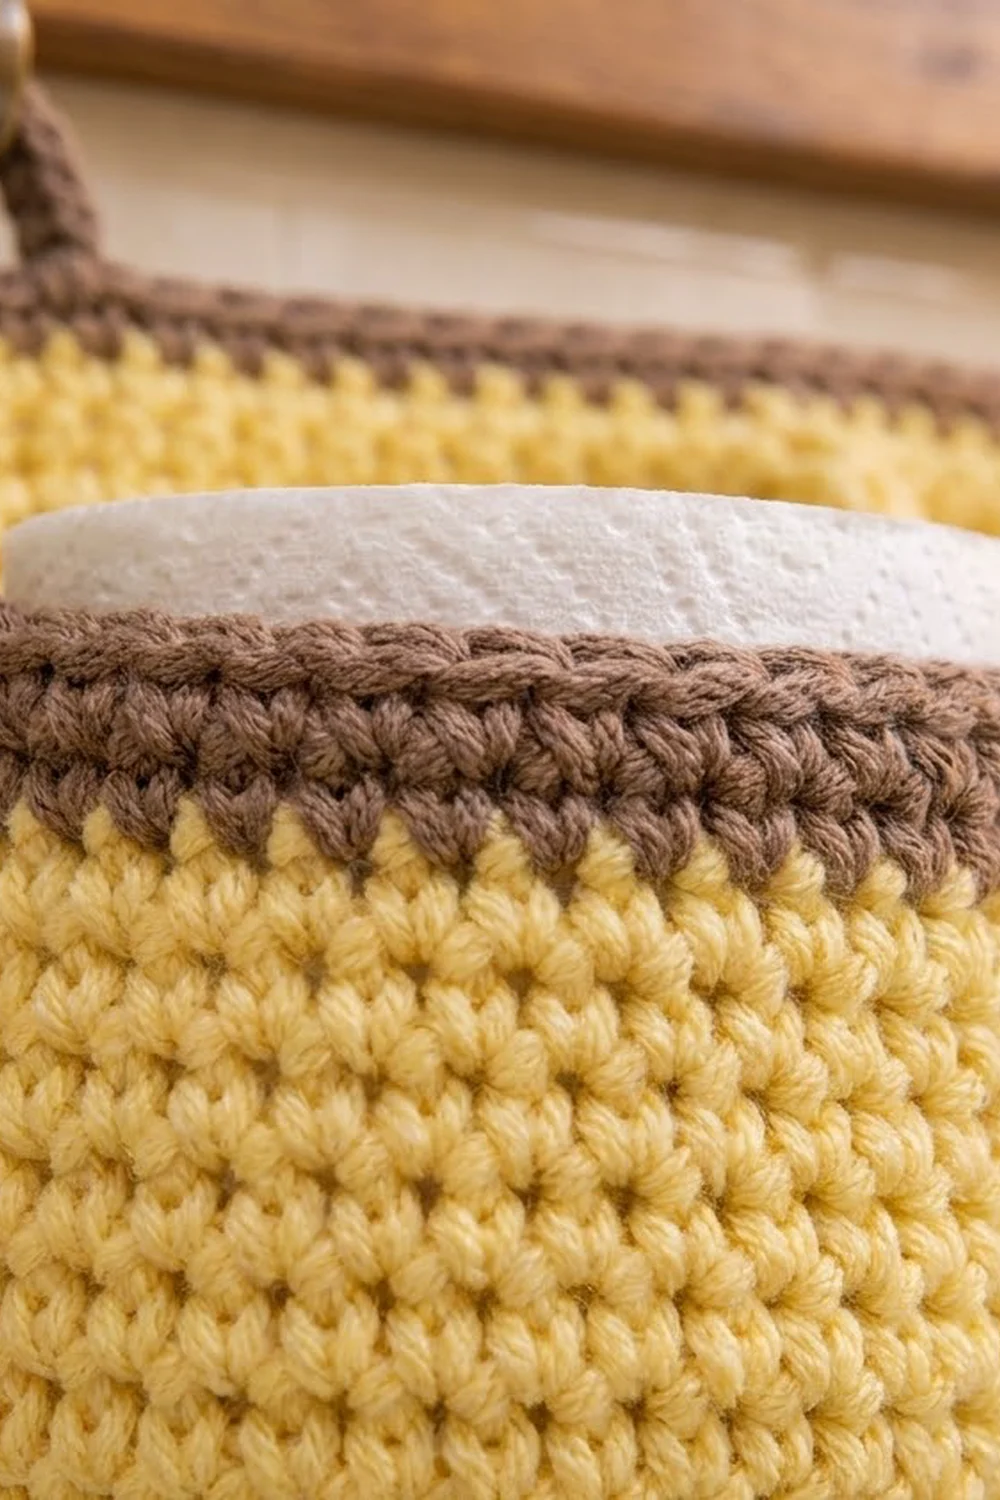
Pocket (Make 4)
Each pocket is worked in continuous rounds from the center of the base up. Mark the first st of each round and move the marker up as you go.
Base
With Color A:
Rnd 1: MR, 6 sc in ring. (6 sts)
Rnd 2: Inc in each st around. (12 sts)
Rnd 3: Sc 1, inc 6 times. (18 sts)
Rnd 4: Sc 2, inc 6 times. (24 sts)
Rnd 5: Sc 3, inc 6 times. (30 sts)
Rnd 6: Sc 4, inc 6 times. (36 sts)
Rnd 7: Sc 5, inc 6 times. (42 sts)
Rnd 8: Sc 6, inc 6 times. (48 sts)
Rnd 9: Sc 7, inc 6 times. (54 sts)
Rnd 10: Sc 8, inc 6 times. (60 sts)
Checkpoint: The base is about 4.75 in (12.1 cm) across. A slight cup is normal with this firm gauge and helps the pocket form its rounded bottom.
Walls
Rnd 11: Sc in BLO of each st around. (60 sts)
This round creates a ridge where the base meets the wall, so the pocket bottom turns up cleanly.
Rnds 12–20: Sc in each st around. (60 sts each round)
You now have 10 wall rounds in Color A, which is 2.5 in (6.4 cm).
Brown Rim
Change to Color B on the last yarn over of Rnd 20.
Rnds 21–23: Sc in each st around. (60 sts each round)
At the end of Rnd 23, sl st into the next st to smooth the step, fasten off, and leave a 24 in (61.0 cm) tail of Color B for sewing the rim to the panel.
Checkpoint: The pocket is 3.25 in (8.3 cm) tall from the Rnd 11 ridge to the top of the rim: 13 wall rounds at 4 rounds per inch. A standard roll stands inside with its top showing above the rim.
Weave in the starting tail only. Keep the long rim tail.
Hanging Tab (Make 2)
With Color B:
Row 1: Ch 17, sc in 2nd ch from hook and in each ch across. (16 sts)
Rows 2–4: Ch 1, turn, sc in each st across. (16 sts each row)
Fasten off and leave a 12 in (30.5 cm) tail. Each tab measures 4 x 1 in (10.2 x 2.5 cm).
Back Panel
The panel is worked in rows with Color A. The first 3 and last 3 rows are shaped so the corners are clipped. After the border, they read as smooth curves.
Row 1: Ch 79, sc in 2nd ch from hook and in each ch across. (78 sts)
Row 2: Ch 1, turn, inc in first st, sc in next 76 sts, inc in last st. (80 sts)
Row 3: Ch 1, turn, inc in first st, sc in next 78 sts, inc in last st. (82 sts)
Row 4: Ch 1, turn, inc in first st, sc in next 80 sts, inc in last st. (84 sts)
Checkpoint: Row 4 measures 21 in (53.3 cm) wide.
Rows 5–21: Ch 1, turn, sc in each st across. (84 sts each row)
Row 22: Ch 1, turn, sc2tog, sc in next 80 sts, sc2tog. (82 sts)
Row 23: Ch 1, turn, sc2tog, sc in next 78 sts, sc2tog. (80 sts)
Row 24: Ch 1, turn, sc2tog, sc in next 76 sts, sc2tog. (78 sts)
Fasten off Color A.
Checkpoint: The panel measures 21 x 6 in (53.3 x 15.2 cm): 84 sts at 4 sts per inch and 24 rows at 4 rows per inch.
Border
Border gauge: The border uses the same sc gauge as the panel. Two rounds at 4 rounds per inch add 0.5 in (1.3 cm) on every side.
Each side count below already includes the increases at that side’s ends. No corner stitches are added separately.
Rnd 1: With RS facing, join Color B in the first st of Row 24.
- Top edge: Inc in first st, sc in next 76 sts, inc in last st. (80 sts)
- Left side: Work 1 sc in each row end down the side. (24 sts)
- Bottom edge: Working in the free loops of the foundation ch, inc in first loop, sc in next 76 loops, inc in last loop. (80 sts)
- Right side: Work 1 sc in each row end up the side. (24 sts)
Join with sl st to first sc. (208 sts: 80 + 24 + 80 + 24)
Rnd 2: Ch 1.
- Top edge: Inc in each of first 2 sts, sc in next 76 sts, inc in each of last 2 sts. (84 sts)
- Left side: Sc in each st. (24 sts)
- Bottom edge: Inc in each of first 2 sts, sc in next 76 sts, inc in each of last 2 sts. (84 sts)
- Right side: Sc in each st. (24 sts)
Join with sl st to first sc and fasten off. (216 sts: 84 + 24 + 84 + 24)
Why the math works: The panel edge is 78 sts across the top and bottom and 24 row ends on each side, which is 204 edge stitches in total. With square gauge, 1 sc per row end matches the stitch width, so the sides stay flat with no extra stitches. The clipped corners are stepped 1 st per row, so working 1 sc per step follows the curve. Each round of a curve needs about 6 extra stitches across all four corners. Rnd 1 adds 4 and Rnd 2 adds 8, giving 12 over two rounds, so the corners lie flat and rounded without ruffling or cupping.
Checkpoint: The bordered panel measures 22 x 7 in (55.9 x 17.8 cm).
Make All Pieces
Before sewing, check that you have:
- Color A, butter yellow: 1 panel and 4 pocket bodies (Rnds 1–20)
- Color B, mocha brown: 4 pocket rims (Rnds 21–23), 1 panel border, and 2 hanging tabs
Layout grid: The four pockets sit in one row across the lower panel. Panel columns are counted 1–84 from the left along Row 4, the first full-width row.
Row 16  |....[  P1  ]....[  P2  ]....[  P3  ]....[  P4  ]....|  rim seam
        |    |      |    |      |    |      |    |      |    |
Row 4   |....[  P1  ]....[  P2  ]....[  P3  ]....[  P4  ]....|  base seam
Cols:        5 – 16      26 – 37      47 – 58      68 – 79
Each pocket gets 21 panel columns, and its 12-stitch attachment strip is centered within them.
Joining
Method: Whipstitch with the tapestry needle. Each pocket is sewn to the panel along a rectangle 12 sts wide and 13 rows tall. Those 12 sts of the pocket’s back lie flat on the panel, and the other 48 sts bulge forward to form the cup.
Stitch-to-stitch logic:
- Fold each pocket flat with the rnd-start marker at center front. Count 6 sts on either side of center back and mark the 12 back sts at both Rnd 11 and Rnd 23.
- Pin the pocket so that its 12 marked Rnd 11 sts line up with the panel’s 12 columns in Row 4. For Pocket 1, these are columns 5–16.
- With Color A, whipstitch each of the 12 base sts to its matching panel st in Row 4, one to one.
- Sew up both side lines of the strip. Each wall round lines up with one panel row, so stitch 1 pocket round to 1 panel row from Row 4 to Row 16. That is 13 rows on each side.
- With the Color B rim tail, whipstitch the 12 marked Rnd 23 sts to columns 5–16 of Row 16, one to one.
- Repeat for Pockets 2–4 at columns 26–37, 47–58, and 68–79.
Tension advice: Pull each stitch snug but not tight. The seam should lie flat without puckering the panel. Sew through both loops of the pocket and one full stitch of the panel so the seam can carry the weight of the rolls.
Hanging tabs: Fold each tab in half to 2 x 1 in (5.1 x 2.5 cm). Overlap 0.5 in (1.3 cm) of the tab ends onto the back of the panel at the top border, centered 1.5 in (3.8 cm) in from each side edge. Sew securely through both layers. Each loop then stands 1.5 in (3.8 cm) above the panel.
Size checkpoint: After joining, the panel still measures 22 x 7 in (55.9 x 17.8 cm). The pockets are about 0.5 in (1.3 cm) apart at their widest points, and the rims sit at the Row 16 line.
Final Blocking
- Lightly mist the panel and pockets with water until damp, not soaked.
- Lay the holder face up on a blocking mat or folded towel.
- Pin the panel edges to 22 x 7 in (55.9 x 17.8 cm), easing the rounded corners into smooth curves.
- Stuff each pocket with a roll wrapped in plastic, or a folded towel, so the cups dry round and upright.
- Let it dry completely, then remove the pins and stuffing.
Final Quality-Control Checklist
- Panel measures 22 x 7 in (55.9 x 17.8 cm)
- All four corners are rounded and flat, with no ruffles
- Border counts were 208 sts (Rnd 1) and 216 sts (Rnd 2)
- Each pocket is 60 sts around, 4.75 in (12.1 cm) across, and 3.25 in (8.3 cm) tall
- Pockets sit at matching heights, with base seams on Row 4 and rim seams on Row 16
- Pocket gaps are even
- Hanging tabs are level and sewn through both layers
- All ends are woven in securely
Troubleshooting
Panel sides wave or pull in: Your row gauge is not square. Rework the border sides, skipping or adding one row end per 4 rows as needed.
Corners ruffle: Your tension in the border is loose. Replace one increase per corner in Rnd 2 with a plain sc.
Pockets too tight for rolls: Work one extra base round as sc 9, inc 6 times (66 sts) before the BLO round. Then continue the walls with 66 sts and keep the 12-stitch attachment strip.
Pockets sag forward: Tighten your gauge, or add a running stitch along the vertical seams for extra support.
Panel bows at the top when loaded: Move the tabs slightly inward, or thread a thin wooden dowel through the top border on the back.
Care
Hand wash in cool water with mild soap, press out the water in a towel, and dry flat, with the pockets stuffed so they keep their shape. Do not tumble dry.
Final Notes
The measurement chain is simple. Gauge of 16 sts and 16 rows = 4 in (10.2 cm) gives a 60-stitch pocket 4.75 in (12.1 cm) across and 3.25 in (8.3 cm) tall. The 84 x 24 panel measures 21 x 6 in (53.3 x 15.2 cm). Two border rounds bring it to 22 x 7 in (55.9 x 17.8 cm). Square gauge lets pocket rounds and panel rows match one to one, so the pockets sew on flat and even.
Happy crocheting!