
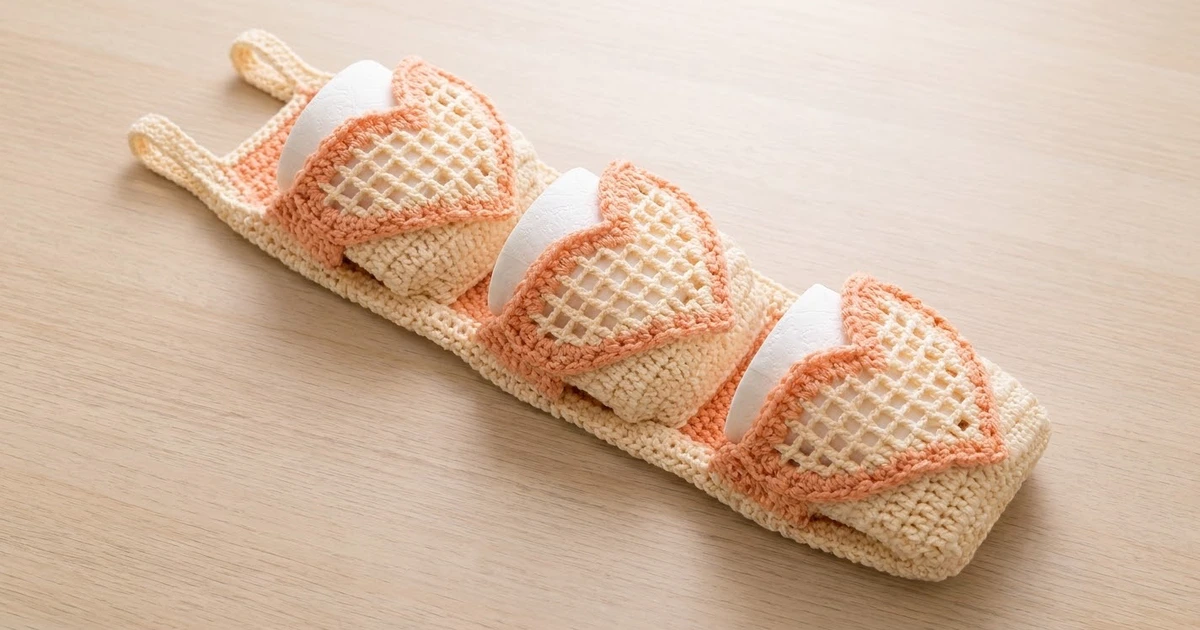
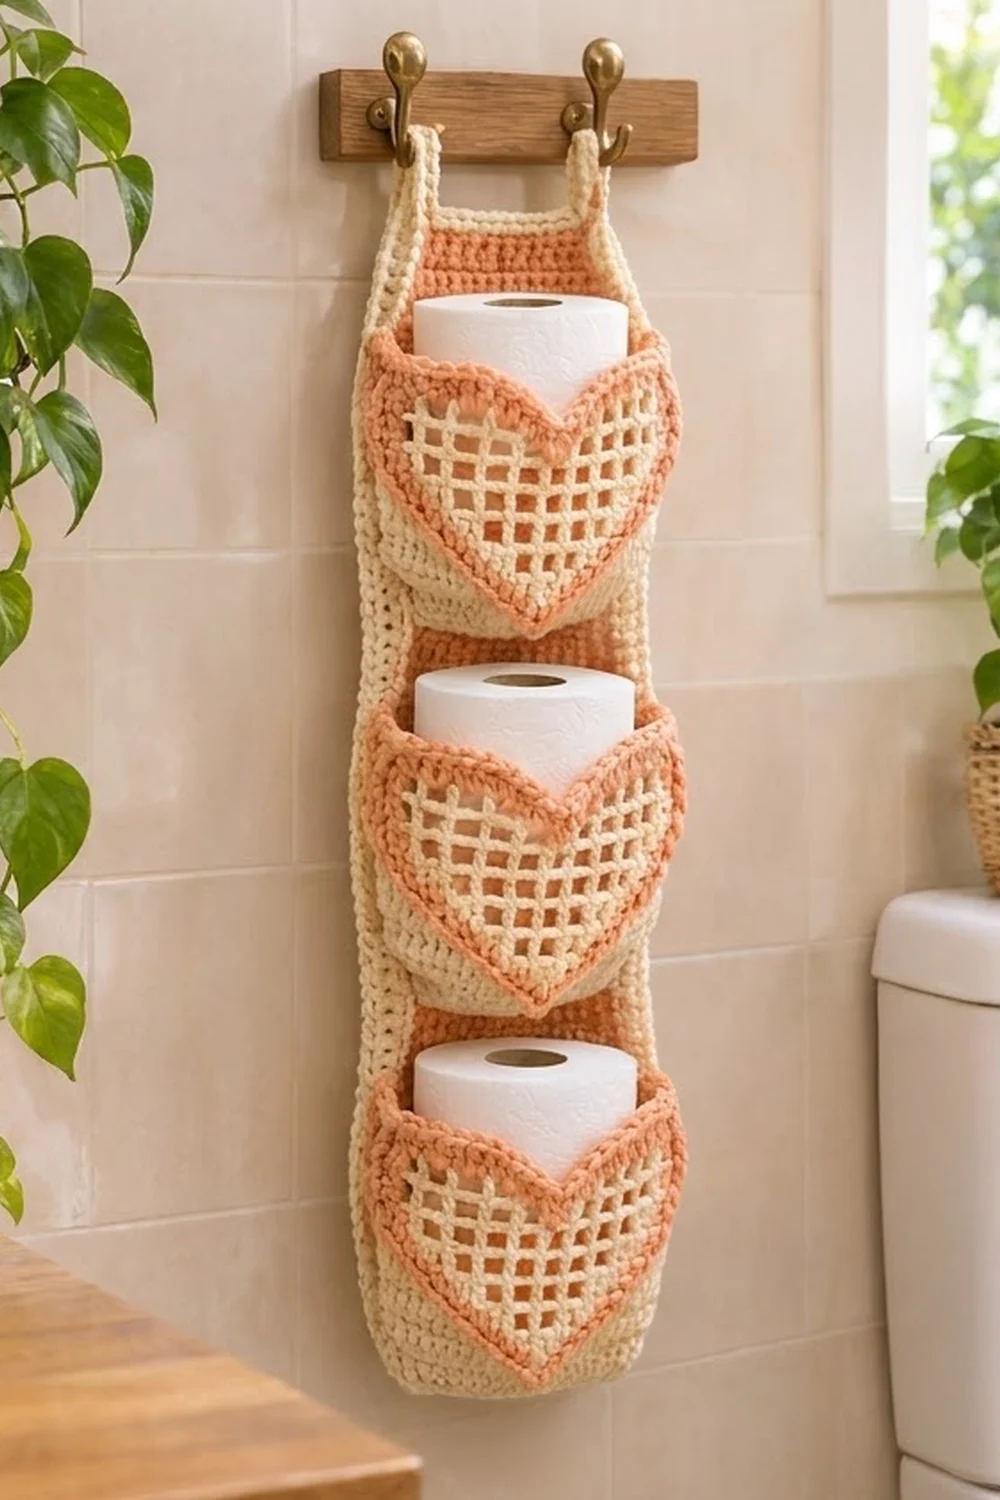
This hanging organizer holds three spare toilet rolls in heart-shaped pockets. Each pocket front has an open filet-mesh heart in cream, outlined in a bold peach band. The pockets stand out from a long peach back panel with a cream border, and two cream straps hang it from hooks or a towel bar.
The look is soft and cottage-style. Only two colors are used: warm cream and peach. The mesh lets the roll show through, so it’s easy to see when it’s time to restock. All instructions use US crochet terms.
The finished back panel measures 7 x 29 in (17.8 x 73.7 cm). The strap loops add about 3 in (7.6 cm), for a total hanging length of about 32 in (81.3 cm). Each pocket front is about 6.5 in (16.5 cm) wide and 5.75 in (14.6 cm) tall at the heart lobes, and each pocket is about 2.9 in (7.4 cm) deep.
You’ll make the following pieces:
– A single-crochet back panel
– A two-round border
– Two straps worked onto the border
– Three filet pocket fronts
– Three cream strips (called gussets) that form each pocket’s sides and bottom
Each gusset is joined to its pocket front, and then the finished pocket is sewn onto the panel.
Finished Size and Construction
- Finished size: 7 x 29 in (17.8 x 73.7 cm) panel; about 32 in (81.3 cm) hanging length
- Skill level: Intermediate
- Terminology: US
- Yarn weight: Worsted (#4) cotton
- Hook: 5.0 mm (H-8)
- Number of pieces: 7 (1 back panel, 3 pocket fronts, 3 gussets)
- Layout: 3 pockets stacked in one vertical column
- Pocket front size: 6 x 5.5 in (15.2 x 14.0 cm) before trim
- Panel size before border: 6 x 28 in (15.2 x 71.1 cm)
- Border depth: 0.5 in (1.3 cm), 2 rounds
Materials
Use a smooth worsted-weight cotton or cotton blend. Cotton holds its shape when loaded, survives washing, and shows the filet mesh crisply. Avoid fuzzy or very stretchy acrylic, because the pockets will sag.
- Cream: 250 g / 425 m (about 465 yd). Used for the pocket fronts, gussets, panel border, straps and sewing.
- Peach: 175 g / 298 m (about 326 yd). Used for the back panel, heart outlines and pocket trim.
Tools:
– 5.0 mm (H-8) crochet hook
– Tapestry needle
– 6 locking stitch markers
– Scissors
– Measuring tape
– Blocking mat and rust-proof pins
– Spray bottle
The quantities include roughly a 15% margin for your gauge swatch and tension differences.
Abbreviations (US Terms)
- ch – chain
- sl st – slip stitch
- sc – single crochet
- dc – double crochet
- sk – skip
- st(s) – stitch(es)
- sp – space
- RS / WS – right side / wrong side
Special stitch definitions:
– Block: a 2-stitch filet square worked solid. When you see “dc in next st,” work a dc into the next stitch, and count a ch-1 space as a stitch.
– Mesh: a 2-stitch filet square worked open. Ch 1, sk 1, dc in next st.
– Surface slip stitch: hold the yarn behind the work, insert the hook from front to back through the fabric, and pull up a loop through the loop already on the hook.
Gauge and Checkpoints
- Single crochet: 14 sc x 16 rows = 4 in (10.2 cm)
- Double crochet: 14 dc x 8 rows = 4 in (10.2 cm)
- Filet: one filet square is 2 sts = about 0.57 in (1.5 cm) wide and 1 row = 0.5 in (1.3 cm) tall.
Make one pocket front before anything else. That piece tests both gauges at once.
Checkpoints:
– After Row 2 of the pocket front, the piece should be 6 in (15.2 cm) wide.
– After Row 12, the pocket front should be 5.5 in (14.0 cm) tall at the lobes.
– After Row 16 of the panel, the panel should be 6 x 4 in (15.2 x 10.2 cm).
– After the border, the panel should be 7 x 29 in (17.8 x 73.7 cm).
If your pieces come out too big, go down 0.5 mm in hook size. If they come out too small, go up 0.5 mm. Don’t change the stitch counts. The pocket depends on the stitch-to-row matching described below.
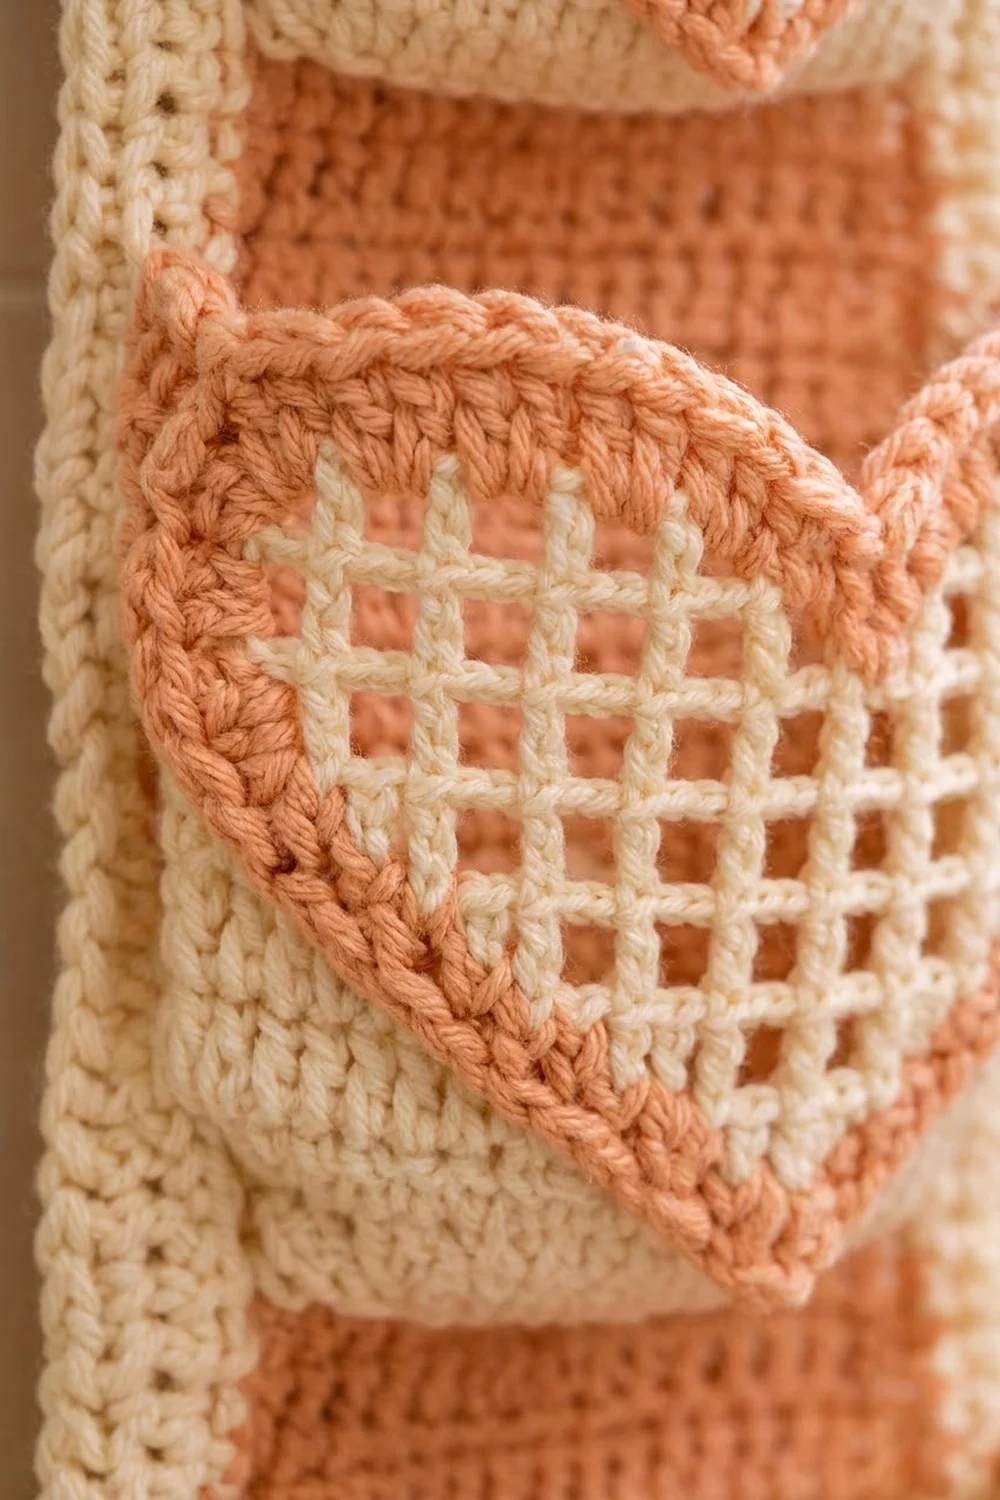
Back Panel (Make 1)
Use peach.
Foundation: Ch 22.
Row 1 (RS): Sc in 2nd ch from hook and in each ch across, turn. (21 sc)
Rows 2–112: Ch 1 (does not count as a stitch), sc in each st across, turn. (21 sc)
Fasten off. The panel should measure 6 x 28 in (15.2 x 71.1 cm).
Place stitch markers on the right-hand edge at the following rows. These mark where each pocket’s bottom will sit:
– Row 5 (Pocket 1)
– Row 41 (Pocket 2)
– Row 77 (Pocket 3)
Pocket Front (Make 3)
Use cream. Rows 1–2 form the solid bottom band. Rows 3–12 are the filet heart chart: Row 3 is chart row 1 and Row 12 is chart row 10. The chart is 10 squares wide.
Foundation: Ch 22.
Row 1: Sc in 2nd ch from hook and in each ch across, turn. (21 sc)
Row 2: Ch 1, sc in each st across, turn. (21 sc)
Row 3 (4 blocks, 2 mesh, 4 blocks): Ch 3 (counts as dc throughout), dc in next 8 sts, [ch 1, sk 1, dc in next st] 2 times, dc in next 8 sts, turn. (21 sts)
Row 4 (3 blocks, 4 mesh, 3 blocks): Ch 3, dc in next 6 sts, [ch 1, sk 1, dc in next st] 4 times, dc in next 6 sts, turn. (21 sts)
Row 5 (2 blocks, 6 mesh, 2 blocks): Ch 3, dc in next 4 sts, [ch 1, sk 1, dc in next st] 6 times, dc in next 4 sts, turn. (21 sts)
Rows 6–7 (1 block, 8 mesh, 1 block): Ch 3, dc in next 2 sts, [ch 1, sk 1, dc in next st] 8 times, dc in next 2 sts, turn. (21 sts)
Rows 8–10 (10 mesh): Ch 4 (counts as dc + ch 1), sk 1, dc in next st, [ch 1, sk 1, dc in next st] 9 times, turn. (21 sts)
The solid blocks narrow by one square on each side every row. This forms the V-shaped point of the heart, with solid cream corners on either side of it.
Row 11 (first lobe, 4 mesh): Ch 4, sk 1, dc in next st, [ch 1, sk 1, dc in next st] 3 times, turn. (9 sts) Leave the remaining 12 sts unworked.
Row 12 (2 mesh): Sl st in first 3 sts, ch 4, sk 1, dc in next st, ch 1, sk 1, dc in next st. (5 sts) Leave the last 2 sts unworked. Fasten off.
Second lobe:
1. Keep the same side facing as at the start of Row 11. Skip 3 more sts of Row 10 (sts 10–12), which leaves a center dip one square deep.
2. Join cream in st 13.
3. Work Row 11 again over sts 13–21. (9 sts)
4. Work Row 12 again. (5 sts) Fasten off.
The front is now 6 in (15.2 cm) wide and 5.5 in (14.0 cm) tall at the lobes.
Heart Outline
Use peach.
1. With RS facing, start at the top of Row 10 on one side edge.
2. Work surface slip stitch down the outer dc posts of Rows 10–8.
3. Follow the staircase line where the solid blocks meet the mesh, down to the point at Row 3.
4. Work back up the other side as a mirror image, ending at the top of Row 10.
5. Work a second line of surface slip stitch directly beside the first, on the block side, to make the bold double-width outline.
Fasten off. Weave in the ends on the WS.
Top Trim
Use peach. With RS facing, join at the top of Row 9 on the side edge. Work around the lobes and dip as follows.
Row 1, first lobe:
– 2 sc in each of the Row 10 and Row 11 row ends (4 sc).
– 1 sc in the corner (1).
– 2 sc across the exposed top of Row 11, square 1 (2).
– 2 sc in the Row 12 row end (2).
– 1 sc in the corner (1).
– 4 sc across the top of Row 12 (4).
– 1 sc in the corner (1).
– 2 sc in the Row 12 row end (2).
– 2 sc across the top of square 4 (2).
– 1 sc in the corner (1).
– 2 sc in the Row 11 row end on the dip side (2).
That gives 22 sc for the first lobe.
Row 1, dip: 4 sc across the top of Row 10, squares 5–6.
Row 1, second lobe: Work the first lobe in reverse. (22 sc)
Row 1 total: 48 sc. Turn.
Row 2: Ch 1, sl st loosely in the back loop of each st across. (48 sl sts) Fasten off.
Edge Prep Row
Use cream. With RS facing, join at the top of Row 9 on the side edge.
– Down the side: 2 sc in each of the dc row ends of Rows 9–3 (14 sc), then 1 sc in each of the Row 2 and Row 1 row ends (2 sc). (16 sc)
– Along the bottom: 1 sc in each foundation ch. (21 sc)
– Up the other side: mirror the first side. (16 sc)
Total: 53 sc. Fasten off.
Gusset (Make 3)
Use cream.
Foundation: Ch 11.
Row 1: Sc in 2nd ch from hook and in each ch across, turn. (10 sc)
Rows 2–53: Ch 1, sc in each st across, turn. (10 sc)
Fasten off. The strip is 2.9 x 13.25 in (7.4 x 33.7 cm). It’s made of a 16-row side section, a 21-row bottom section and a 16-row side section. Mark Rows 16 and 37 on both long edges.
Make All Pieces
- Back panel: 1, in peach. The border and straps are cream.
- Pocket fronts: 3, in cream, with peach outline and trim.
- Gussets: 3, in cream.
Layout, viewed from the front:
   [strap]                    [strap]
+-------------------------------------+  panel Row 112
|  rows 99-112: open panel (3.5 in)   |
|  POCKET 3: rows 77-98               |
|  rows 63-76: open panel (3.5 in)    |
|  POCKET 2: rows 41-62               |
|  rows 27-40: open panel (3.5 in)    |
|  POCKET 1: rows 5-26                |
|  rows 1-4: open panel (1 in)        |
+-------------------------------------+  panel Row 1
Each pocket spans 22 panel rows, which is 5.5 in (14.0 cm). Pocket bottoms are spaced 36 rows apart, which is 9 in (22.9 cm).
Border
The border uses the same sc gauge as the panel, so its 2 rounds add 0.25 in (0.6 cm) per round on every edge.
Round 1: Use cream. With RS facing, join in the top-right corner st.
– Top edge: 3 sc in the corner st, 1 sc in each of the next 19 sts, 3 sc in the last st.
– Side edge: 1 sc in each row end of Rows 111–2. (110 sc)
– Bottom edge: 3 sc in the corner, 1 sc in each of the next 19 sts, 3 sc in the corner.
– Other side edge: 110 sc.
– Sl st to the first sc. (270 sc)
Counting each side from one corner center to the next, the top and bottom have 23 sts and the long sides have 114 sts. Check: 2 x 23 + 2 x 114 − 4 shared corners = 270.
Round 2: Ch 1, then work 1 sc in each st and 3 sc in each corner center st. Sl st to the first sc. (278 sc)
Each side gains 2 stitches. The top and bottom now have 25 sts each and the long sides have 116 sts. Check: 2 x 25 + 2 x 116 − 4 = 278.
Why the math works:
– Row 1 corners: the 3-sc corners use the first and last top stitches, so 19 + 2 corner groups = 25 sts across the top. The sides use only the 110 rows between the top and bottom rows, so no row is counted twice.
– Round 2: each corner adds 2 sts, giving +8 for the round.
– Size: the panel grows from 6 x 28 in (15.2 x 71.1 cm) to 7 x 29 in (17.8 x 73.7 cm).
Straps (Make 2)
- With RS facing, join cream in the first st of the 25-st top edge.
- Rows 1–24: Ch 1, sc in the first 5 sts, turn. (5 sc) Each strap is 6 in (15.2 cm) long.
- Fasten off, leaving a 10 in (25.4 cm) tail.
- Work the second strap the same way over top-edge sts 21–25. The 15 center sts stay free.
- Fold each strap to the back. Sew its last row to the WS of the border, directly behind the strap’s base. This makes a loop that hangs about 3 in (7.6 cm).
Joining
Step 1: Gusset to pocket front (slip-stitch seam).
1. Hold the gusset and the pocket front with RS together.
2. Match gusset Row 1 to the first edge-prep sc, and the marked rows to the bottom corners.
3. Working through one gusset row end and one prep stitch at a time, sl st across the full length. That’s 53 joins: 16 on the side, 21 on the bottom and 16 on the other side.
4. Turn the pocket RS out.
Step 2: Pocket to panel (whipstitch).
1. Pin the gusset’s free long edge to the panel.
2. Sew the bottom section (21 row ends) across the 21 sts of the marked panel row. Use one whipstitch per row end.
3. Sew each side section (16 row ends) up the panel’s edge column, stitch 1 or 21, across 16 panel rows. For Pocket 1, these are Rows 5–20.
Tension: Each gusset bottom section is 5.25 in (13.3 cm) when relaxed. It stretches 0.75 in (1.9 cm) to fit the 6 in (15.2 cm) front and back edges. That slight tension keeps the pocket floor firm. Pull each whipstitch snug but not tight, so the seam lies flat and doesn’t pucker.
Checkpoint: Each attached pocket should be 6.5 in (16.5 cm) across the lobes and stand about 2.9 in (7.4 cm) out from the panel. A standard roll, about 4.5 in (11.4 cm) wide and 4 in (10.2 cm) tall, should slide in with its top showing at the center dip.
Final Blocking
- Weave in all ends along same-color stitches.
- Mist the whole piece until it’s damp. Don’t soak it.
- Lay it face-up and pin the panel to 7 x 29 in (17.8 x 73.7 cm).
- Stuff each pocket with a roll or a rolled towel.
- Pull the mesh squares straight and pin the lobe tips into rounded shapes.
- Let it dry completely. Then hang it and check that both straps sit level.
Final Quality-Control Checklist
- The panel measures 7 x 29 in (17.8 x 73.7 cm).
- Border Round 2 has 278 sts with even corners.
- Each pocket front has 21 sts per row and 10 filet rows.
- The heart outline is continuous, with no gaps at the point.
- The trim has 48 sts per pocket.
- All 53 gusset joins are complete on each pocket.
- The pockets start at panel Rows 5, 41 and 77.
- The straps are equal length and securely sewn.
Troubleshooting
- Mesh squares look tall and narrow. Your dc is loose. Try a tighter yo or go down a hook size, and keep each ch 1 snug.
- The heart point is off-center. Recount Row 3: it should be 9 dc, two meshes, then 9 dc counting the turning ch.
- The gusset doesn’t reach the top of the front. Check that you worked 2 sc per dc row end in the edge prep row.
- A pocket sags under the roll. The bottom seam is too loose. Resew it with firmer whipstitches.
- The panel twists when hung. Block it again and check that both straps have exactly 24 rows.
- The border ruffles. You probably worked extra sc along the sides. Each side of Round 1 needs exactly 110.
Care
Hand wash or machine wash on a cool, gentle cycle in a laundry bag. Reshape while damp and dry flat. Don’t hang it to dry while wet.
Final Notes
The finished size depends on keeping each stage on measurement:
1. Gauge: 14 sts = 4 in (10.2 cm).
2. Pocket front: 21 sts = 6 in (15.2 cm).
3. Edge prep row: 53 sts, matched one-to-one to the 53 gusset rows.
4. Panel: 21 x 112 = 6 x 28 in (15.2 x 71.1 cm).
5. Border: 2 rounds bring the panel to 7 x 29 in (17.8 x 73.7 cm).
Check each number as you go and the three heart pockets will line up neatly.
Happy crocheting!