

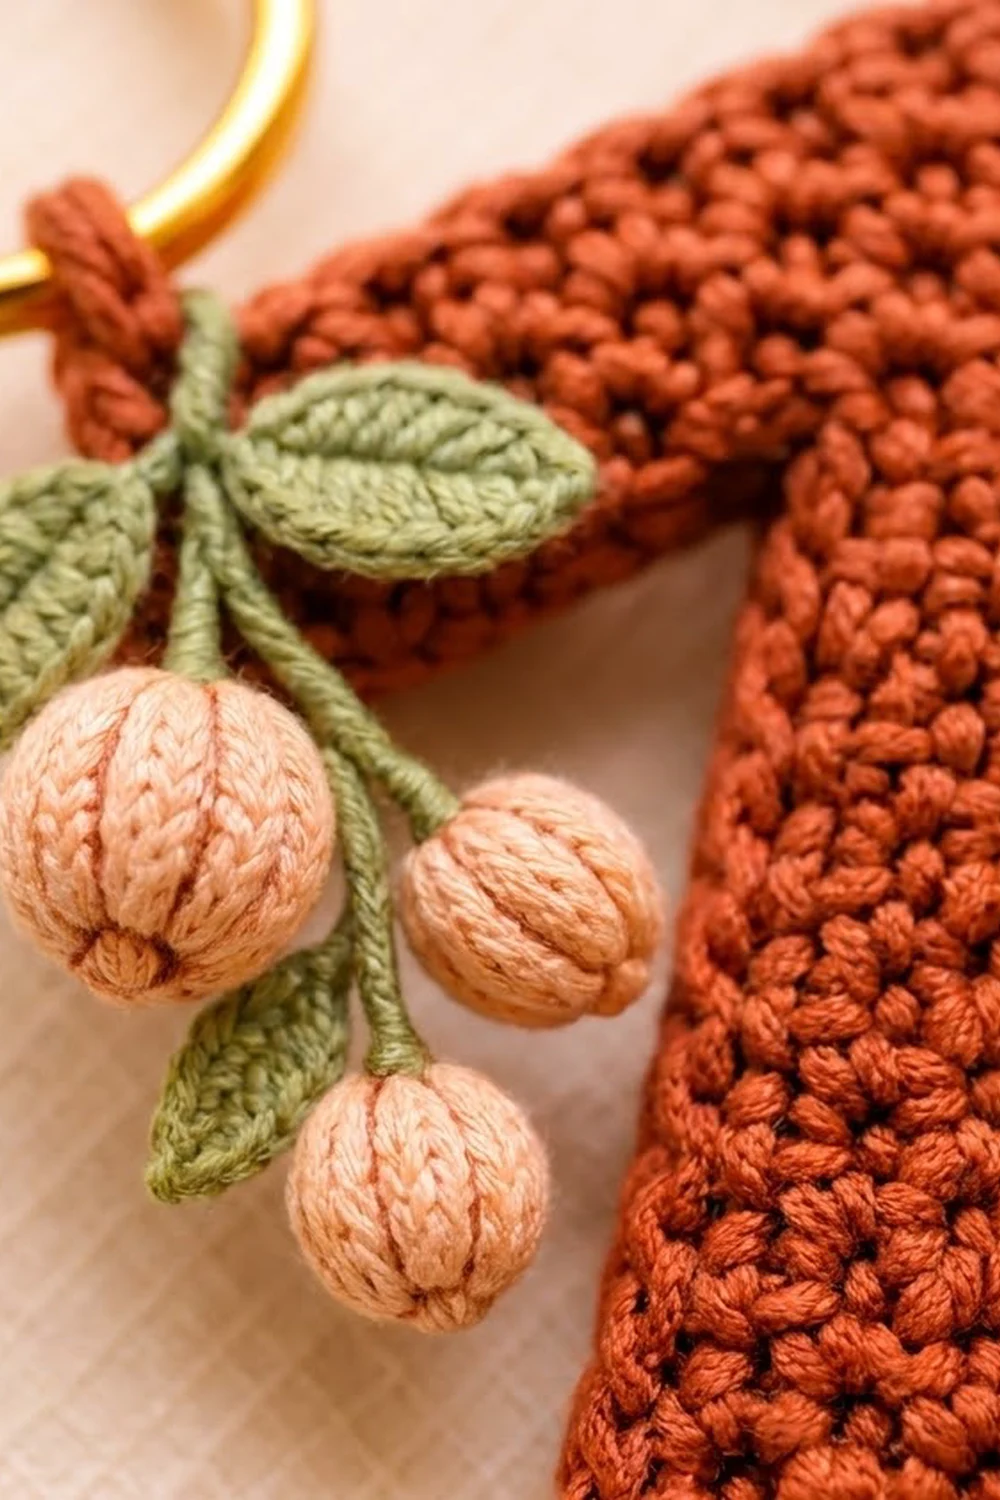
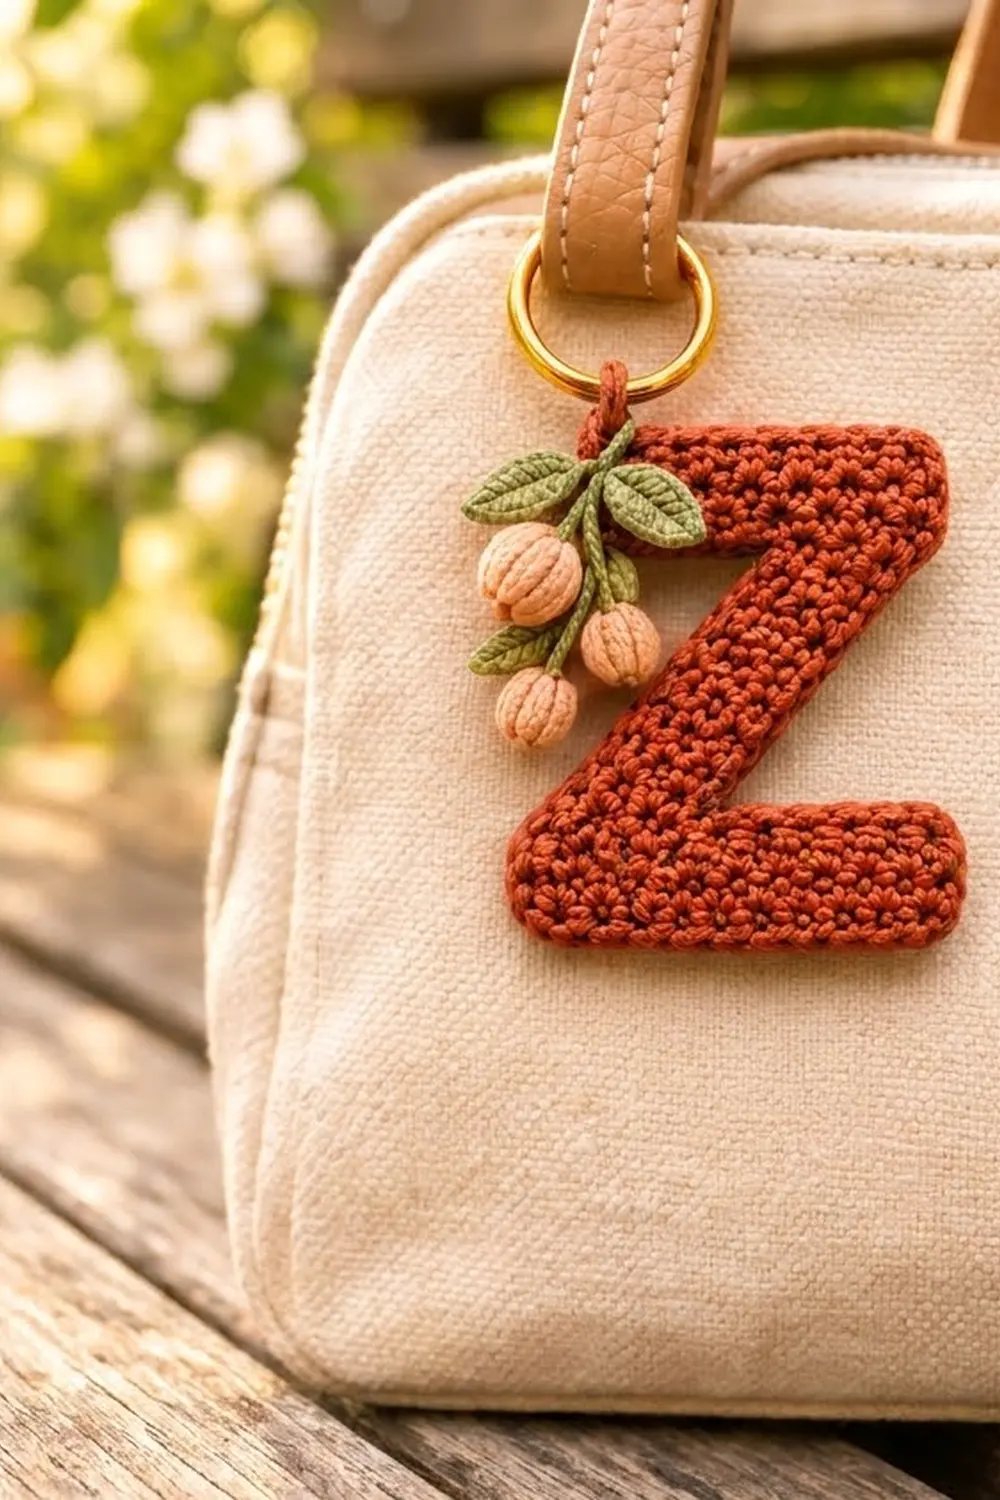
This little charm is a chunky capital Z with rounded corners, worked in dense single crochet in a warm rust-terracotta shade. A small sprig of three ridged peach berries and three sage-green leaves sits at the top-left corner, right where the keychain loop meets a gold ring.
The look is soft and modern: a tight, pebbly fabric, smooth rounded edges, and a botanical accent that makes a plain initial feel like a gift. It works as a bag charm, a key fob, or a personalized gift tag.
The pattern uses US crochet terms. The finished letter measures about 3.6 in (9.1 cm) wide and 4.2 in (10.7 cm) tall, not counting the loop and ring.
Construction is simple. You work the whole Z flat in one piece, from the bottom bar up through a shifting diagonal and into the top bar. One round of single crochet smooths the edges. Then you add a hanging loop, make three berries and three leaves, and sew the sprig on.
Finished Size and Construction
- Finished letter: 3.6 in (9.1 cm) wide x 4.2 in (10.7 cm) tall
- With loop and ring: about 5.7 in (14.5 cm) long
- Skill level: Easy-intermediate
- Terminology: US
- Yarn weight: DK / light (3), cotton or cotton blend
- Hook: 3.0 mm (US C/2 or D/3)
- Number of pieces: 1 letter, plus 3 berries and 3 leaves sewn on as embellishment
- Layout: single charm, no joining of motifs
- Letter size before border: 3.2 in (8.1 cm) wide x 3.8 in (9.7 cm) tall
- Bar thickness before border: 0.9 in (2.3 cm)
- Border depth: about 0.2 in (0.5 cm) per side
Materials
Choose a smooth, tightly plied cotton DK. Cotton gives the crisp stitch definition this charm needs and holds the letter shape without stiffener. Avoid fuzzy or very soft acrylics, because the Z will curl.
- Rust / terracotta (MC): 10 g, about 25 m
- Peach / blush (CC1): 3 g, about 8 m
- Sage green (CC2): 3 g, about 8 m
All quantities include a margin for swatching and tails.
Tools:
- 3.0 mm crochet hook
- 1 in (2.5 cm) gold split key ring or keychain ring
- Small pinch of polyester fiberfill
- Tapestry needle
- 4 stitch markers
- Blocking mat and rustproof pins
- Spray bottle
Abbreviations (US Terms)
- ch – chain
- sl st – slip stitch
- sc – single crochet
- hdc – half double crochet
- dc – double crochet
- sc2tog – single crochet 2 together
- MR – magic ring
- st(s) – stitch(es)
- RS / WS – right side / wrong side
Special stitch – foundation single crochet extension (fsc): Insert the hook into the two bottom strands at the base of the last sc made. Yarn over and pull up a loop (2 loops on hook). Yarn over and draw through 1 loop; this makes the “chain” base. Yarn over and draw through both loops. Each fsc adds 1 st to the row and builds its own base. For the next fsc, insert the hook into the chain base of the fsc you just made.
Gauge and Checkpoints
Gauge: 20 sc and 22 rows = 4 in (10.2 cm) in sc worked flat. That is 5 sts and 5.5 rows per inch.
Before starting, work a small swatch of 16 sc for 6 rows. It should measure 3.2 in (8.1 cm) wide and about 1.1 in (2.8 cm) tall.
Checkpoints:
- After Row 5: 3.2 in (8.1 cm) wide, 0.9 in (2.3 cm) tall
- After Row 16: about 2.9 in (7.4 cm) tall at the top of the diagonal
- After Row 21: 3.2 in (8.1 cm) x 3.8 in (9.7 cm)
- After border: 3.6 in (9.1 cm) x 4.2 in (10.7 cm)
A difference of up to 0.2 in (0.5 cm) is fine. If your bottom bar is too wide, go down to a 2.75 mm hook. If it is too narrow, go up to 3.25 mm. Fix gauge here, not later, because every later measurement depends on it.
The Letter Z
Work in rows of sc, turning with ch 1 (the ch 1 does not count as a st). The side facing you on odd rows is the RS. With the RS facing, number the columns 1 to 16 from left to right. Odd rows are worked right to left; even rows are worked left to right.
Bottom Bar
With MC, ch 17.
Row 1 (RS): Sc in 2nd ch from hook and in each ch across, turn. (16 sc) Row 1 ends at the left edge.
Rows 2–5: Ch 1, sc in each st across, turn. (16 sc)
Row 5 ends at the left edge. Check: 3.2 in (8.1 cm) wide, 0.9 in (2.3 cm) tall.
Diagonal
The diagonal is a strip 6 sts wide that moves one column to the right on every row. You add a st at the right end with 2 sc and remove one at the left end with sc2tog, so the count stays at 6.
Row 6: Ch 1, sc in first 6 sts (columns 1–6), turn, leaving the remaining 10 sts unworked. (6 sc)
Row 7 (right to left): Ch 1, 2 sc in first st, sc in next 3 sts, sc2tog over last 2 sts, turn. (6 sc)
Row 8 (left to right): Ch 1, sc2tog over first 2 sts, sc in next 3 sts, 2 sc in last st, turn. (6 sc)
Rows 9–16: Repeat Rows 7 and 8 four more times. (6 sc each row)
Over Rows 7–16 the strip moves 10 columns to the right. Row 16 sits over columns 11–16 and ends at the right edge, in line with the right side of the bottom bar.
Check: the letter now measures about 2.9 in (7.4 cm) tall. Measured straight across, the diagonal strip is 1.2 in (3.0 cm) wide.
Top Bar
Row 17 (right to left): Ch 1, sc in each of the 6 sts, then work 10 fsc to extend the row left over columns 10 to 1. Turn. (16 sts: 6 sc + 10 fsc)
Rows 18–21: Ch 1, sc in each st across, turn. (16 sc)
Row 21 ends at the top-left corner. Fasten off.
Check: 3.2 in (8.1 cm) wide x 3.8 in (9.7 cm) tall. Both bars are 5 rows thick.
Border
Border gauge: Work 1 sc in each st along stitch edges and 1 sc in each row end along side edges. Work 3 sc in each outer corner and sc2tog across each inner corner.
The Z has 6 outer corners: bottom-left, bottom-right, the top-right of the bottom bar, the bottom-left of the top bar, top-left, and top-right. It has 2 inner corners, where the diagonal meets each bar.
With RS facing, join MC with a standing sc in the first foundation st at the bottom-left corner. Work counterclockwise:
Round 1:
- Bottom edge: 2 more sc in the same st (this completes the corner), sc in each of the next 14 foundation sts, 3 sc in the last foundation st. (20 sc)
- Right edge of bottom bar: Sc in each row end of Rows 1–5. (5 sc)
- Top of bottom bar: 3 sc in column 16 of Row 5, sc in columns 15–8, sc2tog over column 7 and the right row end of Row 6. (12 sts)
- Diagonal, right side: Working up the right row ends of Rows 7–16, sc in each row end, but work 2 sc in the row ends of Rows 8, 11, and 14. (13 sc)
- Right edge of top bar: Sc in each row end of Rows 17–21. (5 sc)
- Top edge: 3 sc in first st of Row 21, sc in next 14 sts, 3 sc in last st. (20 sc)
- Left edge of top bar: Sc in each row end of Rows 21–17. (5 sc)
- Underside of top bar: Working into the fsc bases, 3 sc in column 1, sc in columns 2–9, sc2tog over column 10 and the left row end of Row 16. (12 sts)
- Diagonal, left side: Working down the left row ends of Rows 15–6, sc in each row end, but work 2 sc in the row ends of Rows 14, 11, and 8. (13 sc)
- Left edge of bottom bar: Sc in each row end of Rows 5–1. (5 sc)
Sl st to first sc. (110 sts)
Why the math works: The letter is symmetrical, so each half of the border has the same counts: 20 + 5 + 12 + 13 + 5 = 55, and 55 x 2 = 110.
- Bar edges: Each bar edge has 16 sts. The 14 middle sts get 1 sc each and the 2 corner sts get 3 sc each, so 14 + 6 = 20. Each corner is counted only once.
- Diagonal edges: Each one is about 2.8 in (7.1 cm) long. At 5 sc per inch it needs about 14 sts. The 13 sc plus the sc2tog at the inner corner makes 14.
- Corners: The sc2tog at each inner corner stops the fabric from ruffling, and the 3-sc outer corners stop the points from cupping.
Hanging Loop
Join MC in the center sc of the top-left corner. Ch 8, then sl st in the same st. Ch 1, work 12 sc into the ch-8 loop, and sl st into the base. Fasten off and weave in. The loop is about 0.5 in (1.3 cm) long. Open the split ring and slide it onto the loop.
Berry Sprig
Berries (make 3)
With CC1:
Round 1: 6 sc in MR. (6 sc)
Round 2: 2 sc in each st. (12 sc)
Rounds 3–4: Sc in each st. (12 sc)
Stuff firmly with a small pinch of fiberfill.
Round 5: Sc2tog 6 times. (6 sc)
Fasten off, leaving a 12 in (30.5 cm) tail, and close the hole. Each berry is about 0.7 in (1.8 cm) across.
Ridges: Thread the tail onto the needle. Wrap it from the top center to the bottom center 6 times, spacing the wraps evenly around the berry and pulling them snug. This makes the segmented, ridged surface. Secure the tail at the top. With CC2, work 3 small straight stitches at the bottom to form a tiny calyx.
Leaves (make 3)
With CC2, ch 6.
Round 1: Sl st in 2nd ch from hook, sc in next ch, hdc in next ch, dc in next ch, hdc in last ch, 3 sc in the end of the chain. Working along the other side of the chain: hdc in next ch, dc in next ch, hdc in next ch, sc in next ch, sl st in last ch. (13 sts)
Fasten off, leaving a 6 in (15.2 cm) tail. Each leaf is about 0.9 in (2.3 cm) long.
Stems
With CC2, ch 10 for the main stem and fasten off. Make 3 berry stems of ch 4 each. Sew one berry to the end of each berry stem.
Assembly
Lay the letter RS up with the loop at the top-left.
- Sew the top of the main stem to the top-left corner, right next to the hanging loop.
- Let the stem fall diagonally down over the left end of the top bar.
- Sew the three berry stems to the lower part of the main stem. Let the berries hang over the left edge, just below the top bar.
- Sew two leaves near the top of the stem, one pointing up-left and one pointing up-right. Sew the third leaf below the berries.
- Tack each berry lightly to the letter so it does not swing.
Sew through the front layer of the letter only, so no stitches show on the back.
Final Blocking
- Weave in all MC tails before blocking. You can attach the sprig afterward if you prefer.
- Pin the letter RS up on the blocking mat at 3.6 in (9.1 cm) x 4.2 in (10.7 cm).
- Put a pin at each of the four outer bar corners. Check that both bars are level and parallel.
- Mist evenly until damp. Do not soak it, and do not wet the stuffed berries.
- Smooth the diagonal edges straight with your fingertips.
- Let it dry completely, for at least 4 hours.
- Unpin, and attach the sprig if you haven’t already.
Final Quality-Control Checklist
- Letter measures 3.6 in (9.1 cm) x 4.2 in (10.7 cm), within 0.2 in (0.5 cm)
- Both bars are 5 rows thick and the same width
- Diagonal is an even 6 sts wide on every row
- Border has 110 sts, with 3 sc at each of the 6 outer corners
- Inner corners lie flat, with no gaps or puckers
- The Z reads correctly from the RS and is not mirrored
- Loop is secure and the ring closes fully
- Three berries and three leaves, all tacked down firmly
- No yarn tails visible on either side
Troubleshooting
The diagonal looks jagged. Some stepping is normal when working in rows, and the border and blocking smooth it out. Make sure the 2 sc and the sc2tog are at the correct ends of each row.
The diagonal gets narrower or wider. Recount each row. Every row must have 6 sts.
The top bar is shorter than the bottom bar. You probably worked 9 fsc instead of 10. Row 17 needs 16 sts.
The inner corners have holes. Work the sc2tog tightly. Close any gap that remains with a stitch of the tail on the WS.
The letter curls. Your tension is too tight or the yarn is too soft. Block it firmly, or remake it in cotton with a slightly larger hook.
The Z looks like an S. You worked the border on the wrong side. With the RS facing, the diagonal must run from bottom-left to top-right.
The berries look round, not ridged. Pull the wraps tighter and keep them evenly spaced.
Care
Hand wash in cool water and lay flat to dry, reshaping the letter. If the metal ring might tarnish, remove it first.
Final Notes
Every measurement in this pattern builds on the one before it. A gauge of 20 sc and 22 rows to 4 in (10.2 cm) gives a bottom bar 3.2 in (8.1 cm) wide. The 6-st diagonal moves 10 columns over Rows 7–16, so it meets the top bar exactly at the right edge. Twenty-one rows make a letter 3.8 in (9.7 cm) tall. The 110-st border adds 0.2 in (0.5 cm) per side, bringing the Z to 3.6 in (9.1 cm) x 4.2 in (10.7 cm). If you check each stage, the only thing left to place by eye is the berry sprig.
Happy crocheting!