

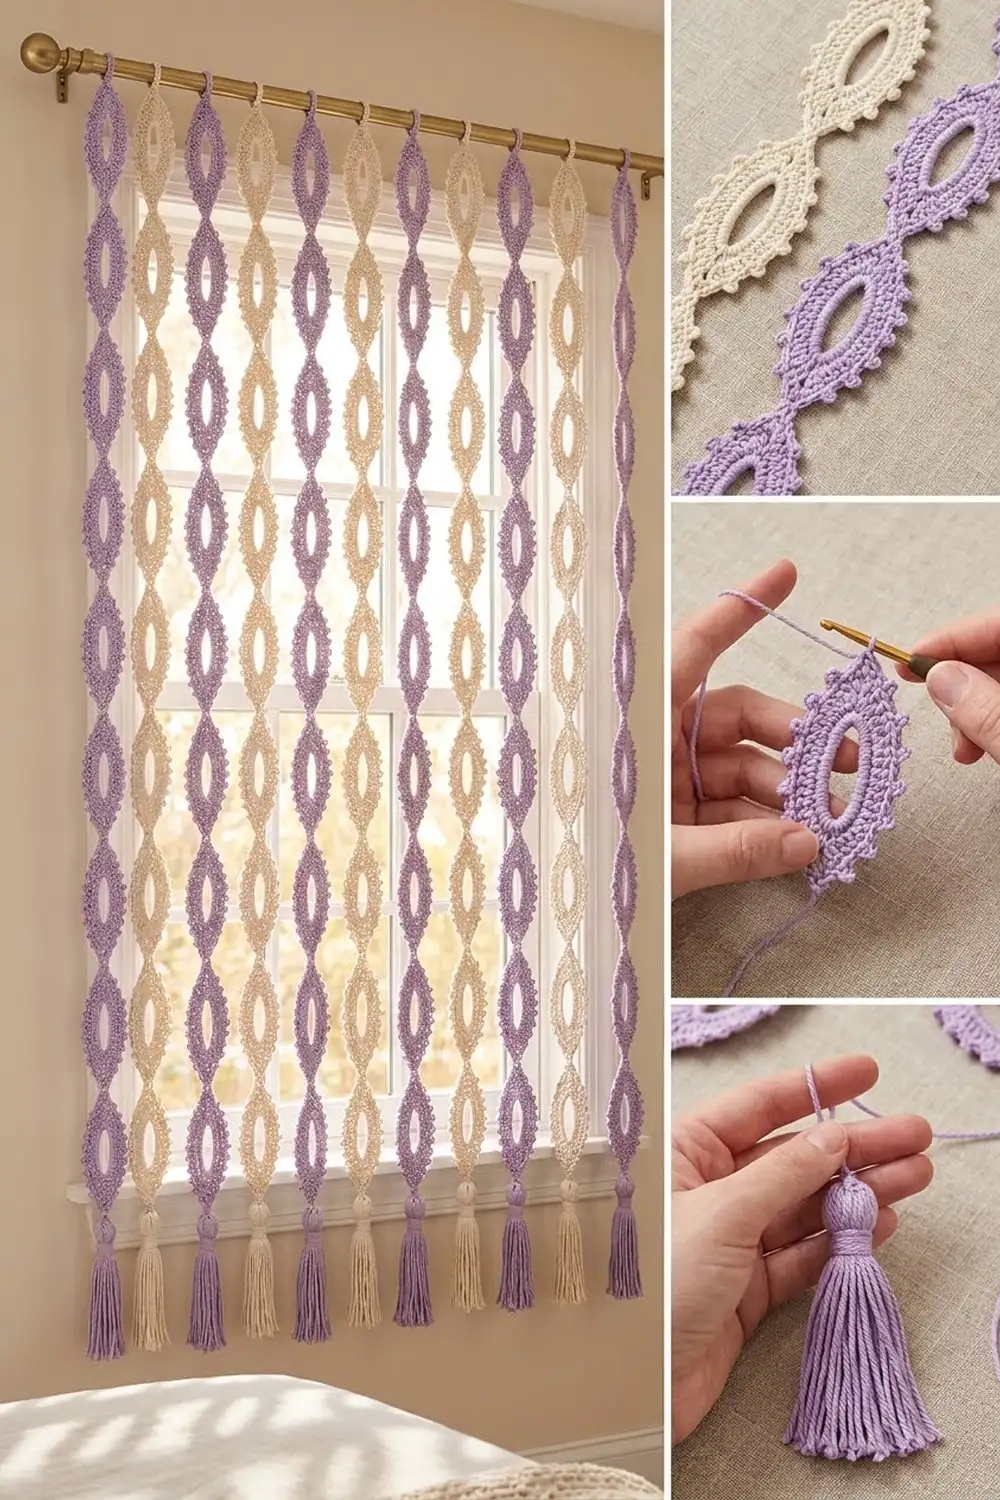
This curtain is a column of pointed oval links that hangs like a strand of lace beads. Each link has an open center, a smooth ring of stitches around it, and a row of small knot picots along both edges. A full tassel at the bottom adds weight, so the strand hangs straight.
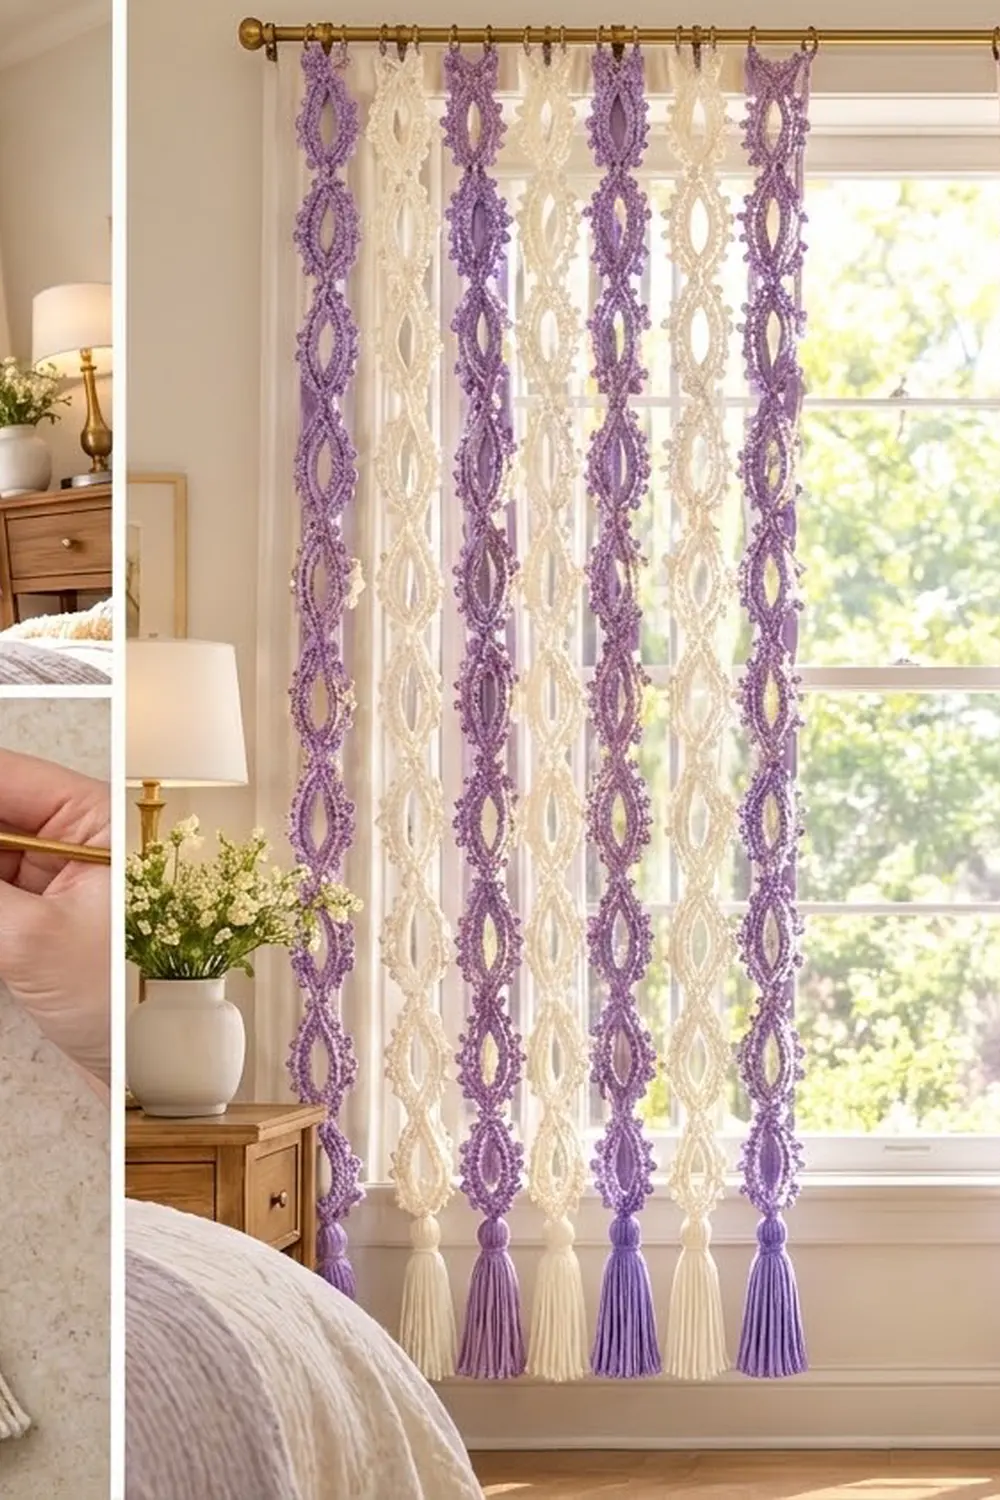
The sample curtain alternates soft lavender and cream strands on a brass rod. The strands are not joined to each other, so light comes through between them and they move a little when the air moves. You can hang one strand as a wall accent or make a full set for a window.
The pattern uses US crochet terms. One finished strand is 2.25 in (5.7 cm) wide and 56 in (142.2 cm) long: a 2 in (5.1 cm) hanging loop, 12 links at 4 in (10.2 cm) each, and a 6 in (15.2 cm) tassel.
Construction is simple. Each link starts with a chain ring and gets two shaping rounds. The third round adds the picot edging and joins the new link to the one above it as you go. When the last link is done, you tie a tassel to its bottom point.
Finished Size and Construction
- Finished strand: 2.25 in (5.7 cm) wide x 56 in (142.2 cm) long
- Skill level: Easy to Intermediate
- Terminology: US crochet terms
- Yarn weight: Worsted (#4), cotton or cotton blend
- Hook: 5.0 mm (US H-8)
- Number of pieces: 12 links per strand, joined as you go into one strand, plus 1 tassel
- Layout: 1 link wide x 12 links tall
- Link size (finished): 2.25 in (5.7 cm) wide x 4 in (10.2 cm) tall, point to point
- Link size before border: 1.75 in (4.4 cm) wide x 3.5 in (8.9 cm) tall
- Border depth: 0.25 in (0.6 cm) on each side and at each point
- Full curtain (as shown): 16 strands, 8 lavender and 8 cream
Materials
Choose a smooth worsted cotton or cotton blend at about 200 m per 100 g. Cotton gives the picots clear definition and helps the strands hang straight. Fuzzy or very stretchy yarns blur the picots and let the links stretch over time.
For one strand:
– Lavender (or Cream): 45 g / 90 m
For the full 16-strand curtain shown:
– Lavender: 350 g / 700 m (8 strands)
– Cream: 350 g / 700 m (8 strands)
One strand uses about 37.5 g / 75 m:
– about 59 m for the links
– 2 m for the hanging loop and tails
– about 14 m for the tassel and its ties
All quantities above include a margin for gauge differences and swatching.
Tools:
– 5.0 mm (US H-8) crochet hook
– Tapestry needle
– 2 locking stitch markers
– Stiff card cut to 6.5 in (16.5 cm) tall, for the tassel
– Sharp scissors
– Measuring tape
– Blocking mat, rustproof pins, and a spray bottle
– Curtain rod for hanging
Abbreviations (US Terms)
- ch – chain
- sl st – slip stitch
- sc – single crochet
- hdc – half double crochet
- st(s) – stitch(es)
- sp – space
- rnd – round
- rep – repeat
- P – knot picot (see below)
Special stitch – Knot picot (P): Ch 3, then sl st into the front loop and the left vertical strand of the last sc made. This makes a small round bump that sits on the edge. A picot is not counted as a stitch, and you never work into it.
Gauge and Checkpoints
Gauge: 16 sc and 18 rows = 4 in (10.2 cm) in sc worked flat with a 5.0 mm hook.
Make one full link before you start the strand. Measure it after each round:
- After Rnd 1: 1.25 in (3.2 cm) wide x 3 in (7.6 cm) tall
- After Rnd 2: 1.75 in (4.4 cm) wide x 3.5 in (8.9 cm) tall
- After Rnd 3: 2.25 in (5.7 cm) wide x 4 in (10.2 cm) tall, point to point
- Open center: about 0.75 in (1.9 cm) wide x 2.25 in (5.7 cm) tall
If your link is too big, go down to a 4.5 mm hook or tighten the foundation chain. If it is too small, go up to a 5.5 mm hook. A 0.25 in (0.6 cm) error in link height adds up to 3 in (7.6 cm) over 12 links, so fix it now.
If the link cups or curls, Rnd 1 is too tight. Spread the 36 sc evenly around the ring. If the link ripples, your hdc stitches are too loose.
Link Pattern
Each link is worked in joined rounds. Do not turn. Pull each round’s sts evenly around the ring so the link stays flat.
Ring: Ch 24, sl st in first ch to form a ring. (24 ch)
Rnd 1: Ch 1, work 36 sc into the ring, working over the chain and into the center space. Sl st in first sc to join. (36 sc)
Pinch the ring flat into an oval. Place one marker in sc 1 (bottom point) and one in sc 19 (top point). That leaves 17 sc on each side.
Rnd 2 (shaping round): Ch 1, (sc, ch 2, sc) in sc 1; sc in next 3 sts, hdc in next 11 sts, sc in next 3 sts; (sc, ch 2, sc) in sc 19; sc in next 3 sts, hdc in next 11 sts, sc in next 3 sts. Sl st in first sc to join.
(36 sts worked 1 per st + 2 extra sc at the points = 38 sts, plus 2 ch-2 point sps)
The hdc stitches make the sides taller, and the sc near each end keep the ends narrow. This gives the link its pointed oval shape. The ch-2 spaces make the two sharp points.
Each side now has 19 sts between the two ch-2 point sps. That count includes the point sc at each end: 1 + 3 sc + 11 hdc + 3 sc + 1 = 19.
Do not fasten off. Rnd 3 is the border and joining round. It is written out in the Border section below because it also joins the new link to the link above.
Make All Strands
Each strand is made the same way, from top to bottom:
- Link 1: Rnds 1–3, adding the hanging loop at its top point.
- Links 2–12: Rnds 1–2, then Rnd 3 with a join to the link above.
- Tassel: tied to the bottom point loop of Link 12.
Quantities for the curtain shown:
– Lavender: 8 strands (96 links, 8 tassels)
– Cream: 8 strands (96 links, 8 tassels)
Rod layout (left to right, L = lavender, C = cream):
| L | C | L | C | L | C | L | C | L | C | L | C | L | C | L | C |
  1   2   3   4   5   6   7   8   9  10  11  12  13  14  15  16
With 0.75 in (1.9 cm) gaps between strands, the curtain is 47.25 in (120.0 cm) wide. That is 16 strands x 2.25 in (5.7 cm) plus 15 gaps x 0.75 in (1.9 cm). Change the number of strands or the gap size to fit your window.
Joining
The links are joined as you go, point to point, in Rnd 3. Each new link joins at its top point to the bottom point loop of the link above. Only one stitch joins to one point loop, so there are no seams to sew and the narrow waist forms on its own.
Stitch-to-stitch logic: The bottom point of every link has a ch-3 loop. When the next link reaches its top ch-2 sp in Rnd 3, replace its ch 3 with: ch 1, sl st into the ch-3 point loop of the link above, ch 1. The two ch-1s plus the sl st take the place of the ch 3, so the stitch count stays the same.
Hanging loop (Link 1 only): At the top point of Link 1, work (sc, ch 16, sc) in the ch-2 sp instead of the ch-3 point loop. When Rnd 3 is done, join new yarn in the ch-16 loop and work 24 sc over it. Fasten off. The loop hangs about 2 in (5.1 cm) and fits a rod up to 1.25 in (3.2 cm) thick.
Tension: Keep the joining sl st as loose as your normal sts. If it is too tight, the links pull together and the waist bunches. If it is too loose, a gap opens between links.
Size checkpoint: After every 3 links, lay the strand flat without stretching it. The links should measure 12 in (30.5 cm) from the top of Link 1 to the bottom of Link 3, and 48 in (121.9 cm) after all 12 links.
Border
The border is Rnd 3, the picot edging. It adds 0.25 in (0.6 cm) on each side and at each point.
Border gauge: 6 picots along each 19-stitch side, spaced every 3 sc.
Rnd 3: Sl st into the bottom ch-2 sp. Ch 1, (sc, ch 3, sc) in same sp (bottom point loop).
Side A: Sc in next 2 sts, [P, sc in next 3 sts] 5 times, P, sc in next 2 sts.
Top point: (sc, ch 3, sc) in ch-2 sp. On Links 2–12, work (sc, ch 1, sl st in bottom point loop of link above, ch 1, sc) instead. On Link 1, work the hanging loop instead.
Side B: Sc in next 2 sts, [P, sc in next 3 sts] 5 times, P, sc in next 2 sts.
Sl st in first sc to join. Fasten off and weave in ends.
Counts per link:
– Each side: 2 + (3 x 5) + 2 = 19 sc and 6 picots
– Each point: 2 sc plus 1 point loop
– Total: 38 sts worked 1 per st + 4 sc at the points = 42 sc, plus 12 picots and 2 point loops
Counts per strand edge: Each long edge of the strand has 12 links x 19 sc = 228 sc and 12 x 6 = 72 picots. No stitches are added at the joins, because each join uses only the point loops.
Why the math works: Each side has 19 sts from Rnd 2, and each one gets exactly 1 sc, so the edge stays flat. The repeat of 3 sc between picots fits 6 picots with 2 sc at each end, so each side is symmetrical. The 2 extra sc at each point give the tight curve enough room to lie flat without puckering.
Tassel
- Wrap yarn 40 times around the 6.5 in (16.5 cm) card.
- Slide a 12 in (30.5 cm) tie strand under the wraps at the top edge. Thread both ends through the bottom point loop of Link 12 and knot it tightly.
- Cut through the wraps at the bottom edge of the card.
- Wrap a 20 in (50.8 cm) strand 12 times around the tassel, 1 in (2.5 cm) below the top. Knot it, then use the needle to hide the ends inside the tassel.
- Trim the tassel to 6 in (15.2 cm) long from the top.
Final Blocking
- Soak the strand in cool water for 10 minutes. Press out the water gently. Do not wring it.
- Roll it in a towel to remove extra water.
- Lay it flat on the blocking mat. Pin each link to 2.25 in (5.7 cm) x 4 in (10.2 cm).
- Pin the top and bottom point of each link in line, so the strand is straight.
- Push each picot outward with your finger so it stands up as a round bump.
- Comb the tassel straight and mist it lightly.
- Let everything dry fully, then hang the strand and check that it is 56 in (142.2 cm) long.
Final Quality-Control Checklist
- Every link has 36 sc in Rnd 1 and 38 sts in Rnd 2.
- Every side has 19 sc and 6 picots in Rnd 3.
- Every link measures 2.25 in (5.7 cm) x 4 in (10.2 cm).
- All 12 links are joined point to point, with no twists.
- The links measure 48 in (121.9 cm) from the top of Link 1 to the bottom of Link 12.
- The hanging loop is firm and fits over the rod.
- The tassel is 6 in (15.2 cm) long, and its neck is 1 in (2.5 cm) below the top.
- All ends are woven in.
- Strands of the same color match in length within 0.5 in (1.3 cm).
Troubleshooting
The link curls into a cup. The sc in Rnd 1 are bunched together. Spread all 36 sc evenly around the ring.
The link is round, not pointed. Check that you worked (sc, ch 2, sc) in the marked sts. Also check that you used sc, not hdc, for the 3 sts next to each point.
The picots lie flat. Tighten the ch 3 a little. Work the sl st into the front loop and side strand of the last sc.
The strand twists. A link was joined from the back. Undo Rnd 3 of that link and join it again with the right side facing you.
Strands differ in length. One strand probably has a link that is a different size. Measure each link and remake the odd one, or block it to size.
The tassel is thin. Add 10 more wraps, or use a heavier yarn for the tassel.
Care
Hand wash in cool water with mild soap, press out the water, and dry the strand flat. Re-pin it to size if the links have stretched.
Final Notes
Each measurement builds on the one before it:
– Gauge is 16 sc = 4 in (10.2 cm).
– Each link is 1.25 in (3.2 cm) wide after Rnd 1 and 1.75 in (4.4 cm) wide after Rnd 2.
– After the border, each link is 2.25 in (5.7 cm) x 4 in (10.2 cm).
– Twelve links make 48 in (121.9 cm).
– With the 2 in (5.1 cm) hanging loop and the 6 in (15.2 cm) tassel, the strand is 56 in (142.2 cm) long.
– Sixteen strands with 0.75 in (1.9 cm) gaps make a 47.25 in (120.0 cm) curtain.
Check the first link, then check again every few links. Happy crocheting!