

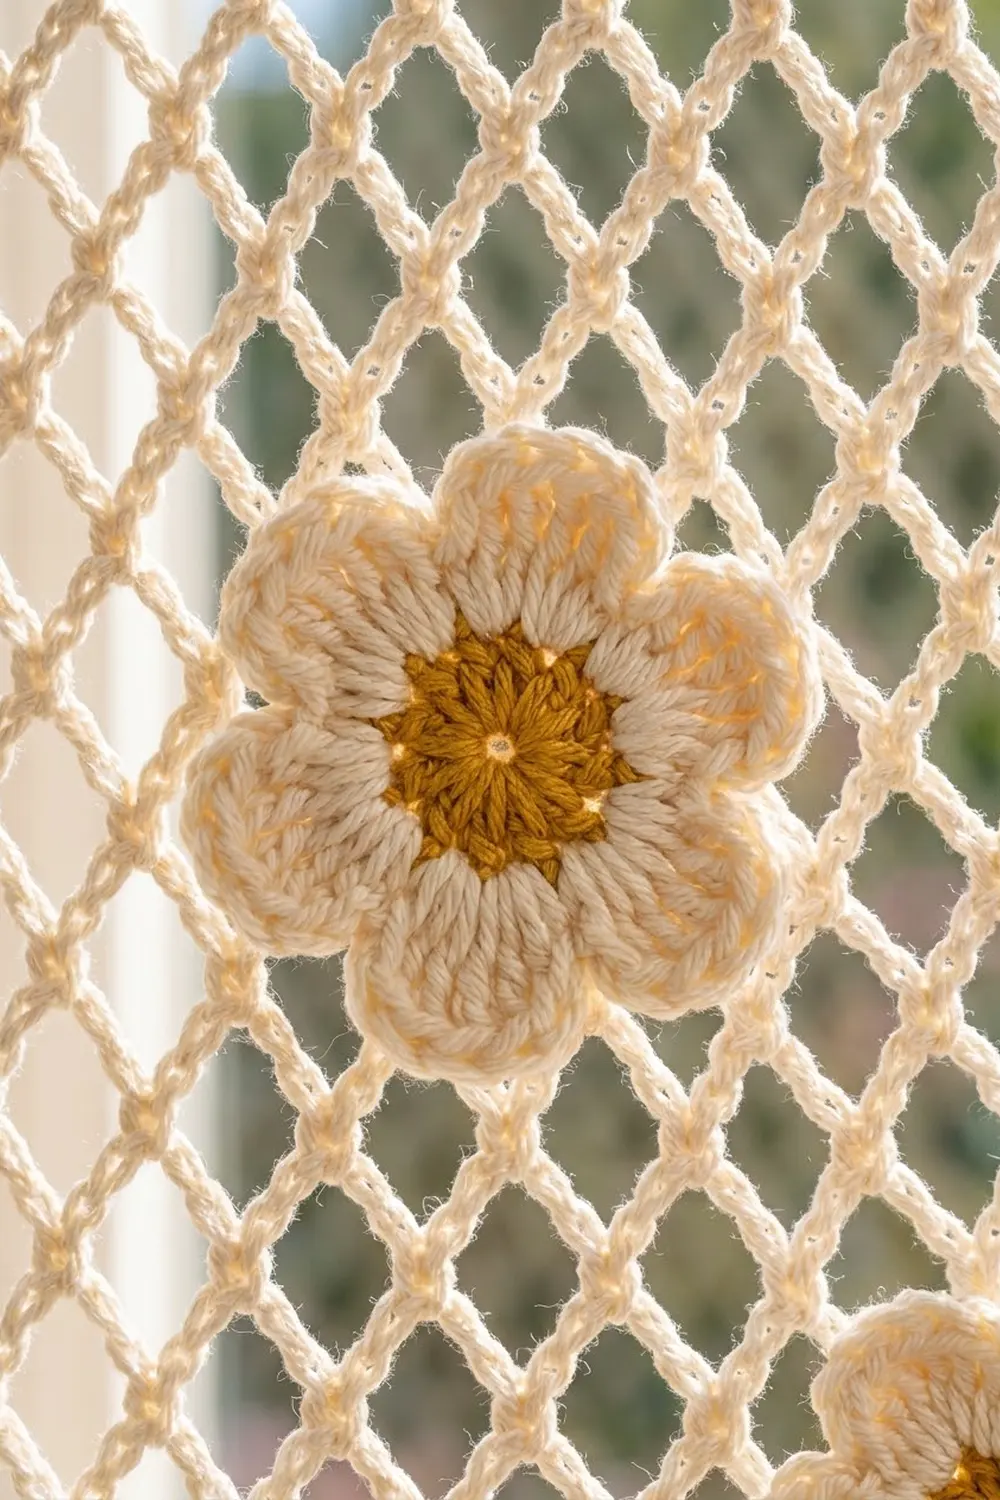
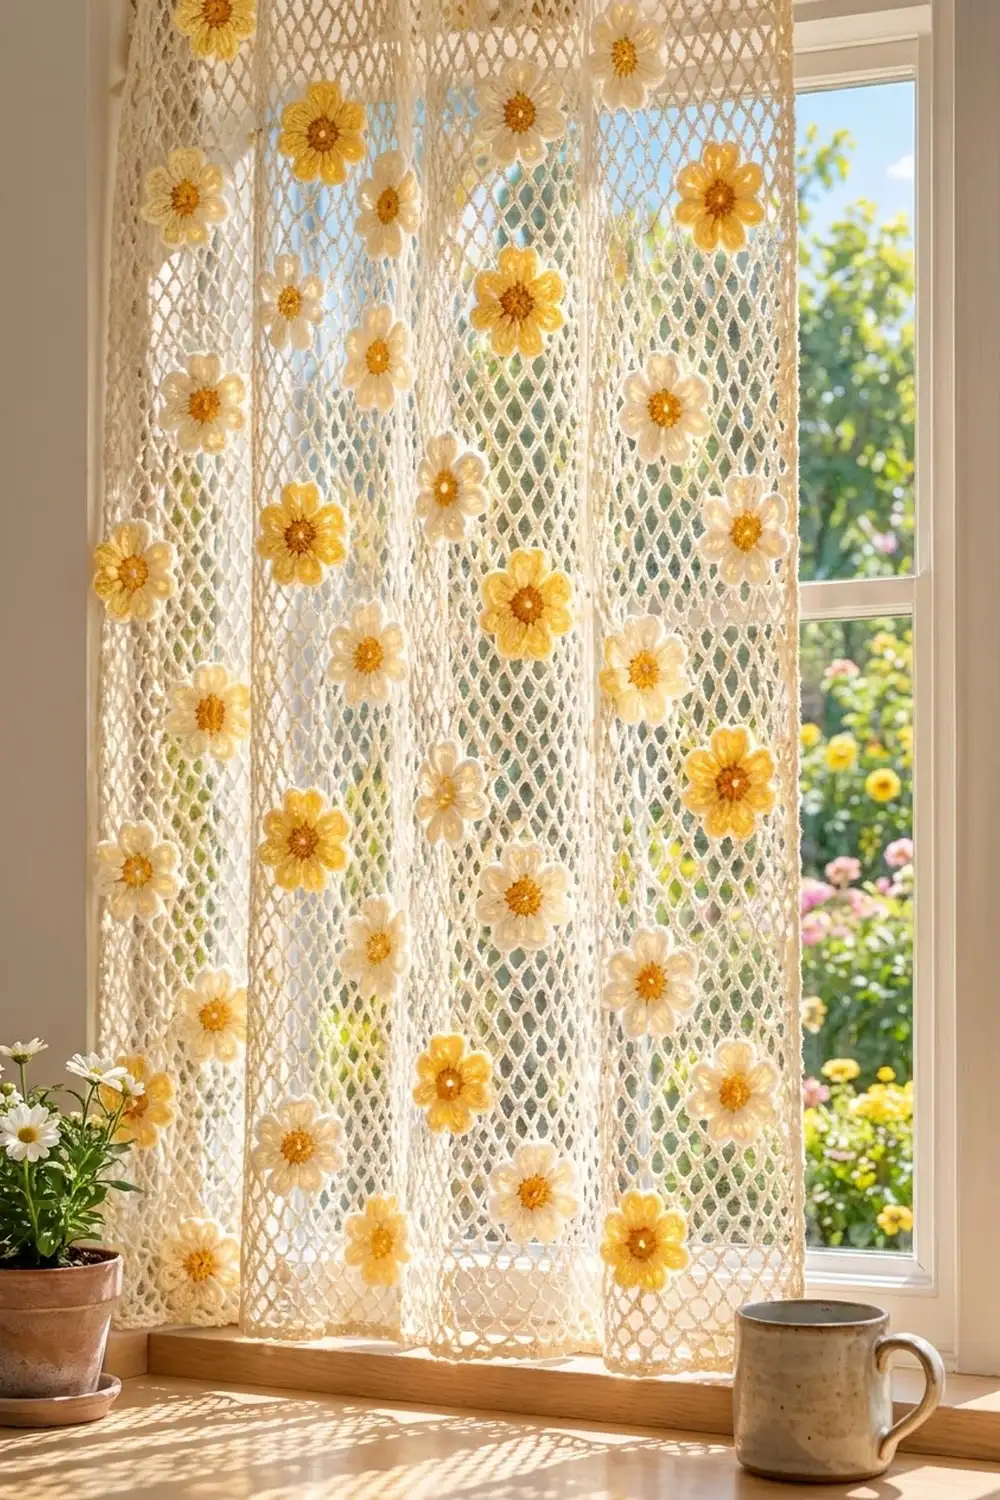
This café curtain is one light panel of cream diamond mesh with small six-petal flowers spread across it. About half the flowers have butter-yellow petals and the rest have cream petals. Every flower has a warm mustard center. When light comes through the window, the mesh is hard to see and the flowers seem to float on the glass.
The look is sunny and cottage-style: plain cotton yarn, a classic chain-loop net and simple appliqué flowers. All instructions use US crochet terms.
The finished panel is 25 in wide x 37 in long (63.5 cm x 94.0 cm), including a narrow single crochet border. Each flower is about 2.5 in (6.4 cm) across.
The construction is simple. You work the mesh flat in rows from a foundation chain, straighten the top with a trim row and add a two-round border all the way around. Then you make 25 flowers separately, block the panel and sew the flowers on using a staggered placement grid.
Finished Size and Construction
- Finished size: 25 in x 37 in (63.5 cm x 94.0 cm)
- Skill level: Easy / advanced beginner
- Terminology: US
- Yarn weight: DK / light (#3) cotton
- Hook: 4.0 mm (G-6)
- Number of pieces: 1 mesh panel (not joined from smaller panels), plus 25 flower appliqués sewn on top
- Layout: 24 diamonds wide x 57 mesh rows tall, with flowers in 7 staggered rows (4-3-4-3-4-3-4)
- Panel size before border: 24 in x 36 in (61.0 cm x 91.4 cm)
- Border depth: 0.5 in (1.3 cm), which adds 1 in (2.5 cm) to each dimension
- Flower size: 2.5 in (6.4 cm) across, with a 1 in (2.5 cm) center
Materials
Choose a smooth cotton in DK weight, either mercerized or matte. Cotton keeps the open mesh crisp, washes well and does not fade much in a sunny window. Avoid fuzzy or very stretchy yarns, because they make the diamonds sag.
- Cream (mesh, border, cream petals): 200 g, approx. 460 m
- Butter yellow (yellow petals): 50 g, approx. 115 m
- Mustard (flower centers): 25 g, approx. 58 m
These amounts assume about 115 m per 50 g. They include a margin of roughly 20% for your gauge swatch and for differences in tension.
Tools:
- 4.0 mm (G-6) crochet hook
- Tapestry needle
- Stitch markers (at least 8)
- Rust-proof pins and a blocking surface at least 26 x 38 in (66.0 x 96.5 cm)
- Measuring tape
- Scissors
- Café clips with rings, or a slim tension rod, for hanging
Abbreviations (US Terms)
- ch – chain
- sc – single crochet
- hdc – half double crochet
- dc – double crochet
- sl st – slip stitch
- sk – skip
- sp – space
- st(s) – stitch(es)
- MR – magic ring
- rep – repeat
Special stitch – Petal: (hdc, 3 dc, hdc) all in the same stitch.
Net loop: ch 5, sc in the next ch-5 loop. Each net loop forms one side of a diamond.
Gauge and Checkpoints
Mesh gauge: 4 diamonds = 4 in (10.2 cm) wide and 8 mesh rows = 5 in (12.7 cm) tall, lightly blocked.
Border gauge: 16 sc = 4 in (10.2 cm).
Test swatch: Ch 18 and work Rows 1–9 of the mesh below over 4 repeats. Pin it out gently without stretching. It should be 4 in (10.2 cm) wide and about 5 in (12.7 cm) tall over Rows 2–9.
Test flower: Make one complete flower first. The mustard center should be 1 in (2.5 cm) across and the finished flower 2.5 in (6.4 cm).
Checkpoints while you work the panel:
- After Row 1: 24 in (61.0 cm) wide
- After Row 16: 10 in (25.4 cm) tall
- After Row 32: 20 in (50.8 cm) tall
- After Row 48: 30 in (76.2 cm) tall
- After Row 57: about 35.5 in (90.2 cm) tall
- After Row 58: 36 in (91.4 cm) tall
- After the border: 25 in x 37 in (63.5 cm x 94.0 cm)
If your swatch is too big, go down a hook size to 3.5 mm. If it is too small, go up to 4.5 mm. Mesh stretches, so measure it hanging lightly rather than pulled tight. The curtain will hang the same way.
Part 1: The Mesh Panel
Use cream throughout.
Foundation: Ch 98 (a multiple of 4, plus 2).
Row 1 (full row): Sc in 2nd ch from hook, ch 5, sk 3 ch, sc in next ch; rep from * to end. Turn.
(25 sc, 24 ch-5 loops.)*
Row 2 (offset row): Ch 5 (counts as dc + ch 2), sc in first ch-5 loop, ch 5, sc in next ch-5 loop; rep from * across, ch 2, dc in last sc. Turn.
(23 full ch-5 loops, plus a half loop at each edge.)*
Row 3 (full row): Ch 1, sc in first dc, ch 5, sc in next ch-5 loop; rep from * across, ending ch 5, sc in 3rd ch of turning ch-5. Turn.
(25 sc, 24 ch-5 loops.)*
Rows 4–57: Rep Rows 2 and 3 another 27 times. Every odd row is a full row with 24 loops. Every even row is an offset row with 23 full loops and two edge half loops. Row 57 is a full row.
Each ch-5 loop drapes diagonally to the next sc, so every two rows close one band of diamonds. The sc at the tip of each diamond is the anchor point you will use to place the flowers later.
Row 58 (trim row): Ch 1, sc in first sc, 3 sc in next ch-5 loop, sc in next sc; rep from * to end. Do not turn and do not fasten off.
(25 sc worked 1 per existing sc + 72 sc worked into the 24 loops = 97 sc.)*
The trim row changes the scalloped loop edge into a straight top edge, so the curtain hangs evenly from clips.
Part 2: Flowers (Make 25)
Make 11 flowers with butter-yellow petals and 14 with cream petals. All 25 have mustard centers.
Round 1 (mustard): MR, ch 1, 6 sc in ring, sl st to first sc.
(6 sc.)
Round 2 (mustard): Ch 1, 2 sc in each st around, sl st to first sc. Fasten off mustard.
(12 sc.)
Pull the magic ring tight so only a tiny eye is left in the center, like a real flower.
Round 3 (petal color): Join petal color in any st. Ch 1, sc in next st, Petal in next st; rep from * 5 more times, sl st to first sc.
(6 sc + 6 Petals of 5 sts = 36 sts, 6 petals.)*
Fasten off, leaving a 12 in (30.5 cm) tail for sewing. Weave in the mustard tails on the back. The sc between petals pinches each petal into a separate rounded shape, which gives the six-petal outline.
Part 3: Flower Placement
Sew the flowers on after the border is done and the panel has been pre-blocked (see Final Blocking). The positions are listed here so you can mark them while the panel is pinned.
Each flower sits on an sc anchor point of a full row. With the front facing you, count sc from the right edge, starting with the edge sc as #1. The sc are 1 in (2.5 cm) apart.
- Rows 5, 21, 37, 53 (4 flowers each): centered on sc #4, #10, #16, #22
- Rows 13, 29, 45 (3 flowers each): centered on sc #7, #13, #19
This spacing puts 6 in (15.2 cm) between flowers across a row and leaves 3 in (7.6 cm) side margins on the 4-flower rows. Flower rows are 5 in (12.7 cm) apart.
Placement grid (top of curtain first; Y = yellow petals, C = cream petals, · = empty column):
Row 53:  Y  ·  C  ·  Y  ·  C
Row 45:  ·  C  ·  Y  ·  C  ·
Row 37:  Y  ·  C  ·  Y  ·  C
Row 29:  ·  C  ·  Y  ·  C  ·
Row 21:  Y  ·  C  ·  Y  ·  C
Row 13:  ·  C  ·  Y  ·  C  ·
Row 5:   Y  ·  C  ·  Y  ·  C
Totals: 11 yellow and 14 cream, 25 flowers in all.
Border
Keep using cream from the end of Row 58. Work 2 border rounds with the right side facing.
Border gauge: 16 sc = 4 in (10.2 cm), or 4 sc per inch.
Round 1: Ch 1, 3 sc in the last sc of Row 58 (corner). Working down the long side, work 5 sc into each of the 28 edge spaces. An edge space is the turning ch-5 or the ch-2/dc half loop of an offset row. At the bottom corner, work 3 sc in the end foundation ch. Working across the free loops of the foundation, sc in each of the next 95 ch, then 3 sc in the foundation ch at the opposite corner. Work 5 sc into each of the 28 edge spaces up the second long side. Work 3 sc in the first sc of Row 58 (corner), then sc in each of the next 95 sts. Sl st to first sc.
Mark the center sc of each 3-sc group as the corner st.
Round 1 counts:
- Top and bottom: 97 sc between corners (1 + 95 + 1), 99 sc including both corners
- Each long side: 142 sc between corners (1 + 140 + 1), 144 sc including both corners
- Total: 97 + 97 + 142 + 142 + 4 corners = 482 sc
Round 2: Ch 1, sc in each st around, working 3 sc in each marked corner st. Sl st to first sc. Fasten off.
Round 2 counts: (482 sc worked 1 per existing st) + (8 extra corner sc) = 490 sc.
- Top and bottom: 99 sc between corners, 101 including corners
- Each long side: 144 sc between corners, 146 including corners
Why the math works: The top edge has 24 diamonds. The trim row puts 4 sc per diamond plus 1 closing sc (24 x 4 + 1 = 97), which matches 4 sc per inch over 24 in (61.0 cm). The foundation edge has the same 97 worked chains, so top and bottom match exactly. Each long side has 28 offset-row edge spaces at 5 sc each, for 140 sc. That is 35 in (88.9 cm) at border gauge, and the corner stitches cover the rest of the 36 in (91.4 cm) side. Each round adds 0.25 in (0.6 cm) on every side, so two rounds add 1 in (2.5 cm) to both width and length.
Final Blocking
- Weave in all panel ends along the border, not through the open mesh, where they would show against the light.
- Soak the panel in cool water for 15 minutes. Press out the water gently in a towel; do not wring.
- Pin the border straight to 25 in x 37 in (63.5 cm x 94.0 cm), with a pin every 2 in (5.1 cm) along each edge.
- Run a measuring tape across several rows of diamonds and nudge them until each one is about 1 in (2.5 cm) wide. Let the panel dry completely.
- While the panel is still pinned, put a stitch marker at each flower anchor point from Part 3.
- Sew each flower on with its tail. First stitch around the outer edge of the mustard center, then tack the tip of every petal to the mesh with 1–2 small stitches. Keep the stitches snug but not tight so the mesh does not pucker.
- Hold a steam iron just above the flowers without touching them to relax the stitches. Unpin when dry.
Final Quality-Control Checklist
- The panel measures 25 in x 37 in (63.5 cm x 94.0 cm) after blocking
- Rows 1 and 57 each have 24 loops and 25 sc
- Row 58 has 97 sc
- Border Round 1 has 482 sc and Round 2 has 490 sc
- The corners are square and lie flat
- There are 25 flowers (11 yellow, 14 cream), each with 6 petals and 36 sts in Round 3
- The flowers follow the grid: 6 in (15.2 cm) apart across and 5 in (12.7 cm) between rows
- No sewing stitches or tails show from the back when held up to the light
- The mesh hangs straight with no slanting diamonds
Troubleshooting
Diamonds lean or slant. You may be skipping the first or last loop of a row. Check that full rows have 24 loops and that offset rows end with ch 2, dc.
Panel narrows toward the top. Your chain loops are getting tighter. Count chains carefully (5, not 4) and keep the same relaxed tension throughout.
Top edge ripples after Row 58. The trim row is looser than your mesh. Rework Row 58 with a 3.5 mm hook, keeping the same 97 sc.
Long sides wave in the border. Work 4 sc per edge space instead of 5. If the sides pull in, work 6 instead.
Flower petals curl. The Petal stitches are too tight. Go up a hook size for Round 3 only, or steam-block the flowers before you sew them on.
Mesh puckers behind a flower. The sewing is too tight. Unpick it and tack the flower down again with looser stitches.
Care
Hand wash in cool water with mild soap, roll in a towel to remove water and lay flat to dry, pinning lightly to shape. Do not use a dryer, which can shrink cotton and distort the mesh.
Final Notes
The measurements build on each other. At 4 diamonds = 4 in (10.2 cm) and 8 rows = 5 in (12.7 cm), the panel is 24 in x 36 in (61.0 cm x 91.4 cm) after Row 58. Two border rounds bring it to 25 in x 37 in (63.5 cm x 94.0 cm). Each 2.5 in (6.4 cm) flower sits on a staggered grid spaced 6 in (15.2 cm) across and 5 in (12.7 cm) down. Check your swatch and count your loops, and the curtain will hang straight and bright in the sun.
Happy crocheting!