

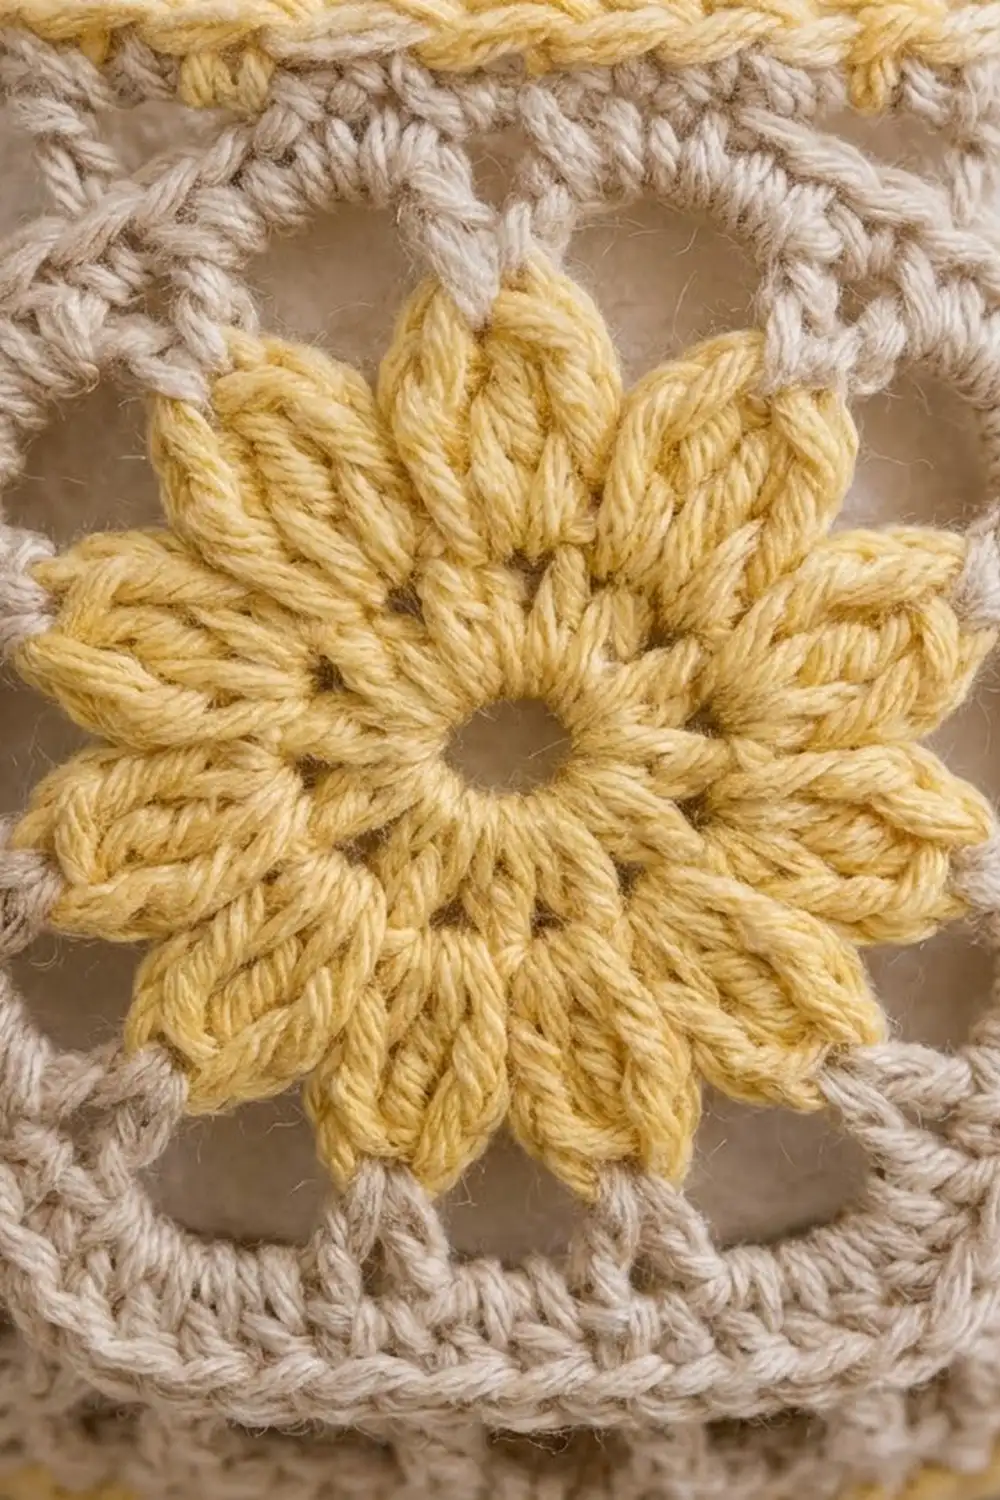
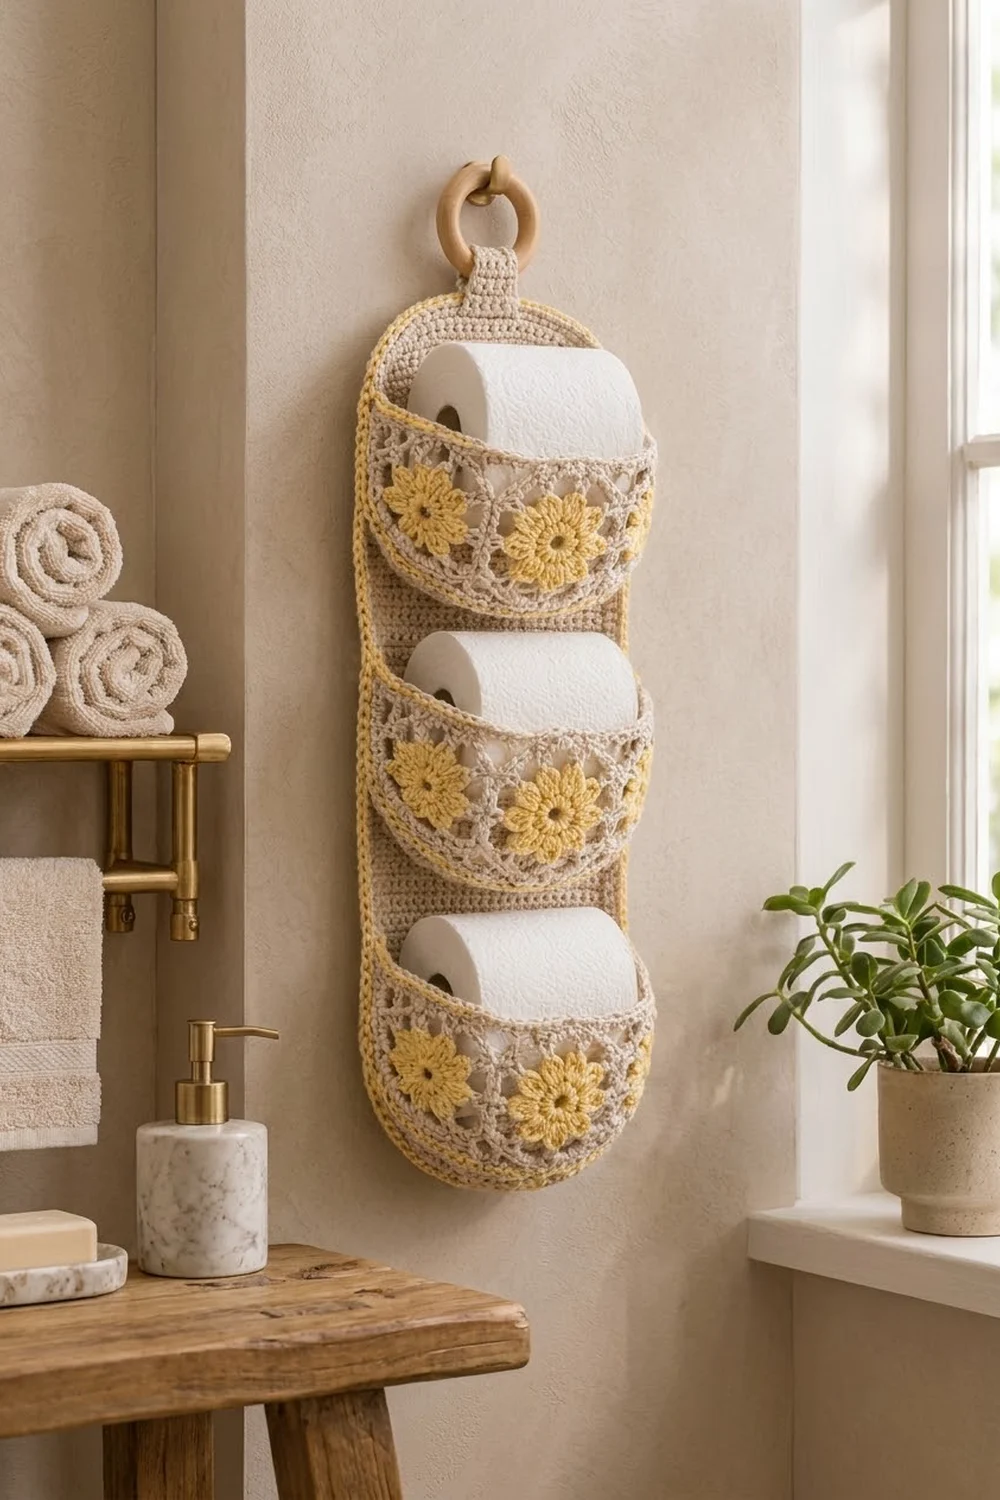
This hanging holder stores three spare rolls on a slim strip of wall. A firm beige backing panel carries three rounded pockets. Each pocket front is a band of lacy hexagons with a buttercup-yellow flower at the center.
The colors are warm beige and soft butter yellow. Yellow trim outlines each pocket rim, each bottom seam and the edge of the panel. The solid panel contrasts with the open lace, and a natural wooden ring hangs the holder on a hook.
The pattern uses US crochet terms. Before the border, the panel measures 7 x 24 in (17.8 x 61.0 cm). After the border it measures 7.9 x 24.9 in (20.1 x 63.2 cm), and it reaches about 29.5 in (74.9 cm) to the top of the ring.
You will make a single crochet panel, a tab, nine flower hexagons and three half-circle bases. Join the hexagons in strips of three, trim each strip straight, seam it to a base in yellow and sew each pocket to the panel.
Finished Size and Construction
- Finished size: 7.9 x 24.9 in (20.1 x 63.2 cm) panel; about 29.5 in (74.9 cm) including the ring
- Skill level: Intermediate
- Terminology: US
- Yarn weight: Worsted (#4) cotton
- Hook: 4.0 mm (G-6)
- Number of pieces: 14 (1 panel, 1 tab, 9 hexagons, 3 bases)
- Layout: 3 pockets stacked vertically, 3 hexagons across each pocket front
- Hexagon size: 3.5 in (8.9 cm) flat to flat, 4 in (10.2 cm) point to point
- Pocket: 10.5 in (26.7 cm) wall, about 5 in (12.7 cm) tall, projects 3.5 in (8.9 cm)
- Panel before border: 7 x 24 in (17.8 x 61.0 cm)
- Border depth: about 0.45 in (1.1 cm) per side
Materials
Use a smooth, mercerized or combed cotton.
- Color A, beige: 200 g, about 310 m
- Color B, butter yellow: 60 g, about 92 m
These quantities include a margin of about 15 percent.
Tools: 4.0 mm (G-6) hook, one 2.75 in (7.0 cm) wooden ring, tapestry needle, stitch markers, pins, measuring tape, blocking mat and spray bottle.
Abbreviations (US Terms)
- ch: chain
- sl st: slip stitch
- sc: single crochet
- hdc: half double crochet
- dc: double crochet
- tr: treble crochet
- sp: space
- sc2tog: single crochet 2 together
- RS: right side
Special stitch, tr2tog across a seam: Yarn over twice, insert the hook in the corner ch-2 sp of one motif, pull up a loop, then (yo, pull through 2) twice. Repeat in the joined corner ch-2 sp of the next motif, then yo and pull through all 3 loops. This counts as 1 stitch.
Gauge and Checkpoints
- Single crochet: 16 sts and 18 rows = 4 in (10.2 cm)
- Double crochet: 16 sts and 8 rows = 4 in (10.2 cm)
Make one hexagon first. Every pocket measurement depends on it being 3.5 in (8.9 cm) flat to flat.
Checkpoints:
- One hexagon: 3.5 in (8.9 cm) flat to flat.
- A strip of 3 hexagons: 10.5 in (26.7 cm) long.
- The straight edge of a base: 7 in (17.8 cm).
- The panel after Row 5: 7 in (17.8 cm) wide.
If your piece is too big, go down 0.5 mm. If it is too small, go up 0.5 mm. If only the hexagon is off, change hooks for the hexagons alone.
Panel
The panel is worked in rows of sc, with rounded corners at both ends.
With A, ch 21.
Row 1: Sc in 2nd ch from hook and in each ch across, turn. (20 sc)
Row 2: Ch 1, 2 sc in first st, sc in each st to last st, 2 sc in last st, turn. (22 sc)
Rows 3-5: Repeat Row 2. (24, 26, then 28 sc)
Rows 6-104: Ch 1, sc in each st across, turn. (28 sc)
Row 105: Ch 1, sc2tog, sc in each st to last 2 sts, sc2tog, turn. (26 sc)
Rows 106-108: Repeat Row 105. (24, 22, then 20 sc)
Do not fasten off. Continue into the Border.
Checkpoint: 7 x 24 in (17.8 x 61.0 cm).
Hanging Tab
With A, ch 9.
Row 1: Sc in 2nd ch from hook and in each ch across, turn. (8 sc)
Rows 2-28: Ch 1, sc in each st across, turn. (8 sc)
Fasten off and leave a long tail. The tab measures 2 x 6.2 in (5.1 x 15.7 cm).
Flower Hexagon
Rnd 1 (B): Make a magic ring. Ch 3 (counts as dc), work 11 dc in the ring, then sl st to the top of the ch-3. (12 dc)
Rnd 2 (B): In each dc around, work (sc, dc, sc). Sl st to the first sc. (12 petals, 36 sts) Fasten off B.
Rnd 3 (A): Join A with sc in the center dc of any petal. [Ch 4, sc in the center dc of the next petal] 11 times, then ch 4 and sl st to the first sc. (12 ch-4 loops)
Rnd 4 (A): Sl st into the first loop. Ch 3 (counts as dc), then work (dc, ch 2, 2 dc) in the same loop for the first corner, and 3 dc in the next loop. [Work (2 dc, ch 2, 2 dc) in the next loop, then 3 dc in the next loop] 5 times. Sl st to the top of the ch-3. (42 dc: 7 per side between corner ch-2 sps)
Rnd 5 (A): Ch 1. Sc in each dc around, and work (sc, ch 2, sc) in each corner ch-2 sp. Sl st to the first sc. (54 sc: 9 per side, counted between the corner ch-2 sps, which are not stitches)
Fasten off with an 18 in (45.7 cm) tail.
Checkpoint: 3.5 in (8.9 cm) flat to flat.
Pocket Base
The base is a flat half circle worked in turned rows of dc. With A, make a magic ring.
Row 1: Ch 3 (counts as dc), work 5 dc in the ring, turn. Pull the ring closed. (6 dc)
Row 2: Ch 3, dc in the same st, then 2 dc in each st across, turn. (12 dc)
Row 3: Ch 3, dc in the same st, dc in the next st. [2 dc in the next st, dc in the next st] across, turn. (18 dc)
Row 4: Work as Row 3, with 2 dc between increases. (24 dc)
Row 5: Work with 3 dc between increases. (30 dc)
Row 6: Work with 4 dc between increases. (36 dc)
Row 7: Work with 5 dc between increases. (42 dc)
Fasten off and leave a 24 in (61.0 cm) tail.
Checkpoint: The straight edge measures 7 in (17.8 cm): 7 rows of 0.5 in (1.3 cm) on each side of the ring. The curved edge measures 10.5 in (26.7 cm): 42 dc at 4 per inch.
Make All Pieces
- Panel: 1 in A
- Tab: 1 in A
- Flower hexagons: 9, with Rnds 1-2 in B and Rnds 3-5 in A
- Bases: 3 in A
Layout, with hexagons pointing up:
Pocket 3 (top):    [H][H][H]
Pocket 2 (middle): [H][H][H]
Pocket 1 (bottom): [H][H][H]
Joining
Hexagon strips
Turn each hexagon so it has points at the top and bottom and flat sides at the left and right. Place two hexagons RS together. With A, whipstitch through the back loops along one vertical side: corner ch-2 sp, 9 sc, then corner ch-2 sp. Each stitch meets its partner, so the seam adds no length. Join three hexagons into a strip.
Keep the whipstitches snug but not tight. A tight seam pulls the strip into a curve.
Checkpoint: 10.5 in (26.7 cm) long and 4 in (10.2 cm) point to point.
Top trim
The top edge zigzags. On each slanted side, the 9 sc are s1-s9, where s1 is next to the valley and s9 is next to the peak.
Row 1 (A, RS): Join A in the upper corner ch-2 sp at the right end and ch 4 (counts as tr). Then, for each hexagon:
- Rising side: tr in s2, dc in s3, dc in s5, hdc in s6, sc in s8, sc in s9. Skip s1, s4 and s7.
- Peak: sc in the top corner ch-2 sp.
- Falling side, mirrored: sc in s9, sc in s8, hdc in s6, dc in s5, dc in s3, tr in s2. Skip s7, s4 and s1.
Between hexagons, work tr2tog across the seam. After the last hexagon, work tr in the end corner ch-2 sp, then turn.
Each hexagon gives 6 + 1 + 6 = 13 sts, so 3 x 13 = 39. Adding 2 end tr and 2 tr2tog gives 43 sts.
Rows 2-3 (A): Ch 1, sc in each st across, turn. (43 sc) Fasten off.
Row 4 (B): Join B, ch 1, sc in each st across. (43 sc) Fasten off.
Bottom trim
Row 1 (A): Work along the bottom zigzag exactly as for the top trim. (43 sts)
Row 2 (A): Ch 1, sc in the next 21 sts, sc2tog, sc in the last 20 sts. This row works 43 sts and removes 1, giving 42 sc. That matches the 42 dc on the curved edge of the base.
Checkpoint: The wall is 10.5 in (26.7 cm) long and about 5 in (12.7 cm) tall.
Wall to base seam
Hold the base and the wall wrong sides together, with the bottom edge of the wall along the curve of the base. With B, sc through both layers from the RS, matching 1 wall sc to 1 base dc. (42 sc) This leaves a yellow ridge along the bottom curve.
Border
Border gauge is the sc gauge: 4 sc per inch and 4.5 rows per inch, so work 8 sc for every 9 row ends.
Rnd 1 (A): Continue from the panel. Ch 1 and work around:
- Top: 2 sc in the first st, sc in the next 18 sts, 2 sc in the last st (22 sc)
- Side: 96 sc across the 108 row ends (8 sc per 9 rows, 12 times)
- Bottom: Work into the foundation ch: 2 sc in the first ch, sc in the next 18 ch, 2 sc in the last ch (22 sc)
- Second side: 96 sc
Sl st to the first sc. (236 sc) Fasten off A.
Rnd 2 (B): Join B at the top center. Sc in each st around, but work 2 sc in the first and last st of the top edge and of the bottom edge. Sl st to join. This round works 236 sts and adds 4. (240 sc: 24 per end, 96 per side)
The math works because 96 sc at 4 per inch equals 24 in, the same length as 108 rows at 4.5 per inch. The 4 extra stitches in Rnd 2 let the rounded corners lie flat.
Checkpoint: 7.9 x 24.9 in (20.1 x 63.2 cm).
Mounting the pockets
Measure up from the bottom of the panel before the border. Mark where the straight edge of each base will sit:
- Pocket 1: Row 9, 2 in (5.1 cm); rim at about 7 in (17.8 cm)
- Pocket 2: Row 45, 10 in (25.4 cm); rim at about 15 in (38.1 cm)
- Pocket 3: Row 81, 18 in (45.7 cm); rim at about 23 in (58.4 cm)
For each pocket:
- Pin the straight edge of the base along the marked row, centered.
- Whipstitch it on with A, about 2 stitches per dc row end.
- Bring each end of the wall to the panel, just inside the border. Whipstitch it on vertically through the row ends of the trim and the vertical side of the end hexagon.
Tab
- Fold the tab over the ring.
- Overlap the ends by 1.25 in (3.2 cm) on the back of the panel, centered at the top.
- Whipstitch the overlap through the panel. The ring should sit about 2 in (5.1 cm) above the panel.
Final Blocking
- Weave in all the ends along seams in the matching color.
- Mist the panel until it is damp.
- Pin it to 7.9 x 24.9 in (20.1 x 63.2 cm), keeping the edges straight.
- Shape each pocket over a toilet roll wrapped in a plastic bag, then mist the lace.
- Pin the hexagon points and the rims smooth.
- Let it dry completely, about 24 hours.
Final Quality-Control Checklist
- Every hexagon is 3.5 in (8.9 cm) flat to flat.
- The top trims have 43 sts and the bottom trims have 42 sc.
- The wall-to-base seams are 42 sc with no puckers.
- The border has 240 sc and lies flat.
- The pockets are level, with 3 in (7.6 cm) between each rim and the next base.
- The tab is secure and does not show from the front.
Troubleshooting
- Hexagon cups: Rnd 4 is too tight. Go up a hook size for Rnds 4-5.
- Hexagon ruffles: Use a smaller hook, or make the Rnd 3 loops ch 3.
- Trim waves: Check that you skipped s1, s4 and s7 on every slanted side.
- Wall shorter than the base curve: Recount bottom trim Row 2. It must have 42 sc.
- Panel edge flares: You worked more than 8 sc per 9 rows. Rework Rnd 1.
Care
Hand wash in cool water, roll the holder in a towel to remove water and dry it flat, reshaping the pockets. Do not tumble dry.
Final Notes
The measurements build on each other. A 3.5 in (8.9 cm) hexagon makes a 10.5 in (26.7 cm) strip. The trimmed strip has a 42-sc bottom edge that matches the 42-dc base curve, and the 7 in (17.8 cm) straight edge of each base fits the 7 in (17.8 cm) panel. The 108 panel rows take 96 border sc per side, which gives a finished panel of 7.9 x 24.9 in (20.1 x 63.2 cm). Happy crocheting!