

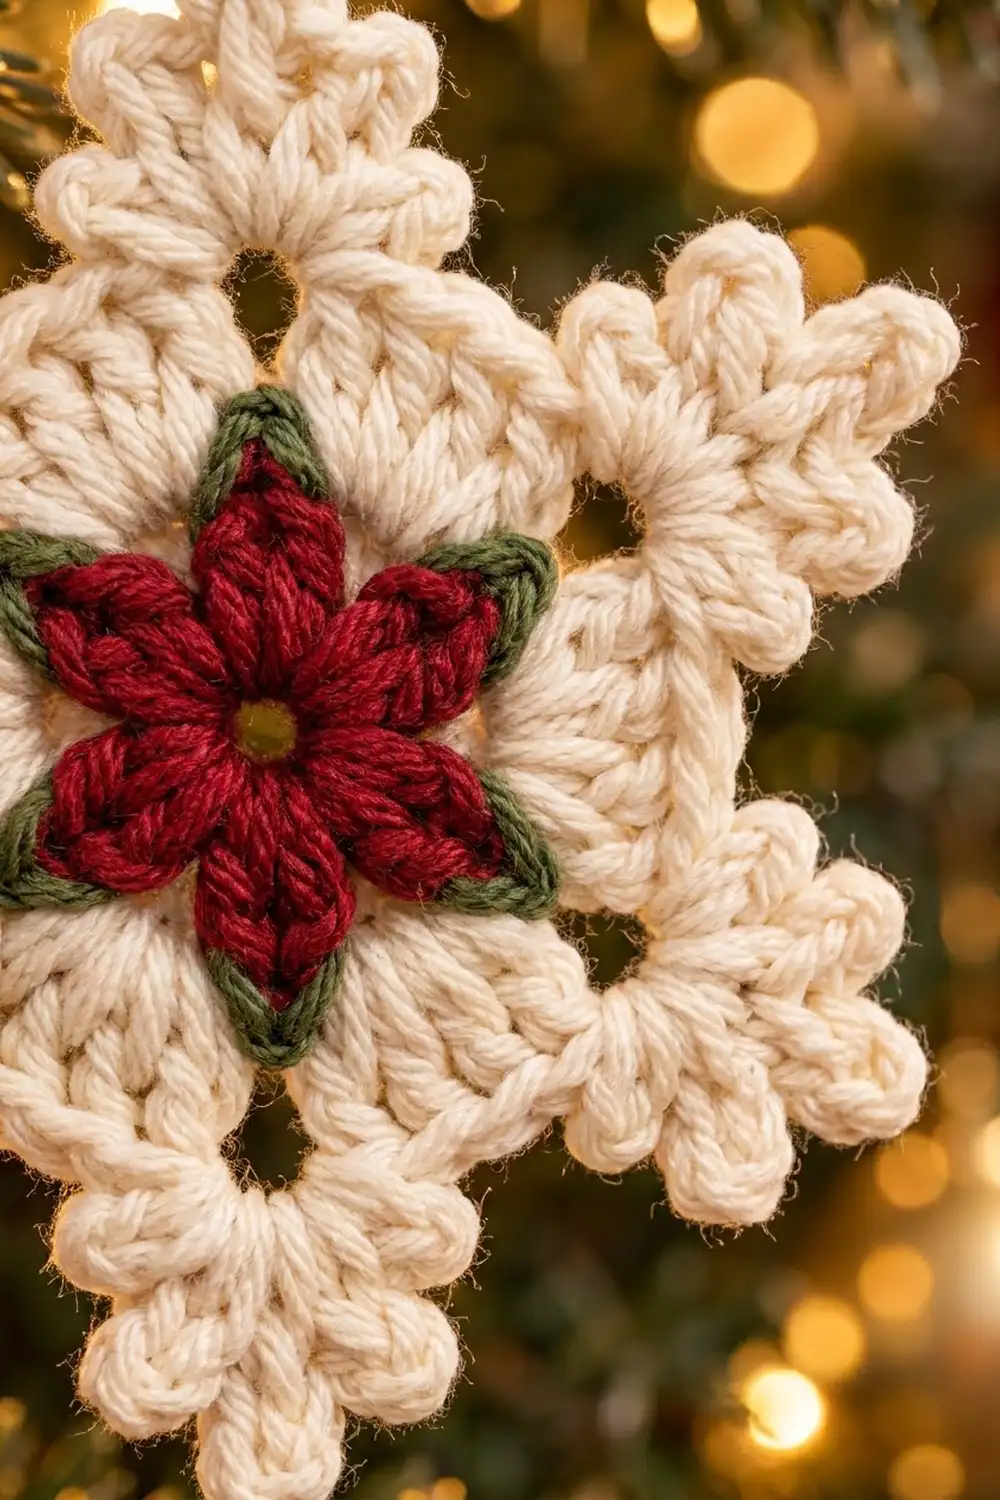
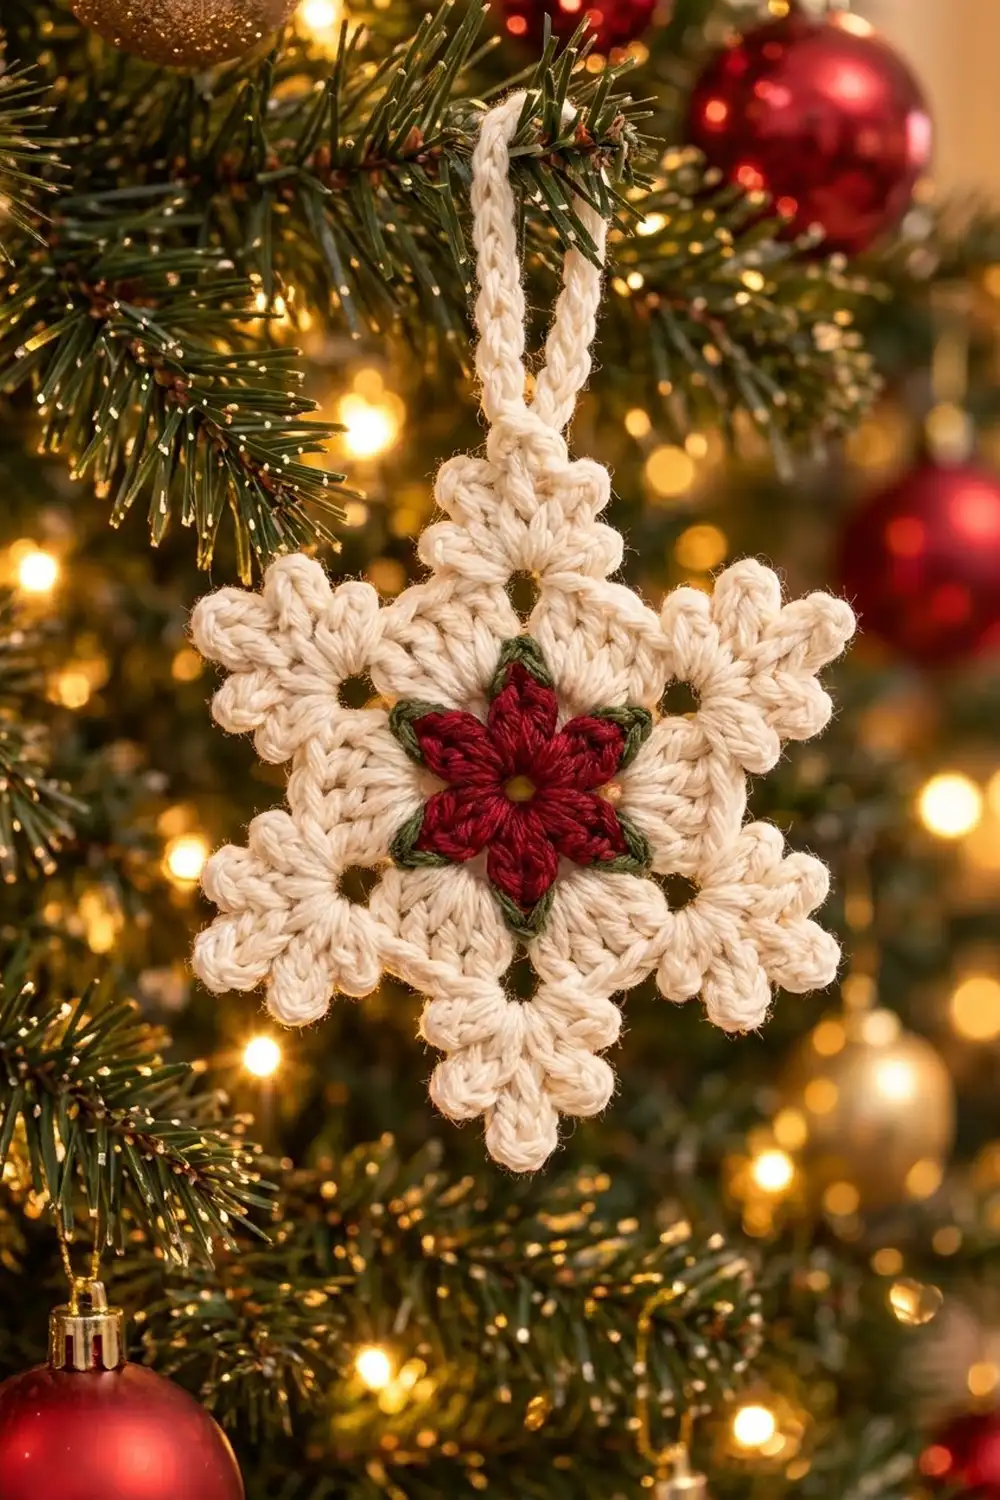
This is a cozy six-pointed snowflake ornament with a small poinsettia in the middle. The center is a deep red flower with six pointed petals, each outlined in moss green. Around it, a soft cream star builds out into six points, and the edges are covered with picot bumps.
The cream, red and green colors give it a classic Christmas look. Small eyelets sit in each valley between the points, so the flake looks lacy without being fragile. It hangs flat from a chain loop and looks great on a tree, a gift tag or a window hook.
The pattern uses US crochet terms. The finished ornament is 5 in (12.7 cm) from point to point and 4.5 in (11.4 cm) across before the picot border.
The ornament is worked in the round as a single piece. You make the red flower first and outline it in green. Then you work three cream rounds that form a hexagon and grow it into six points. A picot border and a hanging loop finish it off. There is no sewing and no joining.
Finished Size and Construction
- Finished size: 5 in (12.7 cm) point to point
- Skill level: Easy-intermediate
- Terminology: US crochet terms
- Yarn weight: Worsted (#4), cotton or cotton blend
- Hook: 4.5 mm (US 7)
- Number of pieces: 1
- Layout: One six-pointed star worked in the round
- Piece size before border: 4.5 in (11.4 cm) point to point
- Border depth: 0.25 in (0.6 cm) on each side
Materials
Use a smooth worsted cotton or cotton-acrylic blend. It gives clear stitch definition, crisp picots and points that hold their shape. Pure acrylic also works, but the points will need firmer blocking.
Yarn:
– Cream (main color): 12 g, about 20 m
– Deep red (flower): 4 g, about 7 m
– Moss green (outline): 2 g, about 3 m
These quantities include a safety margin of about 20%.
Tools:
– 4.5 mm (US 7) crochet hook
– Tapestry needle
– Scissors
– Stitch marker
– Blocking mat and rustproof pins
– Spray bottle with water
– Optional: fabric stiffener
Abbreviations (US Terms)
- ch – chain
- sl st – slip stitch
- sc – single crochet
- hdc – half double crochet
- dc – double crochet
- tr – treble crochet
- sk – skip
- sp – space
- st(s) – stitch(es)
- MR – magic ring
Special stitch:
– Picot: ch 3, then sl st into the 3rd ch from the hook. A picot does not count as a stitch in the stitch counts.
Gauge and Checkpoints
Gauge isn’t critical for an ornament, but it decides the final size. Make one ornament and measure it before you start a batch.
Check these measurements as you go, with the piece laid flat:
- After Round 1: 1 in (2.5 cm) across
- After Round 2: 1.75 in (4.4 cm) across, petal tip to petal tip
- After Round 3: 2 in (5.1 cm) across, outline tip to outline tip
- After Round 4: 3 in (7.6 cm) across, corner to corner
- After Round 5: 3.75 in (9.5 cm) across, corner to corner
- After Round 6: 4.5 in (11.4 cm) across, point to point
- After Round 7: 5 in (12.7 cm) across, point to point
If your piece is more than 0.25 in (0.6 cm) too big at Round 4, go down a hook size to 4.0 mm. If it is that much too small, go up to 5.0 mm. If the flower cups instead of lying flat, loosen up on Round 2. If it ruffles, tighten your tension slightly.
Pattern
Round 1 – Flower Center (Red)
With red, make a MR.
Ch 3 (counts as the first dc). Work 11 dc into the ring. Join with a sl st to the top of the beginning ch-3.
Count: 12 dc.
Pull the ring closed, but leave a tiny hole in the center about 0.1 in (0.3 cm) wide. This is the small center eye of the flower.
Round 2 – Petals (Red)
Ch 1. Sc in the next st, then work (dc, tr, dc) all in the following st. Repeat from * 5 more times. Make the first sc in the same st as the join. Join with a sl st to the first sc.
Count: 24 sts (6 sc, 12 dc, 6 tr) = 6 petals.
Each petal is pointed because the tr at its center sits higher than the dc on either side. The sc between petals forms a valley.
Fasten off the red and weave in the tail.
Round 3 – Petal Outline (Green)
Join green with a sl st in any valley sc.
Ch 1. Sc in the valley sc, sc in the next dc, (sc, ch 1, sc) in the tr, sc in the next dc. Repeat from * 5 more times. Join with a sl st to the first sc.
Count: 30 sc and 6 ch-1 sps.
Each petal now has a thin green border, and the ch-1 sp makes a sharp tip. Between two tip ch-1 sps there are exactly 5 sc: 1 on the far side of the tr, 1 in the dc, 1 in the valley, 1 in the next dc and 1 on the near side of the next tr.
Fasten off the green.
Round 4 – Hexagon Base (Cream)
Join cream with a sl st in any ch-1 sp at a petal tip.
Ch 3 (counts as dc). Work (dc, ch 2, 2 dc) in the same sp. Dc in each of the next 5 sc, then (2 dc, ch 2, 2 dc) in the next ch-1 sp. Repeat from * 4 more times. Dc in each of the last 5 sc. Join to the top of the beginning ch-3.
Count: 54 dc and 6 corner ch-2 sps.
This round is a conversion round. It works 30 dc, one into each of the 30 sc, and adds 24 dc at the corners (4 per tip). That makes 54 dc in total.
Each corner sits right above a petal tip, so the star points line up with the red petals. Each side from one corner sp to the next is 9 dc: 2 from a corner, 5 along the side and 2 from the next corner.
Round 5 – Eyelet Round (Cream)
Sl st in the next dc, then sl st into the corner ch-2 sp.
Ch 3 (counts as dc). Work (dc, ch 2, 2 dc) in the same sp. Dc in each of the next 4 dc, ch 2, sk the next dc, dc in each of the next 4 dc, then (2 dc, ch 2, 2 dc) in the next corner sp. Repeat from * 4 more times. Finish with dc in the next 4 dc, ch 2, sk 1 dc, dc in the last 4 dc. Join to the top of the beginning ch-3.
Count: 72 dc, 6 corner ch-2 sps and 6 eyelet ch-2 sps.
On each side, the 9 dc from Round 4 are used as 4 worked, 1 skipped and 4 worked. The skipped stitch is the middle one, so the eyelet sits exactly halfway between two corners. That spot becomes the valley between two points. Each section now has 12 dc: 4 at the corner plus 8 along the side.
Round 6 – Shaping the Points (Cream)
Sl st in the next dc, then sl st into the corner ch-2 sp.
Ch 3 (counts as dc). Work (dc, ch 2, 2 dc) in the same sp. Then repeat this sequence:
Dc in each of the next 3 dc, hdc in each of the next 2 dc, sc in the next dc, ch 1, sk the eyelet sp, sc in the next dc, hdc in each of the next 2 dc, dc in each of the next 3 dc, then (2 dc, ch 2, 2 dc) in the next corner sp.
Repeat from * 4 more times. End the last repeat after the final 3 dc, then join to the top of the beginning ch-3.
Count: 96 sts (60 dc, 24 hdc, 12 sc), 6 corner ch-2 sps and 6 valley ch-1 sps.
The stitches get shorter toward the eyelet, from dc to hdc to sc, so each side dips into a valley. The corners stay tall, so the tips rise into points. The ch-1 bridges the eyelet without filling it, so a round hole stays open at the base of each valley.
Each section is 16 sts: 4 at the corner plus 6 on each side of the valley. Each half-side, counted from the corner sp to the valley ch-1, is 8 sts: 2 corner dc, 3 dc, 2 hdc and 1 sc.
Checkpoint: 4.5 in (11.4 cm) point to point.
Border
Border Gauge
The picot border adds 0.25 in (0.6 cm) on every side, which brings the ornament from 4.5 in (11.4 cm) to 5 in (12.7 cm). Each picot should stand up as a small round bump. If the picots lean or look flat, chain a little more loosely.
Round 7 – Picot Border (Cream)
Sl st in the next dc, then sl st into the corner ch-2 sp.
Ch 1. Then repeat this sequence:
Work (sc, picot, sc, picot, sc) in the corner ch-2 sp. [Sc in each of the next 2 sts, picot] 3 times, then sc in each of the next 2 sts. Sl st in the valley ch-1 sp. Sc in each of the next 2 sts, then [picot, sc in each of the next 2 sts] 3 times.
Repeat from * 5 more times. Join with a sl st to the first sc.
Count per point: 19 sc (3 at the tip plus 8 on each half-side), 8 picots (2 at the tip plus 3 on each half-side) and 1 valley sl st.
Total: 114 sc, 48 picots and 6 sl sts.
Why the math works: Each half-side in Round 6 has 8 sts, and the border puts exactly 8 sc into them, 2 at a time with a picot in between. So no stitches are added or lost, and the edge stays flat. The tip gets 3 sc in the ch-2 sp, which is just enough to turn the corner sharply. The sl st in the valley pulls the edge in to keep the dip deep. Six points of 19 sc each gives 6 × 19 = 114 sc.
Hanging Loop
After the join, sl st in each st up to the middle sc of the nearest tip, between its two picots.
Ch 20, which is about 2.5 in (6.4 cm). Sl st into the same middle sc. Turn, then sl st in each ch back along the loop. This makes the cord thicker and stops it from stretching. Sl st into the tip again and fasten off, leaving an 8 in (20.3 cm) tail.
Weave all the tails into the back of the stitches in their own color, so no green or red shows through the cream.
Final Blocking
- Lightly spray the ornament with water until it is evenly damp, not dripping.
- Lay it face down on the blocking mat.
- Pin the 6 tip picots so they sit 5 in (12.7 cm) apart point to point across the center.
- Push a pin into each valley eyelet to open it into a clean round hole.
- Pin each petal tip outward so the red flower lies flat.
- Nudge the side picots with your fingertip so they all point outward.
- If you want the ornament stiffer, brush on a thin layer of fabric stiffener.
- Let it dry completely. This usually takes 6–12 hours.
- Unpin it and check the size again.
Final Quality-Control Checklist
- The center has a small hole, about 0.1 in (0.3 cm) wide.
- There are 6 red petals with pointed tr tips.
- The green outline is even all around, with a sharp ch-1 tip on each petal.
- Each star point sits directly above a petal tip.
- All 6 valley eyelets are open and round.
- Each point has 2 picots at the tip and 3 down each side.
- The ornament measures 5 in (12.7 cm) point to point.
- The hanging loop is about 2.5 in (6.4 cm) long and doesn’t twist.
- No yarn tails show from the front.
Troubleshooting
The flower cups or curls up. Your Round 2 is too tight. Redo it with looser dc and tr stitches, or go up 0.5 mm for that round only.
Round 4 ruffles. Check that each side has exactly 5 dc between corners. An extra stitch on a side makes it wave.
An eyelet closed up. You probably worked into the eyelet sp in Round 6. Make sure you ch 1 and skip it.
The points look blunt. Check that each corner has 2 dc on each side of the ch-2 in Rounds 4–6. Pin the tips firmly when you block.
The valleys are shallow. Make sure Round 6 steps down through hdc to sc, and Round 7 uses a sl st in the valley rather than a sc.
The picots look uneven. Make each one with a relaxed ch 3 and close it with a snug sl st.
The ornament is too large. Use a 4.0 mm hook, or try a slightly thinner worsted cotton.
Care
Hand wash in cool water, press out the water in a towel, and reblock flat to dry. Store it flat or hang it by its loop so the points don’t get crushed.
Final Notes
The size of this ornament comes from a simple chain of measurements. The red center is 1 in (2.5 cm), the petals reach 1.75 in (4.4 cm), and the green outline brings it to 2 in (5.1 cm). The cream hexagon is 3 in (7.6 cm), the eyelet round is 3.75 in (9.5 cm), and the shaped points reach 4.5 in (11.4 cm). The picot border then finishes it at 5 in (12.7 cm).
The stitch counts follow the same chain: 12, then 24, then 30, then 54, then 72, then 96, then 114 sc with 48 picots. If you check the counts and measurements at each stage, every ornament in your batch will come out the same size.
Happy crocheting!