
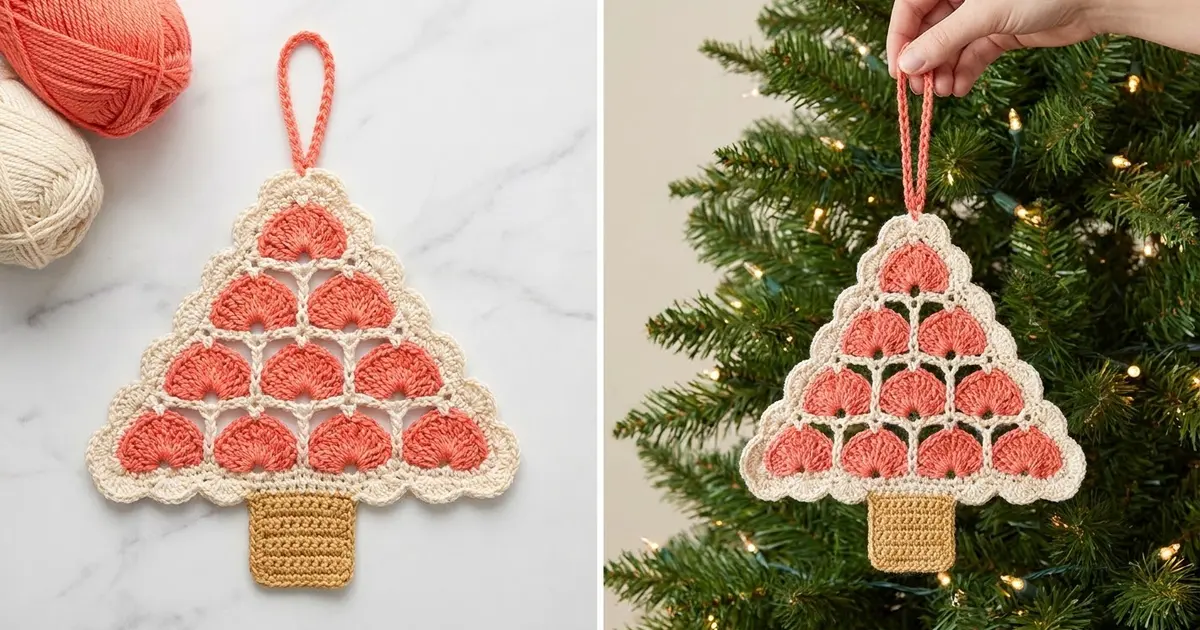
This little tree is all about texture. Four tiers of coral shell fans sit inside a crisp cream lattice. A lacy chain-loop edge outlines the whole triangle, and a small golden-tan trunk anchors the bottom. A coral chain loop at the top makes it ready to hang.
The palette is simple: warm coral, soft cream and a touch of tan. It has a cheerful, slightly Scandinavian look. It works just as well on a tree as it does tied to a gift or hung in a window.
The pattern uses US crochet terms. The finished ornament is 4.75 in (12.1 cm) wide and 5 in (12.7 cm) tall including the trunk. The hanging loop adds about 2 in (5.1 cm) above the top.
You work the tree body flat from the bottom up, alternating cream rows and coral shell rows. Each tier has one shell fewer than the tier below (4, 3, 2, 1). One cream border round outlines the triangle. Then you sew on a small trunk and add the coral loop.
Finished Size and Construction
- Finished size: 4.75 in (12.1 cm) wide x 5 in (12.7 cm) tall, not counting the hanging loop
- Skill level: Easy-intermediate
- Terminology: US crochet terms
- Yarn weight: Light (DK / #3) cotton
- Hook: 3.25 mm (US D/3)
- Number of pieces: 1 tree body plus 1 small trunk, sewn together into a single ornament
- Layout: Triangle of 10 shells in 4 tiers (4, 3, 2, 1 from bottom to top)
- Piece size (tree body before border): 4.25 in (10.8 cm) wide x 3.75 in (9.5 cm) tall
- Border depth: about 0.25 in (0.6 cm) on every edge, giving 4.75 in (12.1 cm) x 4.25 in (10.8 cm)
- Trunk: 0.8 in (2.0 cm) wide x 0.9 in (2.3 cm) tall, with 0.75 in (1.9 cm) showing below the border
Materials
Choose a smooth, tightly plied cotton or cotton blend in DK weight. Cotton gives clear shells and holds its shape after blocking. Acrylic also works, but the shells will look softer and the lattice less crisp. The amounts below assume a yarn of about 120 m per 50 g.
- Coral (Color A): 6 g (15 m), for the shells and hanging loop
- Cream (Color B): 5 g (12 m), for the lattice rows and border
- Tan / golden brown (Color C): 2 g (5 m), for the trunk
These amounts include a small margin for joining, weaving in ends, and checking your gauge on the first tier.
Tools:
- 3.25 mm (US D/3) crochet hook
- Tapestry needle
- Scissors
- Stitch marker
- Blocking mat and rust-proof pins
- Spray bottle with clean water
Abbreviations (US Terms)
- ch – chain
- sc – single crochet
- dc – double crochet
- sl st – slip stitch
- sk – skip
- st(s) – stitch(es)
- sp(s) – space(s)
- RS – right side
Shell: 7 dc worked into the same stitch. The 4th dc is the center dc.
Standing sc: With a slip knot already on your hook, insert the hook into the stitch, yarn over and pull up a loop, then yarn over and pull through both loops. This joins new yarn and makes the first sc in one step.
Gauge and Checkpoints
Gauge: 6 sc = 1 in (2.5 cm) and 13 sc rows = 2 in (5.1 cm), worked with the 3.25 mm hook.
Because the ornament is small, the first tier is your gauge test. Work Rows 1 and 2, then measure before you go on. If you plan to make a set, finish one whole ornament first and use it as the reference for the rest.
Checkpoints:
- After Row 1: the sc row measures about 4.25 in (10.8 cm) wide.
- After Row 2: each shell is about 1 in (2.5 cm) across, and the row of 4 shells is still about 4.25 in (10.8 cm) wide.
- After Row 4: the body is about 1.5 in (3.8 cm) tall.
- After Row 6: the body is about 2.5 in (6.4 cm) tall.
- After Row 9: the body is 3.75 in (9.5 cm) tall and 4.25 in (10.8 cm) wide at the base.
If your piece is too big, go down to a 3.0 mm hook. If it is too small, go up to a 3.5 mm hook. Being off by 0.25 in (0.6 cm) across the base is fine for an ornament. More than that usually means the shells will cup or ruffle.
Tree Body
Work every row with the RS facing, from right to left (left-handed crocheters work left to right). Join each row with a standing sc and fasten off at the end. Leave 4 in (10.2 cm) tails and crochet over them on the next row to save weaving time later.
Row 1 (cream): Ch 26. Sc in 2nd ch from hook and in each ch across. Fasten off. (25 sc)
This face is the RS. Place a stitch marker on it so you always know which side is facing.
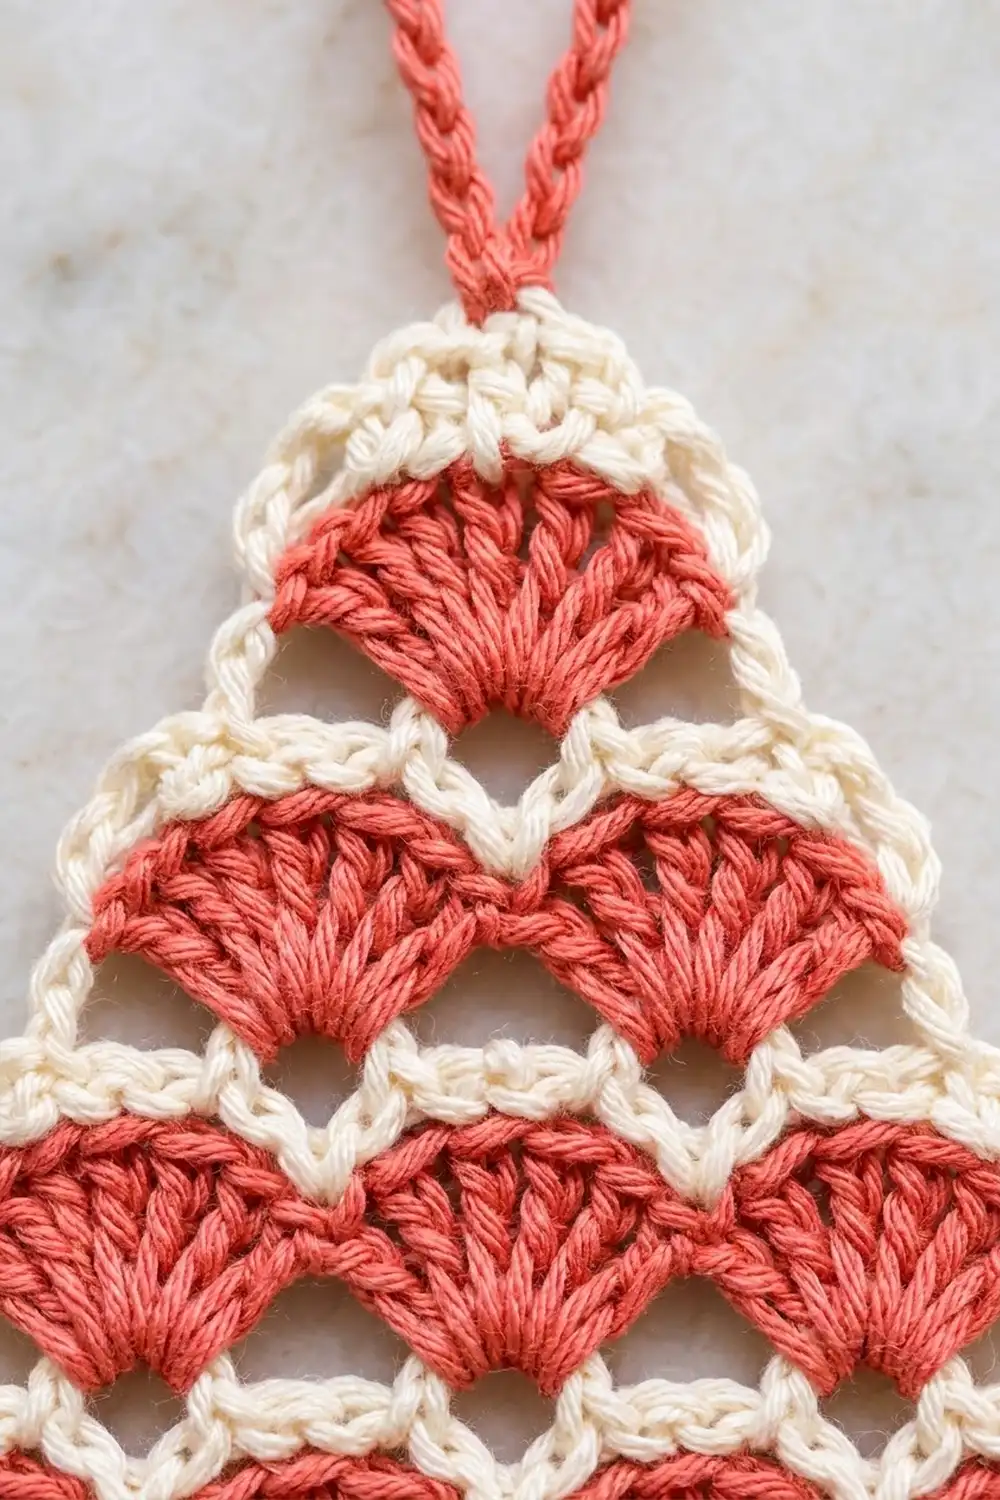
Row 2 (coral): With RS facing, join coral with a standing sc in the first sc of Row 1 (the right-hand end). Sk 2 sts, shell in next st, sk 2 sts, sc in next st; repeat from * 3 more times. Fasten off. (4 shells and 5 sc = 33 sts)*
The 4 shells sit side by side, each separated by a single sc “valley.” The 2 end sc sit at the corners.
Row 3 (cream lattice): Join cream with a standing sc in the center dc of the first shell. Ch 2, dc in the next sc (the valley), ch 2, sc in the center dc of the next shell; repeat from * 2 more times. Fasten off. (4 sc, 3 dc and 6 ch-2 sps)*
This row makes the cream V-shaped line between tiers and puts a dc in each of the 3 inner valleys. The next tier’s shells are worked into those dc.
Row 4 (coral): Join coral with a standing sc in the first sc of Row 3. Shell in next dc, sc in next sc; repeat from * 2 more times. Skip all ch-2 sps. Fasten off. (3 shells and 4 sc = 25 sts)*
Row 5 (cream lattice): Join cream with a standing sc in the center dc of the first shell. Ch 2, dc in the next sc, ch 2, sc in the center dc of the next shell; repeat from * once more. Fasten off. (3 sc, 2 dc and 4 ch-2 sps)*
Row 6 (coral): Join coral with a standing sc in the first sc of Row 5. Shell in next dc, sc in next sc; repeat from * once more. Fasten off. (2 shells and 3 sc = 17 sts)*
Row 7 (cream lattice): Join cream with a standing sc in the center dc of the first shell. Ch 2, dc in the next sc, ch 2, sc in the center dc of the last shell. Fasten off. (2 sc, 1 dc and 2 ch-2 sps)
Row 8 (coral): Join coral with a standing sc in the first sc of Row 7. Shell in next dc, sc in last sc. Fasten off. (1 shell and 2 sc = 9 sts)
Row 9 (cream cap): Join cream with a standing sc in the first dc of the top shell. Sc in each of the next 6 dc. Fasten off. (7 sc)
The cap row curves over the top shell. Leave the 2 sc of Row 8 unworked.
Each tier is centered over the valleys of the tier below, so the sides step in by half a shell per tier. That step gives the triangle its slope.
Border
Border gauge: A ch-3 loop lies flat over 2 sc, about 0.33 in (0.8 cm). A ch-4 loop covers about 0.5 in (1.3 cm), which matches the diagonal distance between anchor points on the sloped sides.
With RS facing, turn the piece so the foundation chain is at the bottom.
Border Round (cream): Join cream with a standing sc in the free loop of the foundation ch at the bottom-left corner (the base of the last sc of Row 1).
- Bottom edge: Working in the free loops of the foundation ch, ch 3, sk 1 ch, sc in next ch; repeat from * 11 more times, ending in the last foundation ch at the bottom-right corner. (12 ch-3 loops; 13 sc including both corner sc)*
- Right side (going up): Ch 4, sc in the top of the outer dc of the end shell of Tier 1 (Row 2). Ch 4, sc in the end sc of Row 3. Ch 4, sc in the outer dc of the end shell of Tier 2. Ch 4, sc in the end sc of Row 5. Ch 4, sc in the outer dc of the end shell of Tier 3. Ch 4, sc in the end sc of Row 7. Ch 4, sc in the end sc of Row 9. (7 ch-4 loops; 7 new sc)
- Top: Ch 3, sk 2 sts, sc in the 4th (center) sc of Row 9. Ch 3, sk 2 sts, sc in the last sc of Row 9. (2 ch-3 loops; 2 new sc)
- Left side (going down): Ch 4, sc in the end sc of Row 7. Ch 4, sc in the outer dc of the end shell of Tier 3. Ch 4, sc in the end sc of Row 5. Ch 4, sc in the outer dc of the end shell of Tier 2. Ch 4, sc in the end sc of Row 3. Ch 4, sc in the outer dc of the end shell of Tier 1. Ch 4, sl st in the first sc. (7 ch-4 loops; 6 new sc)
Fasten off. (Round total: 28 loops and 28 sc)
Why the math works: Row 1 has 25 sts. You start at stitch 1 and skip 1 between anchors, so the sc land in stitches 1, 3, 5 and so on through 25. That gives exactly 13 anchors and 12 loops, and both corners get an sc. The two sides match at 7 loops each. The bottom corner sc are counted only once, on the bottom edge, and the closing sl st takes the place of a 7th sc on the left side. On top, the 7 sc split as 1 anchor + 2 skipped + 1 anchor + 2 skipped + 1 anchor. That puts an anchor exactly at the center for the hanging loop. A closed round must have the same number of loops and sc, and here both are 28.
Trunk
Row 1 (tan): Ch 6. Sc in 2nd ch from hook and in each ch across, turn. (5 sc)
Rows 2-6: Ch 1, sc in each st across, turn. (5 sc)
Fasten off, leaving a 10 in (25.4 cm) tail. The trunk measures 0.8 in (2.0 cm) wide x 0.9 in (2.3 cm) tall.
Attach: Center the trunk under the middle sc of the bottom border (the 7th of 13), with its top 0.15 in (0.4 cm) tucked behind the border. Whipstitch the top edge to the back of Row 1 and the border sc, so no tan shows through the cream loops on the front. Weave in the tail.
Hanging Loop
Join coral with a sl st in the center top sc of the border. Ch 22, sl st in the same sc. Fasten off and weave the tails back along the chain. The loop stands about 2 in (5.1 cm) above the top.
For a sturdier loop, work a sl st back along each ch before closing.
Final Blocking
- Weave in all remaining ends along the cream rows, where they hide best.
- Pin the ornament RS up on a blocking mat.
- Pin the base straight at 4.75 in (12.1 cm) wide, including the border.
- Pin the top center anchor so the body is 4.25 in (10.8 cm) tall including the border.
- Pin each side loop so the sides form straight diagonal lines.
- Gently open each shell into an even fan with your fingertips.
- Mist with water until damp, not soaked.
- Let it dry completely, at least 4 hours, before unpinning.
Final Quality-Control Checklist
- 10 coral shells in 4 tiers: 4, 3, 2, 1.
- Each shell has 7 dc and sits centered over a valley below.
- Cream lattice rows show a clean V between shells.
- Border has 28 loops: 12 on the bottom, 7 on each side, 2 on top.
- Base measures 4.75 in (12.1 cm) wide.
- Total height with trunk is 5 in (12.7 cm).
- Trunk is centered and shows 0.75 in (1.9 cm) below the border.
- Hanging loop is centered and about 2 in (5.1 cm) tall.
- No tails show from the front.
Troubleshooting
Shells cup or ruffle. Your dc are too loose for the 5-stitch span. Go down one hook size for the coral rows only.
Shells pull the base inward. Your sc foundation is tighter than your dc. Work Row 1 with a 3.5 mm hook.
Tiers look off-center. Check that each cream lattice row starts in the center (4th) dc of a shell and that each dc lands in a valley sc.
Side border loops pull tight. Change ch 4 to ch 5 on both sides.
Side border loops droop. Change ch 4 to ch 3 on both sides.
Trunk tilts. Unpick it, center it again under the middle bottom sc, and sew with even tension.
Loop twists. Block it straight, or sl st back along the chain for a flatter cord.
Care
Hand wash in cool water with mild soap, press out excess water in a towel, and reshape flat to dry. Store flat or hanging, away from heavy ornaments that could crush the shells.
Final Notes
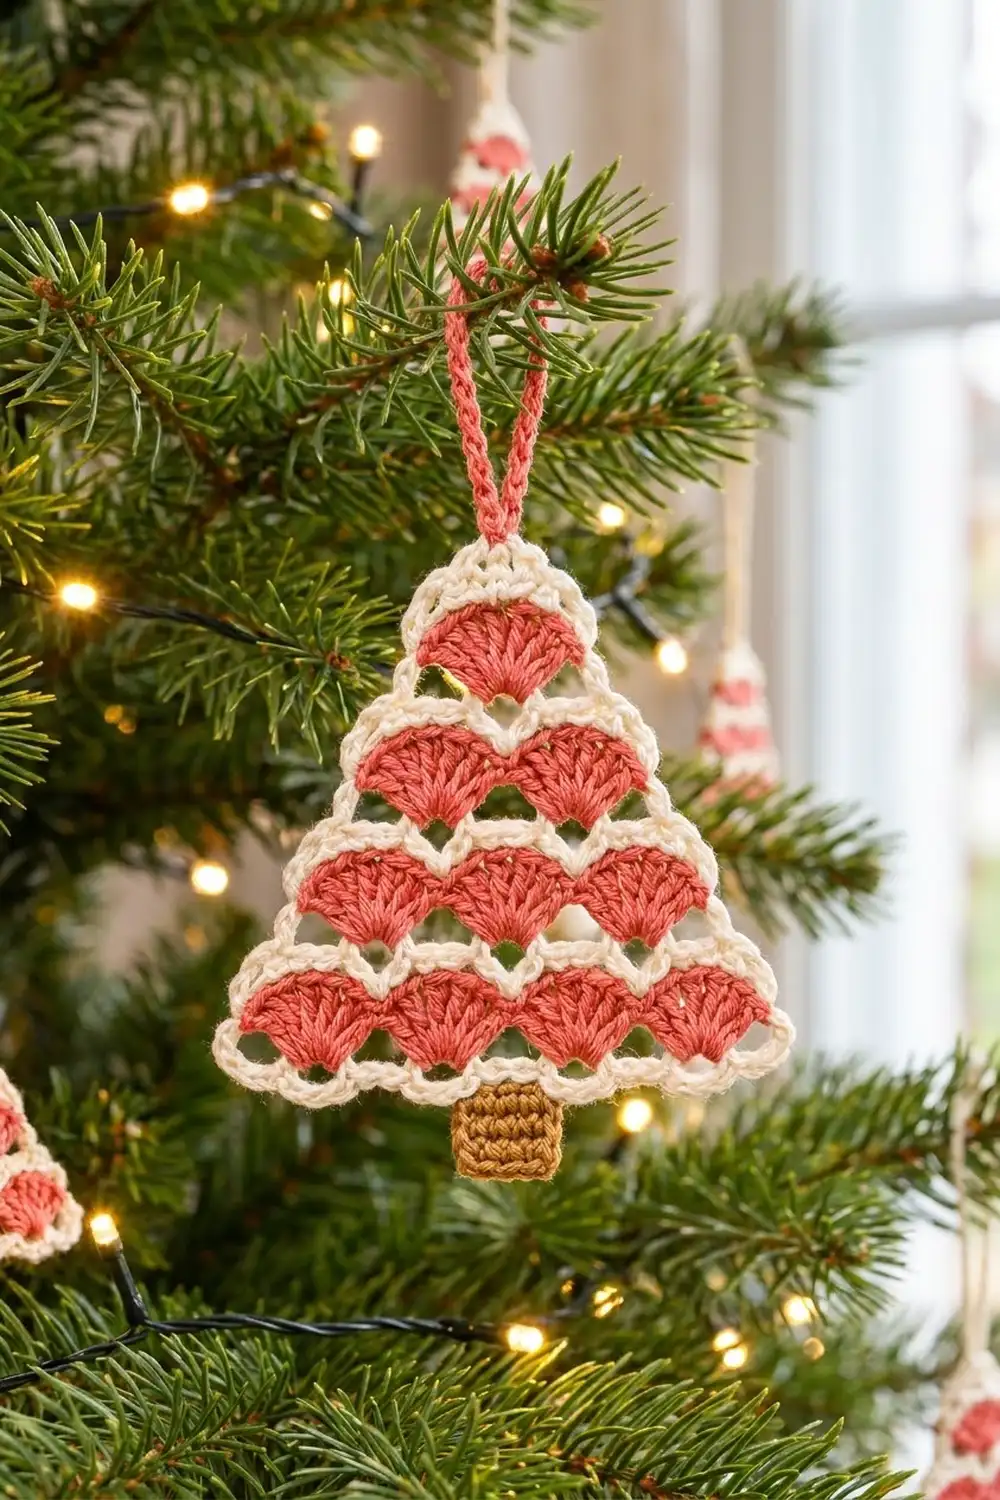
Here is how the measurements build up. A 25-sc base at 6 sc per inch gives 4.25 in (10.8 cm). Four shells of about 1 in (2.5 cm) fill that base. Each tier steps in by half a shell until a single top shell finishes the body at 3.75 in (9.5 cm) tall. The border adds 0.25 in (0.6 cm) on every edge, for a tree 4.75 in (12.1 cm) wide and 4.25 in (10.8 cm) tall. The trunk brings the total height to 5 in (12.7 cm).
Check your gauge after Row 2, count each row, and block carefully. Make one, then make a whole set for the tree.
Happy crocheting!