

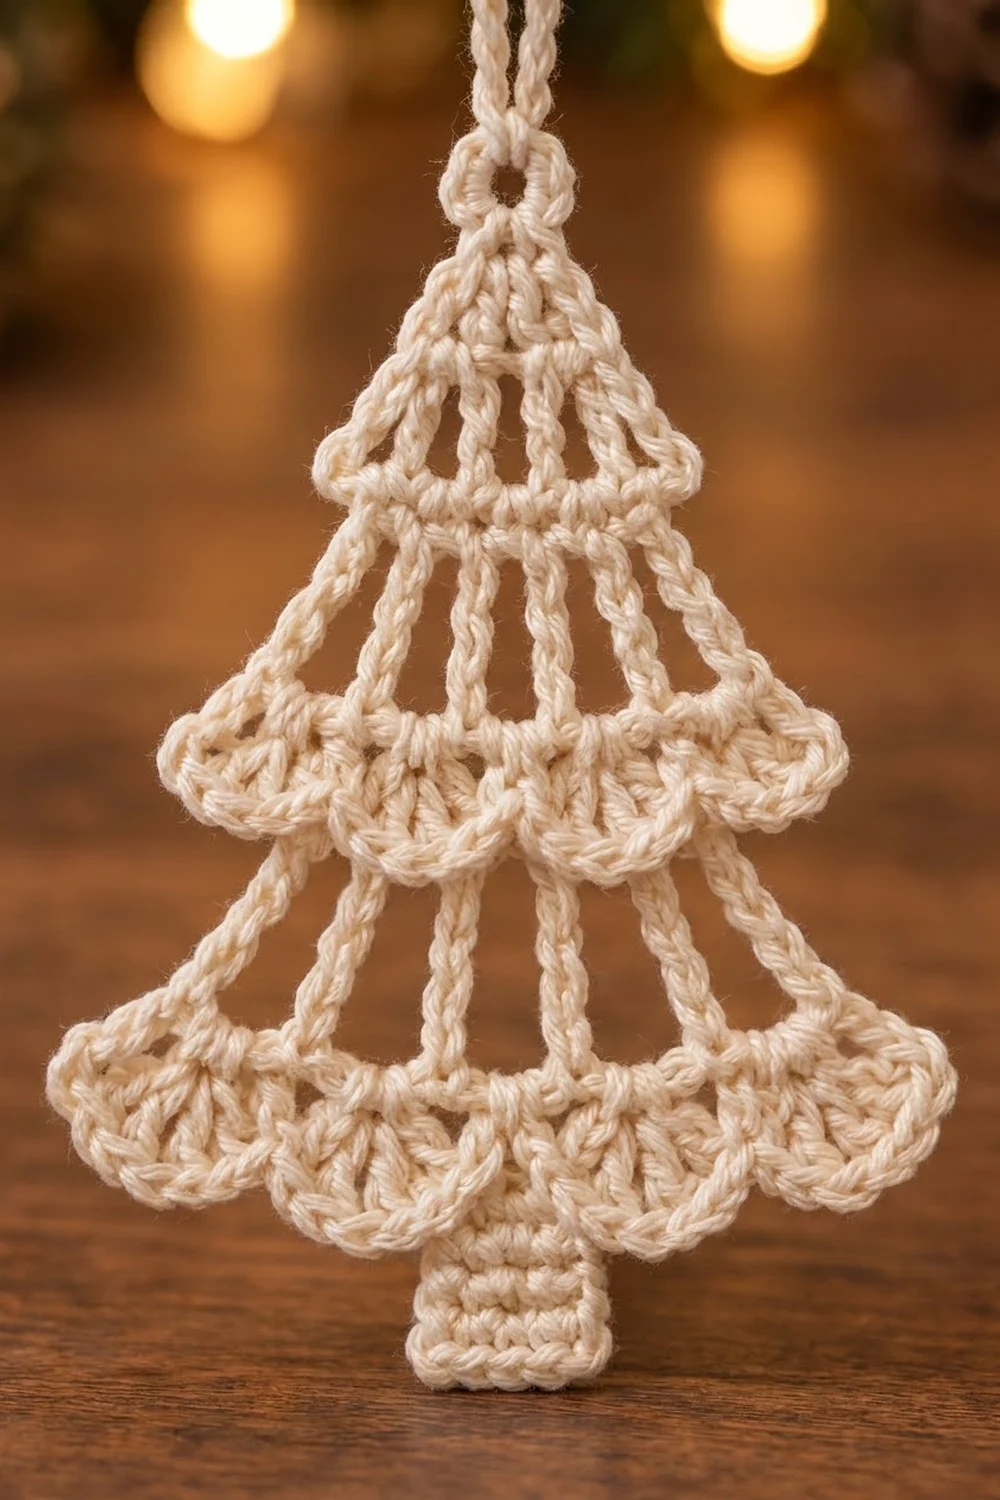
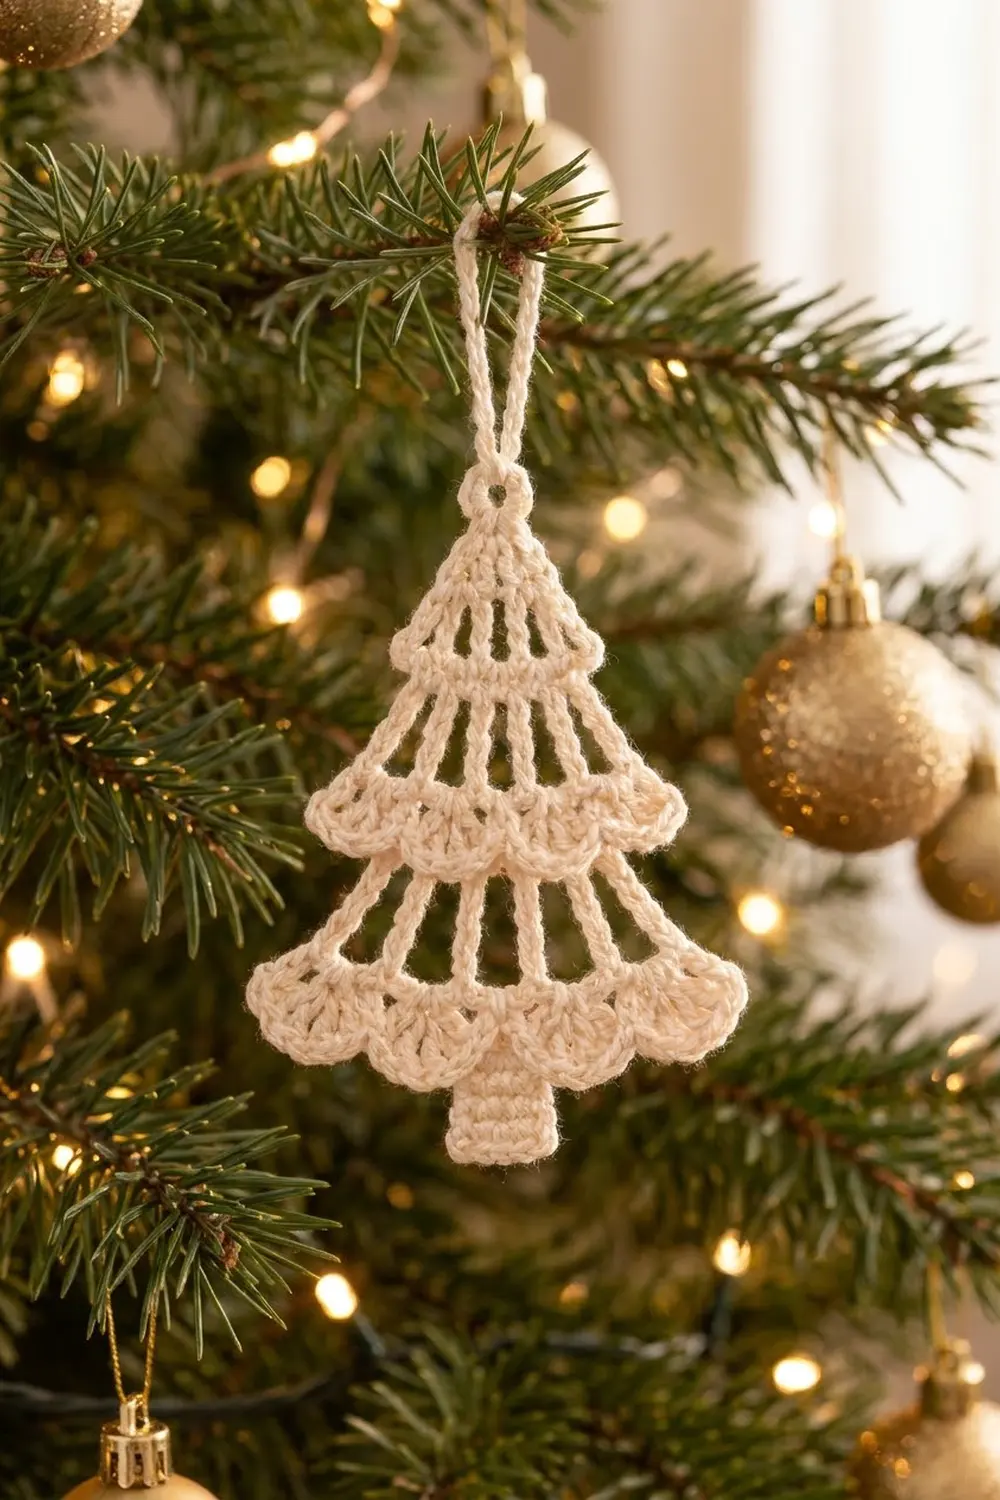
This little tree is all air and light. Three lacy tiers sit one below the other. Each tier is made of tall open spokes and finished with a row of soft scallops, and a small solid trunk anchors the bottom. Hung on a real branch, the spaces let the tree lights glow right through it.
The sample is a single cream color, which gives it a vintage, snow-dusted look that goes with gold, wood, and natural decor. It would also work well in white, pale gold, or soft sage.
The pattern uses US crochet terms. The finished ornament is about 3.25 in (8.3 cm) wide and 4.5 in (11.4 cm) tall, not counting the hanging loop, which adds about 1.25 in (3.2 cm).
You work it flat in one piece, from the top point down. Tier 1 grows out of a small chain ring, and each new tier is worked into the scallops of the tier above. The trunk is worked straight down from the center of the bottom scallop row. One edging pass then firms up both sides and adds the hanging loop at the top.
Finished Size and Construction
- Finished size: 3.25 in (8.3 cm) wide x 4.5 in (11.4 cm) tall, plus a 1.25 in (3.2 cm) loop
- Skill level: Easy-intermediate
- Terminology: US crochet terms
- Yarn weight: Sport / fine (CYC 2) mercerized cotton
- Hook: 2.75 mm (US C-2)
- Number of pieces: 1
- Layout: Single flat motif: 3 tiers + trunk, worked top-down
- Piece size before edging: 3.0 in (7.6 cm) wide x 4.5 in (11.4 cm) tall
- Edging depth: about 0.125 in (0.3 cm) per side, so 0.25 in (0.6 cm) of total width
Materials
Yarn: Use a smooth, tightly plied mercerized cotton in sport weight. Cotton holds the scallops crisply and blocks flat. Acrylic tends to curl and makes the spokes look limp. Avoid fuzzy or brushed yarns, because they fill in the open spaces.
- Cream (one color only): 10 g, about 35 m (38 yd)
That amount includes a margin of about 25% for your gauge swatch and the yarn tails. One ornament uses roughly 8 g on its own.
Tools:
– 2.75 mm (US C-2) crochet hook
– Tapestry needle
– Scissors
– Blocking mat or folded towel
– Rust-proof pins
– Spray bottle with water
– Optional: spray starch for an extra-stiff finish
Abbreviations (US Terms)
- ch – chain
- sl st – slip stitch
- sc – single crochet
- dc – double crochet
- tr – treble crochet (yarn over twice, insert hook, pull up a loop, [yarn over, pull through 2 loops] 3 times)
- sp – space
- st(s) – stitch(es)
- BLO / FLO – back loop only / front loop only
- tch – turning chain
- RS / WS – right side / wrong side
- rep – repeat
Special stitch – Shell: Work the stated number of dc (5 or 7) into the same chain space.
Turning chain note: Ch 4 at the start of a tr row counts as 1 tr. Ch 1 at the start of a shell row does not count as a stitch.
Gauge and Checkpoints
Exact gauge matters less here than for a garment. Even so, the scallops only nest neatly if each tier lands close to the target size. Work Tier 1 first and measure it before you go on. Tier 1 is your gauge swatch.
Checkpoints (measured flat, before edging):
– After Row 2: the fan is 0.875 in (2.2 cm) tall from the ring to the spoke tips.
– After Row 3 (end of Tier 1): 1.25 in (3.2 cm) wide x 1.25 in (3.2 cm) tall.
– After Row 6 (end of Tier 2): 2.0 in (5.1 cm) wide, 2.5 in (6.4 cm) total height.
– After Row 9 (end of Tier 3): 3.0 in (7.6 cm) wide, 3.75 in (9.5 cm) total height.
– After the trunk: 4.5 in (11.4 cm) total height.
If Tier 1 is too big, go down to a 2.5 mm hook. If it is too small, go up to a 3.0 mm hook. If only the height is off, adjust your tr: wrap more loosely if the spokes are short, and pull the first loop up less if they are tall. Spokes that are too short make the tiers look squat, and the scallops will overlap the tier below too much.
Tier 1 (Top)
Foundation: Ch 6, sl st in the first ch to form a ring.
Row 1 (RS): Ch 4 (counts as tr), [ch 1, tr in ring] 4 times. Turn.
(5 tr, 4 ch-1 sps)
The stitches fan out from the ring to form the narrow top point.
Row 2 (WS): Ch 4 (counts as tr), ch 2, [tr in next tr, ch 2] 3 times, tr in 4th ch of tch. Turn.
(5 tr, 4 ch-2 sps)
Each tr sits right on top of a tr from Row 1, so the spokes read as long straight lines.
Row 3 (RS, scallops): Ch 1 (does not count), sc in first tr, [5-dc shell in next ch-2 sp, sc in next tr] 4 times, working the last sc in the 4th ch of tch. Turn.
(5 sc + 20 dc = 25 sts; 4 shells)
The sc land on the spoke tips and the shells fill the spaces between them, so you get 4 rounded scallops. Check the Tier 1 size now.
Tier 2 (Middle)
Row 4 (WS, ridge row): Work this row in FLO. Ch 4 (counts as tr), [ch 2, skip 3 sts, tr in next st] 6 times. Turn.
(7 tr, 6 ch-2 sps)
Math check: 1 starting st + 6 x (3 skipped + 1 worked) = 25 sts, which uses every stitch of Row 3. The spokes land on sts 1, 5, 9, 13, 17, 21, and 25.
The scallops of Row 3 now hang over the top of Tier 2. Because you worked in the front loops from the WS, the unused back loops sit on the RS as a thin ridge line across the top of the tier.
Row 5 (RS): Ch 4 (counts as tr), ch 3, [tr in next tr, ch 3] 5 times, tr in 4th ch of tch. Turn.
(7 tr, 6 ch-3 sps)
The longer chains push the spokes apart, which gives the tier its widening slope.
Row 6 (WS, scallops): Ch 1, sc in first tr, [7-dc shell in next ch-3 sp, sc in next tr] 6 times, working the last sc in the 4th ch of tch. Turn.
(7 sc + 42 dc = 49 sts; 6 shells)
Check: the piece is 2.0 in (5.1 cm) wide and 2.5 in (6.4 cm) tall.
Tier 3 (Bottom)
Row 7 (RS, ridge row): Work this row in BLO. Ch 4 (counts as tr), [ch 3, skip 5 sts, tr in next st] 8 times. Turn.
(9 tr, 8 ch-3 sps)
Math check: 1 + 8 x (5 + 1) = 49 sts, which uses every stitch of Row 6. Working in BLO from the RS leaves the front loops on the RS, so this ridge matches the one on Tier 2.
Row 8 (WS): Ch 4 (counts as tr), ch 4, [tr in next tr, ch 4] 7 times, tr in 4th ch of tch. Turn.
(9 tr, 8 ch-4 sps)
Row 9 (RS, scallops): Ch 1, sc in first tr, [7-dc shell in next ch-4 sp, sc in next tr] 8 times, working the last sc in the 4th ch of tch.
(9 sc + 56 dc = 65 sts; 8 shells)
Fasten off, leaving a 4 in (10.2 cm) tail.
Check: the widest point is 3.0 in (7.6 cm) and the height is 3.75 in (9.5 cm). Because the rows are worked top-down, the tops of the dc form the lower edge, and the shorter sc sit as small valleys between the scallops.
Trunk
In Row 9, the sc fall on sts 1, 9, 17, 25, 33, 41, 49, 57, and 65. St 33 is the center sc, in the valley between the 4th and 5th scallops.
Row T1: With the RS facing, join yarn in st 31, which is the 6th dc of the 4th shell. Ch 1, sc in sts 31, 32, 33, 34, and 35. Turn.
(5 sc)
These 5 stitches are 2 dc, the center sc, and 2 dc, so they sit exactly at the center.
Rows T2–T6: Ch 1, sc in each sc across. Turn.
(5 sc per row)
Fasten off. The trunk is 6 rows tall: 0.75 in (1.9 cm) tall and 0.625 in (1.6 cm) wide. Total height is now 4.5 in (11.4 cm).
Edging and Hanging Loop
The edging is worked along the two slanted side edges and over the top point. It is not worked along the scallops or the trunk. It firms up the outer spokes into the clean, raised edge you see in the photo.
Edging gauge: 3 sc fit along the row end of 1 tr row (about 0.4 in / 1.0 cm), and 1 sc fits along the row end of 1 scallop row.
Per-side count: Each tier has 2 tr rows and 1 scallop row, so one tier edge takes (2 x 3) + 1 = 7 sc. Three tiers x 7 sc = 21 sc per side.
Edging Row (RS):
1. With the RS facing, join yarn at the lower right corner, in the row end of Row 9.
2. Ch 1. Working up the right edge, sc 21 evenly: 1 sc in each scallop-row end and 3 sc in each tr-row end.
3. At the top, work (sc, ch 20, sc) into the foundation ring.
4. Working down the left edge, sc 21 evenly in the same way.
5. Fasten off at the lower left corner.
Total: 21 + 2 + 21 = 44 sc, plus the ch-20 loop
Why the math works: A tr is about as tall as 3 sc stacked, so 3 sc per tr row end keeps the edge flat, with no ruffling or puckering. A scallop row starts with ch 1 and an sc, so its row end is only one sc tall and takes 1 sc. The edging adds about 0.125 in (0.3 cm) on each side, so the width grows from 3.0 in (7.6 cm) to 3.25 in (8.3 cm). The ch-20 loop folds into a loop about 1.25 in (3.2 cm) long. Give it a few twists before blocking to get the corded look in the photo.
Final Blocking
- Weave in all the tails along the spokes or inside the trunk. Do not trim them yet.
- Wet the ornament fully, or mist it heavily. Use diluted starch if you want it stiff.
- Lay it RS up on the blocking mat.
- Pin the top ring, then pin the trunk straight below it to set the center line at 4.5 in (11.4 cm).
- Pin the bottom tier to 3.25 in (8.3 cm) across, then Tier 2 to about 2.25 in (5.7 cm) and Tier 1 to about 1.5 in (3.8 cm) after edging.
- Pin each scallop into an even half-circle, with one pin at each dc tip in the center.
- Straighten every spoke so it runs in a clean line from the ridge to the scallop valley.
- Let it dry completely, then unpin and trim the tails close.
Final Quality-Control Checklist
- Stitch counts: Tier 1 has 5 spokes and 4 scallops, Tier 2 has 7 spokes and 6 scallops, Tier 3 has 9 spokes and 8 scallops.
- Both ridge lines show on the RS.
- The trunk is centered under st 33 and is 5 sc wide.
- Each side edge has 21 sc and lies flat.
- The finished size is 3.25 in (8.3 cm) x 4.5 in (11.4 cm).
- The hanging loop is secure and about 1.25 in (3.2 cm) long.
- No tails show from the front.
Troubleshooting
The scallops ruffle or cup. Your dc are too loose for the chain space. Tighten your tension, or use 6 dc instead of 7 in Tier 3 and keep the sc placement the same.
A tier comes out too narrow. Your chain spaces are tight. Make your chains a little looser, or go up half a hook size for the chain rows only.
A ridge line is on the wrong side. Check your loop. Use FLO on Row 4 (WS) and BLO on Row 7 (RS).
The trunk is off center. Count again from either end of Row 9. St 31 must be the 6th dc of the 4th shell.
The side edges pucker. You have fewer than 3 sc per tr row end. If they flare, you have more than 3.
The ornament flops on the tree. Re-block it with starch and let it dry flat for a full day.
Care
Hand wash in cool water, press out the water in a towel, and re-block flat. If you used starch, it washes out, so re-starch after each wash.
Final Notes
The size depends on each step landing on target. Tier 1 should measure 1.25 in (3.2 cm), Tier 2 should bring the width to 2.0 in (5.1 cm), and Tier 3 to 3.0 in (7.6 cm). The trunk takes the height to 4.5 in (11.4 cm), and the edging finishes the width at 3.25 in (8.3 cm). Check each stage before you move on, and the scallops will nest the way they should. Make one, then a whole tree’s worth.
Happy crocheting!