

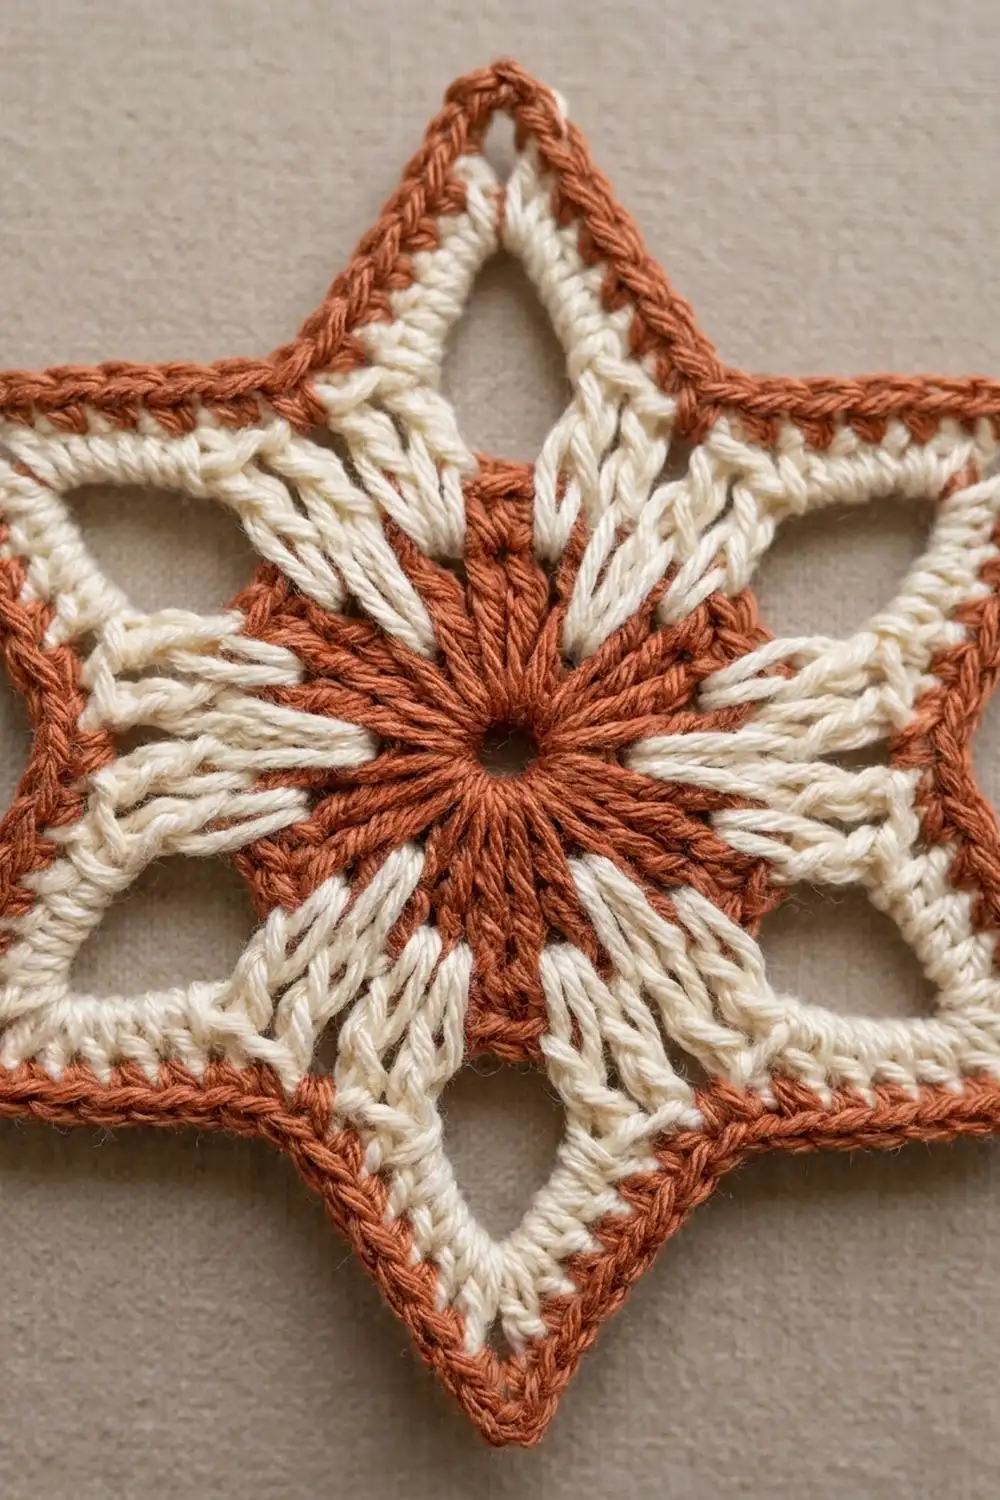
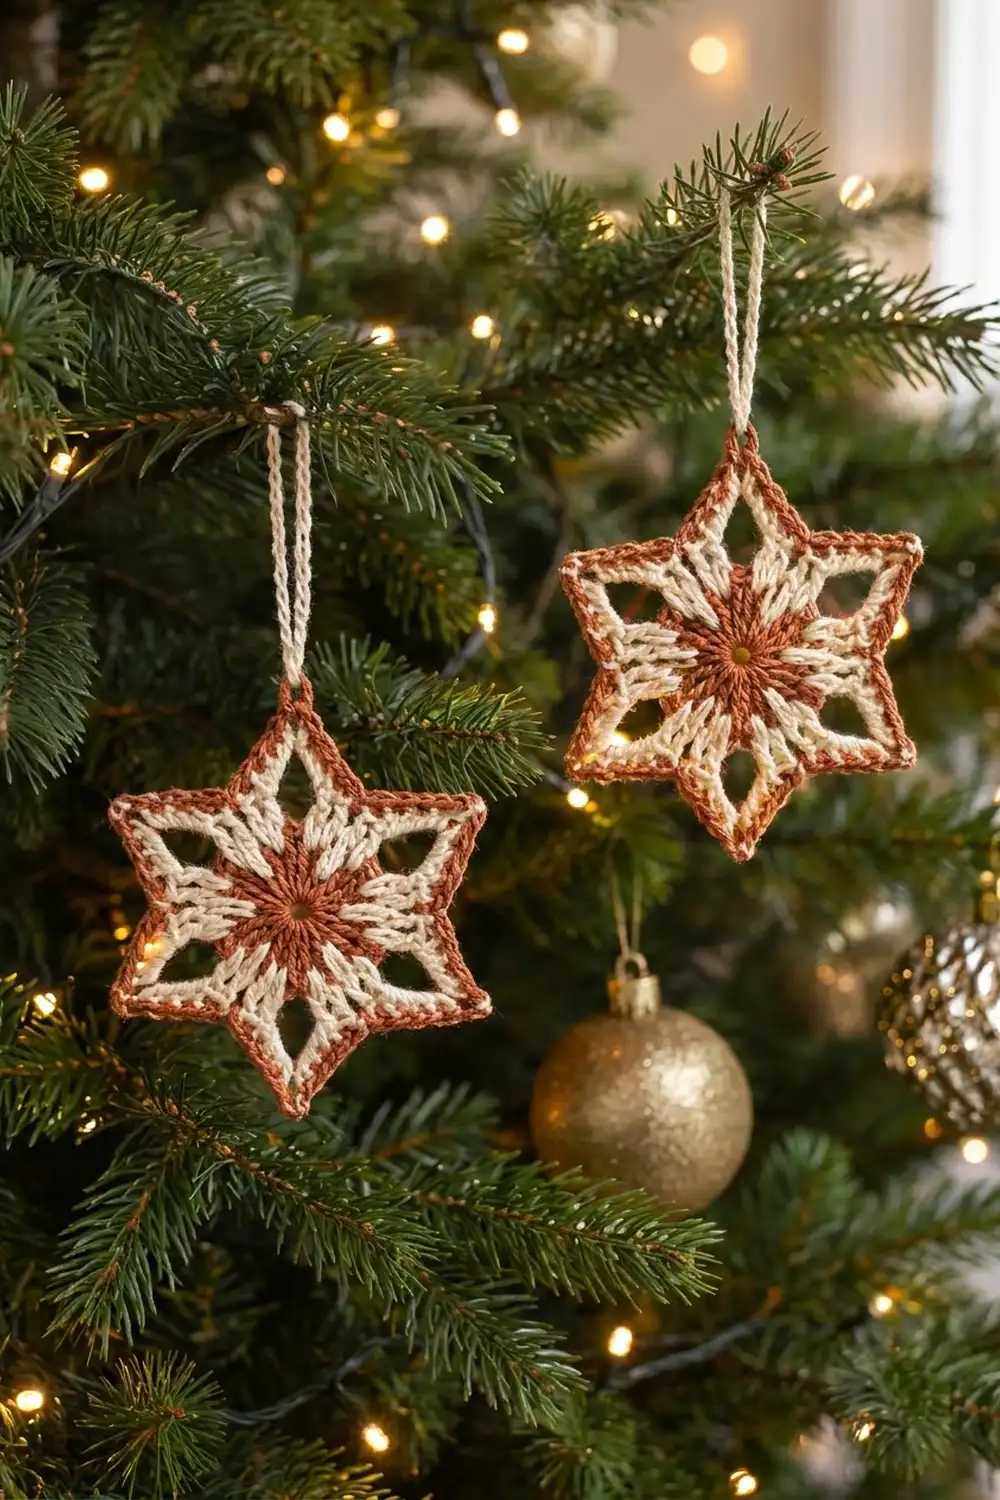
The Cinnamon Frost Star is a flat, six-pointed crochet star with a warm rust center, lacy cream points, and a crisp rust outline. It looks like a little frosted gingerbread snowflake, and it hangs beautifully on a tree, a gift, or a window.
The color story is simple: rust for the center and the edging, cream for the lacy ring and the points. The contrast makes the star shape read clearly, even from across a room, and the open windows let light pass through when it hangs near tree lights.
This pattern uses US crochet terms. The finished star measures about 5.75 in (14.6 cm) from point to point and about 3.75 in (9.5 cm) across from valley to valley.
The star is worked in the round as one single piece. You make a solid rust center, add a cream ring of chain-space windows, build six treble crochet points on top of that ring, and finish with a rust single crochet edging and an optional cream hanging loop.
Finished Size and Construction
- Finished size: 5.75 in (14.6 cm) point to point; 3.75 in (9.5 cm) valley to valley
- Skill level: Easy-intermediate
- Terminology: US crochet terms
- Yarn weight: Worsted (#4), cotton or cotton blend
- Hook: 4.0 mm (G-6)
- Number of pieces: 1 single star motif
- Layout: Single piece, no joining
- Piece size before border: 5.25 in (13.3 cm) point to point
- Border depth: about 0.25 in (0.6 cm) on every edge
- Hanging loop: about 2 in (5.1 cm) long when folded, optional
Materials
Choose a smooth worsted-weight cotton or cotton blend. Cotton gives crisp stitch definition and keeps the points sharp after blocking. Acrylic works too, but it may need a little more steam to lie flat. Pick a rust with enough depth to stand out against the cream; a pale peach will blur the outline.
- Rust / terracotta (Color A): 6 g, about 10 m (11 yd)
- Cream / off-white (Color B): 8 g, about 14 m (15 yd)
These quantities include a margin for the swatch, weaving in ends, and the hanging loop.
Tools:
- 4.0 mm (G-6) crochet hook
- Tapestry needle
- Scissors
- Stitch marker
- Rust-proof pins and a foam blocking mat
- Spray bottle or steam iron
- Ruler or tape measure
Abbreviations (US Terms)
- ch – chain
- sl st – slip stitch
- sc – single crochet
- dc – double crochet
- tr – treble crochet
- sk – skip
- sp(s) – space(s)
- MR – magic ring
- st(s) – stitch(es)
Special stitch – Point: In the same ch-3 sp, work (tr, ch 1, tr, ch 4, tr, ch 1, tr). The ch-4 becomes the tip of the star point.
Gauge and Checkpoints
Gauge is not critical for an ornament, but it controls the final size and how sharp the points look. Make one star first and measure at each checkpoint before making a batch.
- Swatch gauge: 16 sc = 4 in (10.2 cm) with a 4.0 mm hook.
- After Round 1: rust circle about 1.25 in (3.2 cm) across.
- After Round 2: rust circle about 2 in (5.1 cm) across.
- After Round 3: lacy ring about 3.25 in (8.3 cm) across.
- After Round 4: star about 5.25 in (13.3 cm) point to point.
- After Round 5: star about 5.75 in (14.6 cm) point to point.
If your star is too big: go down one hook size to 3.5 mm (E-4), or pull the chain spaces slightly snugger.
If your star is too small: go up one hook size to 4.5 mm (7), or make sure each treble is pulled to full height.
If Round 2 ruffles, your tension is loose; if it cups, your tension is tight. Fix this at Round 2, because every later round sits on that circle.
Pattern
Round 1 – Rust Center
With Color A, make a MR.
Ch 3 (counts as first dc), work 11 dc into the ring. Pull the ring closed. Join with sl st to the top of the beginning ch-3.
Stitch count: 12 dc.
Round 2 – Rust Center Growth
Ch 3 (counts as dc), dc in the same st as the join. Work 2 dc in each remaining st around. Join with sl st to the top of the beginning ch-3.
Stitch count: 24 dc.
The circle should be flat and about 2 in (5.1 cm) across. Fasten off Color A and weave in the end on the back.
Round 3 – Cream Lacy Ring
Join Color B with a sl st in any dc of Round 2.
Ch 6 (counts as dc + ch 3). Sk next dc, dc in next dc, ch 3. Repeat from * 10 more times. Sk the last dc and join with sl st to the 3rd ch of the beginning ch-6.
Stitch count: 12 dc and 12 ch-3 sps.
Each ch-3 sp sits over one skipped rust dc. These spaces form the open “windows” around the rust center. The ring should measure about 3.25 in (8.3 cm) across and lie flat.
Round 4 – Cream Star Points
This round turns the 12 ch-3 sps into 6 valleys and 6 points. The spaces alternate: one valley space, then one point space.
Sl st into the first ch-3 sp. Ch 1, sc in the same sp (first valley). Ch 2, work a Point in the next ch-3 sp, ch 2.
Sc in the next ch-3 sp (valley), ch 2, Point in the next ch-3 sp, ch 2. Repeat from * 4 more times. Join with sl st to the first sc.
Stitch count: 6 sc and 24 tr, with 6 ch-4 tip sps, 12 ch-1 sps, and 12 ch-2 sps.
Each point unit is 1 sc + 4 tr. Six units give 6 sc and 24 tr. The star now measures about 5.25 in (13.3 cm) from point to point. Fasten off Color B and weave in the end.
Border
Border Gauge
The border is a single round of sc in Color A. At 16 sc = 4 in (10.2 cm), each sc covers about 0.25 in (0.6 cm) of edge. That matches the length of the Round 4 edges when you work the border as written below.
Round 5 – Rust Edging
Join Color A with a sl st in any valley sc of Round 4.
Ch 1, then work one point unit as follows:
- Sc in the valley sc. (1 sc)
- 2 sc in the next ch-2 sp. (2 sc)
- Sc in the next tr. (1 sc)
- Sc in the next ch-1 sp. (1 sc)
- Sc in the next tr. (1 sc)
- In the ch-4 tip sp, work (2 sc, ch 3, 2 sc). (4 sc + ch-3 tip)
- Sc in the next tr. (1 sc)
- Sc in the next ch-1 sp. (1 sc)
- Sc in the next tr. (1 sc)
- 2 sc in the next ch-2 sp. (2 sc)
Repeat steps 1–10 five more times. Join with sl st to the first sc.
Per point unit: 15 sc + 1 ch-3 tip.
Round count: 30 sc worked 1 per existing stitch (6 valley sc + 24 tr) + 60 sc worked into spaces (10 per unit) = 90 sc, plus 6 ch-3 tips.
Why the Math Works
Each point has two edges. Each edge carries 7 sc: 2 in the ch-2 sp, 1 in each tr, 1 in the ch-1 sp, and 2 into the tip sp. Two edges of 7 sc plus 1 valley sc give 15 sc per unit, and 6 units give 90 sc.
The ch-3 at each tip gives the point room to stay sharp instead of curling. The valley gets exactly 1 sc with no increase, so the inner corner stays deep. Because nothing extra is added at the valleys and only a chain is added at the tips, the edge lies flat. The border adds about 0.25 in (0.6 cm) at each point, taking the star from 5.25 in (13.3 cm) to 5.75 in (14.6 cm).
Optional Hanging Loop
Join Color B with a sl st in any ch-3 tip sp. Ch 24, then sl st back into the same tip sp. Fasten off and weave the ends into the border on the back.
The chain is about 4 in (10.2 cm) long and folds into a loop about 2 in (5.1 cm) long.
Final Blocking
- Weave in all ends on the back, following the direction of the stitches.
- Lightly mist the star with water until it is damp, not soaked.
- Place it right side up on a blocking mat.
- Pin the center first so the rust circle is round and about 2 in (5.1 cm) across.
- Pin each of the 6 tips through the ch-3 tip, spacing them evenly so the star measures 5.75 in (14.6 cm) point to point.
- Pin each valley so the star measures 3.75 in (9.5 cm) valley to valley.
- Open each ch-3 window of Round 3 with your fingers so the lacy ring looks even.
- Let it dry completely, at least 6 hours. For a stiffer ornament, use a light spray starch before drying.
If you use acrylic, hover a steam iron over the pinned star for a few seconds instead of misting. Do not press the iron onto the yarn.
Final Quality-Control Checklist
- Rust center is flat, round, and about 2 in (5.1 cm) across.
- Round 3 has exactly 12 even ch-3 windows.
- There are exactly 6 points and 6 valleys.
- Each point has 4 tr and a ch-4 tip in Round 4.
- Round 5 has 90 sc and 6 ch-3 tips.
- All points match in length, within about 0.125 in (0.3 cm).
- Finished size is 5.75 in (14.6 cm) point to point.
- All ends are woven in securely and invisible from the front.
- The hanging loop, if used, is centered on a tip and firmly attached.
Troubleshooting
The rust center cups. Your Round 2 is tight. Redo it with a slightly looser tension, or use a 4.5 mm (7) hook for that round only.
The rust center ruffles. Your tension is loose. Go down to a 3.5 mm (E-4) hook for Rounds 1–2.
The points look short or rounded. Pull each tr to full height, and check that every tip has a full ch-4 in Round 4 and a ch-3 in Round 5.
The valleys are shallow. Make sure you work only 1 sc in each valley sc in Round 5, with no extra stitches.
The edging ripples. Check that you work 2 sc, not 3, in each ch-2 sp. The count should be 15 sc per unit.
The edging pulls in and the star curls. Your border tension is tight. Loosen it, or use a 4.5 mm (7) hook for Round 5 only.
Uneven windows in Round 3. Count your chains carefully; each window must be exactly ch 3 over 1 skipped dc.
The color change shows on the front. Join new colors from the front and weave tails on the back only, splitting the plies of the stitches as you go.
Care
Hand wash in cool water with mild soap, press out the water in a towel, and re-pin to dry flat. Store ornaments flat or hanging so the points keep their shape.
Final Notes
The measurement chain is easy to follow. Your rust center should be 1.25 in (3.2 cm) after Round 1 and 2 in (5.1 cm) after Round 2. The cream ring reaches 3.25 in (8.3 cm), the points bring the star to 5.25 in (13.3 cm), and the rust border finishes it at 5.75 in (14.6 cm) point to point.
Check your counts as you go: 12 dc, 24 dc, 12 ch-3 windows, 6 points with 24 tr, and 90 sc in the border. If those numbers match, your star will lie flat and sharp every time.
Make one, measure it, and then make a whole batch in the same calm rhythm.
Happy crocheting!