

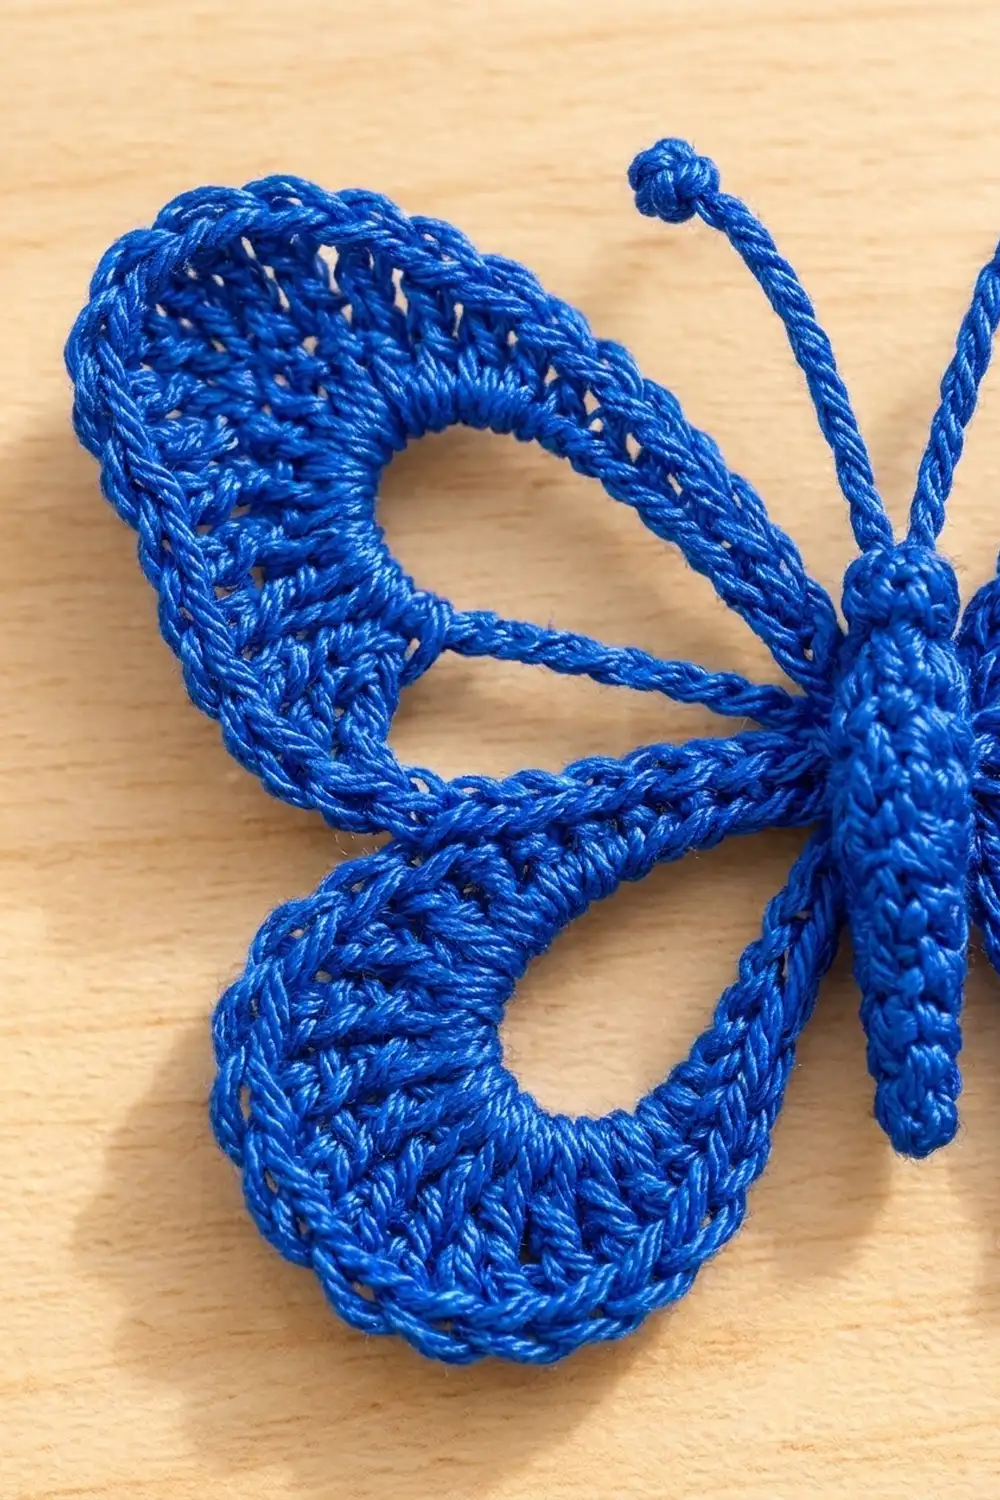
The Cobalt Flutter Butterfly is a crisp, lacy appliqué in deep royal blue. It has four rounded wings, each with a big open window, framed by a fan of double crochet that grows wider toward the outer edge. A slim sculpted body and two antennae with bobble tips finish it.
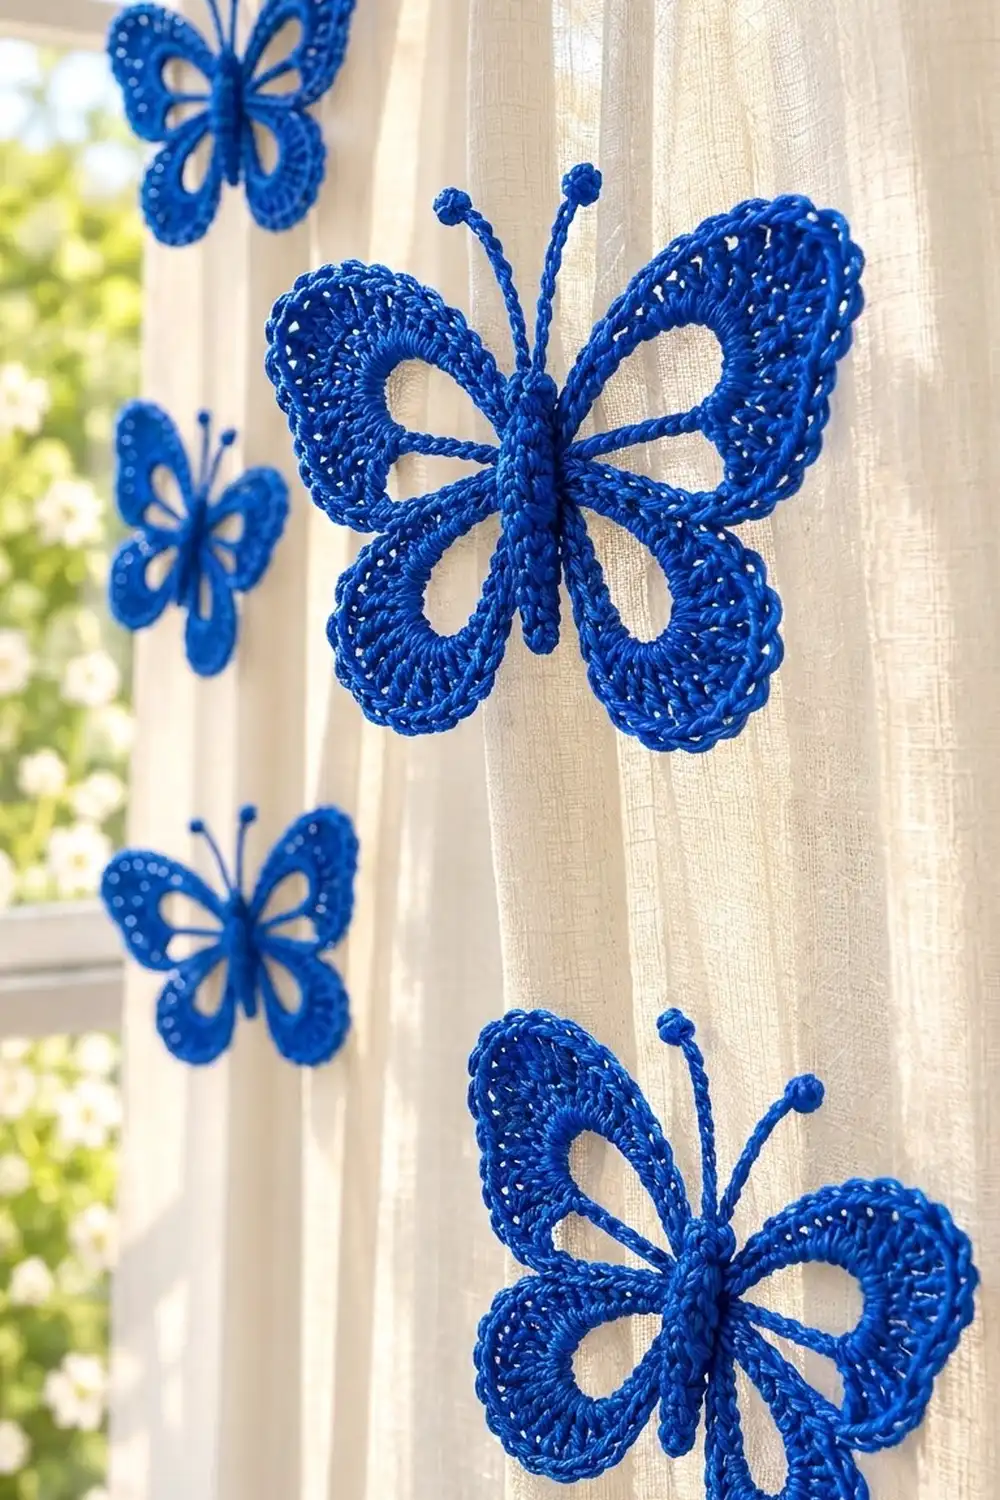
It’s made in one solid color of mercerized cotton thread, so the stitch texture does all the work. The look is clean and a bit vintage. You can sew it to a curtain, a bag or a card, or tack several to a sheer panel as a seasonal display.
This pattern uses US crochet terms. The finished butterfly measures 4 in (10.2 cm) wide and 3.25 in (8.3 cm) tall across the wings, or 4.25 in (10.8 cm) tall including the antennae.
The construction is simple. You work four chain loops off a tiny center ring, then fill each loop with graduated stitches to shape the wings. A single crochet border finishes the edge. You then make the body as a small tube, sew it over the center, and work the antennae straight off the head.
Finished Size and Construction
- Finished size: 4 in (10.2 cm) wide × 3.25 in (8.3 cm) tall (wings); 4.25 in (10.8 cm) tall with antennae
- Skill level: Intermediate (working into chain spaces, bobbles, small-scale amigurumi)
- Terminology: US crochet terms
- Yarn weight: Size 3 crochet thread (Super Fine / 1)
- Hook: 2.25 mm (US B-1)
- Number of pieces: 1 finished motif, made from 2 components (wing section and body)
- Layout: Body centered vertically over the wing junction, antennae at the top
- Wing section size before border: 3.75 in (9.5 cm) wide × 3 in (7.6 cm) tall
- Border depth: 1/8 in (0.3 cm) on every outer edge
- Body length: 2.25 in (5.7 cm)
Materials
Thread: Choose a mercerized cotton, size 3. It has a slight sheen, holds its shape and shows every stitch clearly. Avoid fuzzy or very soft threads, because they blur the open windows.
- Royal blue (cobalt): about 10 g / 28 m (31 yd)
Tools:
– 2.25 mm (US B-1) crochet hook
– Tapestry needle with a small eye
– 2 stitch markers
– Small scissors
– A pinch of matching thread scraps or fiberfill for the body
– Blocking mat, rustproof pins, and spray starch or a light sugar starch
The quantity includes a margin of roughly 25% for your gauge swatch, sewing tails, and differences between brands. The butterfly itself uses about 8 g / 22 m (24 yd).
Abbreviations (US Terms)
- ch – chain
- sl st – slip stitch
- sc – single crochet
- hdc – half double crochet
- dc – double crochet
- sc2tog – single crochet 2 together
- st(s) – stitch(es)
- MR – magic ring
- sp – space
Special stitch – Bobble: Yarn over, insert the hook in the stitch, yarn over and pull up a loop, yarn over and draw through 2 loops. Repeat 3 more times in the same stitch (5 loops on the hook). Yarn over and draw through all 5 loops.
Gauge and Checkpoints
Gauge: 8 sc and 8 sc rounds = 1 in (2.5 cm) with size 3 thread and a 2.25 mm hook. One dc round is about 5/16 in (0.8 cm) tall.
Make the wing section first, because it is the piece that sets the size. Check it at each stage:
- After Round 1: The upper loops lie flat at about 1.25 in (3.2 cm) long and the lower loops at about 1 in (2.5 cm).
- After Round 2: The wing section is 3 in (7.6 cm) wide × 2.5 in (6.4 cm) tall.
- After Round 3: 3.75 in (9.5 cm) wide × 3 in (7.6 cm) tall.
- After the border: 4 in (10.2 cm) wide × 3.25 in (8.3 cm) tall.
If your piece is too big: Go down to a 2.0 mm hook, or keep the chain loops snug rather than loose.
If it’s too small: Go up to a 2.5 mm hook. A tight Round 1 chain is the usual reason the windows close up.
Wing Section
The four wings are worked as one piece, in this order: upper right, lower right, lower left, upper left. Hold the work right side facing you.
Center ring: Ch 4 and sl st in the first ch to form a ring.
Round 1 (wing frames):
– Ch 30 and sl st in the ring (upper-right frame).
– Ch 22 and sl st in the ring (lower-right frame).
– Ch 22 and sl st in the ring (lower-left frame).
– Ch 30 and sl st in the ring (upper-left frame).
You now have 4 chain loops: 2 × ch-30 and 2 × ch-22.
Lay the loops flat like a figure eight with a cross. The upper loops point up and outward at about 45°, and the lower loops point down and outward.
Round 2 (wing fill): You work over each chain loop, inserting the hook into the loop space rather than into individual chains. The short stitches at each end hug the body, and the tall stitches fan around the outer curve.
- Upper-right ch-30 sp: 4 sc, 4 hdc, 24 dc, 4 hdc, 4 sc, then sl st in the ring. (40 sts)
- Lower-right ch-22 sp: 3 sc, 3 hdc, 18 dc, 3 hdc, 3 sc, then sl st in the ring. (30 sts)
- Lower-left ch-22 sp: Work as for the lower right. (30 sts)
- Upper-left ch-30 sp: Work as for the upper right, but don’t sl st in the ring.
Round 2 total: 40 + 30 + 30 + 40 = 140 sts. The sl sts in the ring are not counted.
As you work, push the stitches together along the chain so each loop is fully packed. The open center of each loop becomes the wing window.
Round 3 (outer fan): Sl st in the first sc of the upper-right wing and ch 1 (doesn’t count). From here you work into the tops of the Round 2 stitches, continuing from one wing to the next. Where two wings meet at the ring, go straight from the last sc of one wing into the first sc of the next, without adding any stitches.
- Upper-right wing: sc in the next 4 sts, hdc in the next 4 sts, (2 dc in the next st, dc in the next st) 12 times, hdc in the next 4 sts, sc in the next 4 sts. (4 + 4 + 36 + 4 + 4 = 52 sts)
- Lower-right wing: sc in the next 3 sts, hdc in the next 3 sts, (2 dc in the next st, dc in the next st) 9 times, hdc in the next 3 sts, sc in the next 3 sts. (3 + 3 + 27 + 3 + 3 = 39 sts)
- Lower-left wing: Work as for the lower right. (39 sts)
- Upper-left wing: Work as for the upper right. (52 sts)
Sl st in the first sc to join.
Round 3 total: 52 + 39 + 39 + 52 = 182 sts. As a check: 140 sts + 12 + 9 + 9 + 12 increases = 182.
The increases sit only in the dc section, so the outer edge flares and the body side stays slim. This is what gives each wing a thin band near the body and a wide band on the outside.
Border
Border gauge: 8 sc = 1 in (2.5 cm) along the outer edge. The border adds 1/8 in (0.3 cm) on every side.
Round 4 (border): Ch 1 (doesn’t count) and work into the Round 3 stitches.
- Upper-right wing: sc in the next 8 sts (over the sc and hdc), (sc in the next 2 sts, 2 sc in the next st) 12 times, sc in the next 8 sts. (8 + 48 + 8 = 64 sts)
- Lower-right wing: sc in the next 6 sts, (sc in the next 2 sts, 2 sc in the next st) 9 times, sc in the next 6 sts. (6 + 36 + 6 = 48 sts)
- Lower-left wing: Work as for the lower right. (48 sts)
- Upper-left wing: Work as for the upper right. (64 sts)
Sl st in the first sc. Fasten off and leave a 4 in (10.2 cm) tail.
Round 4 total: 64 + 48 + 48 + 64 = 224 sts. As a check: 182 sts + 12 + 9 + 9 + 12 increases = 224.
Why the math works: The outer arc of each wing is longer than the arc of the round below it. In Round 3, each wing increases once for every 2 dc it covers. Round 4 adds one more increase per 3 sts on the same arc. That matches the extra circumference gained by about 1/8 in (0.3 cm) of extra radius, so the edge stays flat with no ruffling or cupping. The sc and hdc sections at the body end are not increased, so the inner band stays narrow.
Body
The body is worked in continuous spiral rounds of sc, starting at the head. Mark the first stitch of each round.
- Round 1: 6 sc in a MR. (6)
- Round 2: (sc in the next st, 2 sc in the next st) 3 times. (9)
- Rounds 3–4: sc in each st around. (9)
- Round 5 (neck): (sc in the next st, sc2tog) 3 times. (6)
- Round 6: (sc in the next st, 2 sc in the next st) 3 times. (9)
- Rounds 7–14: sc in each st around. (9)
Stuff the head and upper body very lightly with thread scraps. You want a firm cord, not a ball.
- Round 15: (sc in the next st, sc2tog) 3 times. (6)
- Rounds 16–17: sc in each st around. (6)
- Round 18: sc2tog 3 times. (3)
Fasten off and leave a 12 in (30.5 cm) tail for sewing. Thread the tail through the last 3 sts and pull it closed to form the pointed tail end.
Checkpoint: 18 rounds at 8 rounds per inch makes the body 2.25 in (5.7 cm) long and about 5/16 in (0.8 cm) wide.
Antennae
Join the thread with a sl st in a Round 2 stitch on the top of the head.
First antenna:
1. Ch 13.
2. Work a Bobble in the 3rd ch from the hook, then ch 1 to lock it.
3. Sl st in each of the remaining 10 ch.
4. Sl st in the head st where you started.
Second antenna: Sl st in the next 2 head sts, then repeat steps 1–4.
Fasten off and weave in the ends inside the head. Each antenna is about 1 in (2.5 cm) long, with a knob about 3/16 in (0.5 cm) across.
Assembly
Turn the wing section right side up. Place the body vertically over the center ring with the head level with the top of the two upper wings. The tail should extend about 0.5 in (1.3 cm) below the ring, sitting between the lower wings.
Using the long body tail, whipstitch along the underside of the body through the ring and the sc ends of each wing. Wrap the thread twice around the “waist” at Round 5 and Round 14 so the wings are pulled up slightly against the body. Fasten off on the wrong side and weave the tail into the border stitches.
Final Blocking
- Weave in all remaining ends on the wrong side, following the stitch lines so they don’t show through the windows.
- Soak the butterfly in cool water for 5 minutes, then roll it in a towel to remove the excess.
- Pin it to the mat at 4 in (10.2 cm) wide and 3.25 in (8.3 cm) tall. Pin the tip of each wing first, then the outer curves.
- Open each window by pushing a pin into the middle and stretching it gently. The upper windows should be about 1.25 in (3.2 cm) long and the lower ones about 1 in (2.5 cm).
- Straighten each antenna and pin its knob so it angles outward.
- Spray with starch, let it dry completely (usually 2–4 hours), and remove the pins.
Final Quality-Control Checklist
- Wingspan is 4 in (10.2 cm), height 3.25 in (8.3 cm), and 4.25 in (10.8 cm) with antennae.
- Round 2 is 140 sts, Round 3 is 182 sts and the border is 224 sts.
- Each upper wing has 64 border sts and each lower wing has 48.
- All four windows are open, clean teardrops with no twisted chains.
- The inner band (by the body) is narrow and the outer band wide on every wing.
- The body is 2.25 in (5.7 cm) long with a visible neck and a pointed tail.
- The two antennae are equal length with round, firm knobs.
- No ends show on the right side.
Troubleshooting
Windows are closing up: The Round 1 chains are too tight, or you crammed in too many stitches. Re-chain with a looser hand, or use a hook one size up for Round 1 only.
Outer edge ruffles: Your dc are taller than gauge. Change the 2-dc increases in Round 4 to every 4th st, or go down a hook size.
Wings cup forward: Too few stitches on the outer arc. Check that you worked all 12 (upper) and 9 (lower) increases in both Round 3 and Round 4.
Wings look lopsided: One loop was chained with a different count. Count the Round 1 chains before you start Round 2.
Body is floppy: It needs a little more stuffing, or a smaller hook (2.0 mm) for the body only.
Antennae droop: Starch them again and let them dry pinned straight.
Care
Hand wash in cool water with mild soap and lay flat to dry. Starch again and reshape as needed.
Final Notes
The measurement chain is short and easy to check:
– Round 1 loops of ch 30 and ch 22 make windows of 1.25 in (3.2 cm) and 1 in (2.5 cm).
– Round 2 (140 sts) brings the wing section to 3 in (7.6 cm) wide.
– Round 3 (182 sts) brings it to 3.75 in (9.5 cm).
– The 224-st border adds 1/8 in (0.3 cm) per side for a 4 in (10.2 cm) × 3.25 in (8.3 cm) wing section.
– The 2.25 in (5.7 cm) body and 1 in (2.5 cm) antennae complete the butterfly at 4.25 in (10.8 cm) tall.
If each checkpoint matches, the finished butterfly will too. Happy crocheting!