

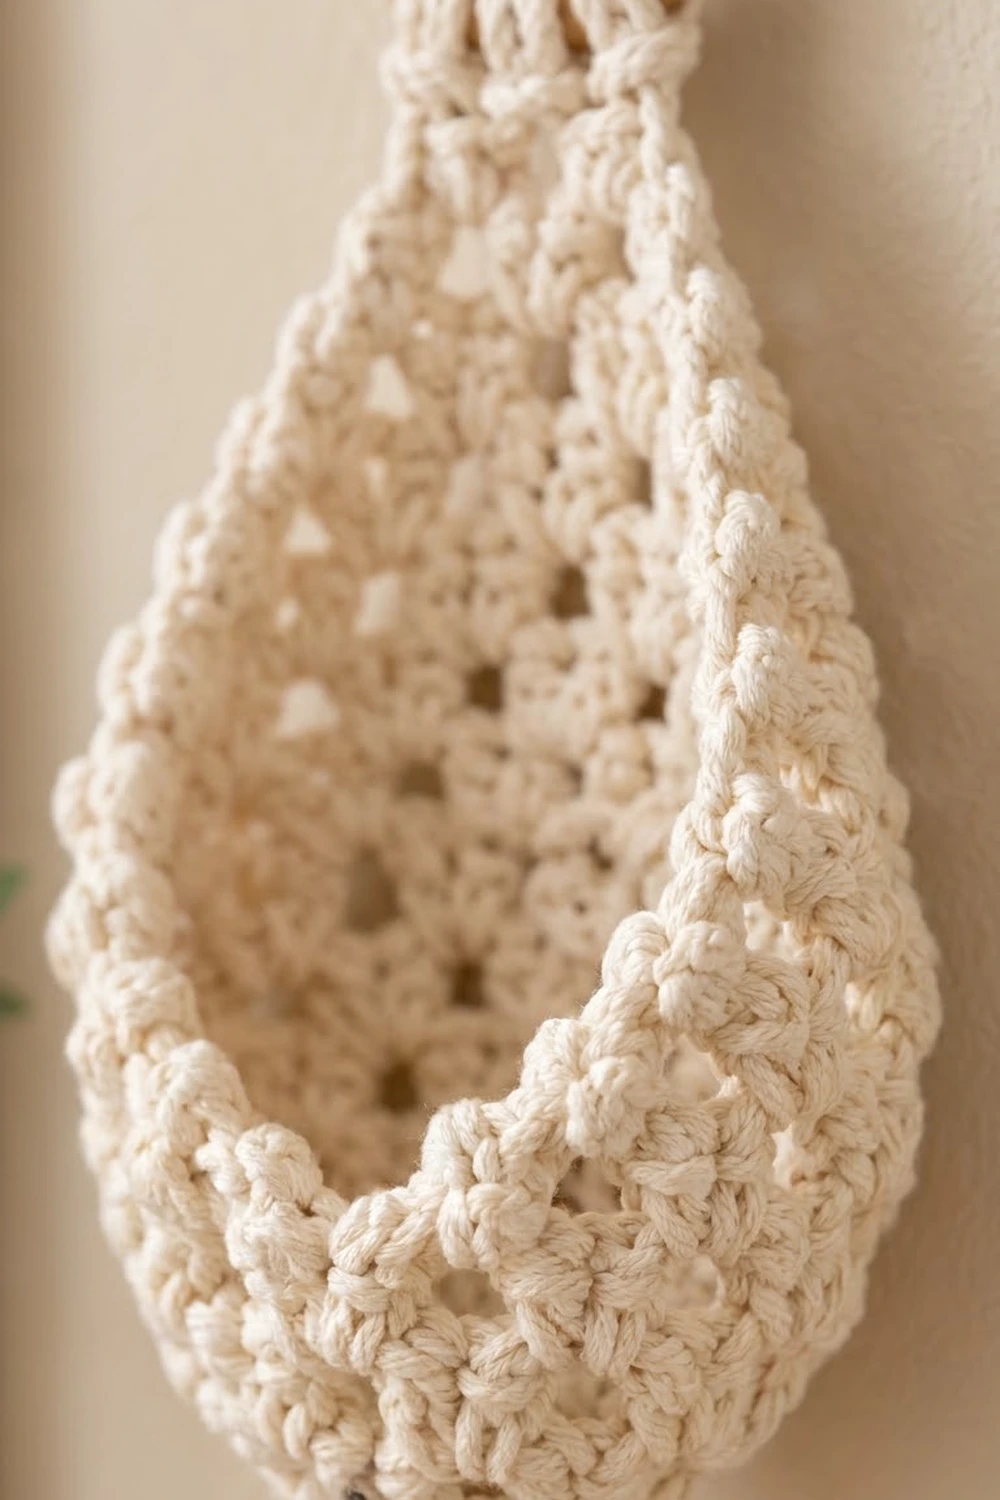
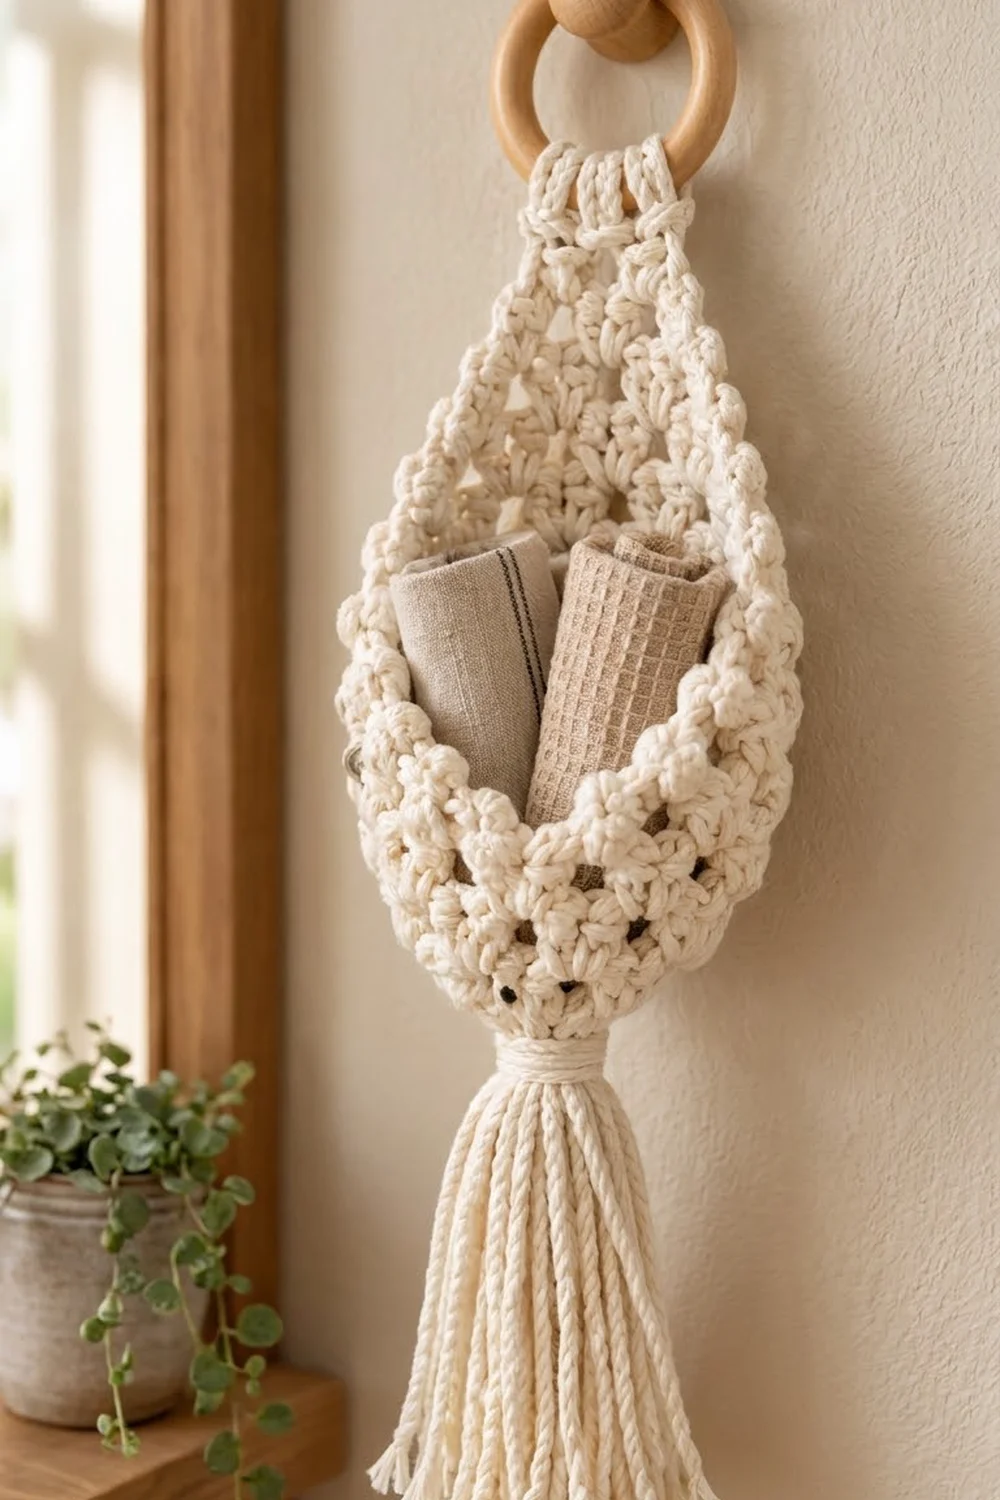
The Willow Drop is a teardrop-shaped hanging wall pocket worked in one cream cotton yarn. Open shell lace forms the body and a rolled bobble rim frames the opening. A narrow strap loops over a natural wooden ring at the top, and a thick tassel wrapped tight under the point finishes the bottom.
It suits boho and farmhouse rooms. Use it for rolled tea towels, letters, dried stems, or a small trailing plant. Because the piece is one color, the texture does the work: staggered shells with triangular openings, chunky bobbles at the rim, and a long, soft fringe.
This pattern uses US crochet terms. The finished pocket body measures 6 in (15.2 cm) wide and about 9.75 in (24.8 cm) long from the top of the strap loop to the point. With the tassel, the overall length is about 15.75 in (40.0 cm), not counting the ring.
Construction is seamless. You work a small cone in joined rounds from the point up to the rim. Next you work rows over the back half only, and the rows taper on their own into a triangle. A bobble border edges the opening and the back panel sides. Last, you work a short strap from the top and tie the tassel through the point.
Finished Size and Construction
- Finished size: 6 in (15.2 cm) wide x 9.75 in (24.8 cm) long, plus a 6 in (15.2 cm) tassel
- Skill level: Intermediate (shells, bobbles, working into row-ends)
- Terminology: US crochet terms
- Yarn weight: Bulky (#5) cotton
- Hook: 6.0 mm (US J-10)
- Number of pieces: 1 crocheted piece, plus 1 tassel and 1 purchased wooden ring
- Layout: Single hanging pocket; no assembly
- Piece size before border: 6 in (15.2 cm) wide x 8.25 in (21.0 cm) from point to top of back panel
- Border depth: about 1.5 in (3.8 cm)
- Strap: 1.1 in (2.9 cm) wide x 3 in (7.6 cm) long before folding
Materials
Choose a smooth, round, bulky-weight cotton or cotton blend in natural cream. Plied cotton gives crisp shells and firm bobbles. Avoid loose single-ply cord, which flattens the bobbles and frays in the tassel.
Yarn (one color):
- Cream: 90 g, about 99 m (108 yd) total
- Pocket body, border, and strap: 65 g, about 72 m
- Tassel and wrap: 10 g, about 11 m
- Margin: 15 g, about 16 m
These amounts assume a bulky cotton of roughly 1.1 m per gram. They include a margin for swatching and tension differences.
Tools:
- 6.0 mm (US J-10) crochet hook
- 3 in (7.6 cm) unfinished wooden ring
- Tapestry needle
- Sharp scissors
- Stiff card 7 in (17.8 cm) tall for the tassel
- 2 stitch markers
- Measuring tape
- Rust-proof pins and a blocking mat
- Spray bottle
Abbreviations (US Terms)
- ch – chain
- sl st – slip stitch
- sc – single crochet
- dc – double crochet
- sp – space
- beg – beginning
- RS / WS – right side / wrong side
- st(s) – stitch(es)
Special stitches:
- Shell: 3 dc in the same stitch or space. When a shell starts a round or row, ch 3 counts as the first dc, then work 2 dc in the same space.
- Double shell: (shell, ch 1, shell) in the same ch-1 sp. This is the cone increase.
- Bobble: (yarn over, insert hook in st, yarn over and pull up a loop, yarn over and pull through 2 loops) 4 times in the same st; yarn over and pull through all 5 loops on hook. Bobbles are worked on WS rows so they pop toward the RS.
Gauge and Checkpoints
Shell gauge: 2 shell repeats (shell + ch 1) = 8 sts = 3 in (7.6 cm) wide; 4 rounds = 3 in (7.6 cm) tall.
Border gauge: 8 sc = 3 in (7.6 cm).
The pocket is its own test piece. Work Rounds 1-4 and measure before going on. Those rounds take only minutes and tell you all you need.
Checkpoints:
- After Round 4: height from point 3 in (7.6 cm); circumference 12 in (30.5 cm), so the cone lies 6 in (15.2 cm) wide when flattened.
- After Round 7: height 5.25 in (13.3 cm); width still 6 in (15.2 cm).
- After Back Panel Row 4: length from point 8.25 in (21.0 cm).
- After Border Row 1: each back panel side edge holds 8 sc over 3 in (7.6 cm).
If your piece is too big, change to a 5.5 mm (US I-9) hook. If it is too small, change to a 6.5 mm (US K-10.5) hook. Don’t add or remove shells to fix the size, because the shell counts set the border math. Change the hook instead.
Pattern: Pocket Cone
Worked in joined rounds with RS facing. Do not turn.
Round 1: Make a magic ring. Ch 3 (counts as dc), 2 dc in ring, ch 1, (shell in ring, ch 1) 3 times. Join with sl st to top of beg ch-3. Pull the ring snug, leaving a 6 in (15.2 cm) tail for the tassel. (4 shells, 4 ch-1 sps; 16 sts)
Round 2 (growth): Sl st in next 2 dc and in next ch-1 sp. Ch 3, 2 dc in same sp, ch 1, shell in same sp (double shell made), ch 1, shell in next sp, ch 1, double shell in next sp, ch 1, shell in next sp, ch 1. Join to top of beg ch-3. (6 shells, 6 ch-1 sps; 24 sts)
Each round places its shells in the ch-1 spaces of the round below. This staggers the shells and opens the small triangular holes.
Round 3: Sl st in next 2 dc and in next ch-1 sp. Ch 3, 2 dc in same sp, ch 1, (shell in next sp, ch 1) 5 times. Join. (6 shells, 6 ch-1 sps; 24 sts)
Round 4 (growth): Sl st in next 2 dc and in next ch-1 sp. Ch 3, 2 dc in same sp, ch 1, shell in same sp, ch 1, (shell in next sp, ch 1) 2 times, double shell in next sp, ch 1, (shell in next sp, ch 1) 2 times. Join. (8 shells, 8 ch-1 sps; 32 sts)
Check: the shells per round run 4, 6, 6, 8. Each double shell adds exactly 1 shell and 1 ch-1 sp, which is 4 sts.
Rounds 5-7: Sl st in next 2 dc and in next ch-1 sp. Ch 3, 2 dc in same sp, ch 1, (shell in next sp, ch 1) 7 times. Join. (8 shells, 8 ch-1 sps; 32 sts each round)
Do not fasten off.
Pattern: Back Panel
Now work in rows over the back half only. The front shells of Round 7 stay unworked and become the pocket rim.
Row 1 (RS): Sl st in next 2 dc and in next ch-1 sp. Ch 3, 2 dc in same sp, (ch 1, shell in next sp) 3 times. Turn. (4 shells, 3 ch-1 sps; 15 sts)
Mark the first and last Round 7 ch-1 sps that hold Row 1 shells. On the front, between the markers, sit 5 free shells and 4 free ch-1 sps: 15 dc + 4 sps = 19 sts. This is the front rim.
Row 2 (WS): Sl st in each of first 3 dc and in next ch-1 sp. Ch 3, 2 dc in same sp, (ch 1, shell in next sp) 2 times. Turn. (3 shells, 2 ch-1 sps; 11 sts)
Row 3 (RS): Sl st in each of first 3 dc and in next ch-1 sp. Ch 3, 2 dc in same sp, ch 1, shell in next sp. Turn. (2 shells, 1 ch-1 sp; 7 sts)
Row 4 (WS): Sl st in each of first 3 dc and in next ch-1 sp. Ch 3, 2 dc in same sp. (1 shell; 3 sts) Fasten off.
Each row loses exactly one shell, because every shell sits in a space between two shells of the row below. That gives the teardrop taper with no decrease stitches. The panel narrows from about 5.6 in (14.2 cm) at Row 1 to about 1.1 in (2.9 cm) at Row 4.
Border
The border is a bobble edging worked in rows around the opening. It runs down one side of the back panel, across the front rim, and up the other side, stopping at the strap base on both sides.
Border gauge: 8 sc = 3 in (7.6 cm), matching the shell fabric’s 8 sts per 3 in (7.6 cm).
Border Row 1 (RS, conversion): With RS facing, join yarn at the Row 4 row-end on the right side of the back panel. Ch 1.
- Right panel edge: 2 sc in each of 4 row-ends = 8 sc
- Front rim: sc in each of 15 dc and 1 sc in each of 4 ch-1 sps = 19 sc
- Left panel edge: 2 sc in each of 4 row-ends = 8 sc
Turn. (19 sts worked 1 per existing st + 16 sc worked into row-ends = 35 sc)
Border Row 2 (WS): Ch 1, sc in first sc, (bobble in next sc, sc in next sc) 17 times. Turn. (17 bobbles + 18 sc = 35 sts)
Border Row 3 (RS): Ch 1, sc in each st across. Turn. (35 sc)
Border Row 4 (WS): Ch 1, sc in first 2 sc, (bobble in next sc, sc in next sc) 16 times, sc in last sc. (16 bobbles + 19 sc = 35 sts) Fasten off.
Row 4 bobbles fall between the Row 2 bobbles, so the rim looks evenly pebbled rather than striped.
Why the math works: Each back panel row is 0.75 in (1.9 cm) tall, so 2 sc per row-end puts 8 sc over 3 in (7.6 cm), which is exactly the border gauge. Along the front, working 1 sc per existing st keeps the 19-st rim at its original length of about 7.1 in (18.0 cm). Nothing stretches or gathers, so the opening sits round. The odd count of 35 lets both bobble rows begin and end with a sc.
Strap and Ring
Strap Row 1: With RS facing, join yarn in the top of the beg ch-3 of Back Panel Row 4. Ch 1, sc in same st and in each of next 2 dc. Turn. (3 sc)
Strap Rows 2-8: Ch 1, sc in each sc across. Turn. (3 sc each row)
Fasten off, leaving a 12 in (30.5 cm) tail. The strap measures 1.1 in (2.9 cm) wide and 3 in (7.6 cm) long.
Pass the strap through the wooden ring from front to back. Fold it down to the WS and whipstitch Row 8 to the back of Strap Row 1. The visible loop is about 1.5 in (3.8 cm) tall, and the sc ridges look like neat vertical cords.
Tassel
- Wrap yarn 24 times around the 7 in (17.8 cm) card. Cut along one edge to get 24 strands of 14 in (35.6 cm).
- Use the Round 1 tail to pull the center of the bundle against the magic ring. Tie it firmly so the strands hang evenly from the point.
- Fold the strands down so the pocket point sits inside the top of the tassel.
- Cut a 40 in (101.6 cm) strand. Wrap it tightly 10 times around the bundle and point, making a band about 0.75 in (1.9 cm) tall. Thread the end under the wraps and bury it in the tassel.
- Trim the tassel to hang 6 in (15.2 cm) below the wrap.
Final Blocking
- Weave in all ends along the WS of the shells.
- Mist the pocket until it is damp but not dripping.
- Stuff the pocket loosely with a folded towel to open the cone.
- Lay it back panel down. Pin the body to 6 in (15.2 cm) wide and 8.25 in (21.0 cm) from point to top of back panel.
- Pin the bobble rim into a smooth curve without flattening the bobbles.
- Comb the tassel straight, mist it, and let it hang over the edge of the mat.
- Let everything dry completely, remove the towel, and hang the ring on a peg or knob.
Final Quality-Control Checklist
- Round 7 has 8 shells and 32 sts.
- Back panel rows read 4, 3, 2, 1 shells.
- Front rim has 5 free shells and 4 free sps.
- Every border row has 35 sts.
- Both bobble rows pop on the RS.
- Strap is 3 sc wide, 8 rows long, and securely stitched.
- Tassel wrap fully covers the pocket point.
- Body measures 6 in (15.2 cm) wide and 9.75 in (24.8 cm) long, including the strap loop.
Troubleshooting
Cone flares or ruffles: your shells are loose. Go down a hook size.
Cone curls inward and feels stiff: your tension is tight. Go up a hook size.
Back panel leans to one side: you missed a sl st at the start of a row. Each row needs sl sts in 3 dc and 1 sp before the first shell.
Bobbles pop inside: you worked them on a RS row. Bobble rows must be WS rows.
Border waves along the sides: extra sc crept in. Use exactly 2 sc per row-end.
Tassel slips off the point: the tie was loose. Retie it with the Round 1 tail and wrap tighter.
Care
Hand wash in cool water with mild soap. Press the water out in a towel, dry flat, and reshape the rim and tassel while damp.
Final Notes
The measurement chain is short. A gauge of 8 sts and 4 rounds per 3 in (7.6 cm) gives a 12 in (30.5 cm) circumference, so the cone lies 6 in (15.2 cm) wide. Seven rounds bring the rim to 5.25 in (13.3 cm). Four back panel rows add 3 in (7.6 cm), for 8.25 in (21.0 cm) in total. A 35-stitch bobble border frames the opening and the strap loop adds 1.5 in (3.8 cm), for a 9.75 in (24.8 cm) body. The 6 in (15.2 cm) tassel brings the overall length to about 15.75 in (40.0 cm).
Check your gauge after Round 4 and keep to the shell counts; the shape will follow.
Happy crocheting!