

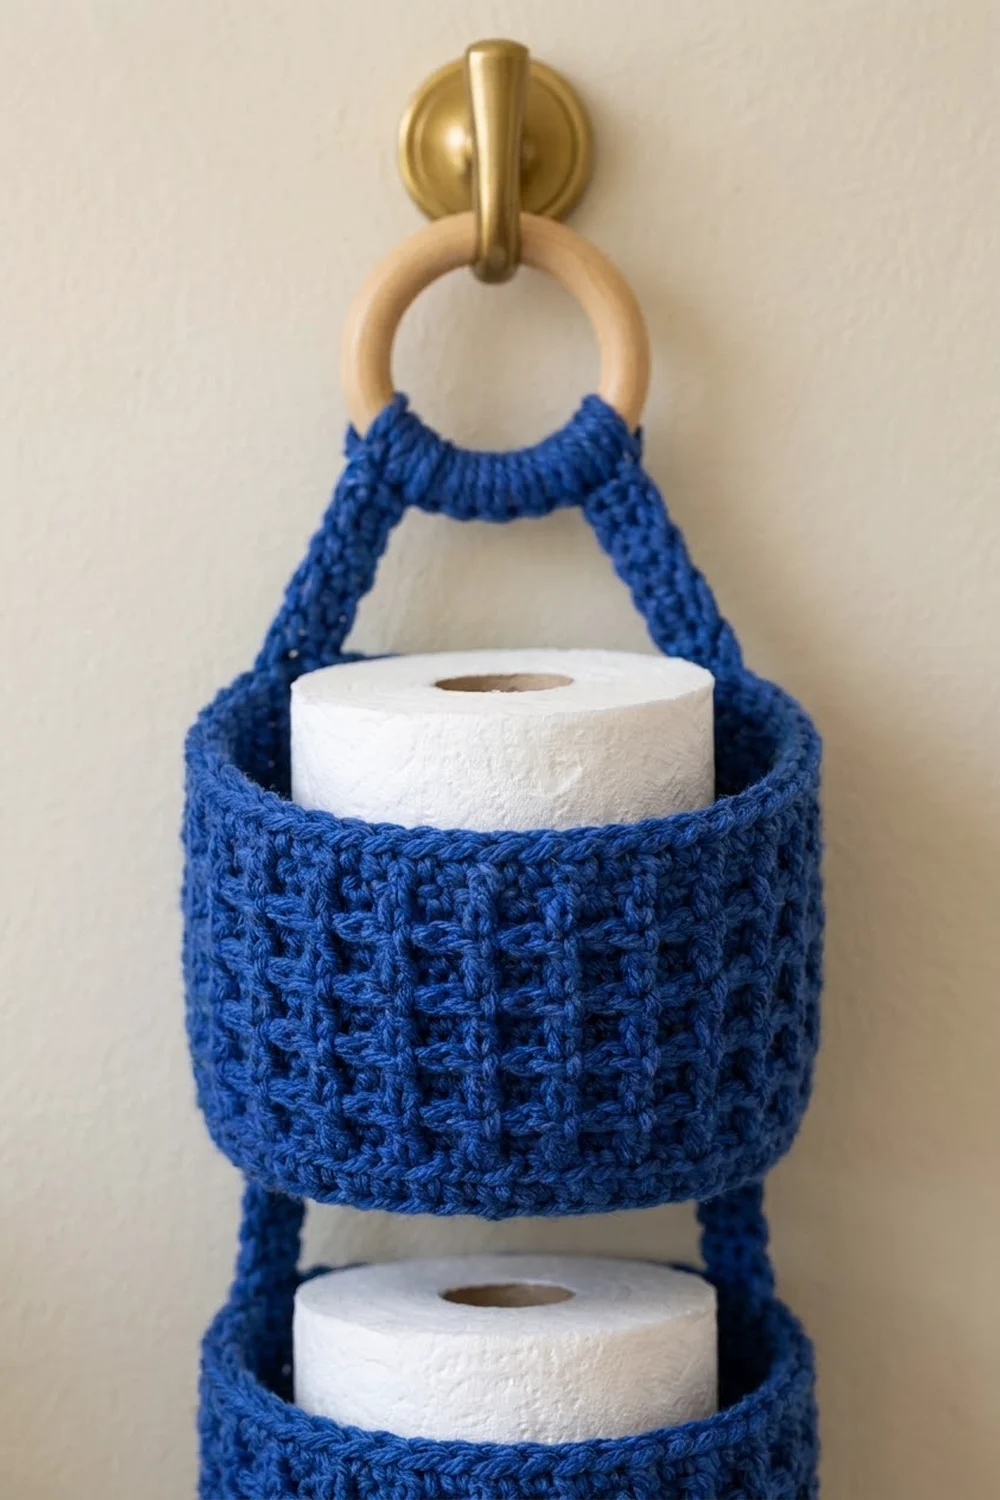
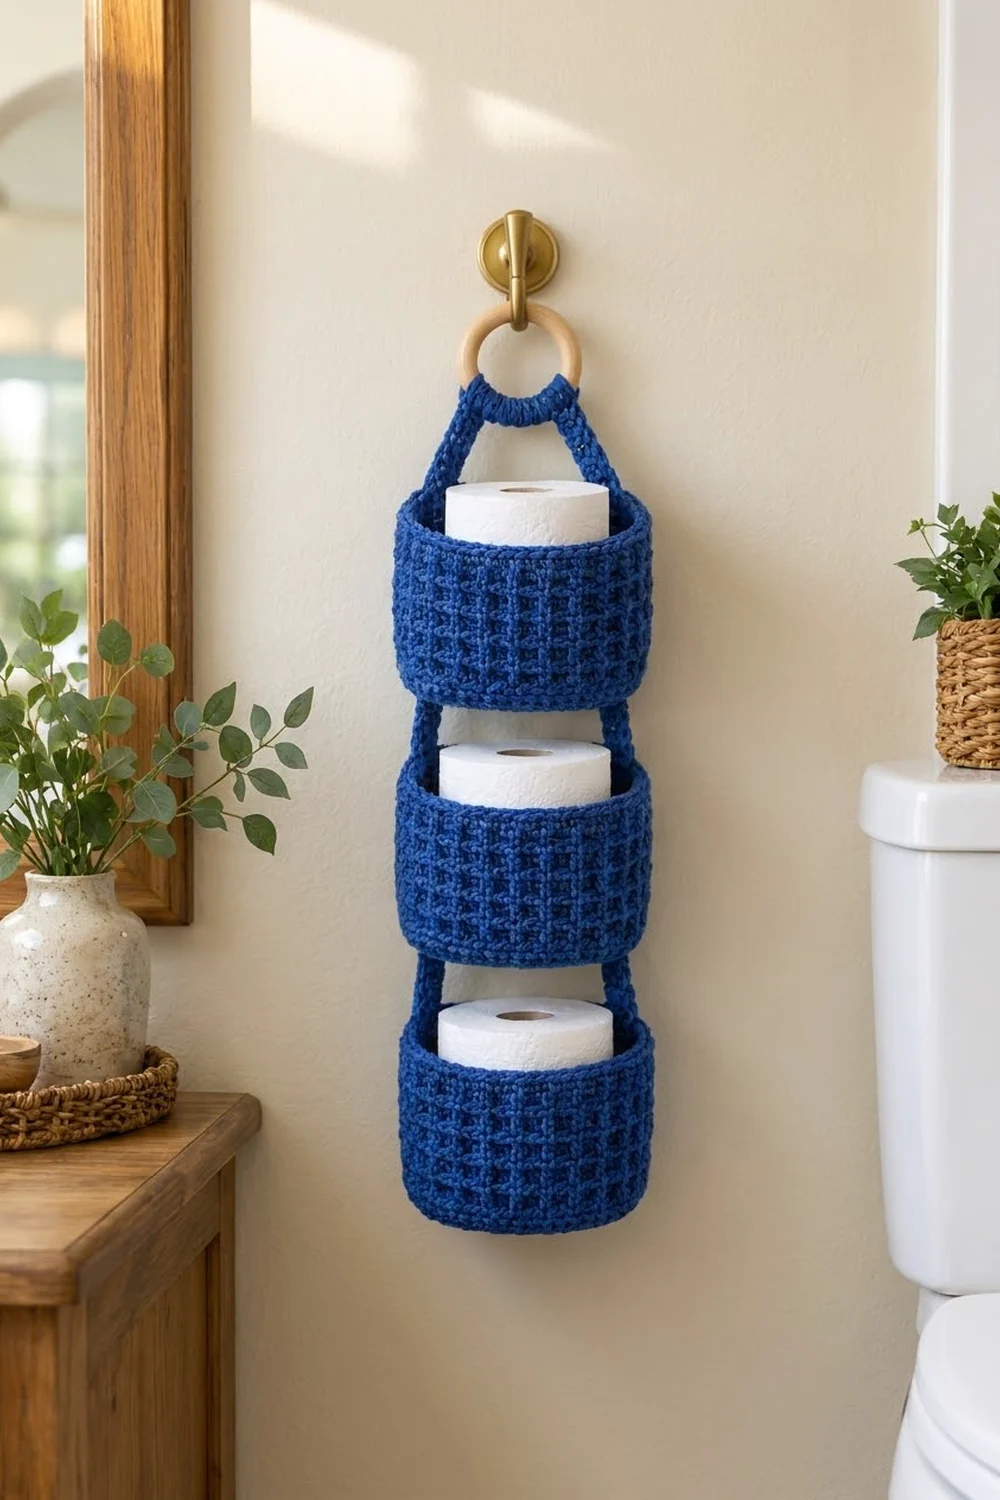
This hanging holder stores three toilet rolls in a narrow vertical stack. Each oval basket has a deep waffle-grid texture that looks woven and is sturdy enough to keep its shape. One cobalt blue yarn keeps the look clean and modern, and the wooden ring at the top adds a natural touch.
The finished holder is about 6.5 in (16.5 cm) wide and 20.5 in (52.1 cm) long from the top of the ring to the bottom of the lowest basket. Each basket fits a standard roll up to about 4.5 in (11.4 cm) across.
This pattern uses US crochet terms.
How it’s built: Each basket starts with an oval base of single crochet worked in joined rounds. One back-loop round turns the edge upward. The walls are worked in waffle stitch and finished with a corded rim. Short straps link the baskets, and one long strap goes over the wooden ring.
Finished Size and Construction
- Finished size: 6.5 in (16.5 cm) wide × 20.5 in (52.1 cm) long, including the ring
- Skill level: Intermediate (front post stitches, reverse single crochet)
- Terminology: US
- Yarn weight: #4 worsted, cotton or cotton blend
- Hook: 5 mm (H-8)
- Number of pieces: 3 baskets, 4 connector straps, 1 hanger strap, plus 1 wooden ring
- Layout: 1 column × 3 baskets, stacked vertically
- Basket size (each): 6.5 in (16.5 cm) long × 5 in (12.7 cm) deep × 3.5 in (8.9 cm) tall
- Wall height before the rim (border): 3 in (7.6 cm)
- Rim (border) depth: 0.5 in (1.3 cm)
Materials
Yarn: Use a firm worsted cotton or cotton blend. Cotton holds its shape in a damp bathroom and shows the waffle texture clearly. Avoid fuzzy or very stretchy acrylics, because the baskets will sag.
- Royal/cobalt blue: 100 g, about 155 m (170 yd). The holder uses roughly 75 g / 115 m (126 yd). The extra allows for swatching and seaming.
All quantities include a safety margin.
Tools:
– 5 mm (H-8) crochet hook
– Wooden ring, 2 in (5.1 cm) across
– Tapestry needle
– 6 stitch markers
– Measuring tape
– Scissors
– Rust-proof pins and a blocking surface
Abbreviations (US Terms)
- ch – chain
- sl st – slip stitch
- sc – single crochet
- dc – double crochet
- FPdc – front post double crochet
- BLO – back loop only
- inc – 2 sc in the same stitch
- st(s) – stitch(es)
- rnd(s) – round(s)
Special stitches
- FPdc: Yarn over. Insert the hook from front to back to front around the post of the stitch below, then complete a dc. It counts as 1 stitch.
- Reverse sc (crab stitch): Work sc from left to right (right-handers), going into the next stitch to the right. This makes a rounded, corded edge.
Gauge and Checkpoints
- Single crochet: 14 sc and 16 rnds = 4 in (10.2 cm)
- Waffle stitch: 14 sts and 8 rnds = 4 in (10.2 cm), so each dc round is 0.5 in (1.3 cm) tall
Make one basket first and check it against these sizes before making the other two:
- After Rnd 9 (base): 6.5 in (16.5 cm) × 5 in (12.7 cm), lying flat
- After Rnd 16 (walls): 3 in (7.6 cm) tall, measured from the table
- After Rnd 18 (rim): 3.5 in (8.9 cm) tall, and a roll drops in easily
If the basket is too big, go down 0.5 mm in hook size. A base that is too big lets the roll tip over. If it is too small, go up 0.5 mm. If the base is more than 0.25 in (0.6 cm) too small, the roll will not fit.
Basket (Make 3)
The base is worked in joined rounds. Start each round with ch 1, which does not count as a stitch. Join each round with a sl st to the first stitch.
Each round has four sections in the same order: end A, side 1, end B, side 2. Each side stays at 6 sts. All increases are worked in the ends.
Base
Ch 9.
Rnd 1: 3 sc in 2nd ch from hook (end A), sc in next 6 ch (side 1), 3 sc in last ch (end B). Rotate and work in the free loops on the other side of the chain: sc in next 6 ch (side 2). Join. (18 sts)
Rnd 2: 2 sc in each of next 3 sts (end A), sc in next 6, 2 sc in each of next 3 sts (end B), sc in next 6. Join. (24 sts)
Rounds 3–9 all follow this pattern:
[(sc in next k sts, inc) × 3, sc in next 6] × 2
The value of k for each round is given below.
Rnd 3 (k = 1): Each end has 9 sts. (30 sts)
Rnd 4 (k = 2): Each end has 12 sts. (36 sts)
Rnd 5 (k = 3): Each end has 15 sts. (42 sts)
Rnd 6 (k = 4): Each end has 18 sts. (48 sts)
Rnd 7 (k = 5): Each end has 21 sts. (54 sts)
Rnd 8 (k = 6): Each end has 24 sts. (60 sts)
Rnd 9 (k = 7): Each end has 27 sts. (66 sts)
Each round adds 6 sts. The base should measure 6.5 in (16.5 cm) × 5 in (12.7 cm).
Turning Round
Rnd 10 (conversion round): Ch 1, sc in BLO of each st around. Join.
(66 worked 1-per-stitch + 0 added = 66 sts)
The unused front loops leave a crisp ridge, so the walls rise straight up from the base.
Waffle Walls
Rnd 11 (conversion round): Ch 2 (does not count), dc in each st around. Join to the first dc.
(66 worked 1-per-stitch + 0 added = 66 sts)
Rnd 12 (waffle A): Ch 2, FPdc around next st, dc in next 2 sts. Repeat from * 22 times. Join. (66 sts)
Rnd 13 (waffle B): Ch 2, dc in next st (the FPdc), FPdc around each of next 2 sts. Repeat from * 22 times. Join. (66 sts)
Rnd 14: Repeat Rnd 12. (66 sts)
Rnd 15: Repeat Rnd 13. (66 sts)
When the raised post stitches alternate from round to round, they make the square waffle grid. The pattern needs a multiple of 3 sts, and 66 is 22 repeats of 3.
Rnd 16 (trim round): Ch 1, sc in each st around. Join.
(66 worked 1-per-stitch + 0 added = 66 sts)
Checkpoint: The walls should be 3 in (7.6 cm) tall. That is 0.25 in for Rnd 10, plus 2.5 in for the five dc rounds, plus 0.25 in for Rnd 16.
Don’t fasten off yet. Continue to the Border section to finish the rim.
Hanger and Connector Straps
Connector Strap (Make 4)
Ch 4.
Row 1: Sc in 2nd ch from hook and in next 2 ch. (3 sts)
Rows 2–20: Ch 1, turn, sc in each st. (3 sts)
Fasten off and leave a 12 in (30.5 cm) tail. Each strap is 0.9 in (2.3 cm) wide × 5 in (12.7 cm) long.
Hanger Strap (Make 1)
Work Rows 1–2 as for the connector strap, then repeat Row 2 until you have 62 rows. That is 15.5 in (39.4 cm). Fasten off and leave a 12 in (30.5 cm) tail.
The length is made up like this:
– 6 rows (1.5 in / 3.8 cm) to overlap each end of the top basket
– 21 rows (5.25 in / 13.3 cm) for each diagonal side
– 8 rows (2 in / 5.1 cm) to go over the ring
6 + 21 + 8 + 21 + 6 = 62 rows.
Make All Pieces
All pieces use the same blue yarn:
- Baskets: 3, about 20 g each
- Connector straps: 4, about 2 g each
- Hanger strap: 1, about 6 g
Layout:
          ( ring )
           /    \        hanger strap
     [   BASKET 1   ]
       |          |      connector straps
     [   BASKET 2   ]
       |          |      connector straps
     [   BASKET 3   ]
The baskets hang with one long side against the wall. All straps attach at the two narrow ends.
Joining
Method: Whipstitch each strap end flat to the outside of the basket wall, using the yarn tails.
Placement: Flatten a basket so the long sides touch. The two folds mark the centers of the narrow ends. Mark the center 3 wall stitches at each end. Each strap is 3 sts wide, so it covers exactly those 3 stitches.
Stitch-to-stitch logic: Strap rows are 0.25 in tall, and dc wall rounds are 0.5 in tall. So 2 strap rows match 1 dc round, and 1 strap row matches 1 sc round. Sew through one strap edge stitch and one wall stitch at a time, going down the left edge, across the bottom, and up the right edge. Then sew across the top.
Connectors:
1. Place the first 6 rows of a connector on the bottom 1.5 in (3.8 cm) of Basket 1. Row 1 should line up with Rnd 10.
2. Leave a free gap of 8 rows, which is 2 in (5.1 cm).
3. Place the last 6 rows inside the top 1.5 in (3.8 cm) of Basket 2’s outer wall, ending at the rim.
4. Repeat at the other end, then link Basket 2 to Basket 3 the same way.
Hanger:
1. Sew the first 6 rows and the last 6 rows of the hanger strap to the top 1.5 in (3.8 cm) at each end of Basket 1.
2. Fold the center 8 rows over the wooden ring.
3. Bring the two strands together just below the ring and whipstitch their edges together for 2 rows, 0.5 in (1.3 cm). This makes the collar. These 2 rows are already counted in the 21 diagonal rows.
Tension: Keep the stitches snug but don’t pull them tight. Pulling dents the waffle wall, and loose sewing lets the straps peel away.
Size checkpoint: Measure from the top of the ring to the bottom of Basket 3:
2 in (ring) + 4 in (hanger drop) + 3 × 3.5 in (baskets) + 2 × 2 in (gaps) = 20.5 in (52.1 cm)
Border (Basket Rim)
The rim is worked on each basket right after Rnd 16, before you join the pieces.
Border gauge: 14 sts = 4 in (10.2 cm) for both the sc round and the reverse sc round. Each round is 0.25 in (0.6 cm) tall.
When the basket is flattened, the rim has a front half and a back half. Each half is 33 sts and includes half of each end: 33 + 33 = 66.
Rnd 17: Ch 1, sc in each st. Join. (66 sts: 33 front + 33 back)
Rnd 18: Ch 1, reverse sc in each st. Join and fasten off. (66 sts: 33 front + 33 back)
Why the math works: The rim keeps the wall count of 66, one stitch into each stitch. This matches the wall circumference of 18.9 in (48.0 cm) at 14 sts per 4 in, so the rim neither flares nor pulls in. The two rounds add 0.5 in (1.3 cm), bringing the basket from 3 in to 3.5 in (8.9 cm).
Final Blocking
- Weave in all tails, going along the stitch columns inside the walls.
- Mist the whole holder with water until it is damp, not soaked.
- Fill each basket with a dry roll or a rolled towel to shape it into an even oval.
- Lay the piece flat and pin the straps straight. The connector gaps should be 2 in (5.1 cm), and the hanger sides should be the same length.
- Press the base ridges flat with your fingers.
- Let it dry completely, at least 24 hours.
Final Quality-Control Checklist
- [ ] Each base measures 6.5 in × 5 in (16.5 × 12.7 cm)
- [ ] Each basket has exactly 66 sts in every wall round
- [ ] The waffle grid is lined up with no spiral drift
- [ ] Each basket is 3.5 in (8.9 cm) tall, with a smooth corded rim
- [ ] The straps are centered on the narrow ends and sewn on all edges
- [ ] Both connector gaps are 2 in (5.1 cm)
- [ ] The collar holds the ring firmly
- [ ] The total length is 20.5 in (52.1 cm), and the holder hangs straight
Troubleshooting
- The base cups upward: Your tension is tight in the ends. Go up 0.5 mm for the base only.
- The base ruffles: You have extra stitches. Recount each end against the given total.
- The waffle grid slants: The joins are drifting. Always join to the top of the first stitch, not to the ch 2.
- The walls lean outward: Rnd 10 was worked in both loops. Rework it in the back loop only.
- The rim flares: Your reverse sc is loose. Go down 0.5 mm for Rnd 18.
- The holder tilts: One strap is sewn off-center or is a different length. Re-measure it and sew it again.
- The roll won’t fit: The base is under 5 in (12.7 cm) wide. Make it again with a larger hook.
Care
Hand wash in cool water and lay flat to dry, with a roll inside each basket to hold the shape. Don’t tumble dry.
Final Notes
Check your size at each stage:
- Gauge: 14 sts = 4 in (10.2 cm)
- Base: 66 sts, 6.5 × 5 in (16.5 × 12.7 cm)
- Walls: 3 in (7.6 cm)
- Rim: adds 0.5 in, for a basket height of 3.5 in (8.9 cm)
- Straps: 5 in (12.7 cm) connectors and a 15.5 in (39.4 cm) hanger
- Assembled holder: 20.5 in (52.1 cm)
If each measurement matches, the next stage will too, and you’ll have a neat, sturdy holder.
Happy crocheting!