

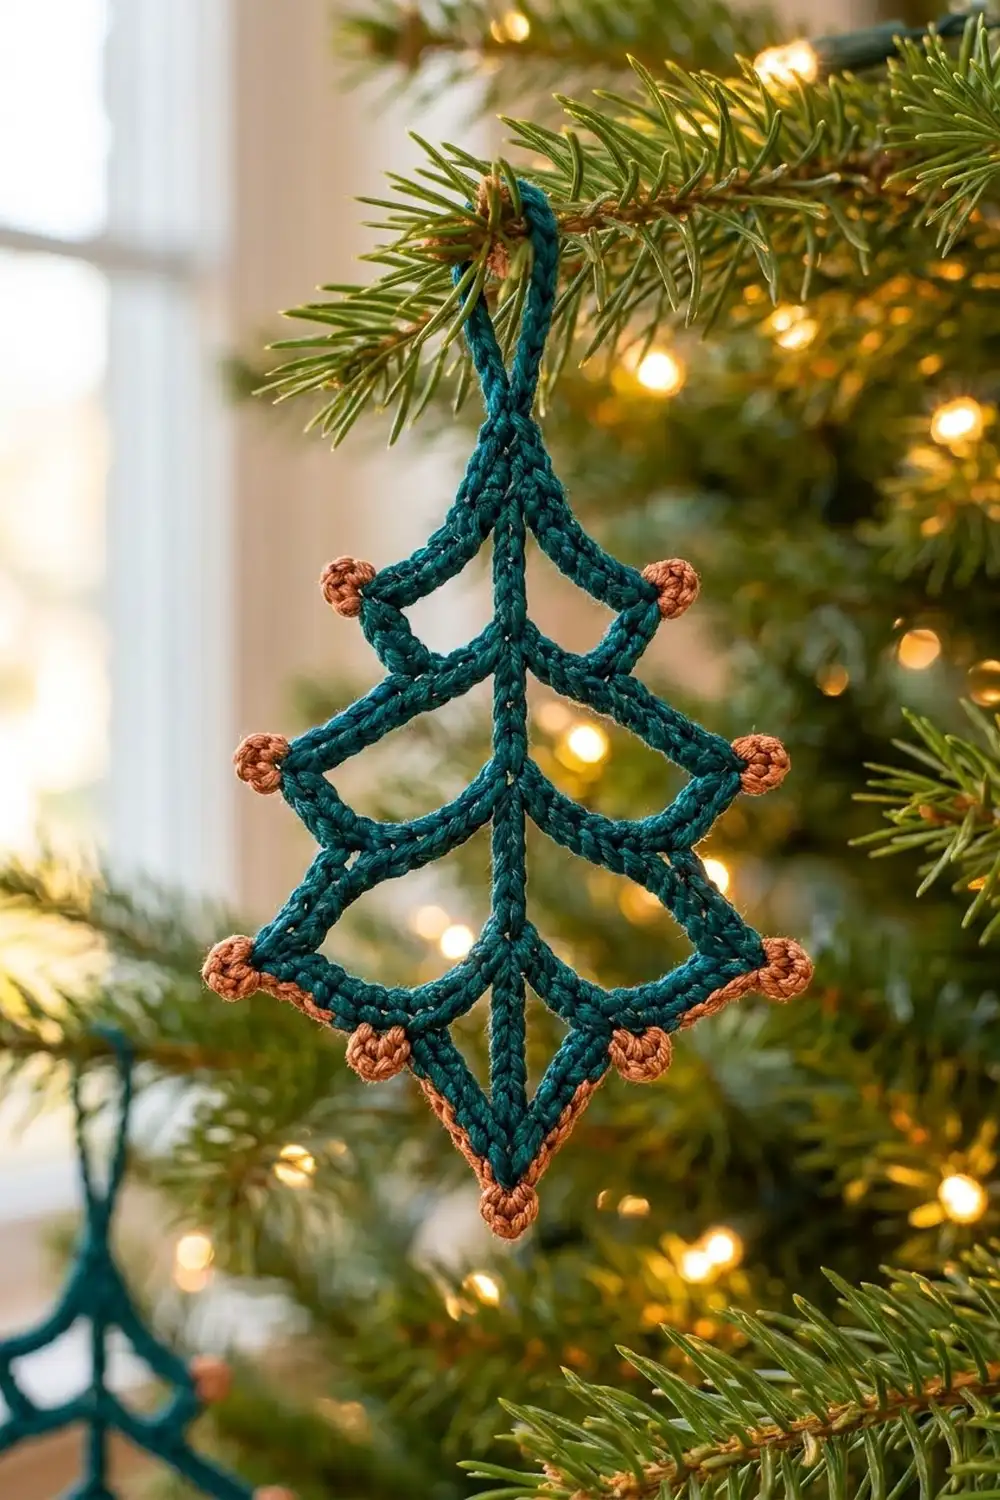
This Copper Frost Lattice Tree is a light, open Christmas ornament made from rope-like crochet lines. It has no solid fabric. A straight spine runs down the center, three tiers of branches open out from it, and small copper bobbles mark every point. On a real tree, the light shows through it.
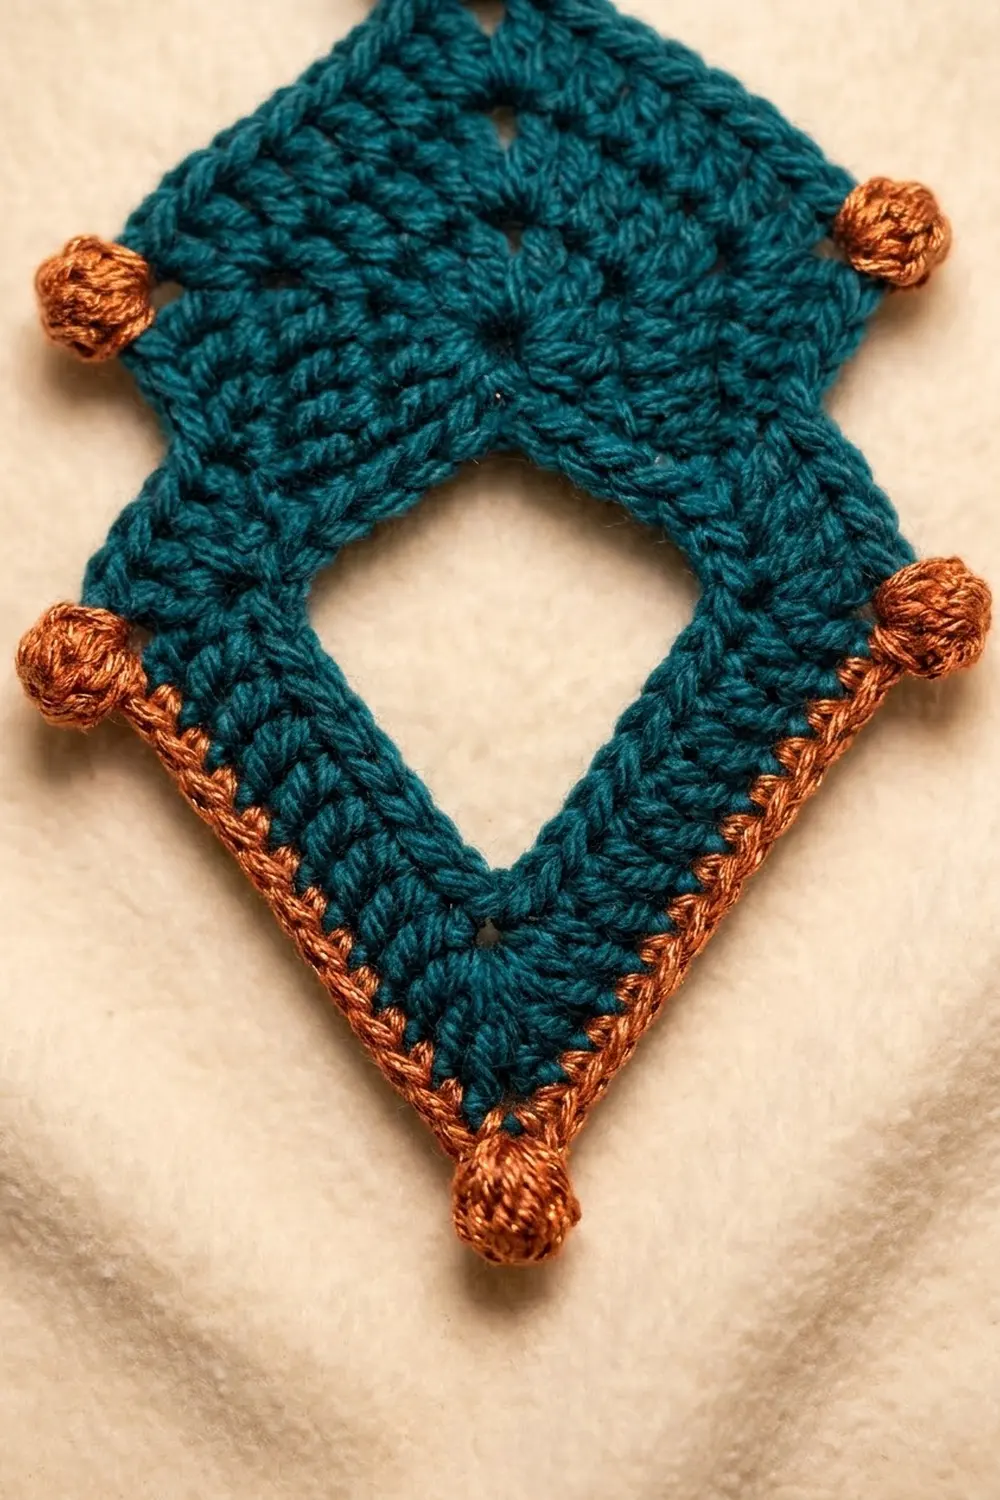
The main color is a deep teal that reads as evergreen without being too dark. A warm copper adds a thin edging along the bottom of the tree and nine round bobble picots at the tips. The look is modern and simple, a bit like a line drawing.
This pattern uses US crochet terms. The finished ornament measures 3.5 in (8.9 cm) wide and 5.25 in (13.3 cm) tall including the hanging loop. The tree itself is 4.25 in (10.8 cm) tall.
Here is how it’s made. First you work a chain loop and a single crochet spine. Then you build the left side downward and the right side upward in foundation single crochet (fsc), joining to the spine at fixed stitches. A short copper border and picots finish it, and blocking sets the curves.
Finished Size and Construction
- Finished size: 3.5 in (8.9 cm) wide x 5.25 in (13.3 cm) tall, including the loop
- Skill level: Intermediate (foundation single crochet, puff stitch)
- Terminology: US crochet terms
- Yarn weight: DK / light (3), cotton or cotton blend
- Hook: 3.5 mm (E-4)
- Number of pieces: 1
- Layout: Single ornament, no assembly
- Piece size before border: 3 in (7.6 cm) wide x 4 in (10.2 cm) tree height, plus a 1 in (2.5 cm) loop, for 5 in (12.7 cm) overall
- Border depth: The copper sc edging adds about 0.125 in (0.3 cm). The picots stick out about 0.25 in (0.6 cm) at each tip and at the bottom point.
Materials
Use a smooth, tightly plied cotton. It gives the clean, braided-cord look and holds its points after blocking. Fuzzy or splitty yarns blur the lines.
- Color A (deep teal): 6 g / about 15 m (16.4 yd)
- Color B (copper / rust orange): 2 g / about 5 m (5.5 yd)
These amounts include a margin for gauge swatching and weaving in ends.
Tools:
– 3.5 mm (E-4) crochet hook
– 3 locking stitch markers
– Tapestry needle
– Scissors
– Blocking board or foam mat, rustproof pins, and spray bottle
– Ruler or tape measure
– Optional: stiffener (diluted fabric glue or starch)
Abbreviations (US Terms)
- ch – chain
- sl st – slip stitch
- sc – single crochet
- fsc – foundation single crochet
- st(s) – stitch(es)
- S# – spine stitch number (see Part 1)
- bp – bobble picot (special stitch)
Foundation single crochet (fsc): Ch 2, insert hook in 2nd ch from hook, yo, pull up a loop, yo, draw through 1 loop (this is the “chain”), yo, draw through 2 loops (this is the “sc”). For each next fsc: insert hook into the “chain” of the stitch just made, yo, pull up a loop, yo, draw through 1 loop, yo, draw through 2 loops. When a strip of fsc starts from a stitch already on your hook, skip the starting ch 2. Begin by inserting into the stitch you just joined to.
Bobble picot (bp): Ch 2, then in the 2nd ch from hook work [yo, insert hook, pull up a loop] 3 times, yo, draw through all 7 loops, ch 1 to close. This makes a round knot about 0.25 in (0.6 cm) across.
Gauge and Checkpoints
Gauge: 6 sc or 6 fsc = 1 in (2.5 cm) along a line.
The line count is what matters, so test it before you start. Work 12 fsc and measure: the strip should be 2 in (5.1 cm) long. If it is longer, go down to a 3.25 mm hook. If it is shorter, go up to a 3.75 mm hook.
Checkpoints:
– After Part 1, the spine measures 4 in (10.2 cm) and the loop is about 1 in (2.5 cm) tall when you lay it flat.
– After Part 2, the left side’s outer tips reach about 1.5 in (3.8 cm) from the spine when relaxed.
– After Part 3, the frame measures 3 in (7.6 cm) tip to tip once pinned.
– After Part 4, the ornament measures 3.5 in (8.9 cm) across at the picots.
If you are within 0.25 in (0.6 cm) of each checkpoint, blocking will close the gap. If you’re further off, change hook size rather than changing stitch counts, because every junction depends on the spine count.
Part 1: Hanging Loop and Spine (Color A)
Ch 12, sl st in the 1st ch to form a ring. This is the hanging loop.
Ch 25. Sc in the 2nd ch from hook and in each ch across. (24 sc)
Sl st into the base of the loop (the joining sl st). Do not fasten off.
Numbering the spine: Number the sc from the top down. S1 is the sc next to the loop (the last one you made), and S24 is the bottom tip. Place markers at S7, S13, and S18. These are the three junction points on the left. On the right side you’ll join into the same stitch numbers.
Hold the piece with the loop at the top and the sc tops facing left. The left side joins through the sc tops. The right side joins through the free loops of the foundation chain under the same stitches.
Checkpoint: The spine is 4 in (10.2 cm) from the base of the loop to S24.
Part 2: Left Side Frame (Color A)
You are still at the top of the spine. Work the left side downward as one continuous line.
Segment A (tier 1 diagonal): Work 8 fsc, starting from the stitch on your hook. (8 fsc)
Tip 1: Ch 1. This is the tip chain.
Segment B (tier 1 curve): Work 7 fsc. Sl st into the top of S7. Move the marker up. (7 fsc)
Segment C (tier 2 diagonal): Work 9 fsc. (9 fsc)
Tip 2: Ch 1.
Segment D (tier 2 curve): Work 8 fsc. Sl st into the top of S13. (8 fsc)
Segment E (tier 3 diagonal): Work 10 fsc. (10 fsc)
Tip 3: Ch 1.
Segment F (inner curve, worked as a spur): Ch 9, sl st into the top of S18. Turn and sc in each of the 9 ch back to Tip 3. (9 sc) The spur is a double-thickness cord, so it matches the fsc lines.
Segment G (lower edge): Work 11 fsc. Sl st into the top of S24. (11 fsc)
Left side total: 53 fsc (8 + 7 + 9 + 8 + 10 + 11), 3 tip ch, and a 9-st spur.
Do not fasten off. You are now at the bottom point.
Part 3: Right Side Frame (Color A)
The right side mirrors the left, but you work it from the bottom up. Join it through the free loops of the foundation chain on S24, S18, S13, and S7.
Segment G (lower edge): Work 11 fsc. (11 fsc)
Tip 3: Ch 1.
Segment F (spur): Ch 9, sl st into the free loop under S18, then sc in each of the 9 ch back to Tip 3. (9 sc)
Segment E (tier 3 diagonal): Work 10 fsc. Sl st into the free loop under S13. (10 fsc)
Segment D (tier 2 curve): Work 8 fsc. (8 fsc)
Tip 2: Ch 1.
Segment C (tier 2 diagonal): Work 9 fsc. Sl st into the free loop under S7. (9 fsc)
Segment B (tier 1 curve): Work 7 fsc. (7 fsc)
Tip 1: Ch 1.
Segment A (tier 1 diagonal): Work 8 fsc. Sl st into the base of the loop. (8 fsc)
Fasten off and weave in the ends.
Right side total: 53 fsc and a 9-st spur, the same as the left. The frame has 106 fsc in total.
Checkpoint: Lay the frame flat and nudge the tips outward. Tip 3 should sit about 1.5 in (3.8 cm) from the spine on each side, Tip 2 about 1.3 in (3.3 cm), and Tip 1 about 1 in (2.5 cm). The curves (B, D, F) are one or two stitches longer than a straight line would need, so they bow upward on their own. That bow is the tiered branch shape.
Part 4: Copper Border and Bobble Picots (Color B)
Border gauge: 6 sc = 1 in (2.5 cm), worked 1 sc into each outer fsc edge. Since this matches the frame gauge, the edging lies flat without pulling the lower edges into a curve.
Lower Edge Trim
With the front facing you, join Color B with a sl st in the left Tip 3 chain.
- Left Tip 3: Bp, sc in the same tip ch. (1 sc, 1 bp)
- Left Segment G: Working into the outer edge of the 11 fsc, sc in each of the next 5 sts, (sc, bp, sc) in the next st, then sc in each of the next 5 sts. (12 sc, 1 bp)
- Bottom point (S24): (Sc, bp, sc) in S24. (2 sc, 1 bp)
- Right Segment G: Sc in each of the next 5 sts, (sc, bp, sc) in the next st, sc in each of the next 5 sts. (12 sc, 1 bp)
- Right Tip 3: Sc in the tip ch, bp, sl st in the same ch. (1 sc, 1 bp)
Fasten off.
Edge totals: 28 sc (1 + 12 + 2 + 12 + 1) and 5 bp.
Why the math works: Each Segment G has 11 fsc. Working 1 sc in each gives 11, and the extra sc in the center stitch makes 12, with the bp sitting between those two sc right at the midpoint (5 stitches on each side). The 2 sc at S24 give the bottom point a sharp turn instead of a rounded one. Since the sc count matches the fsc count stitch for stitch, apart from the deliberate extras at the midpoints and the bottom point, the edges stay straight.
Upper Tip Picots
These four picots are worked one at a time. For each Tip 1 and Tip 2 chain on both sides: join Color B with a sl st in the tip ch, bp, sl st in the same tip ch, and fasten off. (4 bp)
Picot total: 5 + 4 = 9 bobble picots.
Weave each copper tail into the copper stitches only, so no orange shows on the teal lines.
Checkpoint: The ornament measures 3.5 in (8.9 cm) across the Tip 3 picots and 4.25 in (10.8 cm) from the top of the spine to the bottom picot.
Final Blocking
- Wet the ornament in cool water and press out the excess in a towel. Don’t wring it.
- Lay it face up on the blocking board, lining the spine up with a vertical grid line.
- Pin the base of the loop and the bottom picot so the tree is 4.25 in (10.8 cm) tall.
- Pin both Tip 3 picots 3.5 in (8.9 cm) apart, level with each other.
- Pin the Tip 2 picots about 3.1 in (7.9 cm) apart and the Tip 1 picots about 2.5 in (6.4 cm) apart, keeping each pair level.
- Push each curve (B, D, F) gently upward so it arches evenly. Pin under the curve if needed.
- Shape the loop into an even teardrop.
- Spray lightly, or brush on diluted stiffener if you want it extra firm.
- Let it dry completely, about 6–8 hours, before unpinning.
Final Quality-Control Checklist
- [ ] Spine is 24 sc and straight from loop to point
- [ ] Each side has 53 fsc and one 9-st spur
- [ ] The junctions on both sides land on S7, S13, S18, and S24
- [ ] Tips on the same tier are level and the same distance from the spine
- [ ] All three curves on each side arch upward
- [ ] There are 9 copper picots: 6 tips, 2 lower-edge midpoints, 1 bottom point
- [ ] The copper sc edging covers only the two lower edges
- [ ] Width is 3.5 in (8.9 cm); overall height is 5.25 in (13.3 cm)
- [ ] All ends are woven into matching colors
Troubleshooting
The frame cups or twists. The fsc is probably tighter than the spine. Go up half a hook size for the fsc segments only.
One side is lopsided. Recount your junctions. A sl st one stitch off on the spine shifts a whole tier. Pull it out back to that junction and rejoin.
The curves lie straight instead of arching. The fsc may be loose enough to stretch. Re-block, pushing the curves upward, or take one stitch out of each curve segment on both sides.
The bobbles are flat. Pull up each loop to the height of a hdc before closing it, and make sure you finish with the ch 1.
The lower edge ripples. You worked more than one sc into some stitches. Count 12 sc per Segment G.
The ornament droops on the tree. Use a stiffener, or work the spine in back-bump sc to firm it up.
Care
Hand wash in cool water, press out the water in a towel, and reshape flat to dry. If you used stiffener, re-block after washing.
Final Notes
Everything in this ornament comes back to one measurement: 6 stitches per inch (2.5 cm). That gives a 24-sc spine of 4 in (10.2 cm). The fixed junctions at S7, S13, S18, and S24 set the three tiers. Each side’s 53 fsc gives a frame 3 in (7.6 cm) wide, and the copper border with its nine bobble picots brings the finished ornament to 3.5 in (8.9 cm) by 5.25 in (13.3 cm). Check the gauge strip, mark your junctions, and pin carefully, and the tree will come out symmetrical.
Happy crocheting!