

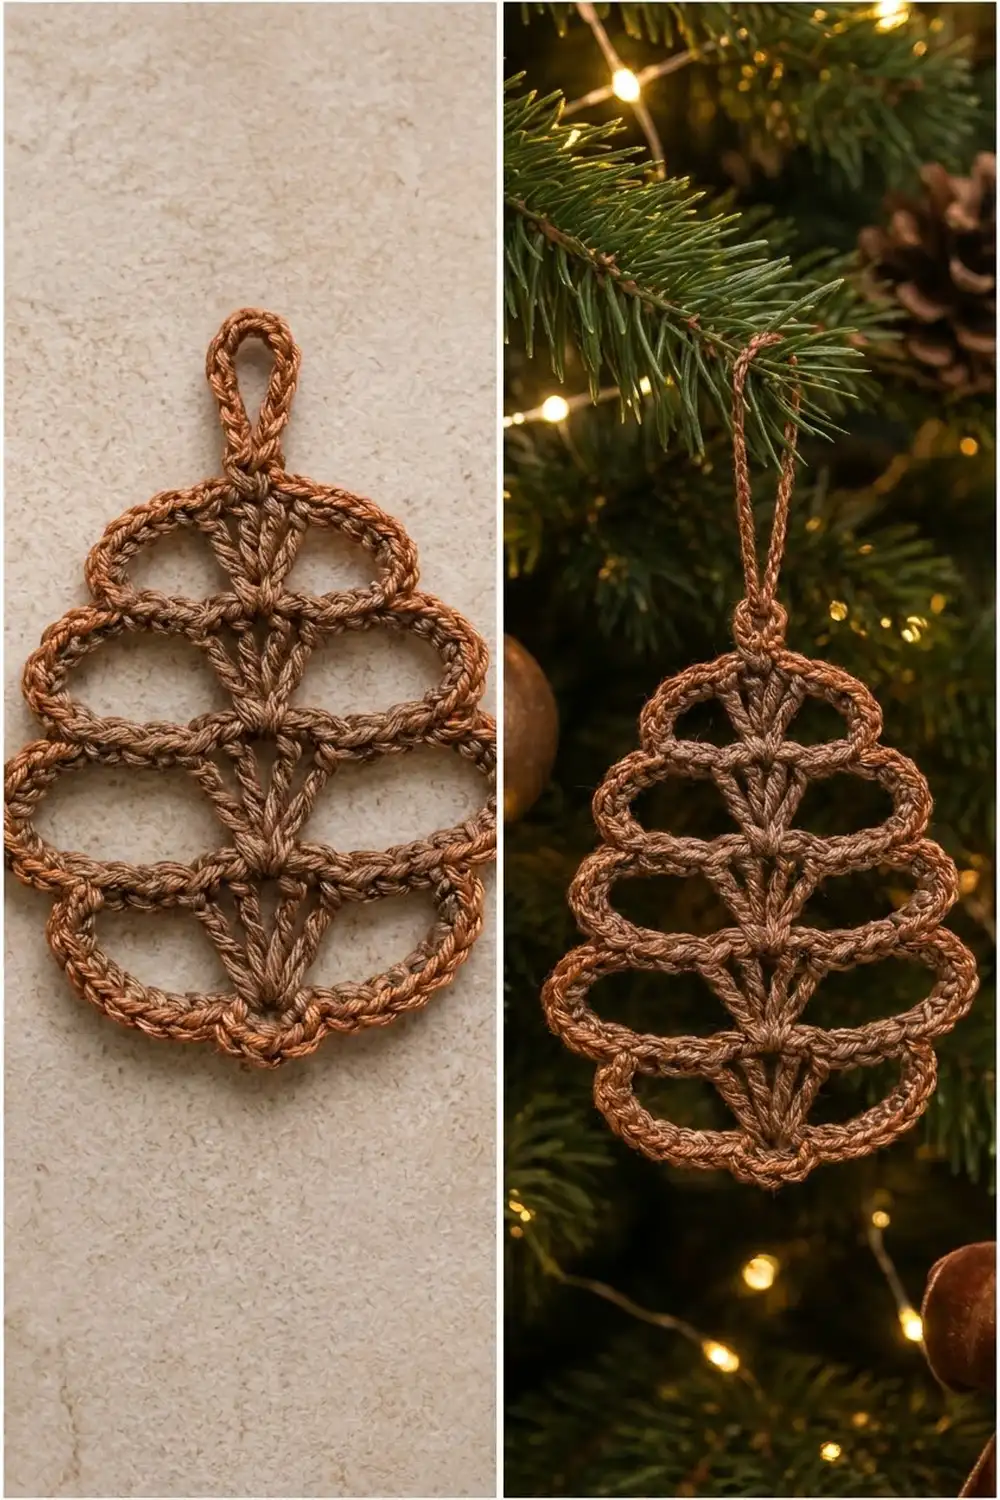
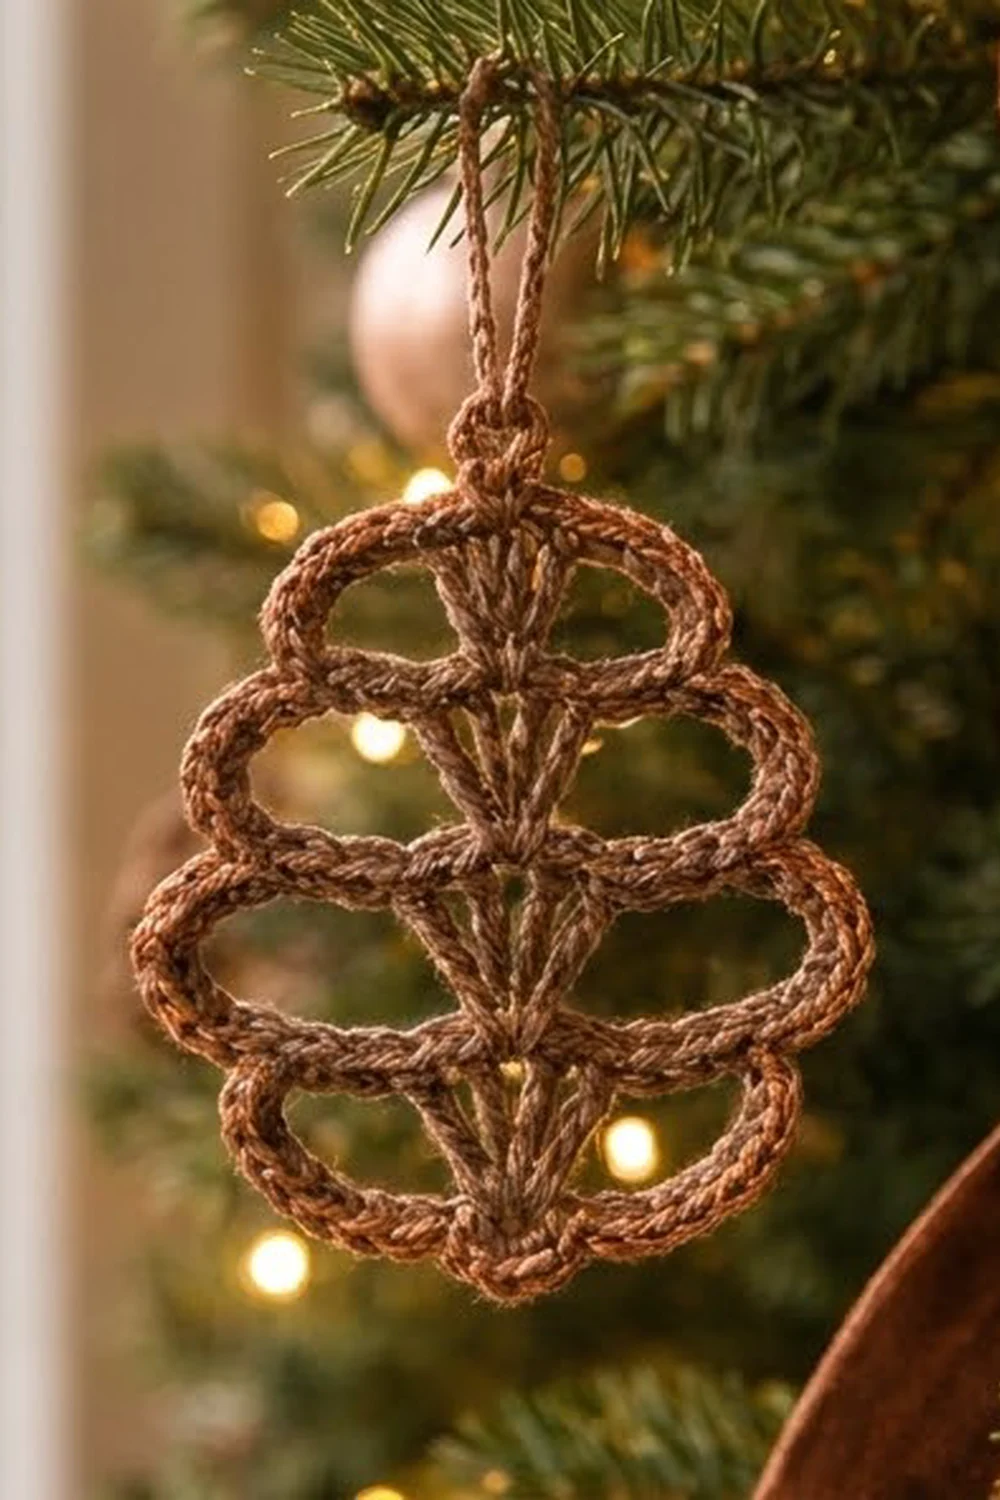
This ornament is a light, airy pine cone made from a central spine and five tiers of oval chain loops. The loops are small at the top, widest in the middle and narrower again at the bottom, which gives the ornament a classic pine cone outline. A V of chain spokes in each tier adds detail through the center, and a thick copper edging gives it a warm, polished finish.
The colors are cinnamon-brown for the framework and copper for the outline. Hang it in front of tree lights and the copper edge glows while the open loops let the light through. It suits a rustic, woodland or vintage tree.
The pattern uses US crochet terms. The finished ornament is about 3.5 in (8.9 cm) wide and 5.2 in (13.2 cm) tall, plus a 1.3 in (3.3 cm) hanging loop, for a total height of 6.5 in (16.5 cm).
You build it in three parts. First you crochet the hanging loop, the spine and all ten lobes in one continuous chain from top to bottom. Next you work back up the spine and add the V spokes. Finally you cover every lobe and the hanging loop with single crochet in copper.
Finished Size and Construction
- Finished size: 3.5 in (8.9 cm) wide x 5.2 in (13.2 cm) tall, plus 1.3 in (3.3 cm) loop
- Skill level: Easy-intermediate (accurate chain counting matters)
- Terminology: US
- Yarn weight: DK (light #3)
- Hook: 4.0 mm (G-6)
- Number of pieces: 1 (single ornament)
- Layout: Central spine, 5 tiers, 2 lobes per tier (10 lobes total)
- Piece size before border: 3.1 in (7.9 cm) wide x 5 in (12.7 cm) tall
- Border (copper edging) depth: about 0.2 in (0.5 cm) per edge
Materials
Use a smooth, tightly plied DK yarn. Mercerized cotton or a cotton blend works best because it holds the loop shapes and shows the stitch texture clearly. Avoid fuzzy or brushed yarns, which blur the lacy lines.
- Color A, cinnamon brown: 5 g / about 12 m (spine, lobes and spokes)
- Color B, copper: 5 g / about 12 m (edging)
These quantities include a generous margin. One ornament uses less, so you can make two or three from the same amounts if you plan carefully.
Tools:
– 4.0 mm (G-6) crochet hook
– 2 locking stitch markers (or 6 if you like to mark every hub)
– Tapestry needle
– Scissors
– Ruler or tape measure
– Blocking mat and rustproof pins
– Spray bottle or light fabric stiffener (optional)
Abbreviations (US Terms)
- ch – chain
- sl st – slip stitch
- sc – single crochet
- st(s) – stitch(es)
- H0–H5 – hubs (see below)
Special term – Hub (H): A hub is a single chain or slip stitch on the spine where lobes meet. H0 is the slip stitch that closes the hanging loop. H1 to H5 are the last chain of each spine segment, numbered from the top down. Placing a marker in each hub as you make it makes Parts 2 and 3 much easier.
Gauge and Checkpoints
Gauge: 10 ch = 2 in (5.1 cm), measured gently relaxed. 10 sc worked into chains = 2 in (5.1 cm).
Gauge is everything in this design, because each lobe’s size comes straight from its chain count. Make a test ornament before you make several.
Checkpoints:
1. After the hanging loop: The closed 15-ch ring should be about 1.3 in (3.3 cm) tall when folded flat.
2. After Tier 3 (Part 1): The spine from H0 to H3 (15 ch) should measure 3 in (7.6 cm). The Tier 3 lobe pair should span about 3.1 in (7.9 cm) when laid out.
3. After Part 1: The spine from H0 to H5 should be 5 in (12.7 cm).
4. After Part 3: The ornament should measure 3.5 in (8.9 cm) x 5.2 in (13.2 cm) without the loop.
If it is too big: Go down to a 3.5 mm (E-4) hook, or chain more tightly. Don’t shorten the chain counts, because that changes the proportions of the lobes.
If it is too small: Go up to a 4.5 mm (7) hook. Small differences are fine for an ornament, but keep the hook the same across a set so the ornaments match.
Part 1: Hanging Loop, Spine and Lobes (Color A)
You work this part as one continuous chain. Lay the work flat after every tier so you can see which side is which. In each tier, the left lobe runs from the new hub up to the hub above it, and the right lobe runs from that upper hub back down to the new hub.
Hanging loop: With Color A, ch 15. Sl st in the 1st ch to form a ring. This sl st is H0; mark it.
Tier 1:
– Spine: Ch 5. The 5th ch is H1; mark it.
– Left lobe: Ch 12, curve the chain out to the left and sl st in H0.
– Right lobe: Ch 12, curve the chain out to the right and sl st in H1.
Count: 5 spine ch + 12 + 12 = 29 sts in this tier.
Tier 2:
– Spine: Ch 5. The 5th ch is H2; mark it.
– Left lobe: Ch 18, sl st in H1.
– Right lobe: Ch 18, sl st in H2.
Count: 5 + 18 + 18 = 41 sts.
Tier 3 (widest):
– Spine: Ch 5. The 5th ch is H3.
– Left lobe: Ch 22, sl st in H2.
– Right lobe: Ch 22, sl st in H3.
Count: 5 + 22 + 22 = 49 sts.
Tier 4:
– Spine: Ch 5. The 5th ch is H4.
– Left lobe: Ch 20, sl st in H3.
– Right lobe: Ch 20, sl st in H4.
Count: 5 + 20 + 20 = 45 sts.
Tier 5 (bottom):
– Spine: Ch 5. The 5th ch is H5, the bottom tip.
– Left lobe: Ch 14, sl st in H4.
– Right lobe: Ch 14, sl st in H5.
Count: 5 + 14 + 14 = 33 sts.
Part 1 totals: 25 spine ch (5 per tier x 5 tiers). Lobe chains per side are 12 + 18 + 22 + 20 + 14 = 86, so 172 lobe chains on both sides. Don’t fasten off. You are now at H5.
Lay the piece flat. Each pair of lobes should look like a pair of wings coming off the spine. Lobe length should rise from Tier 1 to Tier 3 and then fall to Tier 5.
Part 2: V Spokes (Color A, Worked Upward)
Now you work back up the spine, one segment at a time. Each segment gets two chain spokes that start at the lower hub and spread out on either side of the upper hub, which makes a V. In each tier, the left lobe ends at the upper hub and the right lobe starts there. The 2 chains of each lobe closest to that hub are your anchor points.
Segment 5 (starting at H5, working toward H4):
1. Ch 5. Sl st in the 2nd-to-last ch of the Tier 5 left lobe (the 2nd ch away from H4).
2. Sl st in the last ch of that lobe, sl st in H4, sl st in the 1st ch of the Tier 5 right lobe, and sl st in the 2nd ch of that lobe. That is 4 sl sts across the top of the V.
3. Ch 5, sl st in H5.
4. Sl st in each of the next 4 spine ch, then sl st in H4 (5 sl sts up the spine).
Count per segment: 10 spoke ch + 6 sl sts at the anchors and lower hub + 5 sl sts up the spine = 21 sts.
Segments 4, 3, 2 and 1: Repeat steps 1–4. Each time, the hub you just reached becomes the lower hub, and you use the lobes of the tier above it. For example, Segment 4 runs from H4 to H3 using the Tier 4 lobes. Segment 1 runs from H1 to H0 using the Tier 1 lobes and ends with a sl st in H0.
Part 2 totals: 5 segments x 21 = 105 sts. That gives 10 spokes, which form 5 Vs, and each V meets at the hub where its tier ends. Fasten off Color A and weave in the ends along the spine.
Part 3: Copper Edging (Border, Color B)
Border gauge: 1 sc in each ch. At 5 sc per inch (2 sc per cm), the sc covering adds about 0.2 in (0.5 cm) along every outer edge. That is how the width grows from 3.1 in (7.9 cm) to 3.5 in (8.9 cm).
Round 1 (only round):
1. Join Color B with a sl st in H0.
2. Down the left side: Sc in each ch of the Tier 1 left lobe (12 sc) and sl st in H1. Sc in each ch of the Tier 2 left lobe (18 sc) and sl st in H2. Continue the same way: Tier 3 (22 sc), sl st in H3; Tier 4 (20 sc), sl st in H4; Tier 5 (14 sc), sl st in H5.
– Left side: 86 sc + 5 sl sts.
3. Up the right side: Sc in each ch of the Tier 5 right lobe (14 sc) and sl st in H4. Then Tier 4 (20 sc), sl st in H3; Tier 3 (22 sc), sl st in H2; Tier 2 (18 sc), sl st in H1; Tier 1 (12 sc), sl st in H0.
– Right side: 86 sc + 5 sl sts.
4. Hanging loop: Work 20 sc around the 15-ch ring (into the ring itself, not into individual chains), then sl st in H0.
Round total: 86 + 86 = 172 lobe sc, plus 20 loop sc, for 192 sc. There are also 11 sl sts: 10 at the hubs and 1 final.
Why the math works: Each lobe gets exactly one sc per chain, so the edging is as long as the lobe and adds no extra length. The lobes keep their shape and don’t ruffle. The hanging loop is the only place with extra stitches. Working 20 sc over 15 ch (15 + 5 extra) packs the stitches more densely, which makes the loop firm enough to hold its teardrop shape. The sl sts at each hub keep the spine center flat and tight, which keeps the scalloped “waist” between tiers.
Fasten off and weave the Color B ends into the sc behind the copper edge.
Final Blocking
- Lightly mist the ornament or dampen it with water. For a crisp, rigid finish, use a dilute fabric stiffener instead.
- Lay it right side up on a blocking mat.
- Pin H0 and H5 so the spine is exactly 5 in (12.7 cm) long and perfectly straight.
- Pin out the outer curve of each Tier 3 lobe so the widest point measures 3.5 in (8.9 cm) across.
- Shape the other lobes into smooth ovals. Tiers 2 and 4 should be a little narrower than Tier 3, and Tiers 1 and 5 should be clearly smaller.
- Pull each V spoke straight and make sure both arms are the same length.
- Pin the hanging loop into a neat teardrop 1.3 in (3.3 cm) tall.
- Let it dry completely (at least 12 hours) before unpinning.
Final Quality-Control Checklist
- The spine is straight and measures 5 in (12.7 cm) from H0 to H5.
- Both sides have five lobes, and the left and right lobes in each tier match in size.
- The lobes are largest in Tier 3 and get smaller toward the top and bottom.
- All five Vs are visible, and each meets cleanly at its lower hub.
- The copper sc covers every lobe chain evenly, with no gaps or bunching.
- The total size is 3.5 in (8.9 cm) x 5.2 in (13.2 cm), plus a 1.3 in (3.3 cm) loop.
- All ends are woven in and invisible from both sides.
Troubleshooting
Lobes twist or flip over: The chain was twisted before you made the sl st. Undo back to the hub, lay the chain flat and slip stitch again.
One side is larger than the other: You probably miscounted a lobe chain. Count the copper sc on each lobe; they should match the counts above (12, 18, 22, 20, 14).
The edging ruffles: You may have worked 2 sc into some chains. Use exactly one sc per chain.
The edging pulls the lobes into narrow slits: Your sc tension is tighter than your chains. Loosen up or go up half a hook size for Color B only.
The Vs are lopsided: Recheck your anchor points. Each spoke should land in the 2nd ch from the upper hub, never the 3rd.
The ornament curls: Block it again with stiffener and dry it flat under light weight.
Care
Spot clean with cool water and mild soap, then reshape and dry flat. Store flat or hang it in a box so the loops don’t get crushed.
Final Notes
The measurement chain is short and reliable. A gauge of 10 ch = 2 in (5.1 cm) gives a 5 in (12.7 cm) spine across 5 segments. The lobe chains of 12, 18, 22, 20 and 14 create the pine cone shape, at 3.1 in (7.9 cm) wide before the edging. The copper sc border adds 0.2 in (0.5 cm) per edge, for a finished ornament of 3.5 in (8.9 cm) x 5.2 in (13.2 cm) with a 1.3 in (3.3 cm) loop. If your first ornament hits these checkpoints, every one after it will match.
Happy crocheting!