

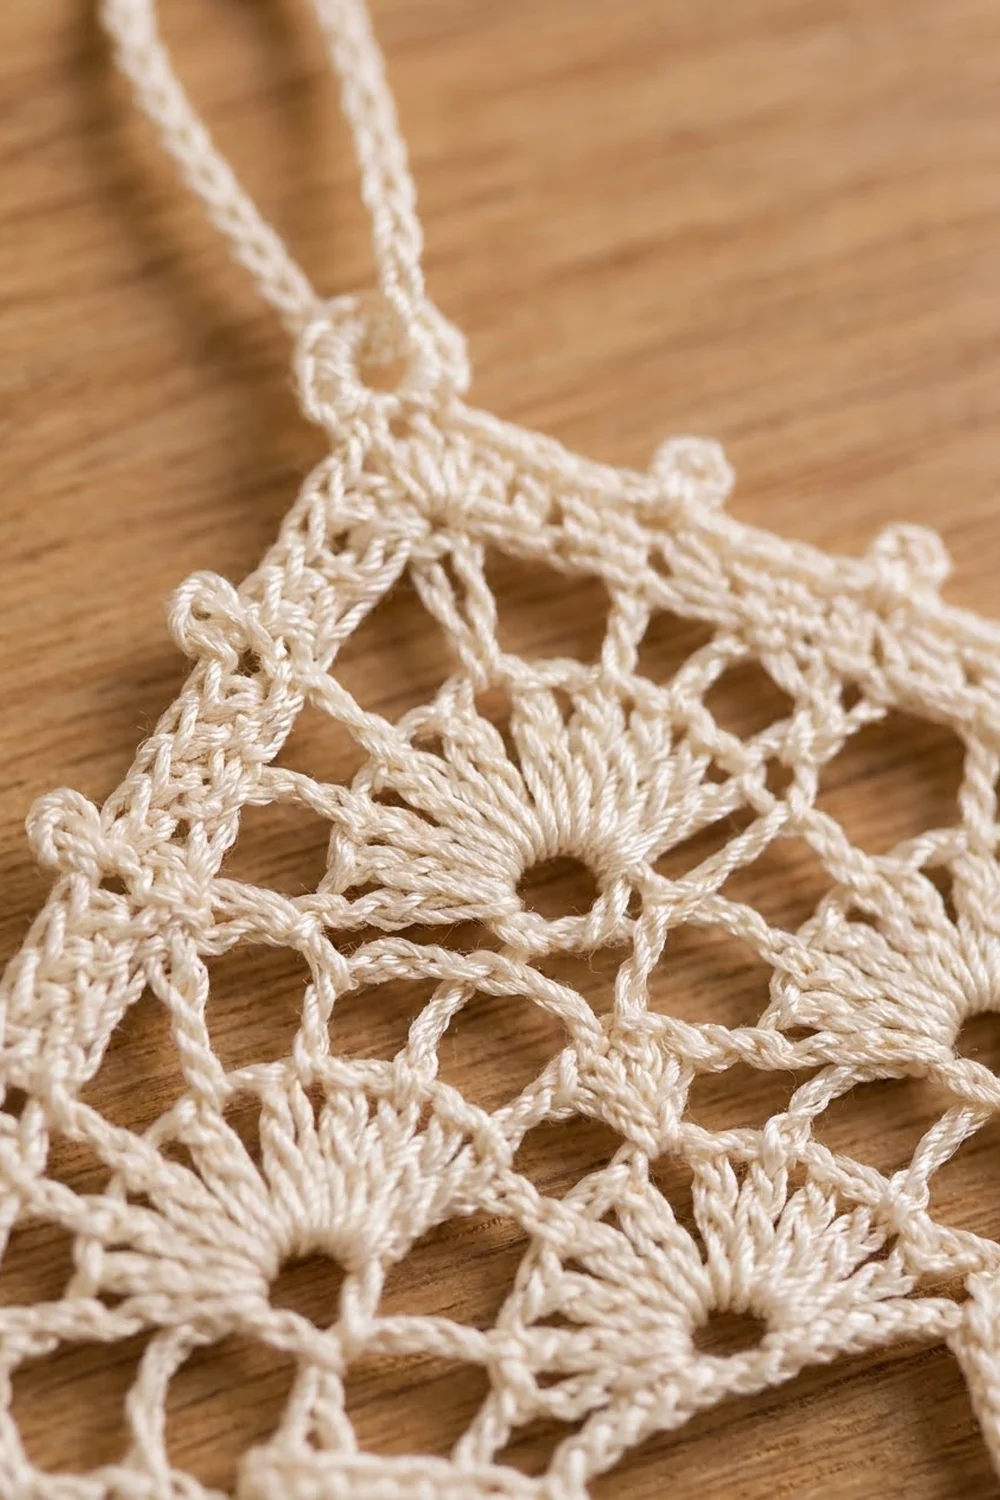
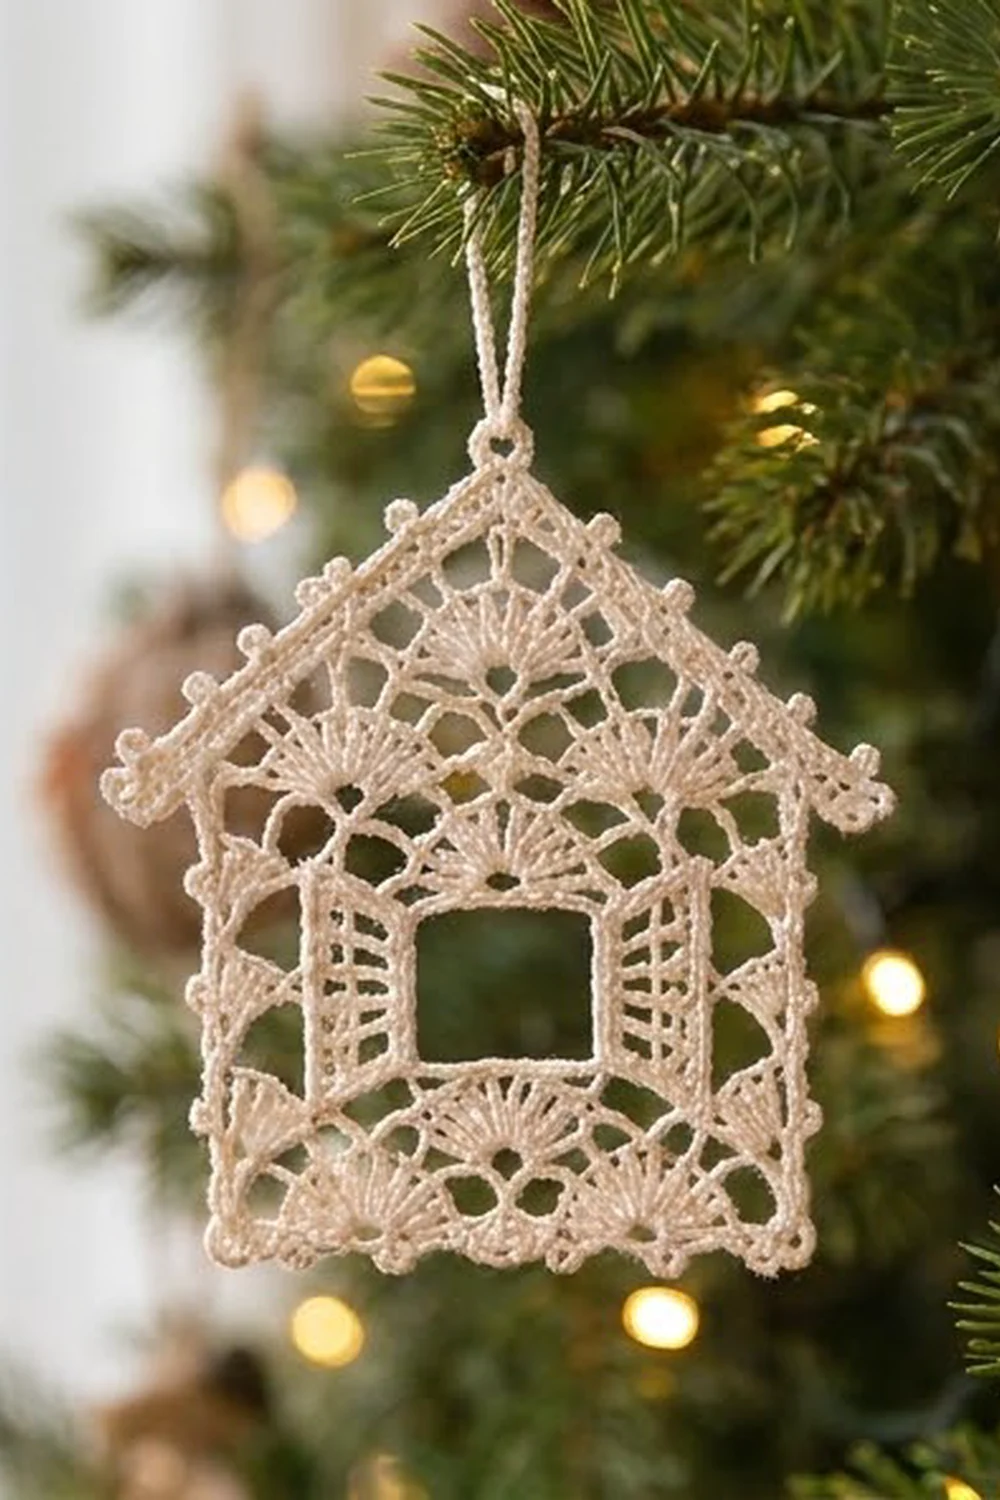
This little lace cottage is a flat thread ornament shaped like a house. It has an open window, ladder shutters, two bands of fan shells and a stepped gable with eaves and a fan at the top. A picot edge goes around the whole outline, and a chain loop at the peak lets it hang from a tree branch, a window latch or a gift.
It is worked in a single cream color, which gives it a classic heirloom look and lets the lace show clearly against greenery or wood. Once starched, it holds a crisp shape for years.
The pattern uses US crochet terms. The blocked ornament measures 4.9 in (12.4 cm) wide at the eaves and 5.5 in (14.0 cm) tall without the hanging loop.
You work the house as one piece in rows from the bottom up: first a fan band, then two separate wall columns that leave the window open, then a bridge row, a second fan band, an eave row that sticks out past the walls, and a stepped mesh gable. After that, one sc round and one picot round go all the way around.
Finished Size and Construction
- Finished size: 4.9 in (12.4 cm) wide x 5.5 in (14.0 cm) tall
- Skill level: Intermediate
- Terminology: US
- Yarn weight: Size 10 crochet thread (Lace, 0)
- Hook: 1.5 mm (US steel 8)
- Number of pieces: 1
- Layout: Single standalone ornament
- Piece size before border: 4.5 in (11.4 cm) wide at the eaves x 5.1 in (13.0 cm) tall
- Body width before border: 3.7 in (9.4 cm)
- Border depth: 0.2 in (0.5 cm) on every edge
Materials
Yarn: Use mercerized cotton crochet thread, size 10. Mercerized cotton gives crisp stitch definition and takes starch well. Avoid acrylic thread, because it will not hold a starched shape.
- Cream / ivory: 8 g, about 42 m (46 yd)
These amounts include a margin of about 30% for your gauge swatch and tension differences.
Tools:
- 1.5 mm (US steel 8) steel crochet hook
- Tapestry needle with a small eye
- 2 locking stitch markers
- Scissors
- Fabric stiffener or spray starch
- Blocking board or foam mat, plastic wrap and rust-proof pins
Abbreviations (US Terms)
- ch – chain
- sl st – slip stitch
- sc – single crochet
- dc – double crochet
- fsc – foundation single crochet
- sk – skip
- sp – space
- st(s) – stitch(es)
Special stitches
- Fan: 7 dc worked into the same stitch.
- Picot: ch 3, sl st in the first of those 3 ch (the 3rd ch from the hook).
- Fsc extension: insert the hook into the last stitch made, yarn over and pull up a loop, yarn over and draw through 1 loop (this is the “chain”), yarn over and draw through 2 loops. For each next fsc, insert the hook under the 2 loops of the “chain” of the previous fsc.
Counting notes: A beginning ch-3 counts as a dc. Every ch counts as a stitch in the totals. When you sl st across stitches at the start of a row, ch-1 spaces count as stitches.
Gauge and Checkpoints
Gauge: 10 dc = 1 in (2.5 cm), and 4 dc rows = 1.2 in (3.0 cm), before blocking. Row heights used in this pattern:
- sc row: 0.1 in (0.3 cm)
- dc row: 0.3 in (0.8 cm)
- fan row: 0.4 in (1.0 cm)
Test first: Work Rows 1–4 and measure before going on. This bottom band is a reliable mini swatch.
Checkpoints:
- After Row 4: 3.7 in (9.4 cm) wide x 0.9 in (2.3 cm) tall
- After Row 9: 2.4 in (6.1 cm) tall; window 1.1 in (2.8 cm) wide x 1.2 in (3.0 cm) tall
- After Row 12: 3.2 in (8.1 cm) tall
- After Row 13: 4.5 in (11.4 cm) wide at the eaves
- After Row 19: 5.1 in (13.0 cm) tall
- After the border: 4.9 in (12.4 cm) x 5.5 in (14.0 cm)
If the piece is too big, go down to a 1.4 mm or 1.25 mm hook. If it is too small, go up to a 1.65 mm hook. A difference of 0.2 in (0.5 cm) in band width is worth fixing, because it grows through the gable.
Body Pattern
Bottom fan band
Foundation: Ch 38.
Row 1: Sc in the 2nd ch from the hook and in each ch across, turn. (37 sc)
Row 2 (fan row): Ch 1, sc in the first st. Sk 2, fan in the next st, sk 2, sc in the next st. Repeat from * 6 times total, turn. (6 fans + 7 sc = 49 sts)
Row 3 (conversion row): Ch 3 (counts as dc). Ch 2, sc in the 4th dc of the next fan, ch 2, dc in the next sc. Repeat from * 6 times total, turn. (7 dc + 6 sc + 24 ch = 37 sts)
Row 4 (trim row): Ch 1, sc in the first dc. Work 2 sc in each ch-2 sp, 1 sc in each sc and 1 sc in each dc, ending with sc in the top of the beginning ch-3. Turn. (13 sc worked 1 per existing st + 24 sc in 12 ch-2 sps = 37 sc)
Checkpoint: 3.7 in (9.4 cm) wide.
Window band: two wall columns
Each column is 13 stitches wide. From the outer edge in, that is a 7-stitch mesh wall strip (dc, ch 1, dc, ch 1, dc, ch 1, dc) followed by a 6-stitch ladder shutter (dc, ch 4, dc). The 11 stitches between the columns stay unworked to form the window.
First column (on the side where Row 4 ended):
Row 5: Ch 3 (counts as dc). Ch 1, sk 1, dc in the next st. Repeat from * 3 times total. Dc in the next st, ch 4, sk 4, dc in the next st, turn. (13 sts)
Row 6: Ch 3 (counts as the inner shutter post), ch 4, dc in the next dc, dc in the next dc. Ch 1, dc in the next dc. Repeat from * 3 times total, working the last dc in the top of the turning ch. Turn. (13 sts)
Row 7: Ch 3. Ch 1, dc in the next dc. Repeat from * 3 times total. Dc in the next dc, ch 4, dc in the top of the turning ch, turn. (13 sts)
Row 8: Repeat Row 6. Do not fasten off. Put the live loop on a stitch marker. You are now at the outer edge.
Second column: Leave sts 14–24 of Row 4 unworked (11 sts). Join thread with a sl st in the last st of Row 4 (st 37, the outer edge). Work Rows 5–8 exactly as for the first column. Fasten off.
Row 9 (bridge row): Put the first column’s live loop back on the hook. Ch 3 (counts as dc). Working across the first column, dc in each dc and in each ch-1 sp, and work 4 dc in the ch-4 sp (13 sts). Ch 11. Continuing on the second column from its inner edge, dc in each dc and in each ch-1 sp, and work 4 dc in the ch-4 sp (13 sts). Turn. (13 + 11 ch + 13 = 37 sts)
Checkpoint: 2.4 in (6.1 cm) tall. The window measures 1.1 in (2.8 cm) wide x 1.2 in (3.0 cm) tall. Each shutter is 0.6 in (1.5 cm) wide and each wall strip is 0.7 in (1.8 cm) wide.
Row 10: Ch 1, sc in each dc, and sc in each ch of the ch-11 (work into the chains, not around them), turn. (37 sc)
Top fan band and eaves
Row 11: Repeat Row 2. (49 sts)
Row 12: Repeat Row 3. (37 sts) Do not turn.
Checkpoint: 3.2 in (8.1 cm) tall.
Row 13 (eave row): Ch 5. Sc in the 2nd ch from the hook and in the next 3 ch (4 sc). Sc in each of the 37 sts of Row 12, working 2 sc in each ch-2 sp. Then work 4 fsc extending past the end of the row. Turn. (4 sc + 37 sc + 4 fsc = 45 sts)
Checkpoint: 4.5 in (11.4 cm) wide. The eaves stick out 0.4 in (1.0 cm) on each side.
Gable Pattern
Each row leaves 4 stitches unworked at each end. That makes a stepped slope of 0.4 in (1.0 cm) across for every 0.3 in (0.8 cm) of height.
Row 14: Sl st in each of the first 5 sts. Ch 3 (counts as dc in st 5). Ch 1, sk 1, dc in the next st. Repeat from * 18 times total, ending in st 41. Turn, leaving 4 sts unworked. (19 dc + 18 ch = 37 sts)
Row 15: Sl st in each of the first 5 sts. Ch 3. Ch 1, sk 1, dc in the next dc. Repeat from * 14 times total, turn. (15 dc + 14 ch = 29 sts)
Row 16: Work as Row 15, repeating from * 10 times total. (11 dc + 10 ch = 21 sts)
Row 17: Work as Row 15, repeating from * 6 times total. (7 dc + 6 ch = 13 sts)
Row 18: Work as Row 15, repeating from * 2 times total. (3 dc + 2 ch = 5 sts)
Row 19 (peak fan): Sl st in each of the first 3 sts. Ch 3, then work 6 dc in the same st. (7 sts) Fasten off.
Checkpoint: 5.1 in (13.0 cm) tall. The gable is 1.9 in (4.8 cm) tall from the top of Row 12.
Border
Border gauge: 10 sc = 1 in (2.5 cm) along every edge. On row ends, work 1 sc per sc row, 3 sc per dc row and 4 sc per fan row on the walls. On the gable, work 2 sc per row end plus 3 sc across each 4-stitch step, skipping the step stitch at the inner corner.
Round 1: With the right side facing, join thread in the first foundation ch at the bottom left. Ch 1.
- Bottom: 3 sc in the first ch, sc in the next 35 ch, 3 sc in the last ch. (41 sc)
- Right wall: 1 sc in each end of Rows 1, 4 and 10 (3 sc), 3 sc in each end of Rows 3, 5–9 and 12 (21 sc), and 4 sc in each end of Rows 2 and 11 (8 sc). (32 sc)
- Right eave: 4 sc across the underside, 3 sc in the tip st, and 3 sc along the 3 remaining unworked sts on top. (10 sc)
- Right slope: For each of Rows 14–17, work 2 sc in the row end and 3 sc across the step (20 sc). For Row 18, work 2 sc in the row end and 1 sc in each of its 2 outer sts (4 sc). (24 sc)
- Peak fan: 1 sc in each of the 7 sts. (7 sc)
- Left slope: Mirror the right slope. (24 sc)
- Left eave: Mirror the right eave. (10 sc)
- Left wall: Mirror the right wall. (32 sc)
Join with a sl st to the first sc. (180 sc)
Round 2: Ch 1.
- Bottom: Sc in 2 sts, then picot, sc in the next 3 sts 13 times. (41 sc, 13 picots)
- Right wall: Sc in 2 sts, then picot, sc in the next 3 sts 10 times. (32 sc, 10 picots)
- Right eave: Sc in 4 sts, sc in the next st, sc in the center tip st, picot, sc in the next 4 sts. (10 sc, 1 picot)
- Right slope: Picot, sc in the next 3 sts 8 times. (24 sc, 8 picots)
- Peak: Picot. Sc in the next 3 sts. Sc in the next st, ch 30, sl st in the top of that sc to form the hanging loop. Sc in the next 3 sts. Picot. (7 sc, 2 picots, 1 loop)
- Left slope: Sc in the next 3 sts, picot 8 times. (24 sc, 8 picots)
- Left eave: Sc in 4 sts, sc in the center tip st, picot, sc in the next 5 sts. (10 sc, 1 picot)
- Left wall: Sc in the next 3 sts, picot 10 times, sc in the last 2 sts. (32 sc, 10 picots)
Join with a sl st to the first sc. (180 sc, 53 picots) Fasten off.
Why the math works:
- Walls: The wall edge is 3.2 in (8.1 cm) tall and gets 32 sc, which is exactly 10 per inch, so it lies flat.
- Bottom: 35 sc sit along 35 chains, plus the 3-sc corners.
- Gable: Each gable step is a 0.3 in by 0.4 in right triangle with a 0.5 in (1.3 cm) slope, and 5 sc on 0.5 in keeps the 10-per-inch rate.
- Size: The border adds 0.2 in (0.5 cm) on every side, which takes the piece from 4.5 x 5.1 in to 4.9 x 5.5 in (12.4 x 14.0 cm). The body becomes 4.1 in (10.4 cm) wide.
Final Blocking
- Weave in all ends along the sc rows, never through the mesh.
- Soak the ornament in fabric stiffener (or starch solution) and gently press out the extra. Do not wring it.
- Lay it face up on a plastic-covered board.
- Pin the bottom straight at 4.1 in (10.4 cm) wide.
- Pin the walls square at 3.2 in (8.1 cm) plus the border.
- Pin the eave tips 4.9 in (12.4 cm) apart and the peak 5.5 in (14.0 cm) above the bottom edge.
- Pin each window corner so the opening is square, and pin each shutter post straight.
- Open every fan and pin out each picot.
- Let it dry completely, then remove the pins.
Final Quality-Control Checklist
- Rows 1, 4, 10 and 12 each have 37 stitches, and Rows 2 and 11 each have 6 fans.
- Each wall column is 13 sts in every row, and the window spans 11 sts.
- Row 13 has 45 sts, and the gable counts are 37, 29, 21, 13, 5, then 7.
- Round 1 has 180 sc, and Round 2 has 53 picots plus the loop.
- Both eaves are the same length, and the peak is centered over the window.
- The hanging loop measures about 1.25 in (3.2 cm) tall.
Troubleshooting
- The walls flare or wave: Your wall border is too dense. Use 2 sc per dc row end and recount the round.
- The window is not square: The shutter columns are uneven. Make sure both columns have exactly 4 rows.
- The gable leans to one side: You slipped across the wrong number of stitches. Leave exactly 4 unworked at each end of every row.
- The fans cup: Your tension is tight. Relax your grip, or go up 0.15 mm on the hook for fan rows only.
- The eaves droop after blocking: Use more stiffener and pin the eave tips level with the top of Row 13.
Care
Hand wash in cool water, re-starch, and block flat to dry. Store the ornament flat between tissue paper so the picots and fans keep their shape.
Final Notes
Here is the full measurement chain:
- Bottom band: 3.7 in (9.4 cm) wide x 0.9 in (2.3 cm) tall
- After the window band: 2.4 in (6.1 cm) tall
- Finished body: 3.2 in (8.1 cm) tall
- Eave row: 4.5 in (11.4 cm) wide
- Gable: 1.9 in (4.8 cm) tall, bringing the piece to 5.1 in (13.0 cm)
- After the border: 4.9 in x 5.5 in (12.4 cm x 14.0 cm)
If you check your size at each checkpoint, the finished cottage will block square, even and ready to hang.
Happy crocheting!