

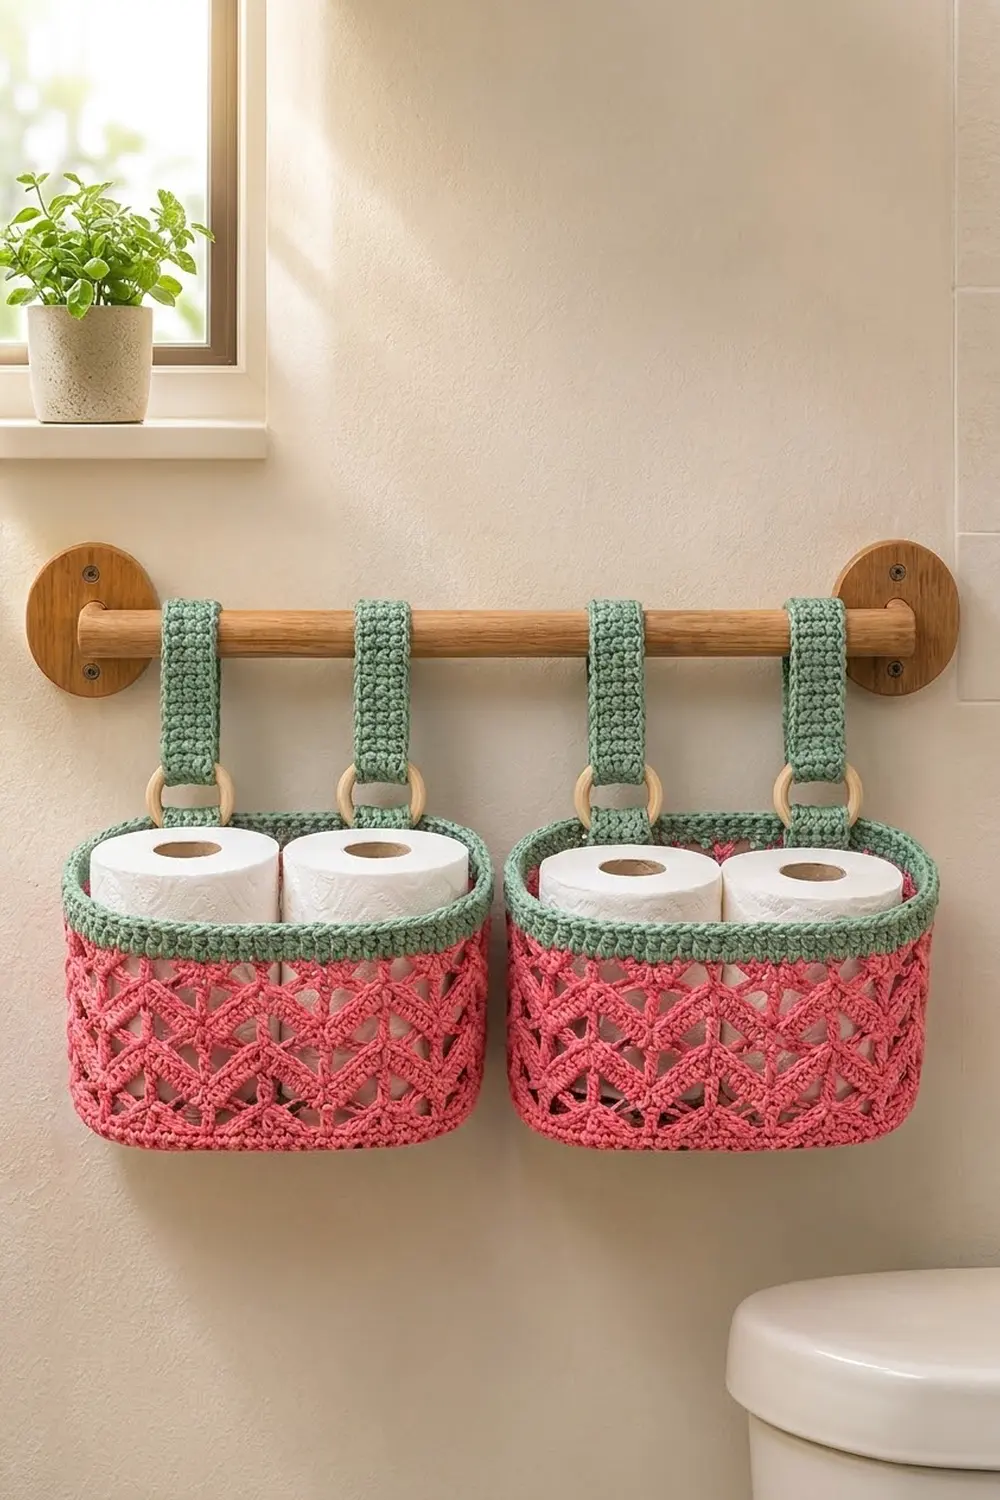
This set has two matching oval baskets in warm coral pink. Each one has a solid double crochet base, an open V-stitch lattice wall and a firm sage green rim. Two sage green straps and two natural wooden rings hang each basket from a towel bar or wall rod.
The lattice gives the walls a zigzag, diamond look that stays light but holds its shape. The green rim and straps frame the pink, so the set looks fresh and a little retro. Each basket is sized to hold two standard toilet paper rolls side by side. It also works for washcloths, hair ties or small toiletries.
All instructions use US crochet terms. Each finished basket measures about 9.9 in long x 5.6 in wide x 4.25 in tall (25.1 x 14.2 x 10.8 cm). Each strap measures 1.4 x 9 in (3.6 x 22.9 cm) before folding.
Each basket is worked in one piece with no sewing. You work an oval base in joined rounds, turn up the wall with a back-loop round, work five lattice rounds, level the top and finish with three green rim rounds. Two small tabs grow from each rim and loop through the wooden rings. The straps connect the rings to the rod.
Finished Size and Construction
- Finished basket size: 9.9 x 5.6 x 4.25 in (25.1 x 14.2 x 10.8 cm)
- Skill level: Intermediate (V-stitch lattice, working into chain spaces)
- Terminology: US
- Yarn weight: Worsted weight (#4) cotton
- Hook: 5 mm (H-8)
- Number of pieces: 2 baskets, 4 straps, 4 wooden rings
- Layout: 2 baskets side by side, each hung from 2 straps
- Piece size (base): 9.9 x 5.6 in (25.1 x 14.2 cm), 90 stitches around
- Size before border: wall height 3.5 in (8.9 cm)
- Border depth: 0.75 in (1.9 cm), 3 rounds of sc
Materials
Choose a smooth, firm cotton or cotton blend in worsted weight. Cotton holds its shape, copes with a damp bathroom and shows the lattice clearly. Avoid very soft acrylic, which lets the walls sag.
- Coral pink (main color): 90 g, about 144 m
- Sage green (rim, tabs, straps): 50 g, about 80 m
These quantities include a margin of about 25 percent to allow for gauge differences and a test swatch.
Tools:
- 5 mm (H-8) crochet hook
- 4 wooden rings, 2 in (5.1 cm) outer diameter
- Tapestry needle
- 4 to 6 stitch markers
- Scissors
- Measuring tape
- Optional: spray starch for blocking
Abbreviations (US Terms)
- ch – chain
- sl st – slip stitch
- sc – single crochet
- dc – double crochet
- tr – treble crochet
- BLO – back loop only
- sk – skip
- sp – space
- st(s) – stitch(es)
- rnd – round
Special stitch – V-st (V-stitch): (dc, ch 3, dc) in the same stitch or space. The ch-3 in the middle is called the V’s center space.
Gauge and Checkpoints
Double crochet gauge: 14 dc = 4 in (10.2 cm); 4 dc rounds = 2.25 in (5.7 cm).
Single crochet gauge: 14 sc x 16 rows = 4 in (10.2 cm).
Lattice gauge: one 6-stitch repeat = 1.7 in (4.3 cm); one lattice round = about 0.55 in (1.4 cm) tall.
Test one piece first. Make one base through Rnd 3 and measure it before you commit to a full basket.
Checkpoints:
- After Rnd 1: about 5.4 x 1.1 in (13.7 x 2.8 cm)
- After Rnd 3: about 7.7 x 3.4 in (19.6 x 8.6 cm)
- After Rnd 5: 9.9 x 5.6 in (25.1 x 14.2 cm), lying flat
- After Rnd 11: wall height 3.0 in (7.6 cm)
- After Rnd 12: wall height 3.5 in (8.9 cm)
- After Rnd 15: wall height 4.25 in (10.8 cm)
If your base is too big, go down half a hook size (4.5 mm). If it is too small, go up half a size (5.5 mm). A base that cups upward means your tension is tight. A base that ruffles means it is loose. Change the hook, not the stitch counts, because the wall depends on exactly 90 stitches.
Basket Base (make 2)
With coral pink, ch 19.
Rnd 1: Dc in 3rd ch from hook (the skipped 2 ch do not count as a stitch), dc in next 15 ch, 6 dc in last ch. Rotate to work along the other side of the foundation chain. Dc in next 15 ch, 5 dc in the same ch as the first dc. Join with sl st to first dc. (42 sts: 2 sides of 15, 2 ends of 6)
The round runs in this order: 1 end stitch, 15 side stitches, 6 end stitches, 15 side stitches, then the last 5 end stitches. Place a marker in the first stitch of each round.
Rnd 2: Ch 2 (does not count as a stitch here and throughout), 2 dc in first st, dc in next 15 sts, 2 dc in each of next 6 sts, dc in next 15 sts, 2 dc in each of last 5 sts. Join. (54 sts: 2 sides of 15, 2 ends of 12)
Rnd 3: Ch 2, dc in first st, 2 dc in next st, dc in next 15 sts, [dc in next st, 2 dc in next st] 6 times, dc in next 15 sts, [dc in next st, 2 dc in next st] 5 times. Join. (66 sts: 2 sides of 15, 2 ends of 18)
Rnd 4: Ch 2, dc in first 2 sts, 2 dc in next st, dc in next 15 sts, [dc in next 2 sts, 2 dc in next st] 6 times, dc in next 15 sts, [dc in next 2 sts, 2 dc in next st] 5 times. Join. (78 sts: 2 sides of 15, 2 ends of 24)
Rnd 5: Ch 2, dc in first 3 sts, 2 dc in next st, dc in next 15 sts, [dc in next 3 sts, 2 dc in next st] 6 times, dc in next 15 sts, [dc in next 3 sts, 2 dc in next st] 5 times. Join. (90 sts: 2 sides of 15, 2 ends of 30)
Each round adds 6 stitches at each curved end and none on the straight sides. That keeps the oval flat and the long sides straight.
Basket Wall (continue on each base)
Rnd 6 (turning round): Ch 1, sc in BLO of each st around. Join to first sc. (90 sc)
The unworked front loops form a crisp ridge, and the wall now rises straight up.
Rnd 7 (lattice set-up): Ch 1, [sc in next st, ch 3, sk 2 sts, V-st in next st, ch 3, sk 2 sts] 15 times. Join to first sc. (15 sc, 15 V-sts)
Each repeat uses 6 stitches, and 15 x 6 = 90.
Rnd 8 (offset round): Ch 6 (counts as dc and ch 3), dc in same sc (first V-st made), ch 3, sc in center sp of next V-st, ch 3, [V-st in next sc, ch 3, sc in center sp of next V-st, ch 3] 14 times. Join with sl st to 3rd ch of beginning ch-6. (15 V-sts, 15 sc)
Rnd 9: Sl st into center sp of first V-st, ch 1, sc in same sp, ch 3, V-st in next sc, ch 3, [sc in center sp of next V-st, ch 3, V-st in next sc, ch 3] 14 times. Join to first sc. (15 sc, 15 V-sts)
Rnd 10: Repeat Rnd 8. (15 V-sts, 15 sc)
Rnd 11: Repeat Rnd 9. (15 sc, 15 V-sts)
Each round places a V-st above the previous sc and an sc inside the previous V. The openings zigzag up the wall and form the diamond lattice.
Rnd 12 (leveling round): Ch 4 (counts as tr), 2 dc in next ch-3 sp, sc in center sp of next V-st, 2 dc in next ch-3 sp, [tr in next sc, 2 dc in next ch-3 sp, sc in center sp of next V-st, 2 dc in next ch-3 sp] 14 times. Join to top of ch-4. Fasten off coral.
Count: 15 tr (1 per sc) + 15 sc (1 per V-st) = 30 anchor stitches, plus 60 dc added in the ch-3 spaces = 90 sts.
The tall stitches fill the low points over each sc, and the short stitches sit on the high V tips, so the top edge comes out level.
Make All Pieces
- Coral pink: 2 baskets (base and wall, Rnds 1–12)
- Sage green: 2 rims (Rnds 13–15), 4 tabs, 4 straps
- Wooden rings: 4
Strap (make 4)
With sage green, ch 6.
Row 1: Sc in 2nd ch from hook and in each ch across. Turn. (5 sc)
Rows 2–36: Ch 1, sc in each st across. Turn. (5 sc)
Fasten off, leaving a 12 in (30.5 cm) tail. The strap measures 1.4 x 9 in (3.6 x 22.9 cm).
Layout grid (front view):
|=========== ROD ===========|
  S1    S2       S3    S4
  O     O        O     O
 [ BASKET 1 ]   [ BASKET 2 ]
S = strap, O = wooden ring. Each basket uses 2 straps and 2 rings.
Border (Green Rim)
Border gauge: 14 sc = 4 in (10.2 cm); 4 sc rounds = 1 in (2.5 cm).
Join sage green with sl st in top of the ch-4 at the start of Rnd 12.
Rnd 13: Ch 1, sc in each st around. Join. (90 sc: 45 front half, 45 back half)
Rnd 14: Ch 1, sc in each st around. Join. (90 sc: 45 front half, 45 back half)
Rnd 15: Ch 1, sc in each st around. Join with an invisible join. (90 sc: 45 front half, 45 back half)
Why the math works: The stitch count stays at 90 from base to rim:
- The base ends at 90 stitches, and the turning round keeps 90.
- The lattice uses 15 repeats of 6 stitches.
- The leveling round brings the count back to exactly 90.
That gives the rim the same circumference as the base, about 25.7 in (65.3 cm), so the walls stand straight with no flare or pull-in. Three sc rounds at 0.25 in (0.6 cm) each give the 0.75 in (1.9 cm) border depth.
Rim Tabs (2 per basket)
Flatten the basket so the round join sits at one curved end. Choose the half that will face the wall as the back half (45 sts). Starting at one fold, count along the back half: 9 sts, 5 tab sts, 17 sts, 5 tab sts, 9 sts. That is 9 + 5 + 17 + 5 + 9 = 45.
Row 1: Join green in the first tab st of Rnd 15, ch 1, sc in same st and next 4 sts. Turn. (5 sc)
Rows 2–8: Ch 1, sc in each st across. Turn. (5 sc)
Fasten off with a 10 in (25.4 cm) tail. The tab is 2 in (5.1 cm) long.
Joining
All joining is done by whipstitching with the green tails.
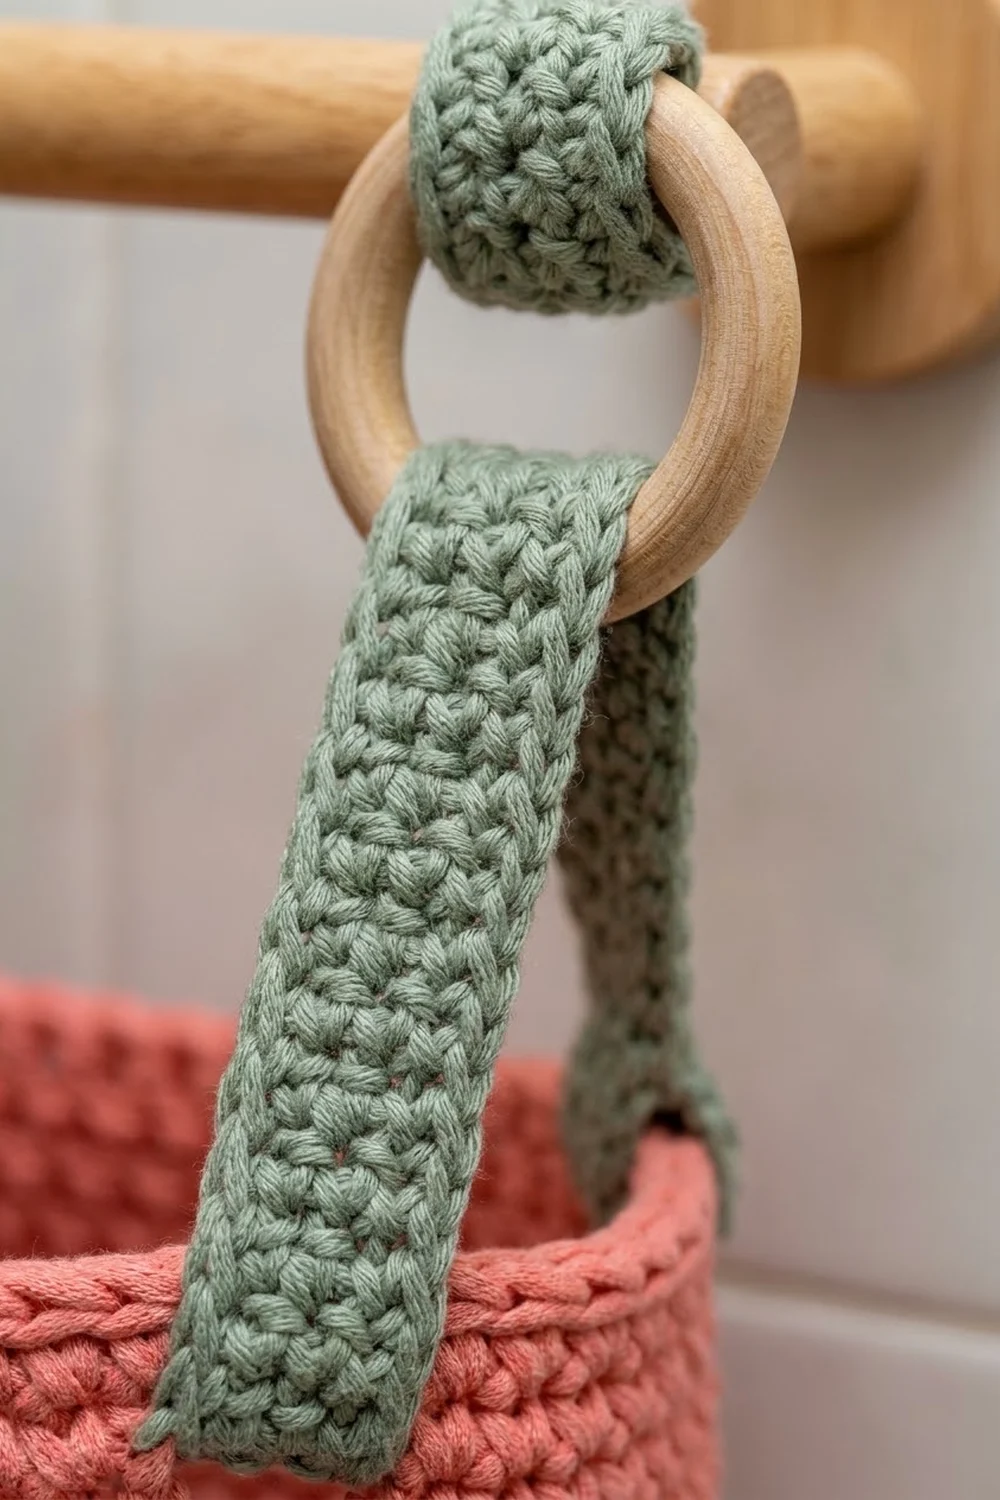
- Tab to ring: Pass a tab through one wooden ring from the outside. Fold it down inside the basket and sew Row 8 to the inside of Rnd 13, stitch for stitch (5 sts to 5 sts). About 0.75 in (1.9 cm) of tab shows above the rim.
- Strap to ring: Pass the bottom 1 in (2.5 cm) of a strap through the same ring and fold it back. Sew the 5 end stitches to the strap, 1 to 1.
- Strap to rod: Fold the top 2.5 in (6.4 cm) of the strap over the rod and sew the 5 end stitches across the strap. If the rod cannot be removed, sew the loop closed around it.
Keep your sewing tension even and snug but not tight. Puckered seams make the rings hang crooked.
Size checkpoint: Each ring should hang about 3 in (7.6 cm) below the rod. The two straps of one basket should be parallel and the same length. If one sags, unpick the top seam and adjust the fold.
Final Blocking
- Weave in all ends. Run each tail through solid stitches for at least 2 in (5.1 cm) before trimming.
- Lightly mist the basket with water, or with diluted spray starch for extra stiffness.
- Fill the basket with a folded towel or two paper rolls so the walls stand straight.
- Gently pull each lattice opening into an even diamond.
- Pat the base flat and check that it measures 9.9 x 5.6 in (25.1 x 14.2 cm).
- Let it dry completely, at least 24 hours, before removing the filling.
- Pin the straps flat at both ends and block them to 1.4 x 9 in (3.6 x 22.9 cm).
Final Quality-Control Checklist
- Base lies flat and measures 9.9 x 5.6 in (25.1 x 14.2 cm).
- Every round from 5 to 15 has 90 stitches or 15 lattice repeats.
- All 15 V-st columns line up vertically.
- The top of Rnd 12 is level before the green rim.
- Wall height is 4.25 in (10.8 cm) all around.
- Tabs sit 17 sts apart, centered on the back half.
- All four straps are the same length, 36 rows each.
- Rings hang level, about 3 in (7.6 cm) below the rod.
- All ends are woven in and secure.
Troubleshooting
Base cups like a bowl: Your tension is too tight, or you skipped an end increase. Recount each end: 6, 12, 18, 24, 30.
Base ruffles: Your tension is too loose. Go down half a hook size.
Lattice twists to one side: You started a round one space off. Check that every V-st sits above an sc and every sc sits in a V center.
Top edge is wavy: A tr and an sc were swapped in Rnd 12. The tr goes over each sc, and the sc goes into each V center.
Rim flares: Count Rnd 13. It must be 90 stitches, not more.
Basket tips forward: The tabs are off-center. Recount 9, 5, 17, 5, 9 on the back half.
Straps stretch over time: Use a firmer cotton, or add a row of sl st along each long edge.
Care
Hand wash in cool water, reshape while damp and dry around a filling. Remove the wooden rings before washing if they are not sealed.
Final Notes
Here is the measurement chain from start to finish:
- A swatch of 14 dc to 4 in (10.2 cm) gives a 90-stitch base of 9.9 x 5.6 in (25.1 x 14.2 cm).
- Those 90 stitches carry straight up through the turning round, 15 lattice repeats and the leveling round.
- The 0.75 in (1.9 cm) green rim brings the wall to 4.25 in (10.8 cm) tall.
- Four 36-row straps and four 2 in (5.1 cm) rings finish the set.
Check each stage against its checkpoint, and both baskets will match and hang level.
Happy crocheting!