

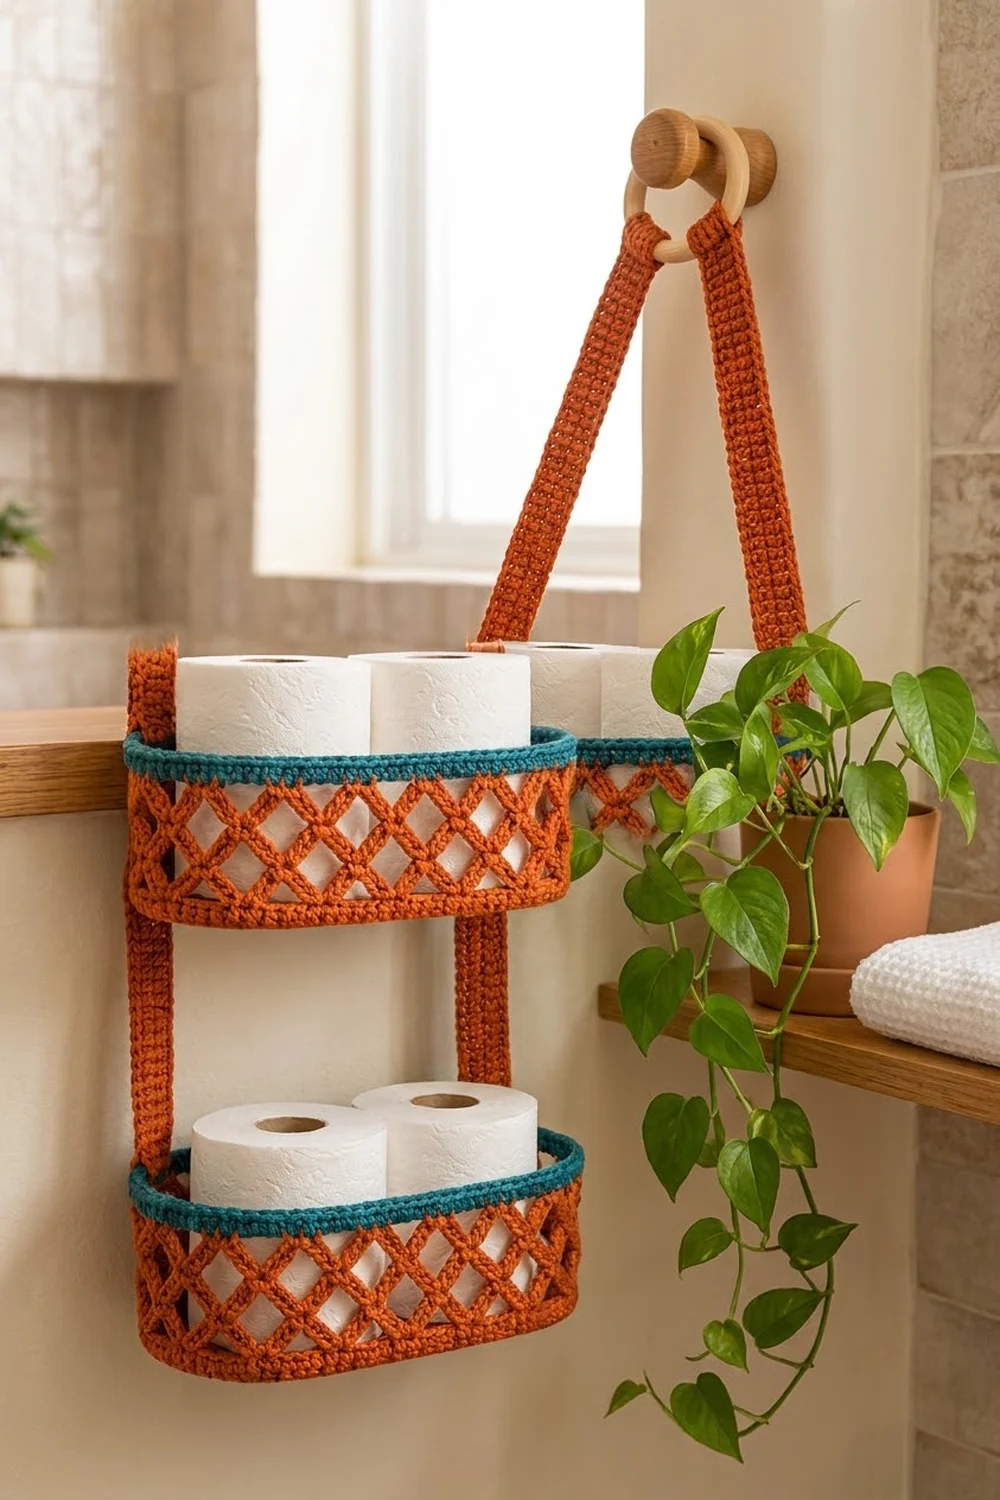
This hanging organizer has two oval baskets stacked on two sturdy straps, with a single wooden ring at the top. Each basket has a solid base, open diamond-lattice walls and a rounded rim in a contrasting color. It is sized to hold two standard toilet paper rolls per tier. It also works well for hand towels, soaps or small plant pots.
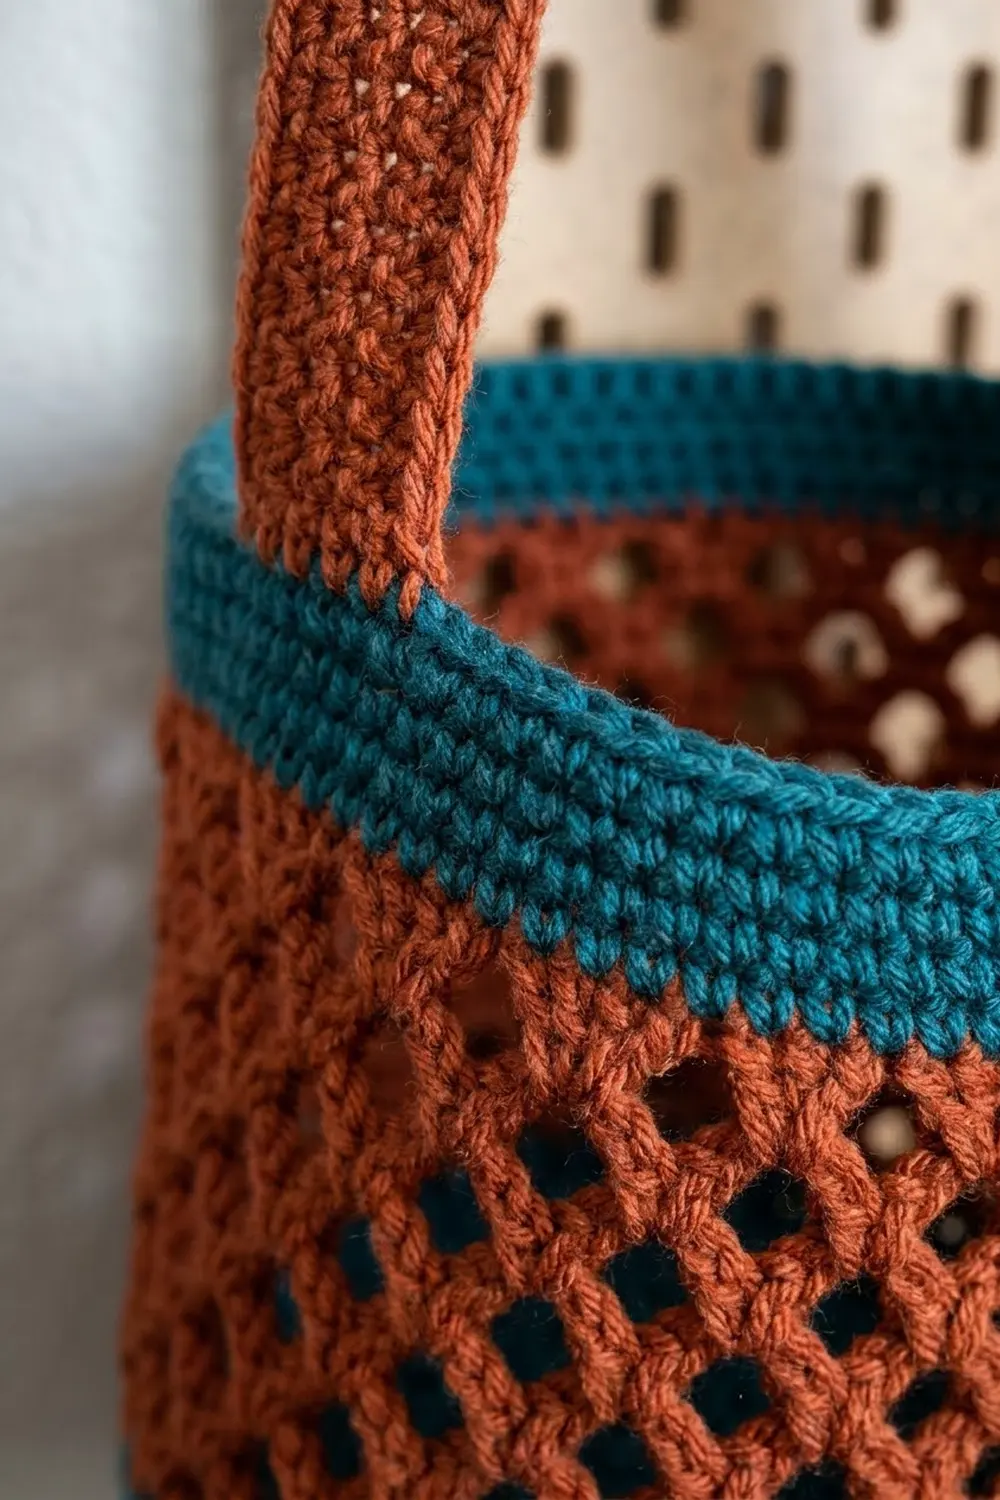
The sample uses warm rust orange for the baskets and straps and deep teal for the rims. The natural wooden ring suits the earthy, boho style. All terms in this pattern are US crochet terms.
Each basket measures about 10 in (25.4 cm) long, 5 in (12.7 cm) wide and 4.25 in (10.8 cm) tall. The assembled organizer hangs about 28 in (71.1 cm) from the top of the ring to the bottom of the lower basket.
Construction is simple. You work an oval base in double crochet rounds. Then you turn up the wall with a back-loop round and build the lattice from chain loops. A solid conversion round closes the lattice, and you add the teal rim. Last, you make two long straps in half double crochet and sew them to both baskets and the ring.
Finished Size and Construction
- Finished size: about 28 in (71.1 cm) tall overall; each basket is 10 × 5 × 4.25 in (25.4 × 12.7 × 10.8 cm)
- Skill level: Easy–Intermediate
- Terminology: US
- Yarn weight: #4 worsted, 100% cotton
- Hook: 5 mm (H-8)
- Number of pieces: 4 crocheted pieces (2 baskets, 2 straps) plus 1 wooden ring
- Layout: 2 baskets stacked vertically, joined by 2 continuous straps
- Piece size: basket base 10 × 5 in (25.4 × 12.7 cm); strap 1.4 × 28 in (3.6 × 71.1 cm)
- Wall height before border: 3.5 in (8.9 cm)
- Border depth: 0.75 in (1.9 cm), for a total wall height of 4.25 in (10.8 cm)
Materials
Use a firm, smooth worsted cotton. Cotton keeps its shape when loaded and is easy to wash. Acrylic gives a softer, floppier lattice.
- Rust orange (MC): 250 g / about 475 m (520 yd)
- Teal (CC): 40 g / about 76 m (83 yd)
- Tools:
- 5 mm (H-8) hook
- 1 wooden ring, 2.5 in (6.4 cm) outer diameter
- 4 stitch markers
- Tapestry needle
- Scissors
- Measuring tape
- Rust-proof pins
- Spray bottle
- Optional fabric stiffener or starch
The quantities include a margin of about 15% for gauge swatching and differences in tension.
Abbreviations (US Terms)
- ch – chain
- sl st – slip stitch
- sc – single crochet
- hdc – half double crochet
- dc – double crochet
- BLO – back loop only
- st(s) – stitch(es)
- rnd – round
- rev sc – reverse single crochet (crab stitch)
Special stitch – reverse single crochet: Work from left to right (right to left if you crochet left-handed). Insert the hook into the next stitch to the right, yarn over and pull up a loop. Then yarn over and pull through both loops on the hook. This makes the rounded, corded edge on the rim.
Gauge and Checkpoints
- Double crochet: 14 dc and 8 rnds = 4 in (10.2 cm)
- Single crochet: 14 sc and 16 rnds = 4 in (10.2 cm)
- Half double crochet: 14 hdc and 10 rows = 4 in (10.2 cm)
Make one complete basket before you start the second. Check its size against these checkpoints:
- After Rnd 1, the base is about 6 × 1 in (15.2 × 2.5 cm).
- After Rnd 3, it is about 8 × 3 in (20.3 × 7.6 cm).
- After Rnd 5, it is 10 × 5 in (25.4 × 12.7 cm).
- After Rnd 12, the wall is 3.5 in (8.9 cm) tall.
- After Rnd 15, the wall is 4.25 in (10.8 cm) tall.
If the piece is too big, go down half a hook size, to 4.5 mm. If it is too small, go up to 5.5 mm (I-9). If the base cups upward, your tension is tight on the curved ends. If it ruffles, your tension is loose. Changing hook size fixes either problem better than changing stitch counts does.
Basket (Make 2)
Oval Base
With MC, ch 23.
Rnd 1: Work 3 dc in the 4th ch from the hook. Do not count the skipped chs as a stitch. Dc in each of the next 18 ch, and work 6 dc in the last ch. Rotate the piece and work along the other side of the foundation chain: dc in each of the next 18 ch, then 3 dc in the same ch as the first dc. Join with a sl st to the first dc. (48 dc: 2 straight sides of 18 and 2 ends of 6)
From now on, start each round with ch 2. The ch 2 does not count as a stitch. Join each round with a sl st to the first dc. Place a marker on the first stitch of each curved end so you can find the increase zones easily.
Rnd 2: Dc in each of the next 18 sts. Work 2 dc in each of the next 6 sts. Dc in each of the next 18 sts. Work 2 dc in each of the next 6 sts. (60 dc: sides of 18, ends of 12)
Rnd 3: Dc in each of the next 18 sts. Work [dc in next st, 2 dc in next st] 6 times. Dc in each of the next 18 sts. Work [dc in next st, 2 dc in next st] 6 times. (72 dc: sides of 18, ends of 18)
Rnd 4: Dc in each of the next 18 sts. Work [dc in next 2 sts, 2 dc in next st] 6 times. Dc in each of the next 18 sts. Work [dc in next 2 sts, 2 dc in next st] 6 times. (84 dc: sides of 18, ends of 24)
Rnd 5: Dc in each of the next 18 sts. Work [dc in next 3 sts, 2 dc in next st] 6 times. Dc in each of the next 18 sts. Work [dc in next 3 sts, 2 dc in next st] 6 times. (96 dc: sides of 18, ends of 30)
Checkpoint: The base should measure 10 × 5 in (25.4 × 12.7 cm) and lie flat.
Turning Round
Rnd 6: Ch 1. Working in the BLO, sc in each st around. Join. (96 sc)
The unworked front loops make a crisp ridge, so the wall turns straight up from the base. Move your markers up to this round: one on the 1st st of each 30-st end and one on the 1st st of each 18-st long side.
Lattice Wall
Rnd 7: Ch 1 and sc in the first st. Ch 5, skip the next 3 sts, sc in the next st. Repeat from * around, ending with ch 5, skip 3. Join with a sl st to the first sc. (24 ch-5 loops; 96 ÷ 4 = 24)
Rnd 8: Sl st in each of the first 3 ch so you reach the center of the first loop. Ch 1 and sc in the same loop. Ch 5, sc in the next ch-5 loop. Repeat from * 22 more times. Ch 5 and join to the first sc. (24 ch-5 loops)
Rnds 9–11: Repeat Rnd 8. (24 ch-5 loops in each round)
Each new loop is anchored at the center of the loop below. This offset forms the diagonal diamond lattice. Pull each sc firmly so the crossing points form tight little knots.
Checkpoint: Stretch the wall gently upward. The 5 lattice rounds should measure about 3 in (7.6 cm), or about 0.6 in (1.5 cm) per round.
Conversion Round
Rnd 12: Ch 1. Work 4 sc in each ch-5 loop around. Join. (24 loops × 4 sc = 96 sc; 0 extra sts added)
This round brings the wall back to the 96 stitches of the base. Re-mark it as 18 / 30 / 18 / 30. Line up the 30-st ends with the curved ends of the base below.
Checkpoint: The wall is 3.5 in (8.9 cm) tall before the border. Fasten off MC.
Make All Pieces
- Basket 1 (upper tier): MC base and walls, CC rim
- Basket 2 (lower tier): MC base and walls, CC rim
- Straps 1 and 2: MC
Yarn per piece:
- Each basket uses about 75 g MC and 15 g CC.
- Each strap uses about 35 g MC.
Layout of the assembled organizer:
            ( O )          <- wooden ring, 2.5 in (6.4 cm)
           /     \
     Strap 1     Strap 2   <- 12 in (30.5 cm) free
        |  [BASKET 1]  |   <- 4.25 in (10.8 cm) sewn
        |              |   <- 6 in (15.2 cm) gap
        |  [BASKET 2]  |   <- 4.25 in (10.8 cm) sewn
Strap (Make 2)
With MC, ch 7.
Row 1: Hdc in the 3rd ch from the hook and in each of the next 4 ch. Do not count the skipped chs as a stitch. (5 hdc)
Rows 2–70: Ch 2 (does not count as a stitch), turn. Hdc in each st across. (5 hdc)
Checkpoint: The strap measures 1.4 × 28 in (3.6 × 71.1 cm). Fasten off and leave a 24 in (61 cm) tail for sewing.
Border (Teal Rim)
Work the border on each basket before joining. The border gauge is 14 sc and 16 rnds = 4 in (10.2 cm), which is 0.25 in (0.6 cm) per round.
Rnd 13: Join CC to the first st of a long side. Ch 1. Sc in each st around, with 18 on each long side and 30 on each end. Join. (96 sc: 18 + 30 + 18 + 30)
Rnd 14: Ch 1 and sc in each st around. Join. (96 sc: 18 + 30 + 18 + 30)
Rnd 15: Ch 1. Rev sc in each st around. Join. (96 rev sc: 18 + 30 + 18 + 30) Fasten off and weave in the ends.
Why the math works: The rim has 96 stitches, the same as the base. The base Rnd 5, the turning Rnd 6 and the conversion Rnd 12 also have 96. Your sc and dc gauges are both 14 stitches per 4 in (10.2 cm). So the top edge has the same circumference as the base, about 27.4 in (69.6 cm), and the walls rise straight without flaring or pulling in.
Checkpoint: The rim is 0.75 in (1.9 cm) deep, and the total wall height is 4.25 in (10.8 cm).
Joining
Method: Whipstitch with the MC tail, sewing through both layers.
- Lay Basket 2, the lower tier, on its long side. Center Strap 1 vertically on the outside of one curved end, over the 15th and 16th sts of that 30-st end section.
- Line up the bottom edge of the strap with the Rnd 6 ridge. Pin the strap up the wall so it reaches the top of the teal rim. This uses 4.25 in (10.8 cm), or about 11 rows.
- Sew both long edges of the strap to the basket. Work one whipstitch per strap row edge. Anchor into the solid rounds (Rnd 6, Rnd 12 and Rnds 13–15) and into each sc knot of the lattice. Do not sew into the open ch-5 loops, because they will stretch.
- Measure 6 in (15.2 cm), or 15 rows, of free strap above the lower rim.
- Pin Basket 1 so its Rnd 6 ridge sits at that point. Sew the next 4.25 in (10.8 cm), or about 11 rows, to its curved end in the same way.
- Repeat Steps 1–5 with Strap 2 on the opposite ends of both baskets.
- Bring both straps together over the wooden ring, keeping them flat and untwisted. Fold the last 1.5 in (3.8 cm), or about 4 rows, of each strap over the ring to the back. Sew each fold down with two rows of whipstitches.
The math for each strap: 11 + 15 + 11 rows are sewn or in the gap, which leaves 33 rows. About 29 of those rows, or 12 in (30.5 cm) including the rounding, form the free hanging section, and 4 rows fold over the ring.
Tension advice: Pull each whipstitch snug but not tight. If you pull too hard, the lattice puckers behind the strap.
Size checkpoint: Hang the organizer from a peg. The lower basket’s base should sit about 28 in (71.1 cm) below the top of the ring, and both baskets should hang level.
Final Blocking
- Lightly mist both baskets with water. Mist them with diluted fabric stiffener instead if you want firmer walls.
- Stuff each basket with a folded towel or a box that measures 10 × 5 × 4.25 in (25.4 × 12.7 × 10.8 cm).
- Pull the lattice gently upward so the diamonds open evenly. Pin the rim straight.
- Lay the straps flat and pin them to 1.4 in (3.6 cm) wide.
- Let everything dry completely for at least 24 hours.
- Remove the stuffing and pins, then re-check that the baskets hang level.
Final Quality-Control Checklist
- Each base is 10 × 5 in (25.4 × 12.7 cm) and lies flat.
- Every lattice round has 24 loops, and the diamonds line up diagonally.
- Rnd 12 and every rim round have 96 stitches.
- The teal rim is 0.75 in (1.9 cm) deep and the corded edge is even.
- The straps are centered on the curved ends and sewn from the base ridge to the rim.
- The gap between tiers is 6 in (15.2 cm) on both sides.
- Both strap folds are secure on the ring.
- All ends are woven in, with no loose tails inside the baskets.
Troubleshooting
- The base cups like a bowl: Your increases are too tight. Go up half a hook size, or check that each end has exactly 6 increases per round.
- The base ruffles: Your tension is loose. Go down half a hook size.
- The walls flare outward: Rnd 12 has more than 96 sts. Recount, and work exactly 4 sc per loop.
- The lattice sags: Pull your anchoring sc tighter, or use stiffener when you block.
- The baskets hang crooked: One strap section is longer than the other. Re-measure the gaps and re-sew so both are 15 rows.
- The rev sc rim twists: Keep the hook angle steady and work loosely.
Care
Hand wash in cool water and lay flat to dry, reshaping the baskets over a towel. Do not tumble dry, and reapply stiffener after washing if needed.
Final Notes
Your measurements build on each other in this order:
- Gauge: 14 sts = 4 in (10.2 cm).
- The 96-st base: 10 × 5 in (25.4 × 12.7 cm).
- The 96-st turning round, then 5 lattice rounds of 24 loops: 3 in (7.6 cm).
- The 96-st conversion round, giving a 3.5 in (8.9 cm) wall.
- The 96-st teal rim, giving a 4.25 in (10.8 cm) basket.
- Two 70-row straps, 28 in (71.1 cm) long, with 6 in (15.2 cm) between tiers.
When every count stays at 96 around the basket, the baskets stand straight and hang level.
Happy crocheting!