
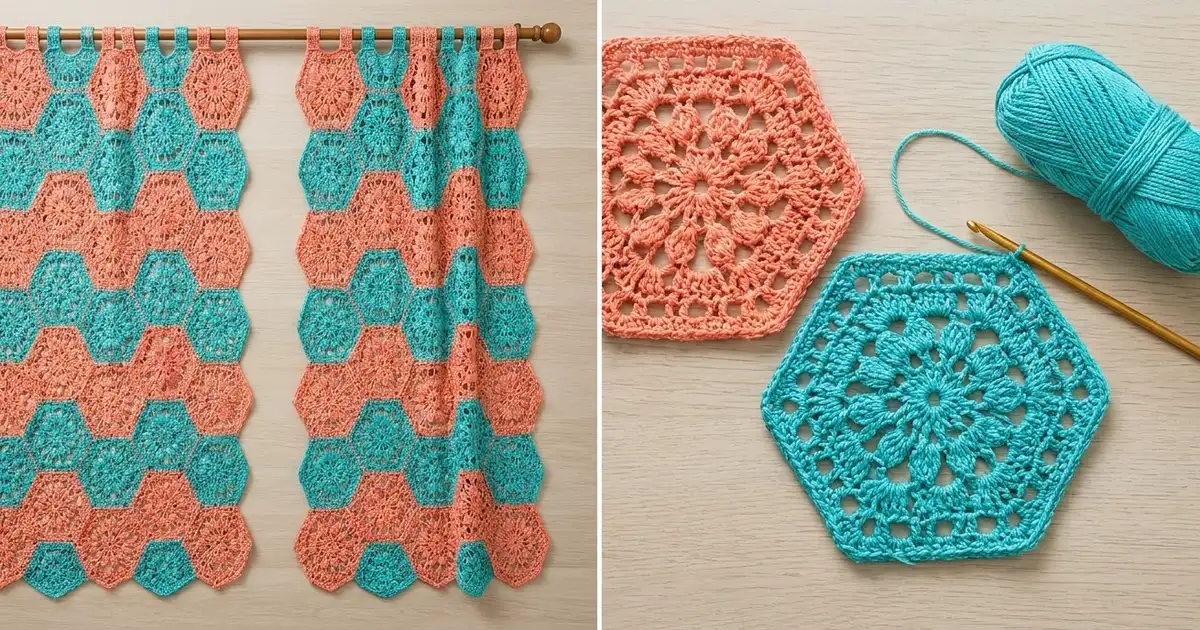
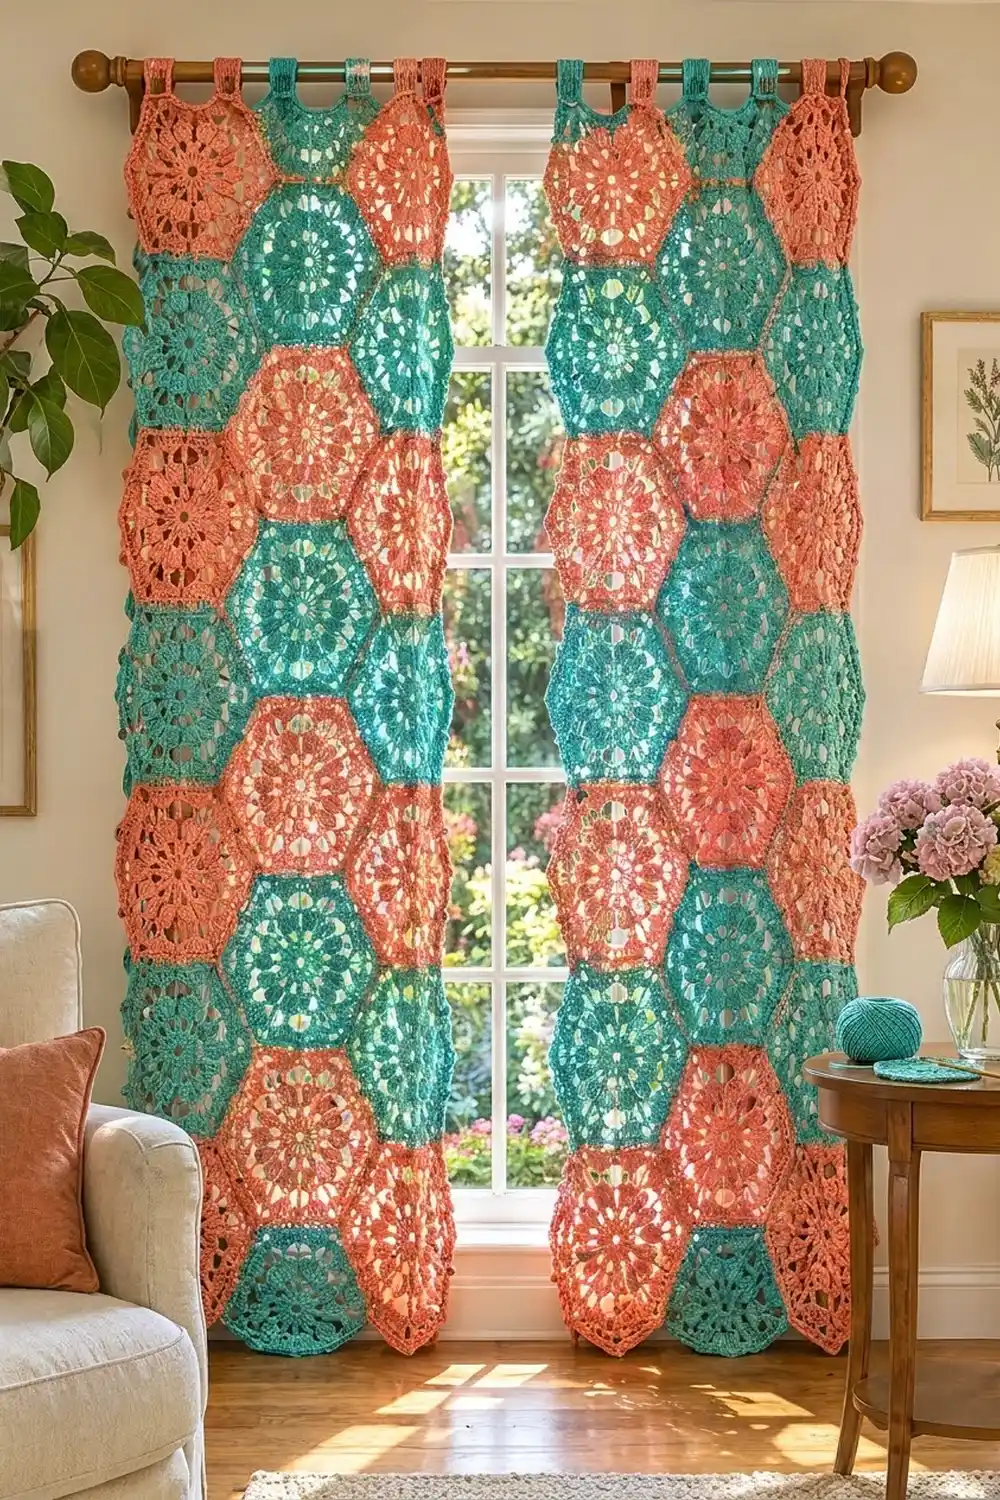
These curtain panels are made from lacy flower hexagons in warm coral and bright turquoise, joined into a honeycomb. Light comes through the open petals and the lattice around them, so the window glows without being fully covered.
Each panel uses two colors in a simple repeat. The hexagons sit point-up in alternating rows of three and two, which gives you a zigzag lower edge and a row of peaks across the top. Short strap tabs hang the panels from a standard curtain rod.
This pattern uses US crochet terms. Each finished panel measures about 21.8 in (55.4 cm) wide and 81 in (205.7 cm) long, plus 3 in (7.6 cm) loops for the rod. The full drop is about 84 in (213.4 cm).
Construction is simple and modular. You crochet 66 identical hexagons, join them with slip stitches into two panels of 33 each, work a 2-round border around each panel, then sew on 10 tabs.
Finished Size and Construction
- Finished panel size: 21.8 in x 81 in (55.4 cm x 205.7 cm), plus 3 in (7.6 cm) tabs
- Skill level: Intermediate
- Terminology: US
- Yarn weight: Worsted (#4) cotton or cotton blend
- Hook: 5.0 mm (H-8)
- Number of pieces: 66 hexagons (33 per panel) and 10 tabs (5 per panel)
- Layout per panel: 13 rows, alternating 3 and 2 hexagons, point-up
- Hexagon size: 8 in (20.3 cm) point to point, 6.9 in (17.5 cm) flat to flat, 4 in (10.2 cm) per side
- Panel size before border: 20.8 in x 80 in (52.8 cm x 203.2 cm)
- Border depth: 0.5 in (1.3 cm)
Materials
Pick a smooth, mercerized or combed cotton. Cotton holds the lace open, keeps the petals crisp, and handles sunlight better than most acrylics. Quantities are based on a yarn with about 85 m (93 yd) per 50 g.
- Color A, Coral: 750 g (about 1,275 m), used for 34 hexagons, all joining, both borders, and 4 tabs
- Color B, Turquoise: 550 g (about 935 m), used for 32 hexagons and 6 tabs
Both amounts include about 15% extra for gauge differences and a test hexagon.
Tools:
– 5.0 mm (H-8) crochet hook
– Tapestry needle
– Stitch markers
– Rust-proof pins and a large blocking surface
– Measuring tape
– Spray bottle
Abbreviations (US Terms)
- ch – chain
- sl st – slip stitch
- sc – single crochet
- dc – double crochet
- sp – space
- st(s) – stitch(es)
- sc2tog – single crochet 2 together
- sc3tog – single crochet 3 together
- RS / WS – right side / wrong side
Cluster (cl): *Yarn over, insert hook in stitch, pull up a loop, yarn over and pull through 2 loops; repeat from * once more in the same stitch, yarn over and pull through all 3 loops.
Beginning cluster (beg cl): Ch 2, then work one “yarn over, insert, pull up a loop, yarn over and pull through 2 loops” in the same stitch, yarn over and pull through both loops on hook.
Gauge and Checkpoints
Gauge: 14 sc and 16 rows = 4 in (10.2 cm) in sc worked in rows.
Make one complete hexagon before you start production, and block it. Measure at each stage:
- After Round 1: about 1.5 in (3.8 cm) across
- After Round 2: about 3.5 in (8.9 cm) across
- After Round 3: about 5.5 in (14.0 cm) point to point
- After Round 4: about 7.25 in (18.4 cm) point to point
- After Round 5: 8 in (20.3 cm) point to point, 6.9 in (17.5 cm) flat to flat, 4 in (10.2 cm) along each side
If the hexagon is too big, go down a hook size. If it’s too small, go up a hook size. A difference of 0.25 in (0.6 cm) per hexagon adds up to 0.75 in (1.9 cm) across the width and about 3 in (7.6 cm) down the length, so it’s worth fixing now.
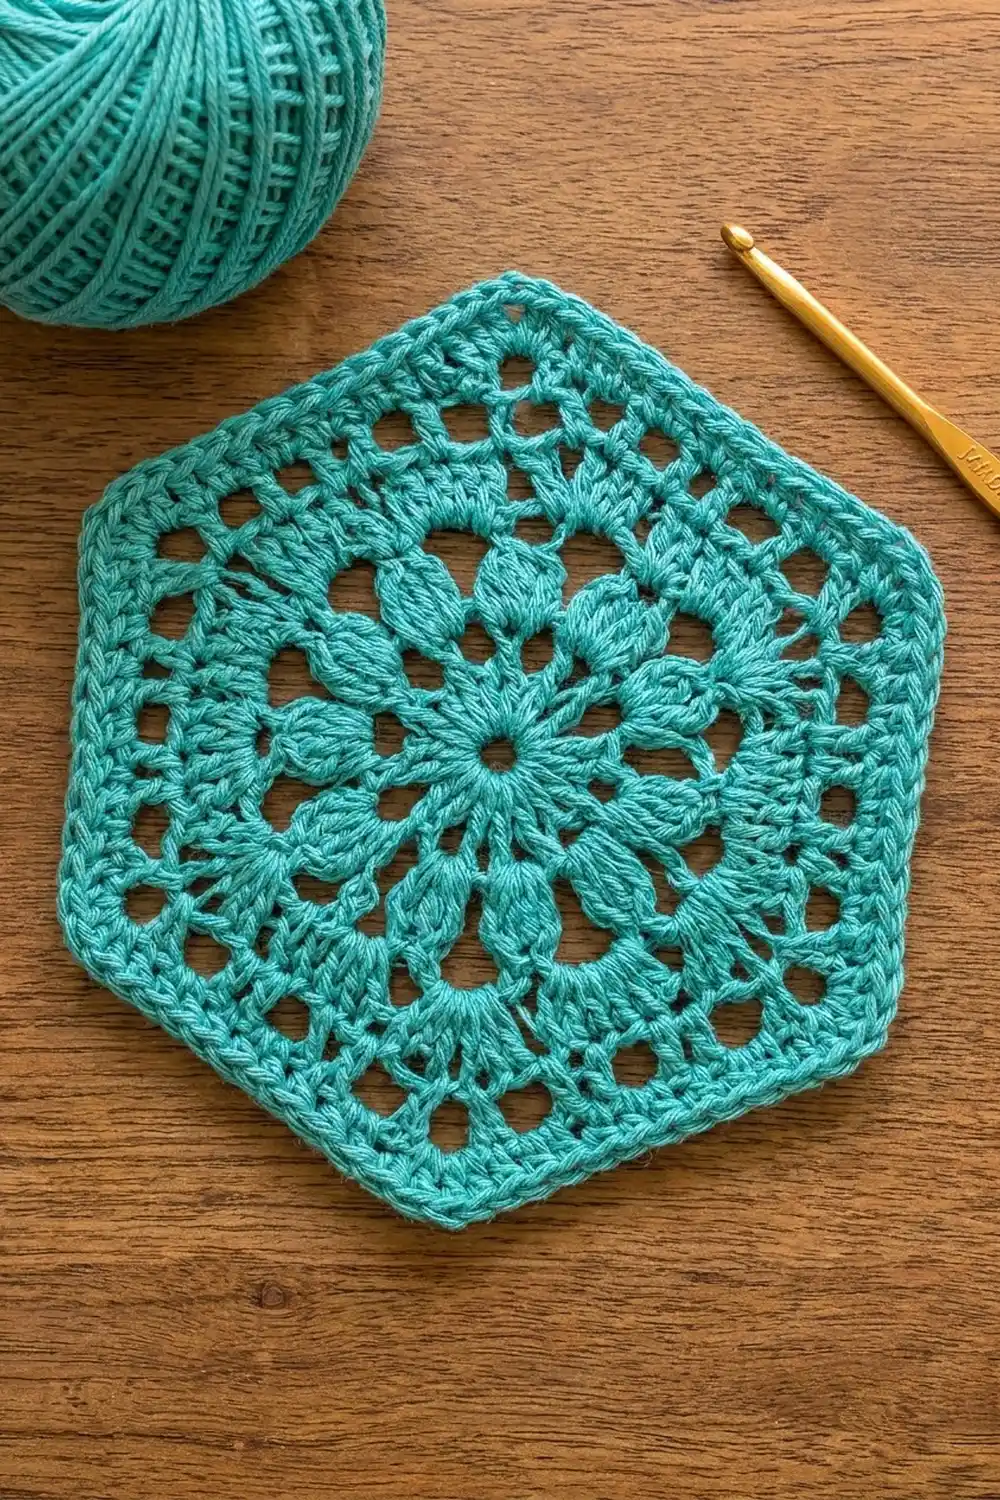
Hexagon Motif (Make 66)
Use Color A or Color B as shown in the layout grid below. Work all rounds with the RS facing.
Round 1: Make a magic ring. Ch 3 (counts as dc), 11 dc in ring. Join with sl st to top of ch-3. (12 dc)
Round 2: Beg cl in same st, ch 3, cl in next st, ch 3; repeat from * around. Join with sl st to top of beg cl. (12 clusters, 12 ch-3 sps)*
These 12 clusters make the flower petals at the center.
Round 3: Sl st into first ch-3 sp. Ch 3 (counts as dc), 2 dc in same sp, ch 3, 3 dc in next ch-3 sp, ch 1, 3 dc in next ch-3 sp, ch 3, 3 dc in next ch-3 sp, ch 1; repeat from * 4 more times. Join with sl st to top of ch-3. (36 dc, 6 corner ch-3 sps, 6 ch-1 sps)*
The ch-3 spaces are your 6 corners. Each side now has 6 dc and 1 ch-1 sp between corners.
Round 4: Sl st in next 2 dc and into corner ch-3 sp. Ch 3 (counts as dc), (2 dc, ch 2, 3 dc) in same sp, ch 1, 3 dc in next ch-1 sp, ch 1, (3 dc, ch 2, 3 dc) in next corner ch-3 sp, ch 1, 3 dc in next ch-1 sp, ch 1; repeat from * 4 more times. Join with sl st to top of ch-3. (54 dc, 6 corner ch-2 sps, 12 ch-1 sps)*
Each side now has 9 dc and 2 ch-1 sps between the corner ch-2 sps. This round makes the open lattice around the flower.
Round 5 (trim round): Ch 1. Sc in each dc and in each ch-1 sp around, and work (sc, ch 2, sc) in each corner ch-2 sp. Join with sl st to first sc. Fasten off and weave in ends. (78 sc, 6 corner ch-2 sps)
Count for Round 5: 54 sc worked 1 per existing dc + 12 sc in the ch-1 sps + 12 corner sc = 78 sc.
Per side: 1 corner sc + 9 sc + 2 sc (in ch-1 sps) + 1 corner sc = 13 sc, with a ch-2 sp at each corner. Six sides x 13 sc = 78 sc. These 13 sc already include both corner stitches of that side.
Make All Pieces
Per panel: 17 hexagons in Color A and 16 hexagons in Color B.
For two panels: 34 Color A and 32 Color B.
Layout for one panel, top to bottom (A = Coral, B = Turquoise). Rows with 2 hexagons are shifted half a hexagon to the right:
Row 1:   A   B   A
Row 2:     B   A
Row 3:   B   A   B
Row 4:     A   B
Row 5:   A   B   A
Row 6:     B   A
Row 7:   B   A   B
Row 8:     A   B
Row 9:   A   B   A
Row 10:    B   A
Row 11:  B   A   B
Row 12:    A   B
Row 13:  A   B   A
Check: rows 1, 5, 9, 13 give 8 A and 4 B. Rows 3, 7, 11 give 3 A and 6 B. The six 2-hexagon rows give 6 A and 6 B. That’s 17 A + 16 B = 33 hexagons.
Tabs (make 10): With Color A (4 tabs) or Color B (6 tabs), ch 9.
Row 1: Sc in 2nd ch from hook and in each ch across, turn. (8 sc)
Rows 2–24: Ch 1, sc in each sc across, turn. (8 sc)
Fasten off, leaving a 12 in (30.5 cm) tail. Each tab measures 2.3 in x 6 in (5.8 cm x 15.2 cm).
Joining
Method: Slip stitch join in Color A. Hold two hexagons with the RS together and work through the back loops of both pieces only. This leaves a flat, neat line on the RS.
Stitch-to-stitch logic: Each shared edge has 13 sc on each hexagon. Insert the hook into the corner ch-2 sp of both pieces, then sl st through each of the 13 matching sc pairs, ending in the next corner ch-2 sps. That’s 13 sl sts per edge, and nothing gets skipped or added.
Order:
1. Join across each row. In every 3-hexagon row, join the vertical sides: 2 seams. In every 2-hexagon row: 1 seam.
2. Join rows together. Lay Row 2 under Row 1. Each Row 2 hexagon fits into a valley, and its upper-left and upper-right edges meet the lower edges of the two hexagons above it. Work one continuous zigzag seam across all 4 edges (52 sl sts). Where three hexagons meet, sl st through all three corner ch-2 sps together.
3. Repeat step 2 until all 13 rows are joined.
Each panel has 20 seams across rows and 48 diagonal edges, for 68 shared edges in total.
Tension: Keep the slip stitches as loose as your motif stitches. If seams pucker or the panel gets shorter than planned, go up a hook size for joining only.
Size checkpoint: After joining Rows 1–3, lay the piece flat. It should measure 20.8 in (52.8 cm) wide and 20 in (50.8 cm) long, point to point. After Rows 1–5: 32 in (81.3 cm) long. The full joined panel measures 20.8 in x 80 in (52.8 cm x 203.2 cm).
Border
Border gauge: 13 sc per 4 in (10.2 cm) hexagon side, matching the motif edge.
The panel outline has 62 exposed hexagon edges: 6 along the top, 6 along the bottom, and 25 along each long side. Along the outline there are 34 outward points (convex corners) and 28 inward valleys where two hexagons meet.
Starting count: 62 edges x 13 sc = 806 sts. Top 6 x 13 = 78. Bottom 6 x 13 = 78. Each side 25 x 13 = 325. No stitches are added at the seams. The 13 sc per edge already include that edge’s corner sc.
Round 1: With RS facing and Color A, join with sl st in the first sc after any panel corner. Ch 1. Sc in each sc along every edge. At each convex corner, ch 2 over the motif’s ch-2 sp. At each valley, sc2tog over the last sc of one hexagon and the first sc of the next hexagon. Join with sl st to first sc.
Count: 806 sts worked 1 per existing st − 28 (one per sc2tog) = 778 sts, plus 34 ch-2 sps.
- Top: 78 − 2 valleys = 76
- Bottom: 78 − 2 = 76
- Left side: 325 − 12 valleys = 313
- Right side: 325 − 12 = 313
Total: 76 + 76 + 313 + 313 = 778.
Round 2: Ch 1. Sc in each st. Work (sc, ch 2, sc) in each ch-2 sp. At each valley, sc3tog over the sc2tog and the st on either side of it. Join, fasten off.
Count: 778 worked 1 per existing st − 56 (2 per sc3tog x 28) + 68 corner sc (2 x 34 corners) = 790 sc, plus 34 ch-2 sps.
- Top: 76 − 4 + 6 (3 peaks) + 2 (one from each top panel corner) = 80
- Bottom: 76 − 4 + 6 + 2 = 80
- Left side: 313 − 24 + 24 (12 side points) + 2 (one from each panel corner) = 315
- Right side: 313 − 24 + 24 + 2 = 315
Total: 80 + 80 + 315 + 315 = 790.
Why the math works: A convex point turns outward by 60°, so it needs 2 extra sc to lie flat. A valley turns inward by the same 60°, so it loses 2 sc to stop ruffling. You have 6 more points than valleys (34 − 28), and that difference is exactly what closes the outline. The border adds 0.5 in (1.3 cm) all around, taking the panel from 20.8 in x 80 in (52.8 cm x 203.2 cm) to 21.8 in x 81 in (55.4 cm x 205.7 cm).
Attach tabs: Fold each tab in half to make a 3 in (7.6 cm) loop. Center one tab on each of the 3 top peaks and one in each of the 2 top valleys. Sew both ends to the WS of the border, 1 in (2.5 cm) down. Match colors to the hexagon below: Color A on the coral peaks, Color B on the turquoise peak and both valleys.
Final Blocking
- Soak each panel in cool water for 15 minutes. Press out the water, but don’t wring it.
- Roll each panel in towels to remove extra moisture.
- Lay it flat on a blocking surface that’s at least 22 in x 82 in (55.9 cm x 208.3 cm). Work in sections if you need to.
- Pin every peak and valley first, then pin the straight side edges.
- Measure: 21.8 in (55.4 cm) wide and 81 in (205.7 cm) long. Adjust the pins until both panels match.
- Open the petals and lattice spaces with your fingers.
- Let the panels dry completely before you unpin them. Attach the tabs after blocking if you’d like them to stay crisp.
Final Quality-Control Checklist
- Every hexagon has 78 sc and 6 corner ch-2 sps
- Every hexagon measures 8 in (20.3 cm) point to point
- Colors match the layout grid on both panels
- All 68 shared edges per panel are joined, 13 sl sts each
- Border Round 2 counts are 80 / 80 / 315 / 315
- Both panels measure 21.8 in x 81 in (55.4 cm x 205.7 cm)
- Tabs are evenly spaced, the same length, and firmly sewn
- All ends are woven in securely on the WS
Troubleshooting
Hexagon cups: Your Round 4 is too tight. Loosen your chains or go up a hook size.
Hexagon ruffles: Round 3 or 4 is too loose. Go down a hook size.
Sides don’t line up for joining: Recount Round 5. Each side needs exactly 13 sc.
Panel grows too long when hung: Cotton stretches under its own weight. Block firmly and keep your joining sl sts snug.
Border waves at points: You may have missed a (sc, ch 2, sc) corner. Check every convex point.
Border flares at valleys: Make sure every valley has its sc2tog in Round 1 and sc3tog in Round 2.
Tabs pull the top edge down: Sew them further down the border, or sew through both border rounds.
Care
Hand wash in cool water with a mild detergent and dry flat. To refresh the shape, lightly mist the panels and re-pin them to size.
Final Notes
Everything here follows one measurement chain. The 13 sc per side give a 4 in (10.2 cm) hexagon edge. Thirty-three hexagons in a 3-2 honeycomb make a 20.8 in x 80 in (52.8 cm x 203.2 cm) panel. Two border rounds add 0.5 in (1.3 cm) on each side for 21.8 in x 81 in (55.4 cm x 205.7 cm), and the tabs bring the drop to about 84 in (213.4 cm). If your test hexagon is right, every later checkpoint will be too.
Happy crocheting!