

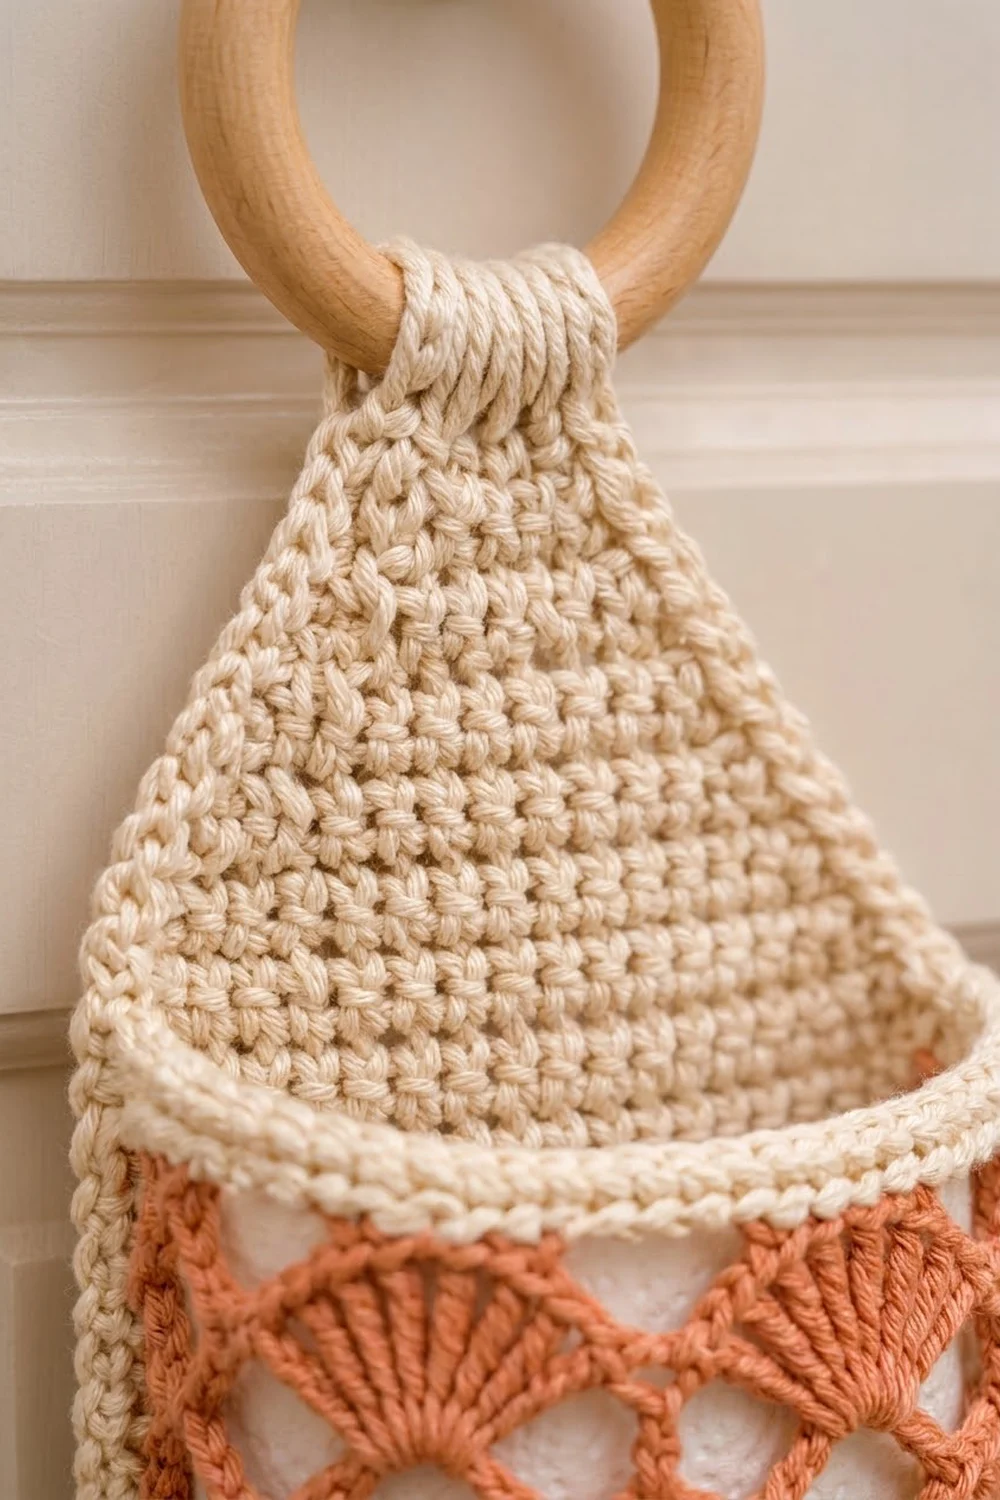
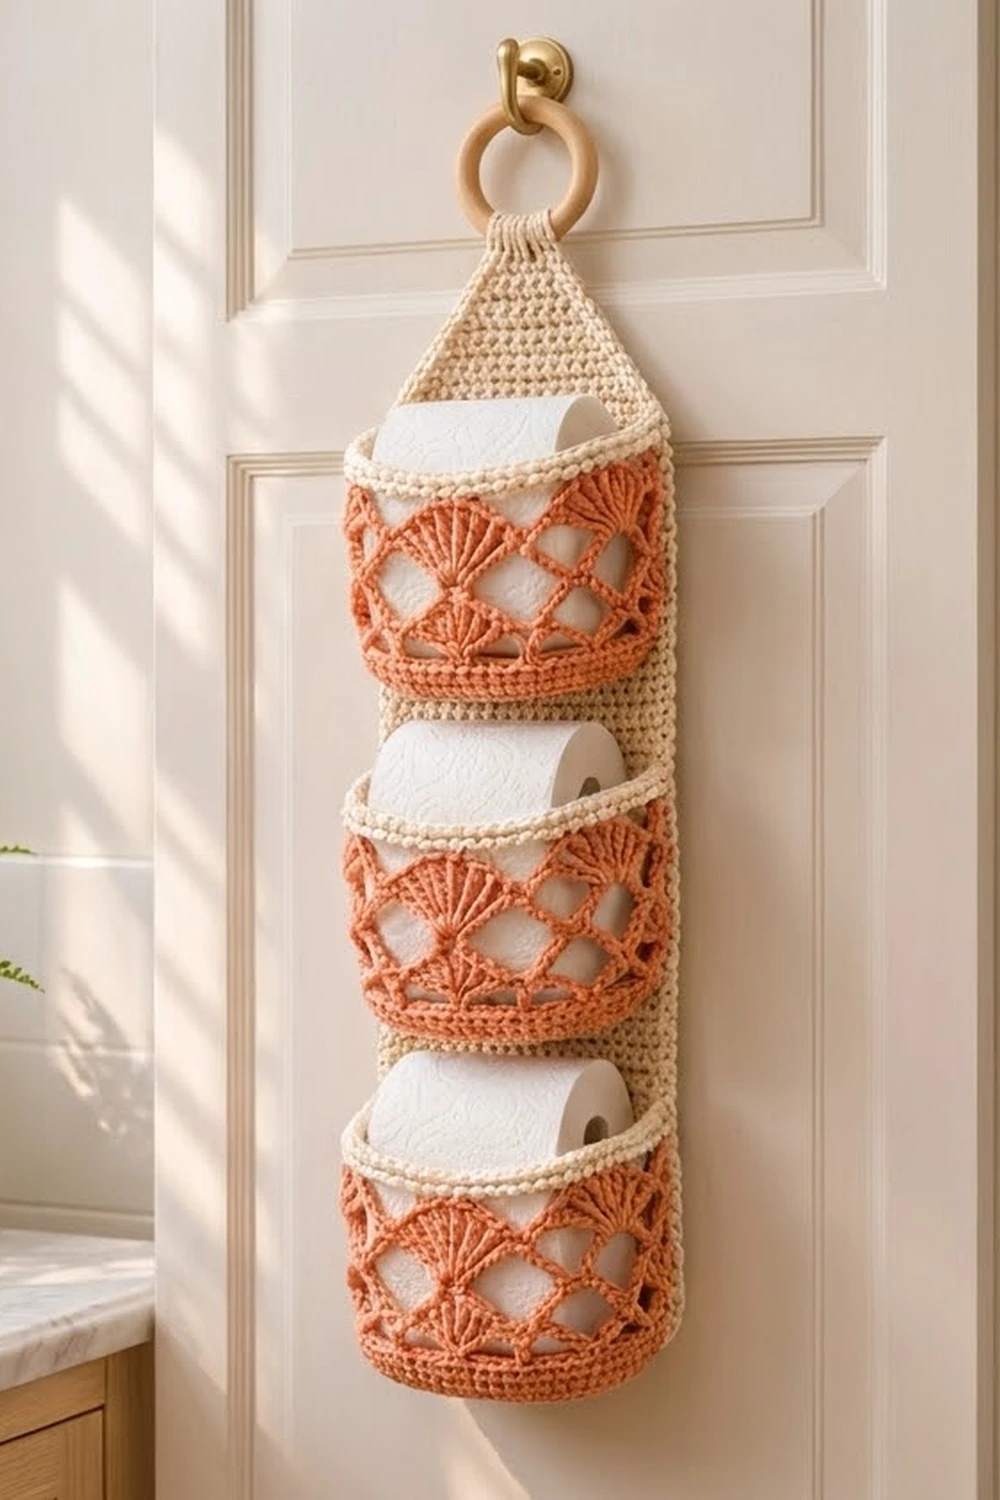
This hanging holder stores three spare toilet rolls on the back of a door. A solid cream panel hangs from a wooden ring, and three coral pockets are sewn down its front, one above the other.
Each pocket has a firm oval base and walls of fan-shaped shells joined by chain loops, so you get rows of open diamonds between the fans. A cream rim with a twisted reverse single crochet edge finishes each pocket and ties it to the panel. The coral and cream together look warm and a little retro, and they suit a light bathroom.
The pattern uses US crochet terms. The finished panel measures 6 in x 22.25 in (15.2 cm x 56.5 cm). The whole holder hangs about 25 in (63.5 cm) from the bottom edge to the top of the ring. Each pocket stands about 4 in (10.2 cm) tall.
You make it in four steps. First, work the panel in rows from the bottom up, narrowing it at the top. Next, add a single crochet border and a short strap for the ring. Then work three pockets in the round, from an oval base up through the shell walls. Finally, sew the pockets to the panel at set row positions.
Finished Size and Construction
- Finished size: 6 in x 22.25 in (15.2 cm x 56.5 cm) for the panel; about 25 in (63.5 cm) overall including the ring
- Skill level: Intermediate
- Terminology: US
- Yarn weight: Worsted (#4) cotton
- Hook: 5 mm (H-8)
- Number of pieces: 4 (1 panel, 3 pockets)
- Layout: 3 pockets stacked vertically on 1 panel
- Pocket size: about 4 in (10.2 cm) tall, with a 60-stitch rim measuring about 15 in (38.1 cm) around
- Panel size before border: 5.5 in x 22 in (14.0 cm x 55.9 cm)
- Border depth: 1 round, about 0.25 in (0.6 cm)
Materials
Use a smooth, mercerized or matte worsted cotton. Cotton holds its shape when it carries weight and copes well with bathroom humidity. Avoid fuzzy yarns, because they blur the shell and diamond texture.
- Cream: about 120 g / 186 m for the panel, border, strap and pocket rims
- Coral: about 100 g / 155 m for the three pocket bodies
- 5 mm (H-8) crochet hook
- One wooden ring, 2 in (5.1 cm) across
- Tapestry needle
- 4 locking stitch markers
- Scissors and a measuring tape
- Rust-proof pins and a blocking mat
The quantities include a margin of about 15% for your gauge swatch and sewing tails.
Abbreviations (US Terms)
- ch: chain
- sl st: slip stitch
- sc: single crochet
- sc2tog: single crochet 2 together
- dc: double crochet
- BLO: back loop only
- sp: space
- st(s): stitch(es)
- rev sc: reverse single crochet (crab stitch)
Shell: 7 dc worked into the same stitch or space.
Reverse single crochet: Work from left to right (right to left if you crochet left-handed). Insert the hook into the next stitch to the right, yarn over, pull up a loop, then yarn over and draw through both loops. This makes a twisted, rope-like edge.
Gauge and Checkpoints
Gauge: 16 sc and 18 rows = 4 in (10.2 cm) in sc worked in rows.
That works out to 4 sts and 4.5 rows per inch. Every measurement in this pattern depends on it.
Make one pocket first. It is the fastest way to check your gauge on the real stitch pattern. Use these checkpoints:
- After Rnd 8 (pocket base): an oval about 3.5 in x 5 in (8.9 cm x 12.7 cm), lying flat
- After Rnd 10: the wall is about 0.5 in (1.3 cm) tall
- After Rnd 16: the wall is about 3.5 in (8.9 cm) tall
- Finished pocket: about 4 in (10.2 cm) tall
- Panel after Row 1: 5.5 in (14.0 cm) wide
- Panel after Row 81: 18 in (45.7 cm) long
If your piece is too big, go down a hook size, to 4.5 mm. If it is too small, go up to 5.5 mm. If your base ruffles, your increases are bunching up, so recheck the stitch counts before you change hooks.
Backing Panel (make 1)
Use cream. At the start of each row, ch 1 and turn. The ch 1 does not count as a stitch.
Row 1: Ch 23. Sc in the 2nd ch from the hook and in each ch across. (22 sts)
Rows 2–81: Sc in each st across. (22 sts)
The panel should now measure 5.5 in x 18 in (14.0 cm x 45.7 cm).
Taper
Row 82: Sc2tog, sc in each st to the last 2 sts, sc2tog. (20 sts)
Row 83: Sc in each st across. (20 sts)
Rows 84–98: Repeat Rows 82–83 seven more times, then work Row 82 once more. Each decrease row removes 2 sts:
- Row 84: 18 sts
- Row 86: 16 sts
- Row 88: 14 sts
- Row 90: 12 sts
- Row 92: 10 sts
- Row 94: 8 sts
- Row 96: 6 sts
- Row 98: 4 sts
Row 99: Sc in each st across. (4 sts)
That makes 9 decrease rows in total (22 − 18 = 4). The taper is 18 rows, or 4 in (10.2 cm) tall, and the panel is 22 in (55.9 cm) long. Do not fasten off.
Panel Border and Hanging Strap
Border gauge: Work 1 sc into the end of each row. That matches the row gauge of 4.5 rows per inch, so the side edges stay flat.
Border Rnd 1: Ch 1, but do not turn. Work down the side as follows.
- Left side: 1 sc in the end of each row, from Row 99 down to Row 1. (99 sc)
- Bottom: Working into the free loops of the foundation chain, 2 sc in the first loop, sc in the next 20 loops, then 2 sc in the last loop. (24 sc)
- Right side: 1 sc in the end of each row, from Row 1 up to Row 99. (99 sc)
- Top: Sc in each of the 4 sts of Row 99. (4 sc)
- Sl st to the first sc.
Round total: 99 + 24 + 99 + 4 = 226 sts.
Why the math works:
- Bottom: The bottom edge is 22 stitches. Adding 1 extra sc at each corner (the 2-sc corners) makes 24, which equals 22 panel columns plus 1 border column on each side. The panel is now 24 columns, or 6 in (15.2 cm), wide.
- Sides: Each side has exactly one stitch per row, so 99 rows give 99 sc.
- Top: The top count of 4 matches Row 99 exactly.
Strap
Strap Row 1: Ch 1, turn. Sc in each of the 4 top border sts. (4 sts)
Strap Rows 2–14: Ch 1, turn. Sc across. (4 sts)
The strap is now about 3.1 in (7.9 cm) long. Leave a 12 in (30.5 cm) tail and fasten off.
Pass the strap through the wooden ring from front to back. Fold it down and sew the last row flat to the back of the panel, just below the tip of the taper.
Pocket (make 3)
Use coral and work in joined rounds. Ch 1 at the start of each round does not count as a stitch. Join each round with a sl st to the first st.
Oval Base
Rnd 1: Ch 9.
- Sc in the 2nd ch from the hook and in the next 6 ch.
- Work 3 sc in the last ch.
- Rotate the piece and work along the other side of the chain: sc in the next 6 ch, then 2 sc in the last ch (the same ch as the first sc).
- Join.
(1 + 6 + 3 + 6 + 2 = 18 sts)
Rnd 2:
- 2 sc in the first st, sc in the next 6.
- 2 sc in each of the next 3, sc in the next 6.
- 2 sc in each of the last 2.
- Join.
(24 sts)
Rnds 3–8: Rounds 3 through 8 all follow the same layout. Let N be the round number minus 2, so N = 1 in Rnd 3 and N = 6 in Rnd 8.
- Sc in the next N sts, 2 sc in the next st. Work this once.
- Sc in the next 6.
- Repeat from * to * 3 times.
- Sc in the next 6.
- Repeat from * to * 2 times.
- Join.
Each round adds 6 sts, as follows:
- Rnd 3: 30 sts
- Rnd 4: 36 sts
- Rnd 5: 42 sts
- Rnd 6: 48 sts
- Rnd 7: 54 sts
- Rnd 8: 60 sts
The base should be an oval about 3.5 in x 5 in (8.9 cm x 12.7 cm). Place a marker in the 3rd st of the second straight section of 6 sts. This marks the center back of the pocket.
Walls
Rnd 9: Ch 1, then sc BLO in each st. (60 sts)
This round turns the edge upward and leaves a ridge of front loops for sewing later.
Rnd 10: Ch 1, then sc in each st. (60 sts)
Rnd 11 (shell round):
- Ch 1, sc in the first st.
- Skip 2 sts, shell in the next st, skip 2 sts, sc in the next st.
- Repeat from * to * around. On the last repeat, end after the final skip 2 and join to the first sc.
(10 shells; 10 sc + 70 dc = 80 sts)
Rnd 12 (net round):
- Sl st across the next 4 sts so you arrive in the 4th dc of the first shell. Ch 1 and sc in that same dc.
- Ch 5, sc in the 4th dc of the next shell. Work this 9 times.
- Ch 5 and join to the first sc.
(10 sc and 10 ch-5 loops)
Each loop now arches over one sc from Rnd 11.
Rnd 13 (offset shells):
- Ch 1, sc in the first sc.
- Work a shell in the next ch-5 sp, then sc in the next sc.
- Repeat from * to * around, ending with a shell in the last sp. Join.
(10 shells; 80 sts)
These shells sit between the shells of Rnd 11, so you get the diamond lattice.
Rnd 14: Repeat Rnd 12. (10 loops)
Rnd 15: Repeat Rnd 13. (80 sts)
Rnd 16: Repeat Rnd 12. (10 loops)
The wall is now about 3.5 in (8.9 cm) tall.
Rnd 17 (conversion round):
- Ch 1, sc in the first sc, 5 sc in the next ch-5 sp.
- Sc in the next sc, 5 sc in the next sp. Repeat around.
- Join.
The count is 10 sc worked one per existing sc, plus 50 sc worked into the 10 loops, for a total of 60 sts. Fasten off the coral.
Cream Rim
Rnd 18: Join cream in any st. Ch 1, then sc in each st. Join. (60 sts)
Rnd 19: Ch 1, then rev sc in each st. Join. (60 sts)
Leave a 24 in (61.0 cm) tail for sewing and fasten off.
The pocket is about 4 in (10.2 cm) tall. Its rim measures about 15 in (38.1 cm) around.
Make All Pieces
- Cream: 1 panel, including the border and strap, plus the rims (Rnds 18–19) on all 3 pockets
- Coral: 3 pocket bodies (Rnds 1–17)
Layout (panel rows counted from the bottom edge):
        ( O )      wooden ring
         ||        strap (14 rows)
        /  \       taper, rows 82–99
       |    |      top margin, rows 76–81
       | P3 |      pocket 3, base row 57, rim row 75
       |    |      gap, rows 49–56
       | P2 |      pocket 2, base row 30, rim row 48
       |    |      gap, rows 22–29
       | P1 |      pocket 1, base row 3, rim row 21
       |____|      rows 1–2
Joining
Use whipstitch and the long cream tail on each pocket. Mark rows 3, 21, 30, 48, 57 and 75 on the panel with locking markers or scrap yarn.
Rim to panel
The rim has 60 sts, and the back half of the pocket holds 30 of them.
- Find the marked center back. Count 12 sts to each side of it to get the center 24 rim sts.
- Line these 24 sts up with the 24 stitch columns of the panel at the rim row. Those 24 columns are the 22 panel stitches plus 1 border sc on each side.
- Sew one rim st to one column, all the way across.
The 3 unsewn back stitches on each side let the pocket bow forward around the roll.
Base to panel
- Find the center 24 front loops left on Rnd 8 by Rnd 9, at the back of the pocket.
- Sew them to the matching base row of the panel, again one loop to one column.
Tension: Pull each stitch just snug. If you pull too tight, the panel puckers into a wave. If you leave the stitches loose, a full roll tips the pocket forward.
Size checkpoint: After all three pockets are sewn on, lay the holder flat. The panel should still measure 6 in x 22.25 in (15.2 cm x 56.5 cm). The gaps between pockets should each be about 1.8 in (4.6 cm), and there should be about 1.3 in (3.3 cm) of plain panel above the top pocket.
Final Blocking
- Before sewing, wet-block the panel to 6 in x 22.25 in (15.2 cm x 56.5 cm) and pin it straight along both sides.
- Spritz each pocket and stuff it with a toilet roll wrapped in a plastic bag. Pull the shells upright so the diamonds open evenly.
- Leave everything to dry completely, for 24 hours.
- Sew the pockets on, then steam the seams lightly from 1 in (2.5 cm) away. Do not touch the iron to the yarn.
- Hang the holder empty for a day so the strap and seams settle.
Final Quality-Control Checklist
- The panel has 22 sts in Rows 1–81 and ends with 4 sts at Row 99.
- The border totals 226 sts: 99 on each side, 24 across the bottom and 4 across the top.
- Each pocket base has 60 sts and lies flat.
- Each shell round has 10 shells of 7 dc each.
- Each conversion round and each rim round has 60 sts.
- The rev sc rims are even, with no skipped twists.
- The rims sit at rows 21, 48 and 75, and the bases at rows 3, 30 and 57.
- The strap is sewn securely and the ring hangs straight.
- All ends are woven in at least 2 in (5.1 cm).
Troubleshooting
- The base cups or ruffles: Recount the base round. Each round must add exactly 6 sts, at the curved ends only.
- The shells lean or overlap: Check that each ch-5 loop is anchored in the 4th (center) dc of a shell, not the 3rd or 5th.
- The diamonds look closed: Your dc are too tight. Loosen your tension or go up a hook size for Rnds 11–16 only.
- The panel edges wave: The border is over-stitched. Use exactly 1 sc per row end.
- The pocket droops when full: Add a few tacking stitches where each pocket side meets the panel edge, 2 in (5.1 cm) below the rim.
- The panel twists when hanging: The strap is off-center. Re-sew it so it lines up with the 4 center columns.
Care
Hand wash the holder in cool water with mild soap. Press out the water gently, reshape it, and dry it flat. Avoid the dryer, because heat can shrink the cotton and distort the shells.
Final Notes
The whole design rests on one chain of measurements:
- The gauge of 16 sc and 18 rows per 4 in (10.2 cm) gives a panel 22 sts wide, or 5.5 in (14.0 cm).
- The single crochet border brings that to 24 columns, or 6 in (15.2 cm).
- Ninety-nine rows give a panel 22 in (55.9 cm) long, which becomes 22.25 in (56.5 cm) with the border.
- Each pocket’s 60-stitch base flows through 10 shells, then converts back to 60 rim stitches.
- The center 24 of those rim stitches sew directly onto the 24 panel columns.
If those checkpoints match, the holder will hang straight and hold three rolls.
Happy crocheting!