
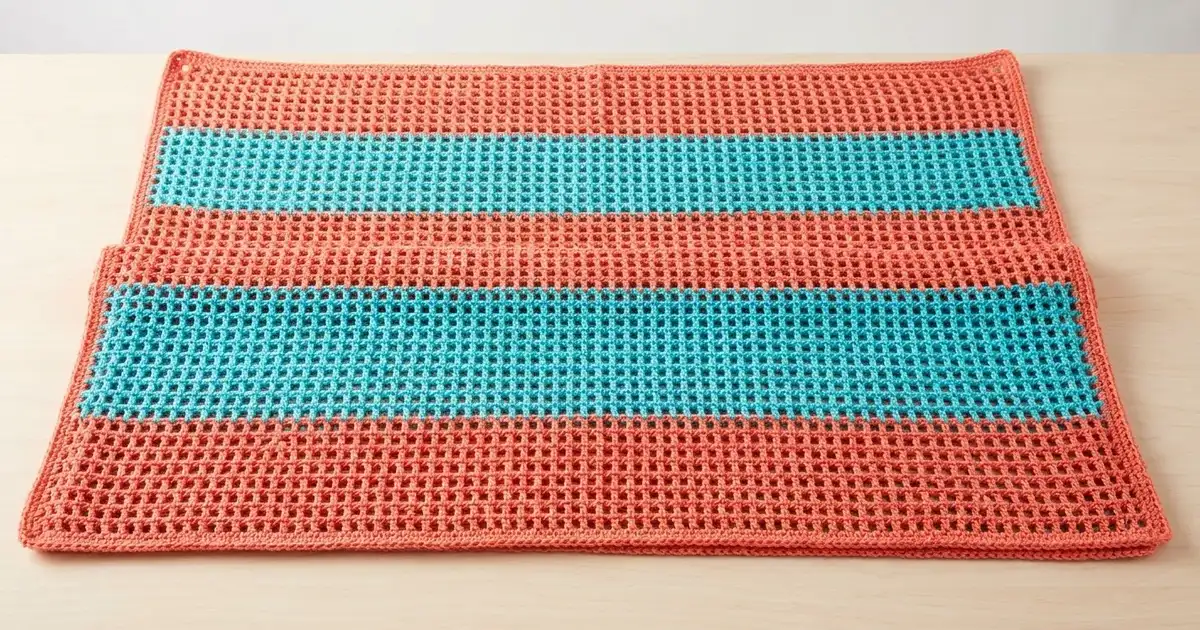
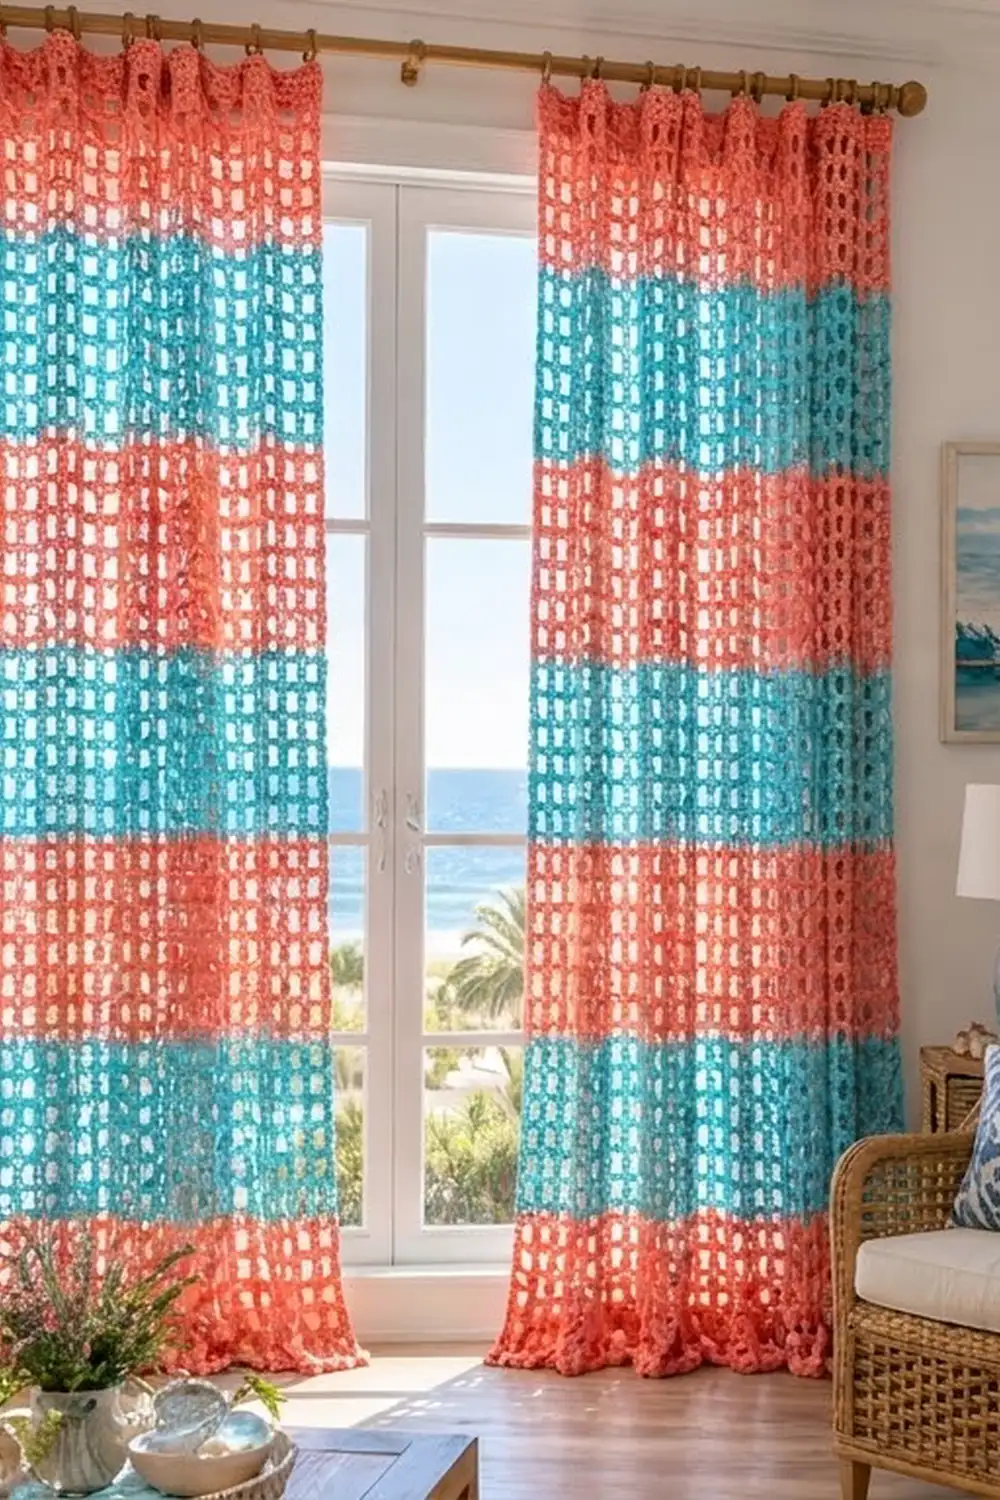
The Coral Tide Curtain Panel is a light, open filet mesh curtain worked in wide horizontal stripes of warm coral and bright turquoise. The grid of small square openings lets daylight and a sea breeze through while still softening the view. That makes it a natural fit for beach houses, sunrooms and any bright, relaxed room.
The panel uses only two colors. Coral starts and finishes the panel and is also used for the border, and turquoise alternates with it in even bands. There are nine stripes in total, five coral and four turquoise, each 9 in (22.9 cm) deep. A narrow, solid single crochet border in coral frames the mesh and gives the edges a firm, straight finish.
This pattern uses US crochet terms. The finished panel measures 40 in wide x 83 in long (101.6 cm x 210.8 cm) after blocking, including the border. To dress a window like the one in the photos, make two identical panels and hang them side by side. Each panel is a separate piece, and the panels are not joined.
You work the panel flat in rows of classic filet mesh (double crochet and chain-1 spaces), changing color every 18 rows. Then you add a four-round single crochet border all the way around and block the panel. Hang it from curtain clip rings on a standard rod.
Finished Size and Construction
- Finished size: 40 in x 83 in (101.6 cm x 210.8 cm), one panel
- Skill level: Easy
- Terminology: US crochet terms
- Yarn weight: Worsted (weight 4), cotton or cotton blend
- Hook: 5.0 mm (H-8)
- Number of pieces: 1 per panel (make 2 for a pair)
- Layout: One continuous rectangle worked flat in rows, with 9 horizontal stripes
- Piece size before border: 38 in x 81 in (96.5 cm x 205.7 cm), which is 76 meshes x 162 rows
- Border depth: 1 in (2.5 cm) on every side, 4 rounds of sc
Materials
Yarn: Use a smooth worsted-weight cotton or cotton blend at about 190 m per 100 g. Cotton keeps the mesh crisp, holds its shape on a sunny window and washes well. Avoid fuzzy or very stretchy yarns. They blur the square openings and let a long panel grow as it hangs.
Amounts are for one panel. Double them for a pair.
- Color A, Coral: 1,650 g (about 3,135 m). This covers 5 stripes plus the full border.
- Color B, Turquoise: 1,050 g (about 2,000 m). This covers 4 stripes.
These quantities include a margin of about 10% for the gauge swatch, weaving in ends and small gauge differences.
Tools:
- 5.0 mm (H-8) crochet hook
- Tapestry needle
- Stitch markers (4 or more)
- Scissors
- Measuring tape (at least 60 in / 152.4 cm long)
- Rust-proof pins and a large blocking surface, or a clean floor covered with towels
- 10 curtain clip rings for hanging
Abbreviations (US Terms)
- ch: chain
- sc: single crochet
- dc: double crochet
- sk: skip
- sp: space
- st(s): stitch(es)
- rep: repeat
- RS: right side
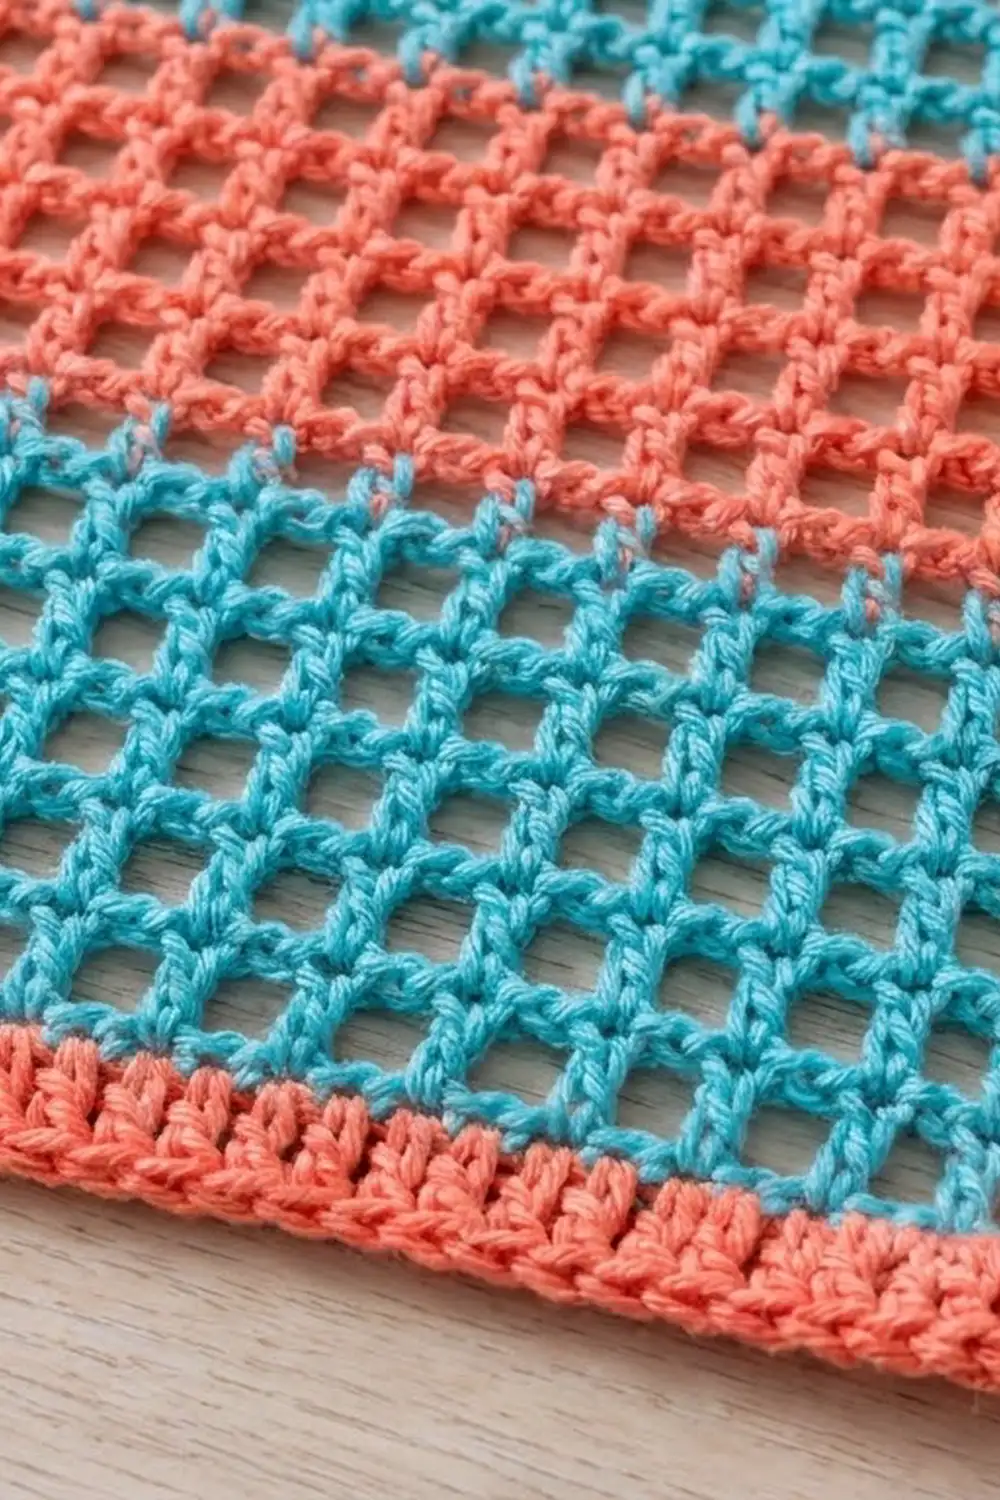
Filet mesh (special stitch): One mesh is 1 dc plus 1 ch-1 sp. Each row is made of dc posts with a ch-1 sp between them. Every dc is stacked on the dc below, so the rows form a grid of square openings. A row of M meshes has M + 1 dc and M ch-1 sps, for 2M + 1 sts in total.
Color change: Work the last dc of the row in the old color until 2 loops remain on the hook. Yarn over with the new color and pull it through.
Gauge and Checkpoints
Gauge: 8 meshes (17 sts) x 8 rows = 4 in x 4 in (10.2 cm x 10.2 cm) in filet mesh. One mesh is 0.5 in (1.3 cm) wide and one row is 0.5 in (1.3 cm) tall.
Test swatch: Ch 20. Work Row 1 and Row 2 as written below, for a swatch 8 meshes wide (17 sts). Repeat Row 2 until you have 8 rows. Wet the swatch, pat it flat, let it dry and measure.
- If your swatch is too big (more than 4 in / 10.2 cm), use a hook 0.5 mm smaller.
- If your swatch is too small, use a hook 0.5 mm larger.
- Check both width and height. If only the height is off, change how far you pull up the first loop of each dc instead of changing hooks.
Checkpoints during the panel:
- After Row 1, the panel should measure 38 in (96.5 cm) wide.
- After Row 18 (the first stripe), it should measure 9 in (22.9 cm) long.
- After Row 90 (5 stripes), it should measure 45 in (114.3 cm) long.
- After Row 162, it should measure 38 in x 81 in (96.5 cm x 205.7 cm).
- After the border, it should measure 40 in x 83 in (101.6 cm x 210.8 cm).
Measure the panel flat and relaxed, never while it hangs off your lap. A long cotton mesh stretches lengthwise under its own weight.
Panel Body
The body is 76 meshes wide and 162 rows long. The stripe sequence from the bottom up is A, B, A, B, A, B, A, B, A, with 18 rows per stripe.
Foundation: With Color A, ch 156.
Row 1 (RS): Dc in the 6th ch from the hook (the 5 skipped ch count as 1 dc, 1 ch-1 sp and 1 skipped ch). Ch 1, sk next ch, dc in next ch. Rep from * across. Turn.
Count: 77 dc and 76 ch-1 sps = 153 sts (76 meshes).*
The math: after the first dc, 150 ch remain. Each repeat uses 2 ch, so you get 75 repeats. Adding the first mesh gives 76 meshes in total.
Row 2: Ch 4 (counts as dc and ch 1). Sk the first ch-1 sp and dc in the next dc. Ch 1, sk the ch-1 sp, dc in the next dc. Rep from * across, working the last dc in the 4th ch of the beginning skipped ch. Turn.
Count: 153 sts (76 meshes).*
Row 3: Ch 4 (counts as dc and ch 1). Sk the first ch-1 sp and dc in the next dc. Ch 1, sk the ch-1 sp, dc in the next dc. Rep from * across, working the last dc in the 3rd ch of the turning ch-4. Turn.
Count: 153 sts (76 meshes).*
Rows 4–18: Repeat Row 3. On the last dc of Row 18, change to Color B.
Count: 153 sts every row. Stripe 1 (A) is complete and should measure 9 in (22.9 cm).
Rows 19–36: With B, repeat Row 3 for 18 rows. Change to A on the last dc of Row 36. (Stripe 2)
Rows 37–54: With A, repeat Row 3. Change to B. (Stripe 3)
Rows 55–72: With B, repeat Row 3. Change to A. (Stripe 4)
Rows 73–90: With A, repeat Row 3. Change to B. (Stripe 5) Checkpoint: 45 in (114.3 cm).
Rows 91–108: With B, repeat Row 3. Change to A. (Stripe 6)
Rows 109–126: With A, repeat Row 3. Change to B. (Stripe 7)
Rows 127–144: With B, repeat Row 3. Change to A. (Stripe 8)
Rows 145–162: With A, repeat Row 3. (Stripe 9) Do not fasten off. Continue straight into the border.
Count: 153 sts in every row, 162 rows in total. The finished body measures 38 in x 81 in (96.5 cm x 205.7 cm).
Each stripe has an even number of rows, so every color change falls at the same side edge. Cut the old color, leaving a 6 in (15.2 cm) tail. Do not carry yarn up the side, because a 9 in (22.9 cm) float would pucker the edge. Weave tails vertically into the dc posts of the same color so they stay hidden in the mesh.
Border
Work the border in rounds with Color A, RS facing, without turning. A ch-2 sp at each corner keeps the corners square and flat.
Border gauge: 4 sc = 1 in (2.5 cm) along every edge, and 4 rounds of sc = 1 in (2.5 cm) deep.
Round 1: Ch 1 and turn so the RS faces you. You are now working across the top edge.
- Top edge: Sc in each of the 153 sts of Row 162 (1 sc in each dc and 1 sc in each ch-1 sp, with the last sc in the turning ch). 153 sc.
- Corner: Ch 2.
- Side edge: Work 2 sc in the side of each row-end, around the dc post or turning chain, down all 162 rows. 324 sc.
- Corner: Ch 2.
- Bottom edge: Working into the foundation chain, sc in the base of each dc and in each skipped ch under the ch-1 sps. 153 sc.
- Corner: Ch 2.
- Second side edge: 2 sc in each of the 162 row-ends. 324 sc.
- Corner: Ch 2. Sl st to the first sc.
Count: 153 / 324 / 153 / 324 = 954 sc plus 4 corner ch-2 sps.
Round 2: Ch 1. Sc in the same st and in each sc to the corner. (Sc, ch 2, sc) in the corner ch-2 sp, then sc in each sc to the next corner. Rep around and sl st to the first sc. Each side gains 2 sc.
Count: 155 / 326 / 155 / 326 = 962 sc.
Round 3: Repeat Round 2.
Count: 157 / 328 / 157 / 328 = 970 sc.
Round 4: Repeat Round 2.
Count: 159 / 330 / 159 / 330 = 978 sc. Fasten off and weave in the ends.
Why the math works:
- Top and bottom: The body has 153 sts across 38 in (96.5 cm). That is very close to 4 sts per inch, so 1 sc per st sits flat.
- Sides: 162 rows x 0.5 in = 81 in (205.7 cm). Working 2 sc per row-end gives 324 sc, which is exactly 4 sc per inch.
- Edges: Both edges match the border gauge, so nothing ruffles or draws in.
- Growth per round: Each round adds 1 sc at each end of every side, which is 2 sc per side. That adds 0.5 in (1.3 cm) of length to each side.
- Total growth: Over 4 rounds, that adds 2 in (5.1 cm) to each dimension. The result is 38 + 2 = 40 in wide and 81 + 2 = 83 in long (101.6 cm x 210.8 cm).
- Corners: In stitches, 159 sc ÷ 4 = 39.75 in (101.0 cm) and 330 sc ÷ 4 = 82.5 in (209.6 cm). The corner ch-2 sps make up the remaining 0.25 in (0.6 cm) and 0.5 in (1.3 cm).
Final Blocking
- Weave in any remaining ends before blocking.
- Soak the panel in cool water for 15 minutes, then press out the water gently. Do not wring it. Roll it in towels to remove more water.
- Lay it flat on a large clean surface covered with towels. Work in sections if needed.
- Pin the top edge straight to 40 in (101.6 cm).
- Pin each side down to 83 in (210.8 cm). Every 12 in (30.5 cm), check that the width is still 40 in (101.6 cm).
- Pin the bottom edge straight. Then nudge the mesh openings square with your fingertips so each dc post stands upright.
- Let it dry completely before unpinning, usually 24–48 hours.
- Clip 10 rings evenly along the top border, about every 4.4 in (11.2 cm), with one ring at each top corner.
Final Quality-Control Checklist
- Every row has 76 meshes (153 sts). Count the openings across one row in each stripe.
- Every stripe is 18 rows and 9 in (22.9 cm) deep.
- There are 9 stripes in the order A, B, A, B, A, B, A, B, A, with coral at both ends.
- The dc posts line up vertically from bottom to top, with no slanted columns.
- The border counts are 159 / 330 / 159 / 330 sc, with a ch-2 sp at each corner.
- The panel measures 40 in x 83 in (101.6 cm x 210.8 cm) after blocking.
- No tails show through the openings.
- If you made two panels, they match within 0.5 in (1.3 cm) in both length and width.
Troubleshooting
The panel is getting narrower. You are probably missing the last dc in the turning chain. Count the meshes every few rows, and put a marker in the turning chain to help.
The panel is getting wider. You are probably working a dc into a ch-1 sp instead of skipping it. Every dc must sit on a dc.
The openings are tall rectangles, not squares. Your dc are too tall. Pull up the first loop less, or try a slimmer hook grip. Blocking corrects small differences.
The color changes leave a stray loop of the old color. Finish the last dc with the new color, as described under Color change, rather than changing at the turning chain.
The border ruffles along the sides. You have too many sc. Check that you worked exactly 2 sc per row-end and 324 sc per side in Round 1.
The border pulls the side edges in. Your sc are too tight. Go up 0.5 mm for the border only.
The panel grew longer while hanging. This is normal for cotton mesh. Take it down, re-wet it and block it flat again to the measurements above.
Care
Hand-wash, or machine-wash cold on a gentle cycle inside a large laundry bag. Lay flat or hang to dry, reshape while damp, and avoid hot tumble drying, which can shrink the cotton.
Final Notes
The whole panel follows one chain of measurements:
- A gauge of 8 meshes x 8 rows = 4 in (10.2 cm) gives 76 meshes = 38 in (96.5 cm) across.
- 162 rows, as 9 stripes of 18 rows each, give 81 in (205.7 cm) of length.
- Four rounds of sc at 4 sc per inch add 1 in (2.5 cm) on every side.
- The finished panel is 40 in x 83 in (101.6 cm x 210.8 cm).
Check your gauge and your counts at each step, and the panel will hang straight and square. Make a second matching panel, clip both onto your rod, and enjoy the light coming through.
Happy crocheting!