
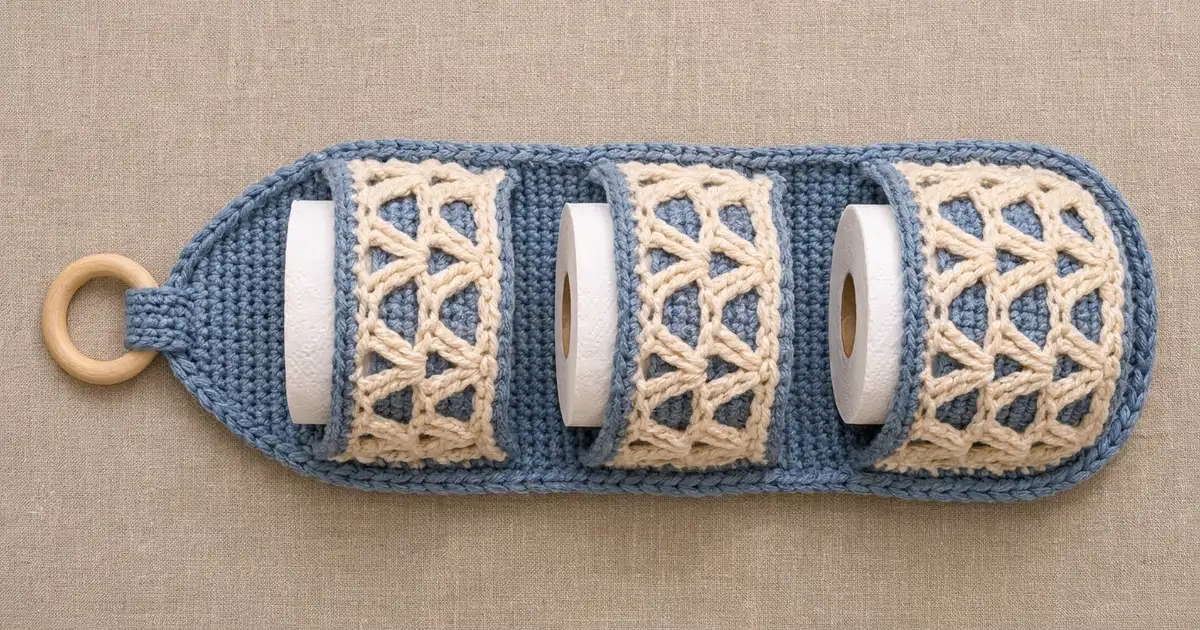
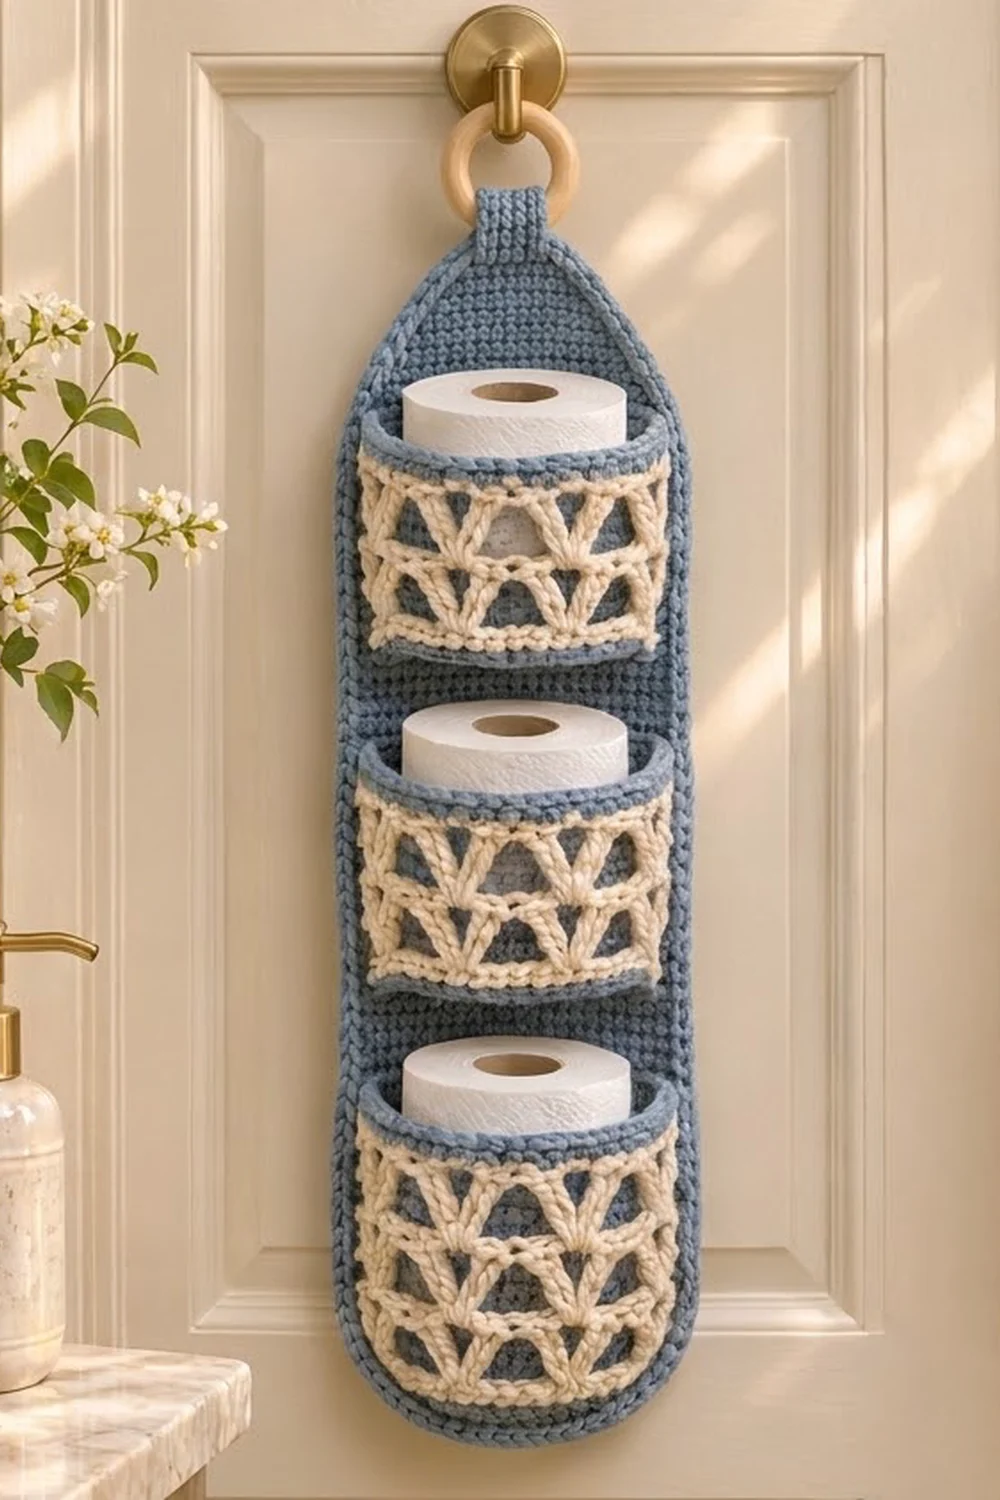
This hanging holder stores three spare rolls on the back of a bathroom door or on a wall hook, so they stay off the floor and out of the cabinet. It has a long denim-blue back panel and three cream lattice pockets stacked down the front, and the whole holder hangs from a wooden ring.
The look is soft and classic. Solid single crochet in blue makes the back firm enough to carry the weight. The pocket walls use offset V-stitches in cream, which make rows of small triangle windows so the white rolls show through. A blue trim around each pocket wall matches the edge of the back panel.
The pattern uses US crochet terms. The back panel finishes at 7.5 in × 23.9 in (19.1 cm × 60.7 cm), not counting the strap and ring. Each pocket stands 4 in (10.2 cm) tall and comes out about 4.4 in (11.2 cm) from the panel.
You’ll work everything flat in rows and then sew the pieces together. The back panel comes first, then a border around it. Each pocket has a rectangular blue base and a cream lattice wall with blue trim. The wall is sewn around three sides of the base, and then the finished pocket is sewn to the panel. A short strap holds the ring.
Finished Size and Construction
- Finished size: 7.5 in × 23.9 in (19.1 cm × 60.7 cm) panel. The strap and ring add about 3 in (7.6 cm) at the top.
- Skill level: Easy-Intermediate
- Terminology: US
- Yarn weight: Worsted (#4)
- Hook: 5.0 mm (H-8)
- Number of pieces: 8 (1 panel, 3 bases, 3 lattice walls, 1 strap)
- Layout: 3 pockets stacked in one column
- Pocket size: base 6.5 in × 4.4 in (16.5 cm × 11.2 cm); trimmed wall 16 in × 4 in (40.6 cm × 10.2 cm)
- Panel size before border: 6.5 in × 22.9 in (16.5 cm × 58.2 cm)
- Border depth: 2 rounds, 0.5 in (1.3 cm) on each side
Materials
Use a worsted-weight cotton or cotton blend. Cotton holds its shape when filled with rolls and copes well with bathroom humidity. The amounts below assume about 170 m (186 yd) per 100 g.
- Denim blue: 250 g, about 425 m (465 yd). This covers the panel, bases, strap, border and wall trims.
- Cream: 100 g, about 170 m (186 yd). This covers the three lattice walls.
Tools:
- 5.0 mm (H-8) crochet hook
- Wooden ring, 2.5 in (6.4 cm) outer diameter
- Tapestry needle
- 6 locking stitch markers
- Scissors
- Blocking mat and pins
- Measuring tape
Both yarn amounts include a margin of about 15%, so a small change in gauge won’t leave you short.
Abbreviations (US Terms)
- ch: chain
- sc: single crochet
- dc: double crochet
- sc2tog: single crochet 2 together
- sl st: slip stitch
- sk: skip
- sp: space
- st(s): stitch(es)
- tch: turning chain
Special stitch – V-stitch (V-st): (dc, ch 2, dc) in the stitch or space given.
Ch 1 at the start of an sc row never counts as a stitch. Ch 3 at the start of a lattice row counts as 1 dc.
Gauge and Checkpoints
Solid sc gauge: 16 sc × 18 rows = 4 in (10.2 cm). That works out to 4 sts per 1 in (2.5 cm) and 4.5 rows per 1 in (2.5 cm).
Lattice gauge: a 62-sc foundation measures 15.5 in (39.4 cm), and the 6 lattice rows measure 3 in (7.6 cm).
Make one base first and use it as your gauge swatch. It is a plain 26 × 20 sc rectangle, so it checks your gauge and gives you a finished piece at the same time.
Checkpoints:
- Base: 6.5 in × 4.4 in (16.5 cm × 11.2 cm).
- Panel after Row 90: 6.5 in × 20 in (16.5 cm × 50.8 cm).
- Panel after the arch: 22.9 in (58.2 cm) long.
- Lattice wall before trim: 15.5 in × 3.5 in (39.4 cm × 8.9 cm).
- Lattice wall after trim: 16 in × 4 in (40.6 cm × 10.2 cm).
If your base comes out too big, go down half a hook size. If it comes out too small, go up half a size. Getting the width right matters most, because the base, the panel and the bottom edge of each wall all have to line up stitch for stitch.

Back Panel
Use blue yarn.
Foundation: Ch 27.
Row 1: Sc in 2nd ch from hook and in each ch across, turn. (26 sc)
Rows 2–90: Ch 1, sc in each st across, turn. (26 sc)
The panel should now measure 20 in (50.8 cm). Mark Rows 4, 31 and 58 on the right side. These rows are where the pocket bases will be attached.
Arch shaping
- Row 91: Ch 1, sc2tog, sc in next 20 sts, sc2tog, turn. (24 sts)
- Row 92: Ch 1, sc in each st across, turn. (24 sts)
- Row 93: Ch 1, sc2tog, sc in next 18 sts, sc2tog, turn. (22 sts)
- Row 94: Ch 1, sc in each st across, turn. (22 sts)
- Row 95: Ch 1, sc2tog, sc in next 16 sts, sc2tog, turn. (20 sts)
- Row 96: Ch 1, sc in each st across, turn. (20 sts)
Rows 97–103: On each row, ch 1, sc2tog, sc across to the last 2 sts, sc2tog, turn. The counts are 18, 16, 14, 12, 10, 8 and 6 sts.
Fasten off after Row 103. The 6 rows of slow decreases followed by 7 rows of fast ones give a rounded arch instead of a pointed one. The arch adds 2.9 in (7.4 cm), so the panel is now 22.9 in (58.2 cm) long.
Pocket Base (Make 3)
Use blue yarn.
Foundation: Ch 27.
Row 1: Sc in 2nd ch from hook and in each ch across, turn. (26 sc)
Rows 2–20: Ch 1, sc in each st across, turn. (26 sc)
Fasten off. The base measures 6.5 in × 4.4 in (16.5 cm × 11.2 cm). The foundation-chain edge becomes the back edge, which is sewn to the panel.
Lattice Wall (Make 3)
Use cream yarn.
Foundation: Ch 63.
Row 1: Sc in 2nd ch from hook and in each ch across, turn. (62 sc)
Row 2: Ch 3, sk next st, V-st in next st, sk 2, V-st in next st 19 times, sk 1, dc in last st, turn. (20 V-sts + 2 dc)
Row 3: Ch 3, dc in first st, V-st in sp between next 2 V-sts 19 times, 2 dc in top of tch, turn. (19 V-sts + 2 edge pairs)
Row 4: Ch 3, V-st in sp between next 2 groups 20 times, dc in top of tch, turn. (20 V-sts + 2 dc)
Row 3 has 21 groups (an edge pair, 19 V-sts and another edge pair), so there are exactly 20 gaps between them. That’s why Row 4 brings back the full 20 V-sts.
Rows 5–7: Repeat Rows 3, 4 and 3. Row 7 has 19 V-sts + 2 edge pairs.
The offset V-sts in each row leave triangle-shaped holes between them.
Row 8 (conversion row): Ch 1, sc in each dc and 1 sc in each ch-2 sp across, but work 2 sc in the 10th ch-2 sp. The count is 42 sc in the dc + 19 sc in the ch-2 sps + 1 extra = 62 sc. Fasten off.
Row 8 brings the count back to the 62 sts you started with, so the top and bottom edges are the same length. The wall should measure 15.5 in × 3.5 in (39.4 cm × 8.9 cm).
Blue trim round: Join blue in the first st of Row 8. Work the sides in this order:
- Top: 3 sc in the first st, sc in the next 60 sts, 3 sc in the last st. (66 sts)
- End: 14 sc down the row ends. Work 1 sc per sc row and 2 sc per dc row: 1 + (6 × 2) + 1 = 14.
- Bottom: 3 sc in the first foundation loop, sc in the next 60 loops, 3 sc in the last loop. (66 sts)
- Other end: 14 sc up the row ends.
Join with a sl st. (160 sts total) Fasten off, leaving a 36 in (91.4 cm) tail for sewing. The trimmed wall measures 16 in × 4 in (40.6 cm × 10.2 cm).
Strap
Use blue yarn.
Foundation: Ch 7.
Row 1: Sc in 2nd ch from hook and across, turn. (6 sc)
Rows 2–20: Ch 1, sc in each st across, turn. (6 sc)
Fasten off, leaving a 12 in (30.5 cm) tail. The strap measures 1.5 in × 4.4 in (3.8 cm × 11.2 cm).
Make All Pieces
Blue:
- 1 back panel
- 3 bases
- 1 strap
- Trim on all 3 walls
Cream: 3 lattice walls.
Layout, front view, top to bottom:
      [ ring ]
      [strap ]
   (  arch top  )
   |            |
   | [Pocket 3] |  base on Row 58
   |            |
   | [Pocket 2] |  base on Row 31
   |            |
   | [Pocket 1] |  base on Row 4
   |____________|
The pocket bases sit 27 rows apart, which is 6 in (15.2 cm). A roll is 4.25 in (10.8 cm) tall, so that leaves 1.75 in (4.4 cm) of clearance above each roll.
Border (Back Panel)
Use blue yarn. Work around the panel with the right side facing you.
Border gauge: along the row ends, work 8 sc for every 9 rows. Because 18 rows measure 4 in and 16 sc measure 4 in, 8 sc over 9 rows matches 4 sc per inch exactly. That keeps the sides flat, with no ruffling or puckering.
Round 1: Join at the lower right corner of Row 1.
- Bottom edge: 3 sc in the corner st, sc in the next 24 sts, 3 sc in the last st. (30 sts, corners included)
- Left side, Rows 1–90: 80 sc (8 sc per 9 rows).
- Left arch, Rows 91–103: 13 sc, 1 per row end.
- Top of Row 103: 6 sc.
- Right arch: 13 sc.
- Right side: 80 sc.
Join with a sl st. The total is 30 + 80 + 13 + 6 + 13 + 80 = 222 sts.
Round 2: Ch 1, sc in each st around, and work 3 sc in the center st of each lower corner group. Join with a sl st. (222 + 4 = 226 sts) Fasten off.
Why the math works: the 26 body sts measure 6.5 in (16.5 cm). Each border round adds 0.25 in (0.6 cm) per side, so two rounds bring the width to 7.5 in (19.1 cm). That matches the 30 sts on the bottom edge in Round 1 at 4 sts per inch. Each side has 80 sc at 4 per inch, which equals the 20 in (50.8 cm) body length. The finished length is 22.9 in + 0.5 in + 0.5 in = 23.9 in (60.7 cm).
Joining
Sew everything with blue yarn and a whipstitch, going through both loops on each edge. Pull each stitch just snug enough that the edges meet. Don’t pull hard enough to gather them.
Step 1 – Wall to base. Place markers on the base to split its three outer edges into 20 row ends (left side), 26 sts (the last row) and 20 row ends (right side). That makes 66 sts, which matches the 66 sts on the bottom edge of the trimmed wall. Sew one wall stitch to each base stitch, starting at the back-left corner of the base. The wall’s 3-sc corner groups end up at the back corners. When you’re done, the wall wraps around the sides and front of the base to make an open box.
Step 2 – Base to panel. Line the back edge of Pocket 1’s base (its foundation edge, 26 loops) up with the 26 sts of marked Row 4 on the panel. Whipstitch 1 to 1.
Step 3 – Wall ends to panel. Sew each 14-st end of the wall up the first or last stitch column of the panel body, over 18 rows (4 in / 10.2 cm). Space it at about 4 wall sts for every 5 panel rows.
Step 4 – Remaining pockets. Repeat Steps 2 and 3 for Pocket 2 on Row 31 and Pocket 3 on Row 58.
Step 5 – Strap. Thread the strap through the ring and fold it in half. Center both ends on the back of the arch over the top 6 sts, overlapping 0.75 in (1.9 cm). Stitch through all layers twice.
Size check: the panel still lies at 7.5 in × 23.9 in (19.1 cm × 60.7 cm). Each pocket projects about 4.4 in (11.2 cm).
Final Blocking
- Lightly spritz the panel and the pockets with water.
- Lay the panel face up and pin it to 7.5 in × 23.9 in (19.1 cm × 60.7 cm).
- Put a rolled towel or a spare roll in each pocket to round out the lattice walls.
- Gently pull the triangle holes open with your fingers so they all match.
- Let it dry completely, at least 24 hours, before you hang it.
Final Quality-Control Checklist
- The panel is 26 sts wide and the arch ends at 6 sts.
- The border has 222 sts in Round 1 and 226 sts in Round 2.
- Each wall has 20 V-sts on even rows and 19 on odd rows, and 62 sts in Row 8.
- Each wall trim has 160 sts.
- The base and the bottom of each wall join 66 to 66.
- The pockets sit on Rows 4, 31 and 58.
- The strap is centered and sewn on securely.
- All yarn ends are woven in on the back.
Troubleshooting
- Panel sides ripple: you have too many border sts on the row ends. Go back to 8 sc per 9 rows.
- Panel sides pull in: you have too few border sts on the row ends. Check that each side has 80 sc.
- V-sts drift to one side: you probably missed the edge pair. Odd rows start and end with 2 dc, and even rows start and end with 1 dc.
- Wall is too short to go around the base: recount Row 8 and make sure it has 62 sts.
- Arch is pointy: you decreased on every row too early. Rows 91–96 should only decrease on alternating rows.
- Holder sags: use a tighter hook for the panel, or sew the strap through all layers again.
Care
Hand wash in cool water, press out the water in a towel, and dry flat. If it loses its shape, re-block it with rolls in the pockets.
Final Notes
Everything in this pattern follows from one gauge, 4 sc per inch. That gives a 26-st panel 6.5 in (16.5 cm) wide and 90 rows 20 in (50.8 cm) long. The arch adds 2.9 in (7.4 cm), and the two border rounds bring the panel to 7.5 in × 23.9 in (19.1 cm × 60.7 cm). Each pocket matches 66 sts on the base to 66 sts on the bottom of the wall, and stands 4 in (10.2 cm) tall. If you check each measurement along the way, all the pieces will line up.
Happy crocheting!