

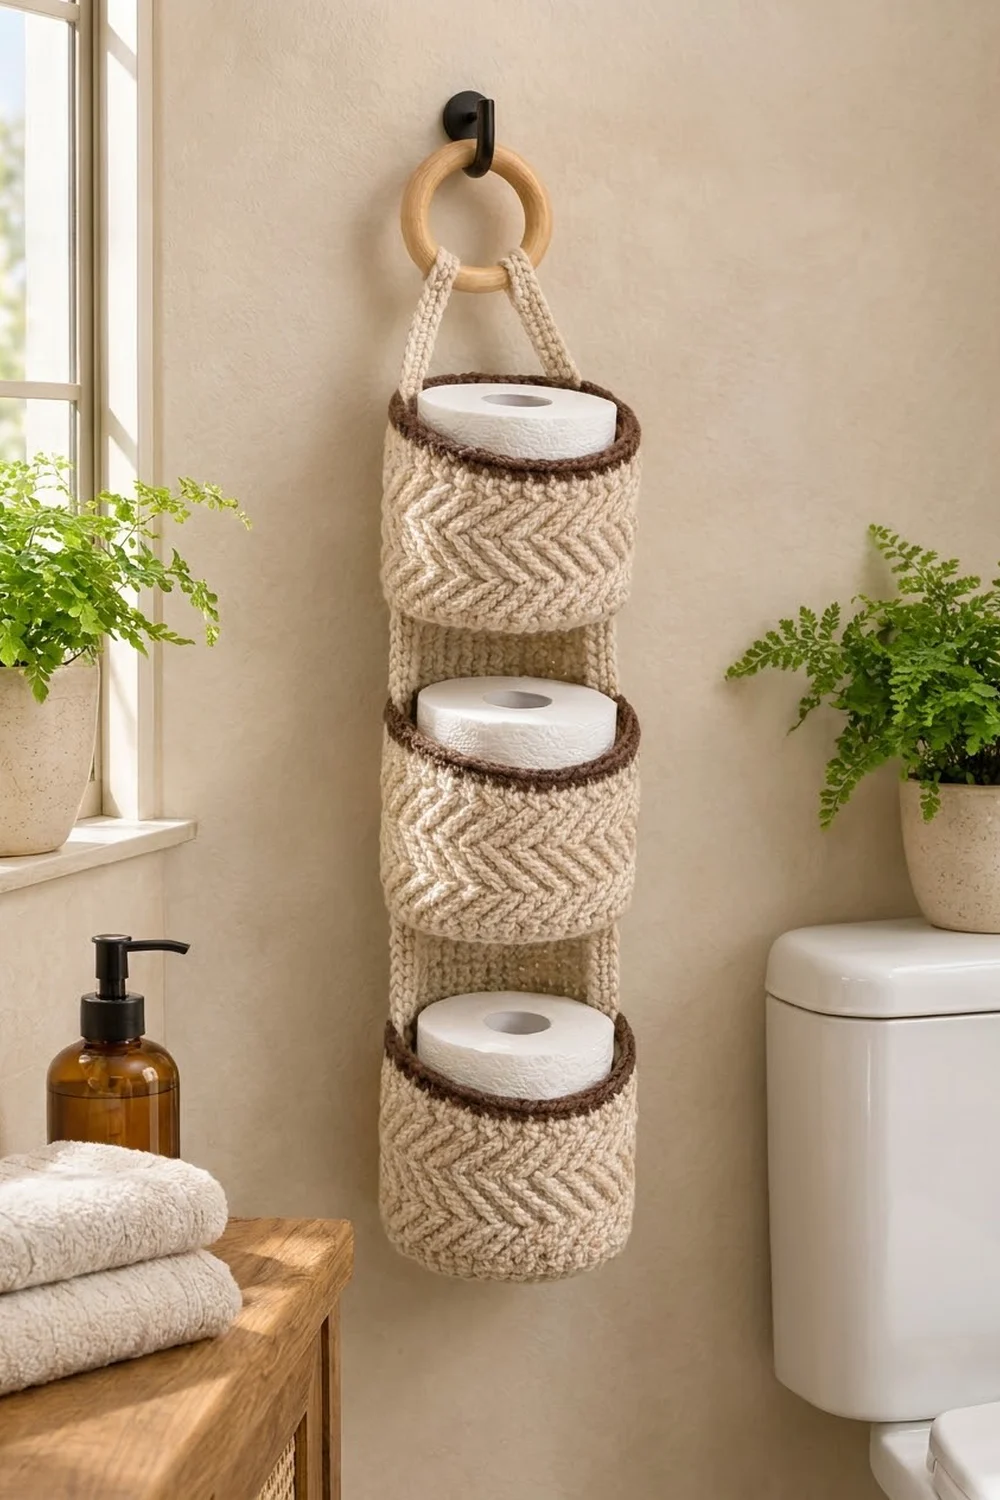
This hanging toilet paper holder keeps three spare rolls tidy, visible and off the floor. Three cream baskets hang one above the other from two slim straps that meet around a natural wooden ring. You can hang it from any hook, towel bar or door knob.
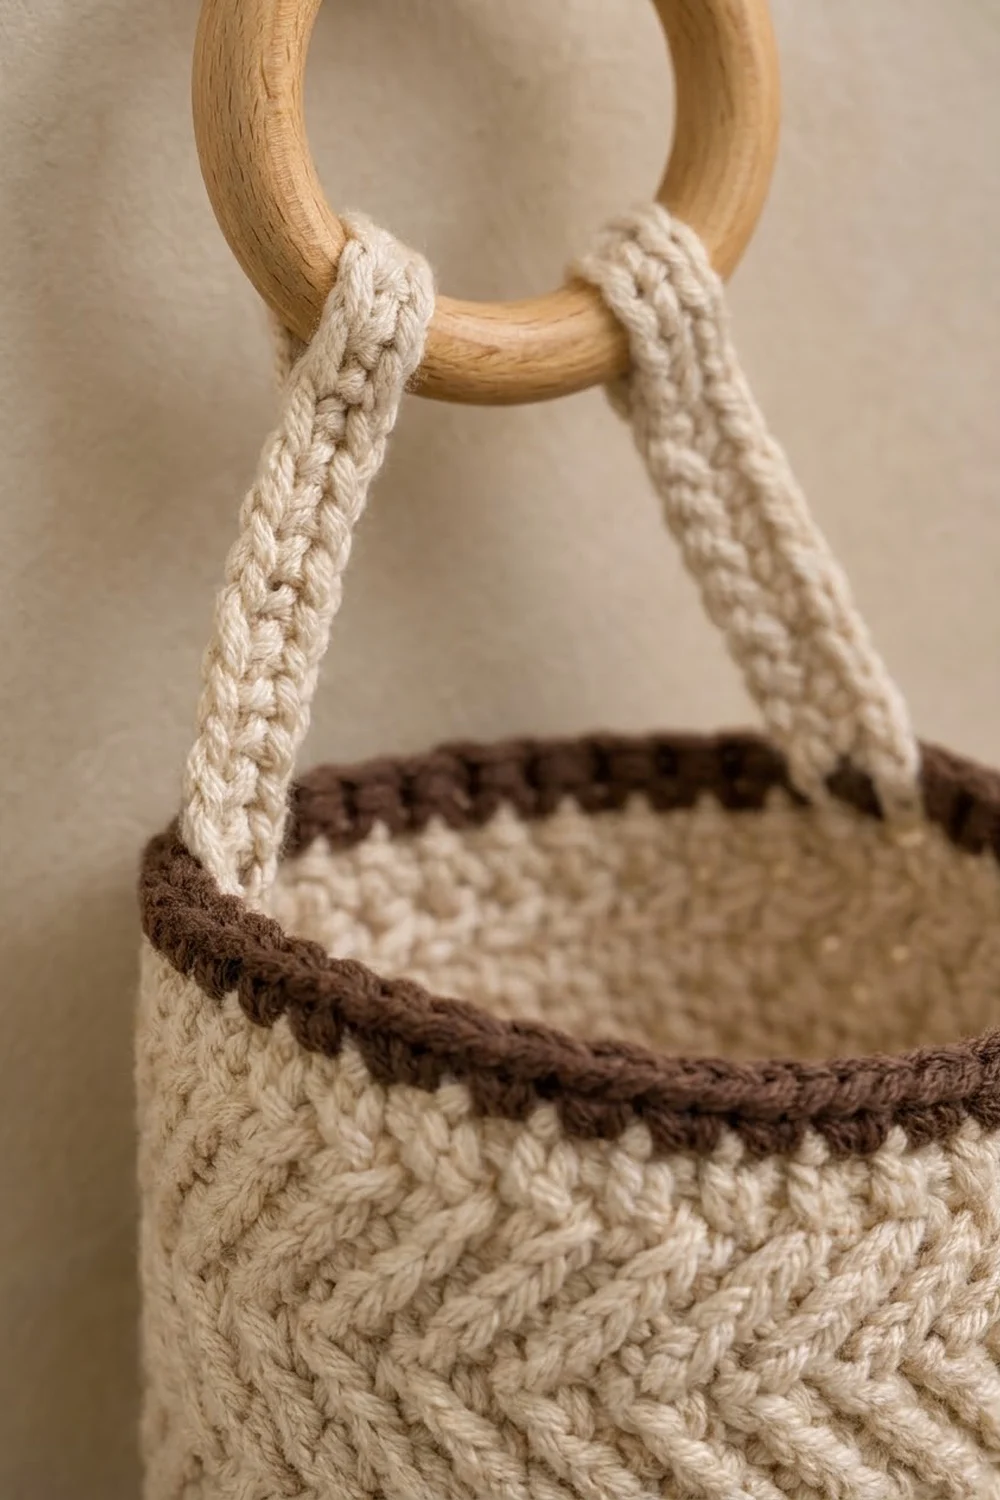
The baskets are worked in herringbone half double crochet. Every wall round is turned, so the stitches slant one way and then the other. Stacked together, the rounds look like a woven chevron. A chocolate-brown rim of single crochet and reverse single crochet finishes each basket with a firm, cord-like edge.
This pattern uses US crochet terms. When assembled, the holder is about 23 in (58.4 cm) tall from the bottom basket to the top of the ring, and about 5 in (12.7 cm) wide. Each basket is 4.75 in (12.1 cm) across the base and 3.95 in (10.0 cm) tall.
You will make three baskets, each worked from the bottom up in joined rounds. Then you make two long strap strips, sew them to the sides of the baskets, and wrap them around the ring.
Finished Size and Construction
- Finished size: 23 in (58.4 cm) tall including the ring × 5 in (12.7 cm) wide
- Skill level: Intermediate
- Terminology: US crochet terms
- Yarn weight: Worsted (#4) cotton
- Hook: 5.0 mm (H-8)
- Number of pieces: 5 crocheted pieces (3 baskets, 2 straps), plus 1 wooden ring
- Layout: 1 column × 3 baskets, with 2 in (5.1 cm) gaps
- Piece size (basket): 4.75 in (12.1 cm) base diameter × 3.95 in (10.0 cm) tall
- Basket height before rim: 3.45 in (8.8 cm)
- Rim depth: 0.5 in (1.3 cm)
- Strap size: 1 in (2.5 cm) wide × 21.5 in (54.6 cm) long
Materials
Yarn: Use a smooth, firmly twisted worsted-weight cotton or cotton blend. Cotton holds its shape under the weight of a roll and stands up to bathroom humidity. Avoid fuzzy acrylic, which hides the herringbone texture. The quantities below assume about 1.9 m per gram (about 190 m per 100 g).
- Color A – Cream: 150 g, 285 m (312 yd)
- Color B – Chocolate Brown: 20 g, 38 m (42 yd)
These quantities include a margin of about 15–20% for your gauge swatch and any small differences in tension.
Tools:
- 5.0 mm (H-8) crochet hook
- Wooden ring, 3 in (7.6 cm) outer diameter
- 4 stitch markers
- Tapestry needle
- Scissors
- Measuring tape
- Pins or clips for assembly
Abbreviations (US Terms)
- ch – chain
- sl st – slip stitch
- sc – single crochet
- inc – 2 sc in the same stitch
- BLO – back loop only
- hhdc – herringbone half double crochet (see below)
- rev sc – reverse single crochet (crab stitch)
- st(s) – stitch(es)
- Rnd – round
Herringbone half double crochet (hhdc): Yarn over, insert the hook into the stitch, yarn over and pull the loop through the stitch and through the first loop on the hook in one motion (2 loops remain), yarn over, pull through both loops. This stitch leans to one side. When you turn every round, the lean reverses and creates the chevron.
Reverse single crochet (rev sc): Work from left to right (left-handers work from right to left). Insert the hook into the next stitch to the right, pull up a loop, yarn over, pull through both loops.
Gauge and Checkpoints
Gauge: 16 sts × 16 rows = 4 in (10.2 cm) in sc. In hhdc worked in turned rounds, 16 sts = 4 in (10.2 cm) and 10 rounds = 4 in (10.2 cm), so each hhdc round is 0.4 in (1.0 cm) tall.
Make one complete basket before you start the others. That first basket is your gauge test. Check it at each stage:
- After Rnd 5 (30 sts): base diameter 2.4 in (6.1 cm)
- After Rnd 10 (60 sts): base diameter 4.75 in (12.1 cm), and the base lies flat
- After Rnd 15: wall height 1.85 in (4.7 cm)
- After Rnd 19: wall height 3.45 in (8.8 cm)
- After Rnd 21: total height 3.95 in (10.0 cm)
Put a roll inside after Rnd 19. The roll should drop in easily with about 0.25 in (0.6 cm) of ease all around.
Too big? Go down to a 4.5 mm hook. Too small, or does a 4.25–4.5 in (10.8–11.4 cm) roll stick? Go up to a 5.5 mm hook. Do not add stitches to fix the size, because the rim and strap placement depend on exactly 60 stitches.
Basket (Make 3)
Base
Use Color A.
Rnd 1: Make a magic ring and ch 1. Work 6 sc into the ring. Join with a sl st to the first sc. (6 sts)
Rnd 2: Ch 1. Work 2 sc in each st around. Join. (12 sts)
Rnd 3: Ch 1. Sc 1, inc 6 times. Join. (18 sts)
Rnd 4: Ch 1. Sc 2, inc 6 times. Join. (24 sts)
Rnd 5: Ch 1. Sc 3, inc 6 times. Join. (30 sts)
Checkpoint: The base measures 2.4 in (6.1 cm) across.
Rnd 6: Ch 1. Sc 4, inc 6 times. Join. (36 sts)
Rnd 7: Ch 1. Sc 5, inc 6 times. Join. (42 sts)
Rnd 8: Ch 1. Sc 6, inc 6 times. Join. (48 sts)
Rnd 9: Ch 1. Sc 7, inc 6 times. Join. (54 sts)
Rnd 10: Ch 1. Sc 8, inc 6 times. Join. (60 sts)
Checkpoint: The base measures 4.75 in (12.1 cm) across and lies flat without ruffling or cupping. To keep the circle round instead of hexagonal, you can move the position of the increase in alternate rounds. Work half the plain stitches before the first increase, then finish the round with the leftover stitches.
Walls
Rnd 11 (turning round): Ch 1. Work 1 sc BLO in each st around. Join. (60 sts: 60 worked 1-per-stitch + 0 added)
The unused front loops form a crisp ridge that turns the flat base up into a wall.
Rnd 12: Ch 2 (does not count as a st) and turn. Work 1 hhdc in each st around. Join with a sl st to the first hhdc. (60 sts)
Rnds 13–19: Repeat Rnd 12 seven more times, turning at the start of each round. (60 sts in each round)
You now have 8 hhdc rounds. Because every round is turned, the slant of the stitches reverses each round, which builds the herringbone chevron on the outside. The joins will drift slightly, so place a marker in the first stitch of every round.
Checkpoint: The wall is 3.45 in (8.8 cm) tall, measured from the base ridge. Fasten off Color A.
Rim
Rim gauge: The rim follows the sc gauge of 16 sts = 4 in (10.2 cm). Each rim round is 0.25 in (0.6 cm) tall.
Rnd 20: Do not turn. Join Color B with a sl st in any st and ch 1. Work 1 sc in each st around. Join. (60 sts)
Rnd 21: Ch 1. Work 1 rev sc in each st around. Join and fasten off. (60 sts)
Why the math works: The wall has 60 stitches around a circumference of 15 in (38.1 cm), at 4 sts per inch. Both rim rounds work exactly 1 stitch into each existing stitch, so the rim also has 60 stitches over 15 in (38.1 cm). The rim cannot flare, which would happen with extra stitches, or pull in, which would happen with fewer. Reverse sc is naturally a little firmer than sc, which is what gives the rim its rolled, cord-like look without narrowing the opening.
Checkpoint: The basket is 3.95 in (10.0 cm) tall from the bottom to the top of the rim.
Weave in all ends on the inside.
Strap (Make 2)
Use Color A.
Row 1: Ch 5. Work 1 sc in the 2nd ch from the hook and in each ch across. (4 sts)
Rows 2–86: Ch 1 and turn. Work 1 sc in each st across. (4 sts)
Fasten off and leave a 12 in (30.5 cm) tail.
Checkpoint: Each strap is 1 in (2.5 cm) wide and 21.5 in (54.6 cm) long, which is 86 rows at 4 rows per inch.
Make All Pieces
- Baskets: 3, each using about 38 g of Color A and 6 g of Color B
- Straps: 2, each using about 7 g of Color A
- Wooden ring: 1
Layout (front view, top to bottom):
        ( RING )
         /    \
   strap        strap     4 in (10.2 cm) free
  |[ BASKET 1 ]|          3.95 in (10.0 cm)
  |    gap     |          2 in (5.1 cm)
  |[ BASKET 2 ]|          3.95 in (10.0 cm)
  |    gap     |          2 in (5.1 cm)
  |[ BASKET 3 ]|          3.95 in (10.0 cm)
Strap row map (counted from Row 1 at the bottom):
- Rows 1–16: sewn to Basket 3
- Rows 17–24: gap
- Rows 25–40: sewn to Basket 2
- Rows 41–48: gap
- Rows 49–64: sewn to Basket 1
- Rows 65–80: free strap up to the ring
- Rows 81–86: wrapped around the ring
Joining
Strap placement: On each basket, mark 4 stitches that sit over the round joins, for example stitches 59, 60, 1 and 2 of Rnd 21. Then mark the 4 stitches directly opposite them: stitches 29–32. The two strap positions are 30 stitches apart, so the straps sit on opposite sides of the basket. The strap covers the seam where the rounds join.
Method: Use a whipstitch with Color A. The strap lies flat against the outside wall. Its 4 stitches line up with the 4 marked wall stitches. Sew down both long edges of the strap, through the strap’s edge stitches and the wall stitches underneath.
Stitch-to-stitch logic for one basket: There are 16 strap rows for each basket height of 3.95 in (10.0 cm).
- Strap row 1 matches Rnd 11, the base ridge.
- Strap rows 2–14 (13 rows) match Rnds 12–19 (8 hhdc rounds, 3.2 in or 8.1 cm). Sew 2 strap rows to each of Rnds 12, 13, 15, 17 and 19. Sew 1 strap row to each of Rnds 14, 16 and 18.
- Strap rows 15–16 match Rnds 20–21, the rim. Sew through the sc round only, so the rev sc cord stays visible above the strap.
Attach Basket 3 first. Then attach Basket 2 at rows 25–40 and Basket 1 at rows 49–64.
Tension: Keep your sewing stitches snug but not tight. If you pull too hard, the hhdc wall puckers and the basket turns oval. Sew all three baskets to one strap, then pin the second strap so its row numbers line up exactly with the first before you sew it.
Ring: Bring both free strap ends up through the ring from front to back. Fold rows 81–86 down behind the strap, so they meet rows 75–80, and sew them down firmly with the tail.
Checkpoint: Hang the holder and measure. You should have 2 in (5.1 cm) gaps, 4 in (10.2 cm) from the top rim to the strap fold, and 23 in (58.4 cm) overall.
Final Blocking
- Lightly mist the whole piece with water.
- Stuff each basket with a toilet roll wrapped in a plastic bag.
- Shape the rims into round circles and press the bases flat.
- Lay the holder flat on a towel and straighten the straps, so the gaps measure exactly 2 in (5.1 cm).
- Leave it to dry completely, which takes about 24 hours. Then remove the rolls and bags.
Final Quality-Control Checklist
- Every basket has 60 stitches in every wall and rim round.
- The base diameters are 4.75 in (12.1 cm) and match within 0.25 in (0.6 cm).
- Each basket is 3.95 in (10.0 cm) tall.
- The herringbone slant reverses on every round.
- The brown rims look even, and no join gap shows.
- The straps are 1 in (2.5 cm) wide, and their row maps match exactly.
- The baskets hang level and do not tilt forward.
- All ends are woven in on the inside and secured.
- The ring fold is sewn on all edges.
Troubleshooting
- The base cups upward: Your tension is too tight. Relax it, or go up half a hook size for the base only.
- The base ruffles: You may have extra stitches. Count every round, and make sure you have 6 increases per round.
- The wall flares outward: Your hhdc is looser than your sc. Use a hook 0.5 mm smaller for Rnds 12–19.
- No chevron is visible: You forgot to turn. Every hhdc round must begin with ch 2 and a turn.
- The seam spirals visibly: This is normal for turned rounds. The strap covers it, so center the strap on the seam marker.
- The basket tilts forward: The two straps are not exactly opposite each other. Count 30 stitches between them and re-sew.
- The rim waves: Check that you worked exactly 60 rev sc, and that you didn’t add stitches at the join.
Care
Hand wash in cool water with mild soap, gently press out the water, reshape the baskets around rolls, and dry flat. Do not tumble dry, because cotton can shrink and pull the herringbone texture out of shape.
Final Notes
Each stage depends on the measurement before it. The gauge of 16 sts = 4 in (10.2 cm) gives a 60-stitch base that is 4.75 in (12.1 cm) across. That base sets a 60-stitch wall of 15 in (38.1 cm) around. The 8 hhdc rounds bring the wall to 3.45 in (8.8 cm), and the 60-stitch rim adds 0.5 in (1.3 cm) for a 3.95 in (10.0 cm) basket. That height becomes 16 strap rows, and the 86-row straps hold three baskets, two 2 in (5.1 cm) gaps and the ring, for a holder 23 in (58.4 cm) tall. Check each measurement as you reach it and the finished holder will hang straight.
Happy crocheting!