
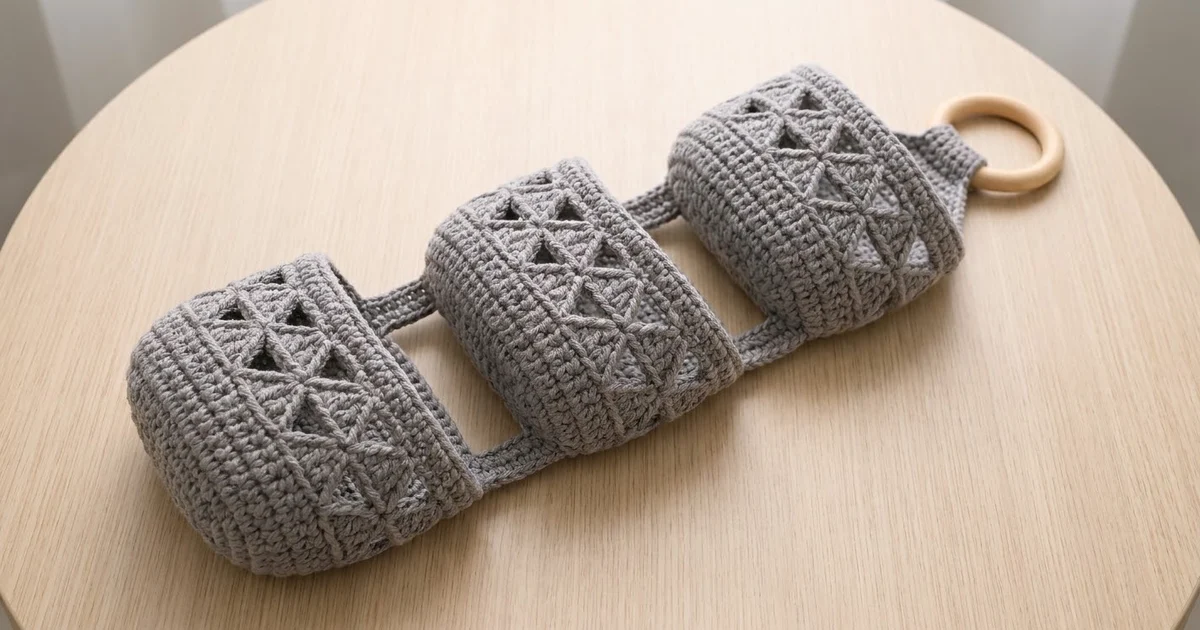
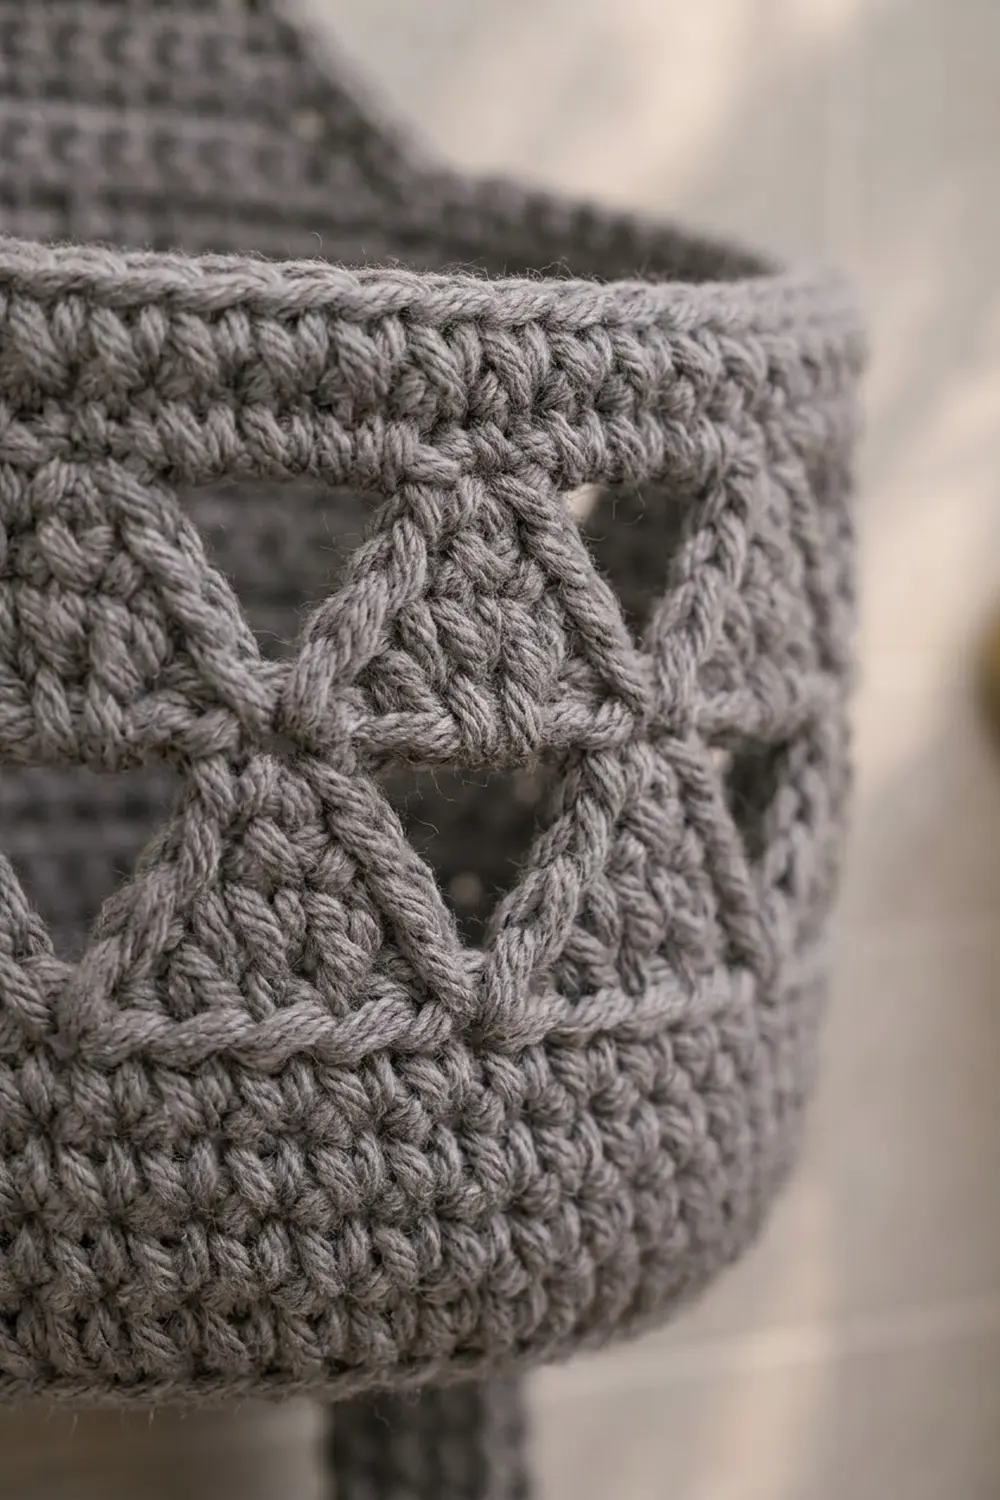
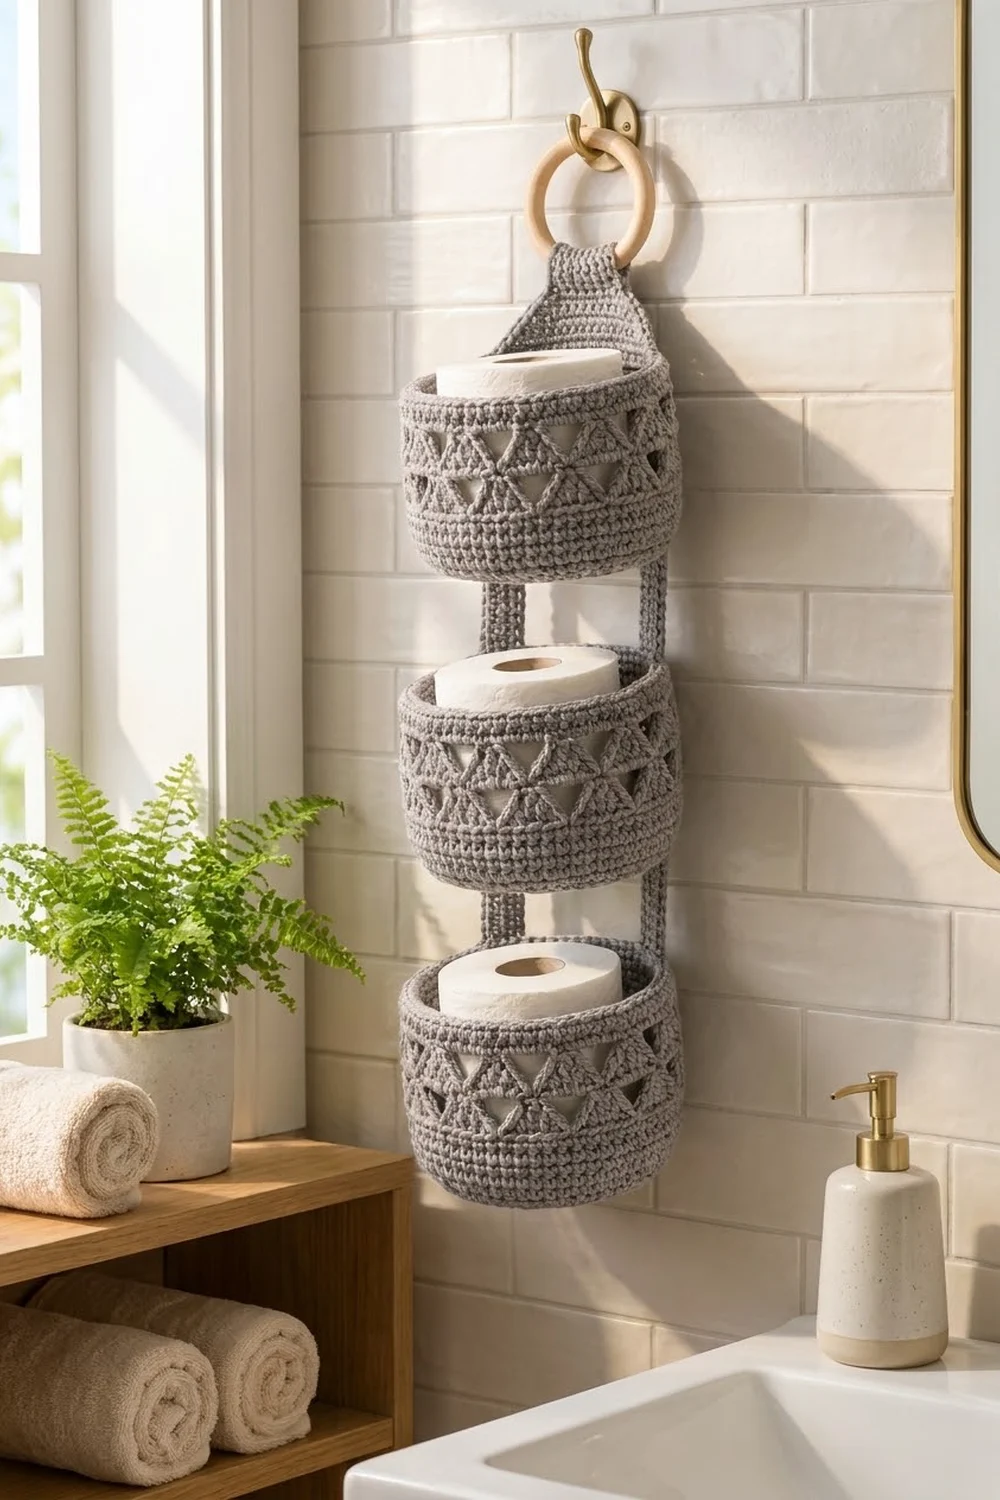
This hanging holder stacks three oval baskets, one above the other, to keep spare toilet paper rolls off the floor and within easy reach. Each basket has a band of solid triangles with open triangular windows between them. The band adds texture and lets you see what’s inside, and the basket stays sturdy.
The sample is worked in one calm medium gray, which goes with brass fixtures, white tile and natural wood. A plain wooden ring at the top lets it hang from a robe hook, towel hook or door hook. The style is simple and modern, and it suits a farmhouse bathroom too.
The pattern uses US crochet terms. The finished holder measures 6.5 in (16.5 cm) wide and about 19.75 in (50.2 cm) tall, not counting the ring. Each basket is 6.5 in (16.5 cm) wide, 4.75 in (12.1 cm) deep and 3.75 in (9.5 cm) tall.
You make three identical baskets in joined rounds. Each one starts with an oval base, then you work the walls straight up, add the triangle band and finish with a two-round rim border. Two long flat straps are sewn down the backs of all three baskets, and a tapered tab is worked off the top basket and folded around the ring.
Finished Size and Construction
- Finished size: 6.5 in (16.5 cm) wide × 19.75 in (50.2 cm) tall, ring not included
- Skill level: Easy-intermediate
- Terminology: US crochet terms
- Yarn weight: Worsted (#4), cotton or cotton blend
- Hook: 5.0 mm (H-8)
- Number of pieces: 6 (3 baskets, 2 straps, 1 hanging tab worked onto the top basket)
- Layout: 1 column of 3 baskets, with a 2 in (5.1 cm) gap between baskets
- Basket size: 6.5 in (16.5 cm) wide × 4.75 in (12.1 cm) deep × 3.75 in (9.5 cm) tall
- Basket wall height before border: 3.5 in (8.9 cm)
- Border depth: 0.25 in (0.6 cm)
Materials
Yarn: Use a firm worsted-weight cotton or cotton blend. Cotton holds its shape, takes steam well and doesn’t stretch much under the weight of the rolls. Acrylic also works, but it can sag a little more.
- Medium gray: 200 g, about 380 m (415 yd)
These quantities include a safety margin of about 20 percent. The sample used about 165 g.
Tools:
– 5.0 mm (H-8) crochet hook
– Wooden ring, 3 in (7.6 cm) outer diameter
– 6 stitch markers
– Tapestry needle
– Scissors
– Measuring tape
– Rust-proof pins and a blocking mat or folded towel
Abbreviations (US Terms)
- ch – chain
- sc – single crochet
- sc2tog – single crochet 2 together
- sl st – slip stitch
- BLO – back loop only
- sk – skip
- sp – space
- st(s) – stitch(es)
Special stitch, enclosing sc: In Triangle Round 4, insert your hook under the ch-5 loop and under the ch-3 loop just below it. Catch both loops together as you work each sc. This pulls the chains up into one clean bar at the top of each triangle window.
Gauge and Checkpoints
Gauge: 14 sc × 16 rows = 4 in (10.2 cm), worked in rows or rounds.
Work one complete basket before you make the others. Each basket uses a lot of stitches, so a small gauge error adds up quickly.
Checkpoints:
– After Round 9, the base measures 6.5 in × 4.75 in (16.5 cm × 12.1 cm).
– After Round 14, the wall measures 1.25 in (3.2 cm) above the base ridge.
– After Round 18, at the end of the triangle band, the wall measures 2.5 in (6.4 cm).
– After Round 22, the wall measures 3.5 in (8.9 cm).
– After the border, the wall measures 3.75 in (9.5 cm).
If your base is too big, go down 0.5 mm in hook size. A loose basket will bag under the weight of a roll. If it’s too small, go up 0.5 mm. A standard roll is about 4.25 in (10.8 cm) across, so the base must be at least 4.5 in (11.4 cm) deep.
Basket (Make 3)
Work in joined rounds. Join each round with a sl st to the first sc. Ch 1 at the start of each round doesn’t count as a stitch. Don’t turn.
Oval Base
Foundation: Ch 9.
Round 1: 3 sc in 2nd ch from hook, sc in next 6 ch, 3 sc in last ch. Rotate and work along the other side of the chain: sc in next 6 ch. Join. (18 sts = 3 + 6 + 3 + 6)
Place a marker in the center stitch of each 3-sc end. These are the curved ends. All increases happen there, and the 6 straight stitches on each side never change.
Round 2: Ch 1, 2 sc in each of the 3 end sts, sc in 6 side sts, 2 sc in each of the 3 end sts, sc in 6 side sts. Join. (24 sts; each end has 6)
Round 3: Ch 1, at each end work (sc in next st, 2 sc in next st) 3 times, and sc in each of the 6 side sts. Join. (30 sts; each end has 9)
Round 4: Ch 1, at each end work (sc in next 2 sts, 2 sc in next st) 3 times, and sc in the 6 side sts. Join. (36 sts; each end has 12)
Round 5: Ch 1, at each end work (sc in next 3 sts, 2 sc in next st) 3 times, sides as set. Join. (42 sts; each end has 15)
Round 6: Ch 1, at each end work (sc in next 4 sts, 2 sc in next st) 3 times, sides as set. Join. (48 sts; each end has 18)
Round 7: Ch 1, at each end work (sc in next 5 sts, 2 sc in next st) 3 times, sides as set. Join. (54 sts; each end has 21)
Round 8: Ch 1, at each end work (sc in next 6 sts, 2 sc in next st) 3 times, sides as set. Join. (60 sts; each end has 24)
Round 9: Ch 1, at each end work (sc in next 7 sts, 2 sc in next st) 3 times, sides as set. Join. (66 sts; each end has 27)
Checkpoint: the base measures 6.5 in × 4.75 in (16.5 cm × 12.1 cm), and the total of 66 is 27 + 6 + 27 + 6. Remove the markers.
Lower Wall
Round 10: Ch 1, sc in BLO of each st around. Join. (66 sts)
This makes a crisp ridge where the base turns up into the wall.
Rounds 11–14: Ch 1, sc in each st around. Join. (66 sts)
Checkpoint: the wall measures 1.25 in (3.2 cm) above the ridge.
Triangle Band
66 stitches divide into 11 repeats of 6, so the band has 11 triangles.
Round 15 (Triangle Round 1, conversion): Ch 1, (sc in next 5 sts, ch 1, sk next st) 11 times. Join. (66 = 55 sc + 11 ch)
Round 16 (Triangle Round 2): Ch 1, sk first sc, (sc in next 3 sc, ch 3, sk next sc, ch-1 sp and next sc) 11 times. On the last repeat, sk the last sc and the ch-1 sp, because the first sc was already skipped. Join to the first sc. (66 = 33 sc + 33 ch)
Round 17 (Triangle Round 3): Ch 1, sk first sc, (sc in next sc, ch 5, sk next sc, ch-3 sp and next sc) 11 times. On the last repeat, sk the last sc and the ch-3 sp. Join. (66 = 11 sc + 55 ch)
The solid sc groups have now narrowed from 5 to 3 to 1, which makes the upward-pointing triangles. The skipped spaces widen upward into inverted triangle windows.
Round 18 (Triangle Round 4, closing): Ch 1, (sc in the single sc, 5 enclosing sc in the ch-5 sp, catching the ch-3 below) 11 times. Join. (66 = 11 + 55)
Checkpoint: the wall measures 2.5 in (6.4 cm).
Upper Wall
Rounds 19–22: Ch 1, sc in each st around. Join. (66 sts)
Checkpoint: the wall measures 3.5 in (8.9 cm). Don’t fasten off. Go straight on to the border section below, then come back to the straps.
Straps (Make 2)
Foundation: Ch 5.
Row 1: Sc in 2nd ch from hook and in each ch across. Turn. (4 sts)
Rows 2–61: Ch 1, sc in each st across. Turn. (4 sts)
Fasten off, leaving a 36 in (91.4 cm) tail for sewing.
Checkpoint: each strap measures 1.1 in × 15.25 in (2.8 cm × 38.7 cm).
The 61 rows break down as 15 rows per basket wall and 8 rows per gap: 15 + 8 + 15 + 8 + 15 = 61. That gives 15.25 in (38.7 cm).
Make All Pieces
- Baskets: 3 in medium gray, about 45 g each
- Straps: 2 in medium gray, about 10 g each
- Hanging tab: 1, worked onto the top basket, about 8 g
Layout (back view):
        [ RING ]
        [ TAB  ]
  [  TOP BASKET   ]   15 rows
     |S|      |S|     8-row gap
  [ MIDDLE BASKET ]   15 rows
     |S|      |S|     8-row gap
  [ BOTTOM BASKET ]   15 rows
Joining
Mark the back. Flatten each basket so the round join sits at the right-hand side edge. On the back face there are 33 stitches. Count in 10 stitches from the join and place a marker. The next 14 stitches are the “back center.”
Place the straps. Strap A covers back-center stitches 1–4. Then leave 6 stitches open, which is a 1.7 in (4.3 cm) gap. Strap B covers stitches 11–14. The total is 4 + 6 + 4 = 14 stitches, or 4 in (10.2 cm), which is exactly the width of the tab above.
Stitch-to-stitch logic. Each basket wall from Round 10 through Border Round 2 is 15 rounds tall, and each strap uses 15 rows per basket, so they line up 1:1.
- Line up strap Row 1 with Round 10 (the ridge) of the bottom basket.
- Whipstitch both long edges of the strap to the wall, one strap row to each wall round.
- Leave 8 strap rows free for the gap, which is 2 in (5.1 cm).
- Attach the middle basket over the next 15 rows, leave 8 rows free, then attach the top basket. Strap Row 61 ends level with the top basket’s rim.
Tension. Sew firmly, but don’t pull so hard that the wall puckers. Go through only the outer layer of the wall so your sewing doesn’t show inside the basket.
Size checkpoint. Measure from the bottom basket’s ridge to the top basket’s rim. It should be 15.25 in (38.7 cm). Each gap should be 2 in (5.1 cm), with no twisting.
Border
Border gauge: 14 sts = 4 in (10.2 cm). The rim’s 66 stitches give a rim of 18.9 in (48.0 cm) around.
Work these two rounds on each basket straight after Round 22. On the 3 baskets, this is done before you attach the straps.
Border Round 1 (Round 23, trim): Ch 1, sc in each st around. Join. (66 = 66 worked one per stitch + 0 added; front 33, back 33)
Border Round 2 (Round 24, trim): Sl st in BLO of each st around. Join. (66 = 66 + 0; front 33, back 33)
Fasten off and weave in the end.
Why the math works: Both border rounds keep exactly 66 stitches, so the rim stays the same size as the wall. It won’t flare or pull in. The slip stitches in the back loop add a firm, smooth 0.25 in (0.6 cm) edge, so the wall goes from 3.5 in (8.9 cm) to 3.75 in (9.5 cm).
Hanging Tab (top basket only)
Do this after you’ve attached the straps. Join the yarn into back-center stitch 1, working into the top of Border Round 2. Work in rows.
- Row 1: Ch 1, sc in each of the 14 back-center sts. Turn. (14 sts)
- Rows 2–3: Ch 1, sc across. Turn. (14)
- Row 4: Ch 1, sc2tog, sc in next 10 sts, sc2tog. Turn. (12)
- Row 5: Ch 1, sc across. Turn. (12)
- Row 6: Ch 1, sc2tog, sc in next 8 sts, sc2tog. Turn. (10)
- Row 7: Ch 1, sc across. Turn. (10)
- Row 8: Ch 1, sc2tog, sc in next 6 sts, sc2tog. Turn. (8)
- Row 9: Ch 1, sc across. Turn. (8)
- Row 10: Ch 1, sc2tog, sc in next 4 sts, sc2tog. Turn. (6)
- Rows 11–26: Ch 1, sc across. Turn. (6)
Rows 1–10 make 2.5 in (6.4 cm) of tapered tab. Rows 11–26 make a 4 in (10.2 cm) strip.
Pass the strip through the wooden ring and fold it to the back. Whipstitch Row 26 to the back of Row 10. Folded, the loop stands 2 in (5.1 cm) tall. That gives the total height: 15.25 + 2.5 + 2 = 19.75 in (50.2 cm).
Final Blocking
- Spritz the whole holder lightly with water until it’s damp but not wet.
- Stuff each basket firmly with a toilet paper roll wrapped in a plastic bag, or with a folded towel.
- Pin the triangle windows open so the points line up straight around the basket.
- Lay the holder flat on its back and line up the straps so they’re straight and parallel, with 2 in (5.1 cm) gaps.
- Use steam to set the rims and the tab. Cotton responds well to steam, but keep the iron from touching the yarn.
- Let it dry completely for 12–24 hours before you remove the stuffing.
Final Quality-Control Checklist
- [ ] Each basket has 66 stitches in every wall round and 11 even triangles.
- [ ] Each base measures 6.5 in × 4.75 in (16.5 cm × 12.1 cm).
- [ ] Each basket wall is 3.75 in (9.5 cm) tall, border included.
- [ ] The straps are 61 rows long and match each other.
- [ ] Both gaps are exactly 2 in (5.1 cm).
- [ ] The tab is centered and covers both straps.
- [ ] The ring loop is sewn securely through both layers.
- [ ] All ends are woven in on the inside.
- [ ] The holder hangs straight with a roll in each basket.
Troubleshooting
The base cups or curls up: Your tension is too tight on the increase rounds. Use a hook 0.5 mm larger for the base only.
The base ripples: You have extra stitches. Recount each end against the totals given for each round.
The triangle windows are lopsided: You skipped the wrong stitch in Round 16 or 17. Check that every repeat comes back to 6 stitches.
The chains sag inside the windows: You missed the ch-3 when working Round 18. Rework it, enclosing both chain loops.
The rim flares: Your Border Round 2 slip stitches are too loose. Work them a little tighter.
The baskets tilt forward: The straps are sewn too high on the wall. Start the straps at the Round 10 ridge.
The holder twists: One strap is longer than the other. Recount the rows in both straps.
Care
Hand wash in cool water with mild soap, press out the water in a towel, and dry flat with each basket stuffed so it keeps its shape. Steam lightly to refresh it.
Final Notes
The measurement chain is simple: a gauge of 14 sc × 16 rows = 4 in (10.2 cm) gives a 66-stitch oval. That makes a basket 6.5 in (16.5 cm) wide and 3.75 in (9.5 cm) tall over 15 wall rounds, which match the 15 strap rows per basket. Add two 8-row gaps and you get straps 15.25 in (38.7 cm) long. The tab brings the finished height to 19.75 in (50.2 cm). Check each stage as you go, and all three baskets will line up.
Happy crocheting!