

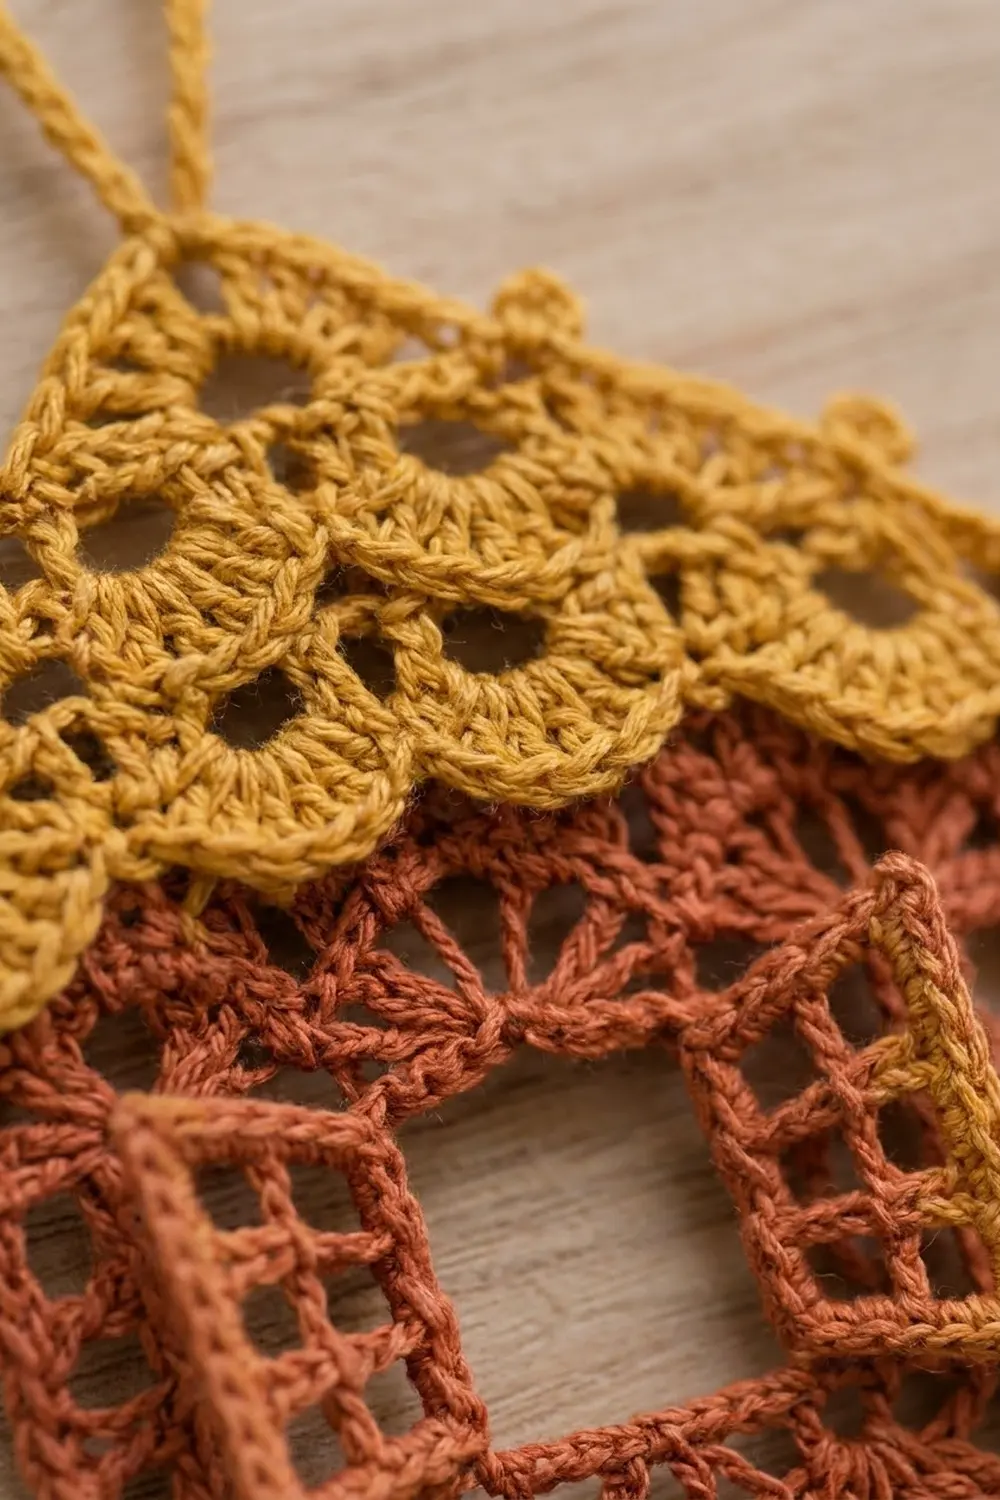
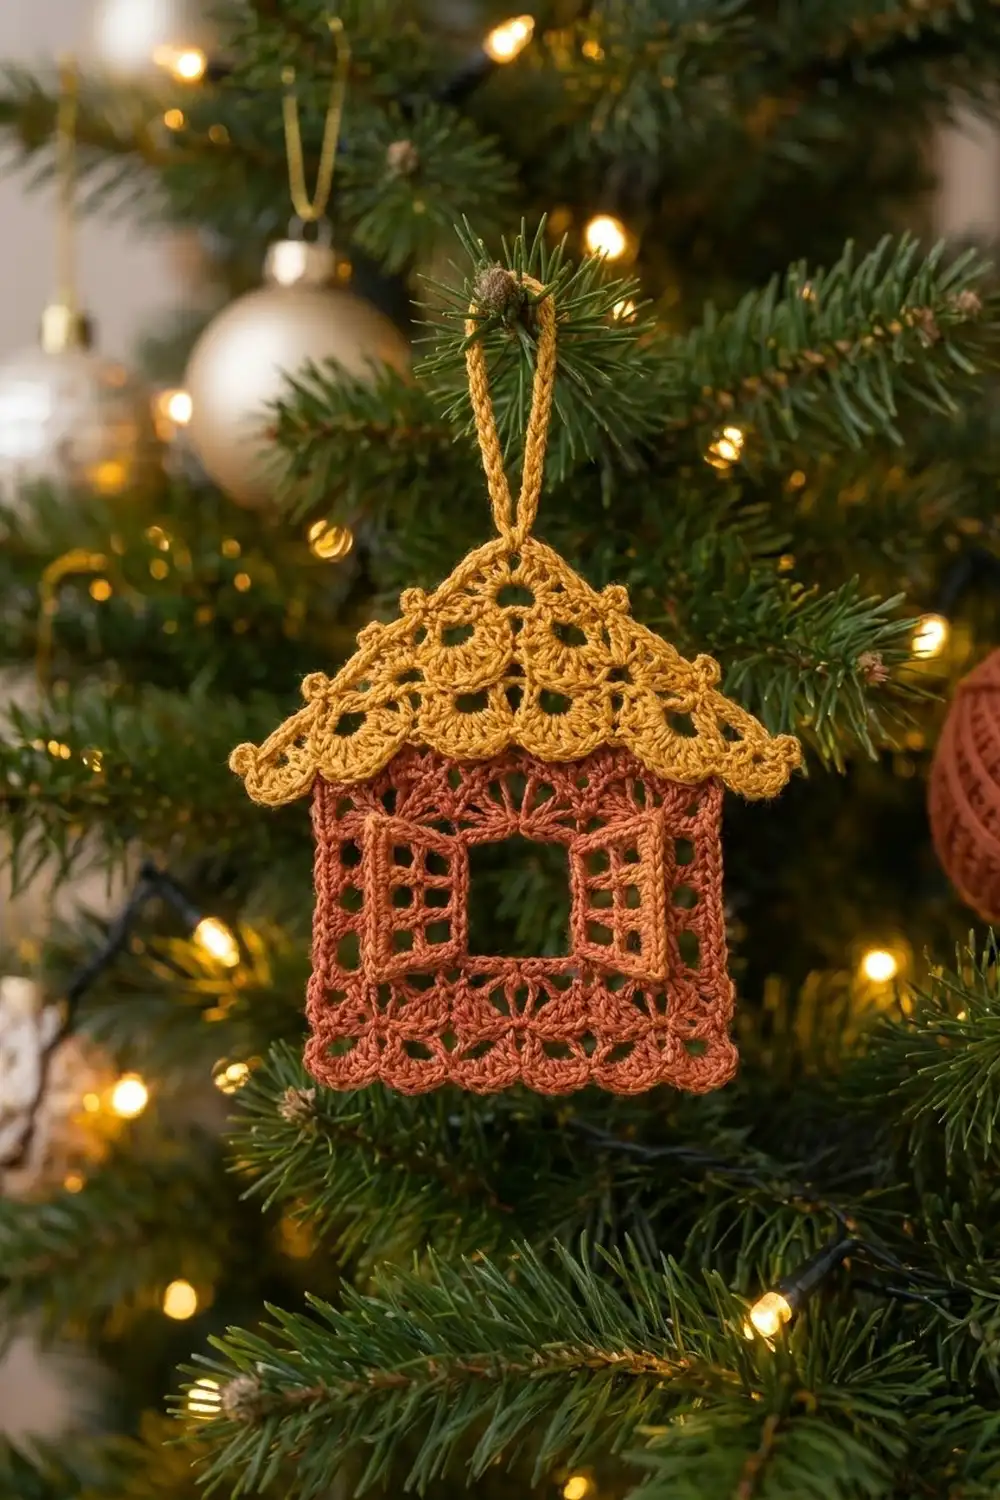
The Cozy Cottage is a small, lacy house ornament made for the tree. The roof is mustard and built from stacked shell fans. The walls are rust, with an open window, two little shutters swung open, and a scalloped bottom edge. It looks like a gingerbread cottage made out of lace.
The pattern uses two colors of size 3 crochet cotton. That thread is fine enough to show the stitch detail and firm enough to hold a crisp shape after blocking. All instructions use US crochet terms.
The finished ornament is about 4.7 in (11.9 cm) wide and 4.5 in (11.4 cm) tall. The hanging loop adds another 1.75 in (4.4 cm).
You work it as one piece. The rust walls are made in rows from the bottom up, and the window is formed by working two separate side columns. Next you add a rust border with bottom scallops, and then the shutters along the window edges. The mustard roof is worked straight onto the top of the walls, then you add the drops under the roof overhangs and chain the hanging loop.
Finished Size and Construction
- Finished size: 4.7 in (11.9 cm) wide × 4.5 in (11.4 cm) tall, plus a 1.75 in (4.4 cm) loop
- Skill level: Intermediate
- Terminology: US
- Yarn weight: Size 3 crochet cotton (fine thread)
- Hook: 2.25 mm (B-1)
- Number of pieces: 1 (a single ornament)
- Layout: Rectangular walls with a triangular roof that overhangs on both sides
- Wall size before border: 3.6 × 2.6 in (9.1 × 6.6 cm)
- Wall size after border: 3.9 × 2.9 in (9.9 × 7.4 cm)
- Border depth: 0.15 in (0.4 cm) on the sides; 0.3 in (0.8 cm) of scallops at the bottom
Materials
Use a smooth mercerized cotton in size 3. It holds a crisp edge, blocks well and doesn’t fuzz on the tree. Avoid acrylic: it won’t keep the shell shapes after blocking.
- Color A, rust/terracotta (walls, shutters, wall border): 8 g, about 22 m
- Color B, mustard yellow (roof, roof drops, loop): 5 g, about 14 m
These amounts include a safety margin of roughly 30 percent.
Tools:
– 2.25 mm (B-1) crochet hook
– Tapestry needle
– Scissors
– 1 stitch marker
– Rustproof pins and a foam blocking mat
– Spray bottle; light spray starch (optional)
Abbreviations (US Terms)
- ch – chain
- sl st – slip stitch
- sc – single crochet
- dc – double crochet
- fdc – foundation double crochet
- sk – skip
- st(s) – stitch(es)
- RS – right side
Foundation double crochet (fdc): Yarn over and insert the hook into the base of the last stitch. Yarn over and pull up a loop, then yarn over and pull through 1 loop (this chain is the base for the next fdc). Finish as a regular dc: [yarn over, pull through 2 loops] twice.
Fan: The stated number of dc worked into one stitch.
Turning ch: In this pattern, a ch 3 at the start of a row counts as 1 dc. A ch 1 does not count as a stitch.
Gauge and Checkpoints
Gauge: 7 dc = 1 in (2.5 cm); 7 dc rows = 2 in (5.1 cm).
The walls are your gauge swatch, so work them first and check as you go:
- After Row 3: 3.6 in (9.1 cm) wide and about 0.9 in (2.3 cm) tall.
- After Row 9: 3.6 × 2.6 in (9.1 × 6.6 cm). The window opening should be about 1.3 in (3.3 cm) wide and 1.1 in (2.8 cm) tall.
- After roof Row 1: 4.7 in (11.9 cm) wide.
If the walls measure 3.8 in (9.7 cm) wide or more after Row 3, switch to a 2.0 mm hook. If they measure 3.4 in (8.6 cm) or less, switch to a 2.5 mm hook. Being off by up to 0.25 in (0.6 cm) is fine, because blocking will even it out.
House Walls (Color A)
Row 1: Ch 27. Dc in the 4th ch from the hook and in each ch across. Turn. (25 sts) The skipped 3 ch count as the first dc.
Row 2 (fan row): Ch 1. Sc in the first st, sk 2, 5 dc in the next st, sk 2, sc in the next st. Repeat from * to * 3 more times. Turn. (25 sts: 5 sc + 20 dc, which is 4 fans)
Row 3: Ch 3 (counts as dc). Sk the first st and dc in each of the next 24 sts. Turn. (25 dc)
Choose the side with the neatest fans as the RS and mark it.
Window columns: The window is formed by working two 8-st columns separately and skipping the center 9 sts.
Row 4, first column: Ch 3 (counts as dc), dc in each of the next 7 sts. Turn, leaving the rest of the row unworked. (8 sts)
Rows 5–7, first column: Ch 3, dc in each of the next 7 sts. Turn. (8 sts each)
Fasten off after Row 7.
Row 4, second column: Sk the 9 center sts of Row 3. Join Color A in the 18th st, counting from the side where the first column was worked. Ch 3, dc in each of the next 7 sts. Turn. (8 sts)
Rows 5–7, second column: Ch 3, dc in each of the next 7 sts. Turn. (8 sts each)
Fasten off after Row 7.
Row 8 (window top): Join Color A in the outer-edge st of either column’s Row 7. Ch 3 (counts as dc) and dc in each of the next 7 sts of that column. Ch 9, then dc in each of the 8 sts of the other column. Turn. (25 sts: 16 dc + 9 ch)
Row 9: Ch 3 (counts as dc). Sk the first st, then dc in each of the 7 sts of the first column, in each of the 9 ch, and in each of the 8 sts of the second column. Turn. (25 dc) Do not fasten off.
Checkpoint: 3.6 × 2.6 in (9.1 × 6.6 cm), with a window opening of 9 sts × 4 rows.
Wall Border (Color A)
Border gauge: 2 sc per dc row-end and 1 sc per sc row-end will lie flat at this gauge.
Side count: Each side has 8 dc row-ends (Rows 1 and 3–9) and 1 sc row-end (Row 2). That gives 2 × 8 + 1 = 17 sc per side. The side counts do not include the bottom corners.
Bottom count: The bottom has 25 sts, worked into the 25 foundation ch. This count includes both corner sc.
Border round: With the RS facing, continue from the end of Row 9 without fastening off. You are now at a top corner.
- First side: Work down the side with 2 sc in each dc row-end and 1 sc in the Row 2 row-end. (17 sc) Ch 1 to turn the corner (this ch is not counted).
- Bottom: Working into the foundation ch, sc in the first ch, sk 2, 5 dc in the next ch, sk 2, sc in the next ch. Repeat from * to * 3 more times. Ch 1 to turn the corner (not counted). (25 sts: 5 sc + 20 dc, which is 4 scallops)
- Second side: Work up the other side the same way as the first. (17 sc)
Fasten off. Each bottom scallop sits directly under a Row 2 fan, which gives a neat lace band.
Why the math works: The fan repeat is 6 sts plus 1 (sc, sk 2, fan, sk 2), so 25 = 1 + 4 × 6, and both the bottom and Row 2 end on an sc. The sides use the standard spacing for dc row-ends, so the walls stay flat without ruffling or pulling in.
Checkpoint: 3.9 in (9.9 cm) wide and 2.9 in (7.4 cm) tall, including the scallops.
Shutters (Make 2, Color A)
Each window side edge is made of 4 dc row-ends from Rows 4–7.
Row 1: With the RS facing, join Color A at the bottom of one inner window edge. Work 2 sc in each of the 4 row-ends. Turn. (8 sc)
Row 2: Ch 3 (counts as dc), dc in each of the next 7 sts. Turn. (8 sts)
Row 3: Ch 1, sc in each st across. (8 sc)
Fasten off and leave a 6 in (15.2 cm) tail.
Repeat on the opposite window edge. Each shutter measures about 0.6 in (1.5 cm) wide and 1.1 in (2.8 cm) tall. Because 2 × 0.6 in = 1.2 in, which is less than the 1.3 in (3.3 cm) opening, the shutters could close without bunching.
Fold each shutter outward onto the front of the wall. Use the tail to tack the top outer corner with 1–2 small stitches, so the shutter sits open at a slight angle.
Roof (Color B)
Row 1 (eave row): With the RS facing, join Color B with a sl st in the first st of Row 9. Ch 6, then dc in the 4th ch from the hook and in the next 2 ch. That makes 4 overhang sts, because the skipped 3 ch count as 1 dc. Dc in each of the 25 sts of Row 9, starting with the st that holds the sl st. Then work 4 fdc, the first one into the base of the last dc. Turn. (33 sts: 4 overhang + 25 + 4 overhang)
Row 2: Ch 1. Sc in the first st, sk 3, 7 dc in the next st, sk 3, sc in the next st. Repeat from * to * 3 more times. Turn. (33 sts: 5 sc + 28 dc, which is 4 fans)
Row 3: Sl st in each of the next 4 sts to reach the center dc of the first fan. Ch 1 and sc in the same st. 7 dc in the next sc, sc in the center dc of the next fan. Repeat from * to * 2 more times. Turn. (25 sts: 4 sc + 21 dc, which is 3 fans)
Row 4: Sl st in each of the next 4 sts, ch 1, sc in the same st. 7 dc in the next sc, sc in the center dc of the next fan. Repeat from * to * 1 more time. Turn. (17 sts: 3 sc + 14 dc, which is 2 fans)
Row 5: Sl st in each of the next 4 sts, ch 1, sc in the same st, 7 dc in the next sc, sc in the center dc of the last fan. Turn. (9 sts: 2 sc + 7 dc, which is 1 fan)
Row 6 (peak): Sl st in each of the next 4 sts, ch 1, sc in the same center dc. (1 sc)
Each row moves in by half a fan on each side, about 0.6 in (1.5 cm) of width. That gives the stepped, scalloped pitch of the roof.
Hanging loop: Ch 30, sl st in the peak sc. Fasten off and weave in the end through the loop’s base to make it stronger. Checkpoint: The roof is 4.7 in (11.9 cm) wide and about 1.6 in (4.1 cm) tall.
Roof Drops (Color B)
On each side, the underside of the 4 overhang sts has 4 bases. On one side these are the original ch; on the other they are the fdc bases.
With the RS facing, join Color B at the outer corner of the overhang underside. Sc in base 1, sk base 2, 6 dc in base 3, then sl st in base 4, next to the wall. Fasten off. Repeat on the other overhang. (8 sts per drop)
Each drop is a small scallop under the eave, and it hangs about 0.4 in (1.0 cm) past the bordered wall.
Final Blocking
- Weave in all ends, keeping each color inside stitches of the same color.
- Spritz the ornament until it is damp, but not soaked.
- Pin the walls to a 3.9 in (9.9 cm) wide rectangle.
- Pin each bottom scallop at its center point.
- Pin the roof so the base is 4.7 in (11.9 cm) wide and centered over the walls, with the peak straight above the window.
- Open each roof fan evenly and pin the tips of the side fans.
- Pin the shutters at their angle and pin the window corners square.
- Add light starch if you want, then let it dry completely before unpinning.
Final Quality-Control Checklist
- The walls measure 3.9 × 2.9 in (9.9 × 7.4 cm).
- The roof is 4.7 in (11.9 cm) wide, with equal overhangs.
- The roof fans read 4-3-2-1 and are centered.
- The window is square and both shutters open evenly.
- There are 4 bottom scallops, lined up under the Row 2 fans.
- The loop is secure, and all ends are hidden.
Troubleshooting
- The walls ruffle at the sides: Your row-end sc are too loose or too many. Recheck that each side has 17 sc.
- The window is lopsided: The columns don’t have the same number of rows. Each column needs exactly 4 rows.
- The roof leans to one side: You didn’t land on a fan’s center dc. Count the sl sts again: always 4.
- The fans cup: Your tension is too tight. Go up 0.25 mm in hook size for the roof only.
- The shutters droop: Tack the top outer corner again, and starch lightly.
- The overhangs are uneven: Recount Row 1. Both sides need exactly 4 overhang sts.
Care
Spot clean or hand wash cool, press out the water in a towel, and pin it back into shape to dry. Store it flat between tissue paper so the fans stay crisp.
Final Notes
Each stage builds on the one before it:
- Gauge is 7 dc per 1 in (2.5 cm).
- 25 sts make walls 3.6 in (9.1 cm) wide, and 9 rows make them 2.6 in (6.6 cm) tall.
- The border brings the walls to 3.9 × 2.9 in (9.9 × 7.4 cm).
- 33 roof sts make a roof 4.7 in (11.9 cm) wide and 1.6 in (4.1 cm) tall.
- The finished ornament is 4.7 × 4.5 in (11.9 × 11.4 cm), plus a 1.75 in (4.4 cm) loop.
Check each number before moving on, and your cottage will come out square and even.
Happy crocheting!