

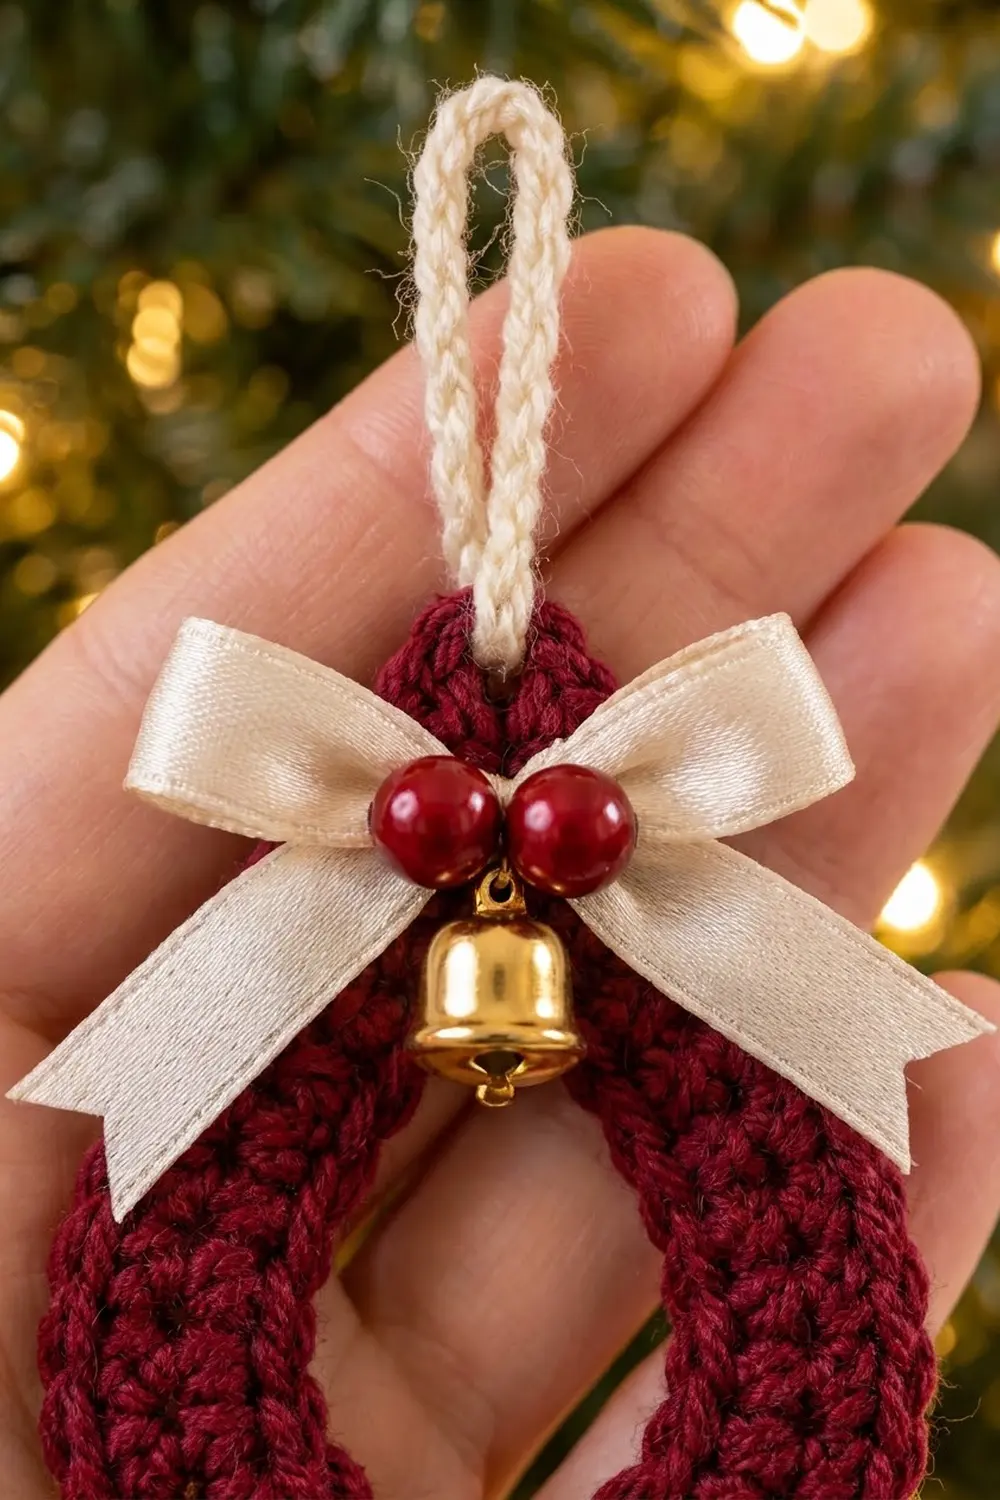
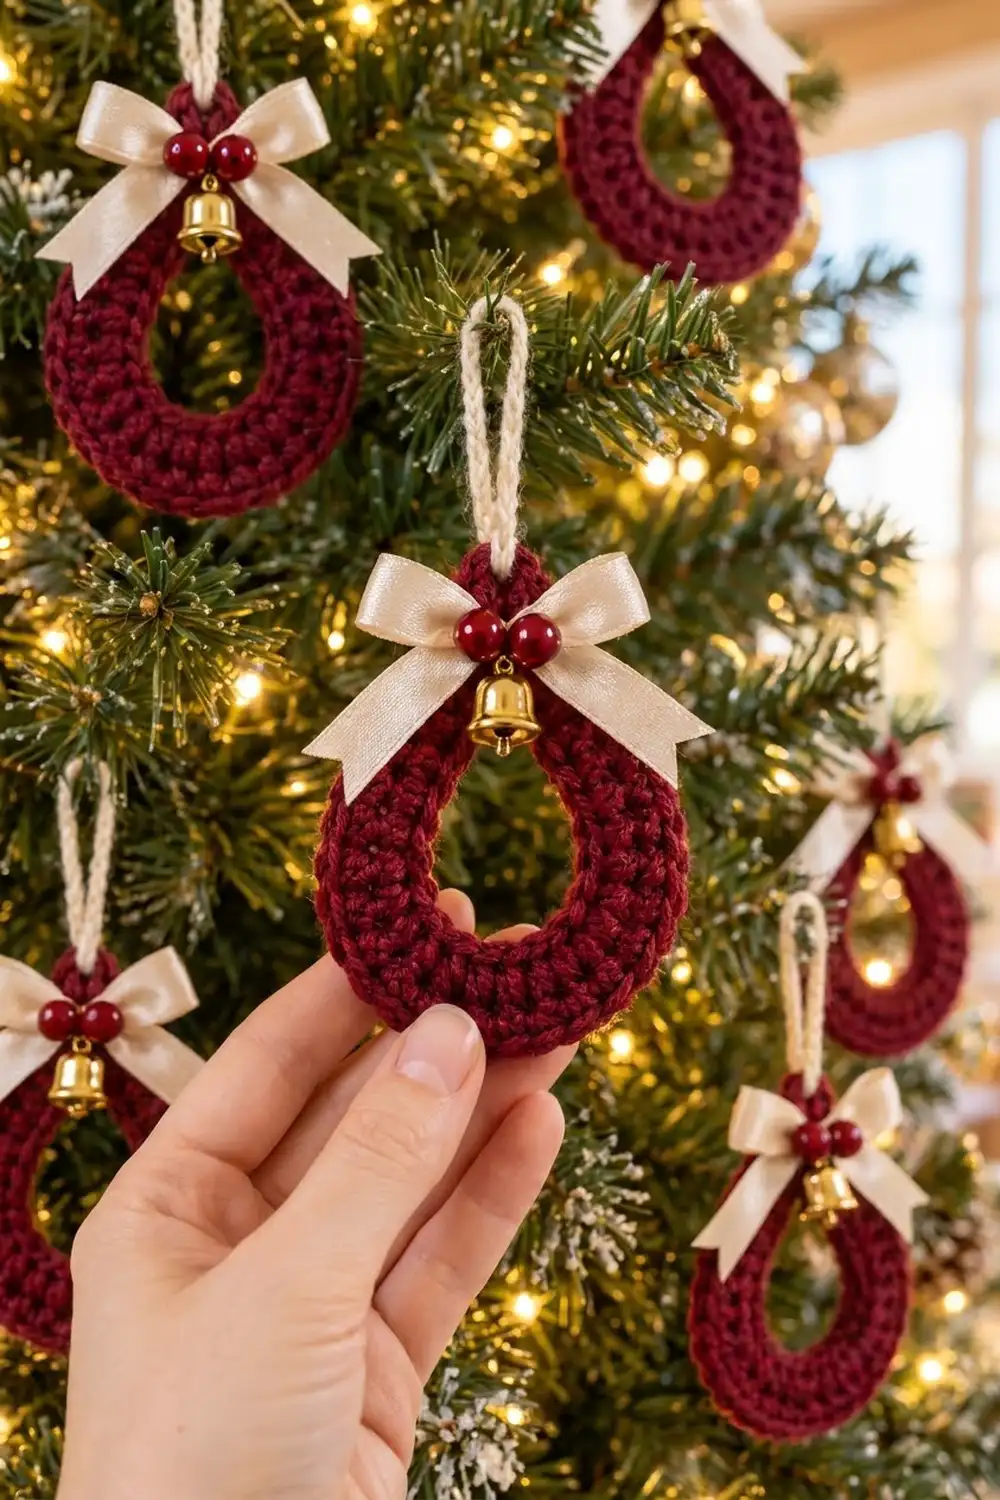
This ornament is one crocheted teardrop in deep cranberry burgundy, with an open center. The band is solid and cushy. It has a sharp point at the top and a smooth, round curve at the bottom. A cream hanging loop, an ivory satin bow, two glossy red beads and a small gold jingle bell finish the top.
The colors are classic Christmas: rich red, warm cream and a touch of gold. The ornament shows up well on a lit tree, and each one takes about 20 minutes, so a full set is a quick project.
This pattern uses US crochet terms. The finished ornament measures 3.5 in (8.9 cm) wide and 4 in (10.2 cm) tall, not counting the hanging loop.
Construction is simple. You chain a ring, then work 4 rounds outward around it. A corner at the top builds the point, and evenly spaced increases along the bottom keep the curve flat. The last single-crochet round is the border. The loop, bow, beads and bell go on at the end.
Finished Size and Construction
- Finished size: 3.5 in (8.9 cm) wide x 4 in (10.2 cm) tall, plus a 2.25 in (5.7 cm) loop
- Skill level: Easy
- Terminology: US crochet terms
- Yarn weight: Worsted (#4)
- Hook: 4.0 mm (G-6)
- Number of pieces: 1 crocheted teardrop, plus a crocheted loop and sewn-on trims
- Layout: One standalone ornament, worked in the round
- Center opening: about 1.5 in (3.8 cm) wide x 2 in (5.1 cm) tall
- Size before border (after Round 3): 3.1 in (7.9 cm) wide x 3.6 in (9.1 cm) tall
- Border depth: 1 round of sc, about 0.2 in (0.5 cm)
- Band width (all 4 rounds): about 1 in (2.5 cm)
Materials
Pick a smooth worsted-weight yarn with clear stitch definition. Acrylic or an acrylic-wool blend holds the teardrop shape well and steam blocks nicely. Avoid fuzzy or splitty yarns, because the stitch texture is part of the look.
Yarn (per ornament):
- Color A, cranberry burgundy: 8 g, about 16 m (17.5 yd)
- Color B, cream (loop): 2 g, about 3 m (3.3 yd)
These amounts include a margin for weaving in ends. One 100 g ball of Color A makes about 12 ornaments.
Tools and trims:
- 4.0 mm (G-6) crochet hook
- Tapestry needle
- Sewing needle and ivory thread
- Ivory satin ribbon, 5/8 in (1.6 cm) wide, 10 in (25.4 cm) per ornament
- 2 red round beads, 8 mm, per ornament
- 1 gold jingle bell, 1/2 in (1.3 cm), per ornament
- 2 locking stitch markers
- Scissors
- Blocking mat and rust-proof pins
- Optional: fray stopper for ribbon ends
Abbreviations (US Terms)
- ch – chain
- sl st – slip stitch
- sc – single crochet
- hdc – half double crochet
- sp – space
- st(s) – stitch(es)
- inc – increase (2 sts in the same st)
Special stitch – Point corner: (st, ch 1, st) all in the same st or ch-1 sp. This makes 2 stitches with a ch-1 sp between them and builds the sharp top of the teardrop.
Note: The ch 2 at the start of hdc rounds and the ch 1 at the start of sc rounds do not count as stitches.
Gauge and Checkpoints
Gauge: 18 sc = 4 in (10.2 cm), or 4.5 sts per inch. One sc round is about 0.2 in (0.5 cm) tall. One hdc round is about 0.3 in (0.8 cm) tall.
Gauge controls whether the teardrop lies flat. The best swatch is one complete ornament. Make one, check it against these numbers, then make the rest.
Checkpoints (measured flat, unstretched):
- After Round 1: the ring is about 5.3 in (13.5 cm) around.
- After Round 2: 2.5 in (6.4 cm) wide x 3 in (7.6 cm) tall.
- After Round 3: 3.1 in (7.9 cm) wide x 3.6 in (9.1 cm) tall.
- After Round 4: 3.5 in (8.9 cm) wide x 4 in (10.2 cm) tall.
Too big by more than 0.25 in (0.6 cm)? Change to a 3.75 mm hook. Too small? Change to a 4.5 mm hook. Keep every stitch count the same. If the bottom curve cups, your tension is tight. If it ripples, your tension is loose.
Teardrop Pattern
Start with Color A and leave a 6 in (15.2 cm) tail.
Foundation: Ch 24. Make sure the chain isn’t twisted, then sl st in the first ch to form a ring.
Round 1: Ch 1, sc in the same ch as the join and in each ch around. Sl st to the first sc. (24 sc)
Now mark the sections. Put a marker in the first sc. This is the top stitch. From there, the next 6 sts are the right side, the next 11 are the bottom and the last 6 are the left side (1 + 6 + 11 + 6 = 24). Put a second marker in the first bottom stitch.
Round 2: Ch 2. Point corner in the top stitch: (hdc, ch 1, hdc). Hdc in each of the next 6 sts (right side).
Bottom: Hdc in next st, (inc, hdc in next st) 5 times. This uses 11 sts and makes 16 hdc.
Hdc in each of the last 6 sts (left side). Sl st to the first hdc. (30 hdc and 1 ch-1 sp)
Check: 2 point + 6 right + 16 bottom + 6 left = 30.
Round 3: Sl st into the ch-1 sp. Ch 2, point corner in the same sp: (hdc, ch 1, hdc).
Right side: Hdc in the second point hdc of Round 2, then hdc in each of the next 6 sts. (7 hdc)
Bottom: Hdc in next st, inc, hdc in next 3 sts, inc, hdc in next 4 sts, inc, hdc in next 3 sts, inc, hdc in next st. This uses 16 sts and makes 20 hdc. The increases sit in mirror positions, so the curve stays even.
Left side: Hdc in each of the next 6 sts, then hdc in the first point hdc of Round 2. (7 hdc)
Sl st to the first hdc. (36 hdc and 1 ch-1 sp)
Check: 2 point + 7 + 20 + 7 = 36. If you count each point hdc with its own side, the round reads 8 + 20 + 8 = 36.
Move the bottom marker up so it sits in the first of the 20 bottom hdc.
Border (Round 4)
The border is one round of sc. It firms up the outer edge, sharpens the point and gives the smooth outline you see on the finished ornament.
Border gauge: 4.5 sc per inch. The straight sides take 1 sc in each st. The bottom curve takes 4 increases.
Round 4: Sl st into the ch-1 sp. Ch 1, point corner in the same sp: (sc, ch 1, sc).
Right side: Sc in each of the next 8 sts (the second point hdc plus the 7 right-side hdc). (8 sc)
Bottom: Sc in next 2 sts, inc, sc in next 4 sts, inc, sc in next 4 sts, inc, sc in next 4 sts, inc, sc in next 2 sts. This uses 20 sts and makes 24 sc.
Left side: Sc in each of the next 8 sts (the 7 left-side hdc plus the first point hdc). (8 sc)
Sl st to the first sc. Fasten off and leave a 6 in (15.2 cm) tail. (42 sc and 1 ch-1 sp)
Per-section counts: point 2 sc, right side 8 sc, bottom 24 sc, left side 8 sc. Total 2 + 8 + 24 + 8 = 42.
Why the math works: The sides are straight, so the outer edge is about as long as the edge below it. One stitch per stitch keeps each side at about 1.8 in (4.6 cm) without puckering. The bottom is a half circle. Its border midline sits about 1.65 in (4.2 cm) from the center of the curve, so the arc is about 5.2 in (13.2 cm). At 4.5 sts per inch, that needs about 23 to 24 sc. Using 24 adds a little ease, so the curve lies flat without rippling. The point corner adds 2 sts and a ch-1 sp each round, so the top angle stays sharp instead of rounding off.
Hanging Loop
Hold 2 strands of Color B together. Join them with a sl st in the ch-1 sp at the top point. Ch 22, then sl st back into the same ch-1 sp. Fasten off.
The doubled strands twist slightly and look like a soft cord. The loop stands about 2.25 in (5.7 cm) above the point. Weave the ends into the back of Round 4.
Bow, Beads and Bell
- Cut 10 in (25.4 cm) of ivory ribbon. Tie a bow about 3 in (7.6 cm) wide.
- Trim each tail at an angle so it points down and outward. Seal the cut ends with fray stopper if you have it.
- Center the bow on the front, just below the hanging loop, so the knot covers Rounds 2 and 3 at the point. With ivory thread, sew through the knot and into the band 3 or 4 times.
- Sew the 2 red beads side by side over the center of the knot.
- Sew the jingle bell just below the beads so it hangs freely over the top of the opening.
- Tack the back of each bow loop lightly to the band so the bow stays flat.
Final Blocking
- Weave in all yarn ends before blocking, working along the inside of the stitches on the back.
- Pin the ornament face down on the blocking mat before adding the bow and bell, or remove them first.
- Pin the top point first, then the bottom center, to set the height at 4 in (10.2 cm).
- Pin the widest part of the curve to 3.5 in (8.9 cm).
- Pin the inner opening to 1.5 in (3.8 cm) wide x 2 in (5.1 cm) tall, with a neat point at the top.
- Hold a steam iron 1 in (2.5 cm) above the piece and steam it lightly. Don’t press it. For wool blends, spritz with water instead.
- Let it dry fully, at least 2 hours, before you unpin it and add the trims.
Final Quality-Control Checklist
- Round counts are 24, 30, 36 and 42 sts.
- The ornament measures 3.5 in (8.9 cm) x 4 in (10.2 cm).
- The top point is sharp and centered over the bottom curve.
- Both sides have 8 border sc and look like mirror images.
- The bottom curve lies flat, with no cupping or ruffling.
- The opening is a clear teardrop, about 1.5 in (3.8 cm) x 2 in (5.1 cm).
- The loop is centered and firmly attached.
- The bow is level, and its tails are the same length.
- The beads and bell are sewn tight, and the bell rings freely.
- No yarn ends show on the front.
Troubleshooting
Bottom curve cups or curls: Your tension is tight, or you missed an increase. Recount the bottom section and go up half a hook size.
Bottom curve ripples: Your tension is loose. Go down half a hook size, or skip the last bottom increase in Round 4 for 23 bottom sc. If you do, the round total becomes 41.
Point looks rounded: Make sure each point corner is worked into the ch-1 sp, not into a stitch. Pull the ch 1 snug.
Teardrop leans to one side: You placed the bottom section off-center. Recheck the markers from Round 1.
Ring twisted: Undo it and rejoin the foundation chain flat.
Opening too small: Your chain is tight. Chain with a 4.5 mm hook, then switch back to the 4.0 mm hook for Round 1.
Bow droops: Tack the bow loops to the band at the back as well as at the knot.
Care
Spot clean with cool water and mild soap, then pin to shape and air dry. Remove the bell before any deeper cleaning, and store the ornament flat so the point keeps its shape.
Final Notes
The measurement chain is short and easy to check. A 24-chain ring measures about 5.3 in (13.5 cm) around. Round 2 grows it to 30 sts and 2.5 in (6.4 cm) wide. Round 3 reaches 36 sts and 3.1 in (7.9 cm) wide. The sc border finishes at 42 sts and 3.5 in (8.9 cm) x 4 in (10.2 cm). Check each stage, block the shape, then add the loop, bow, beads and bell.
Happy crocheting!