

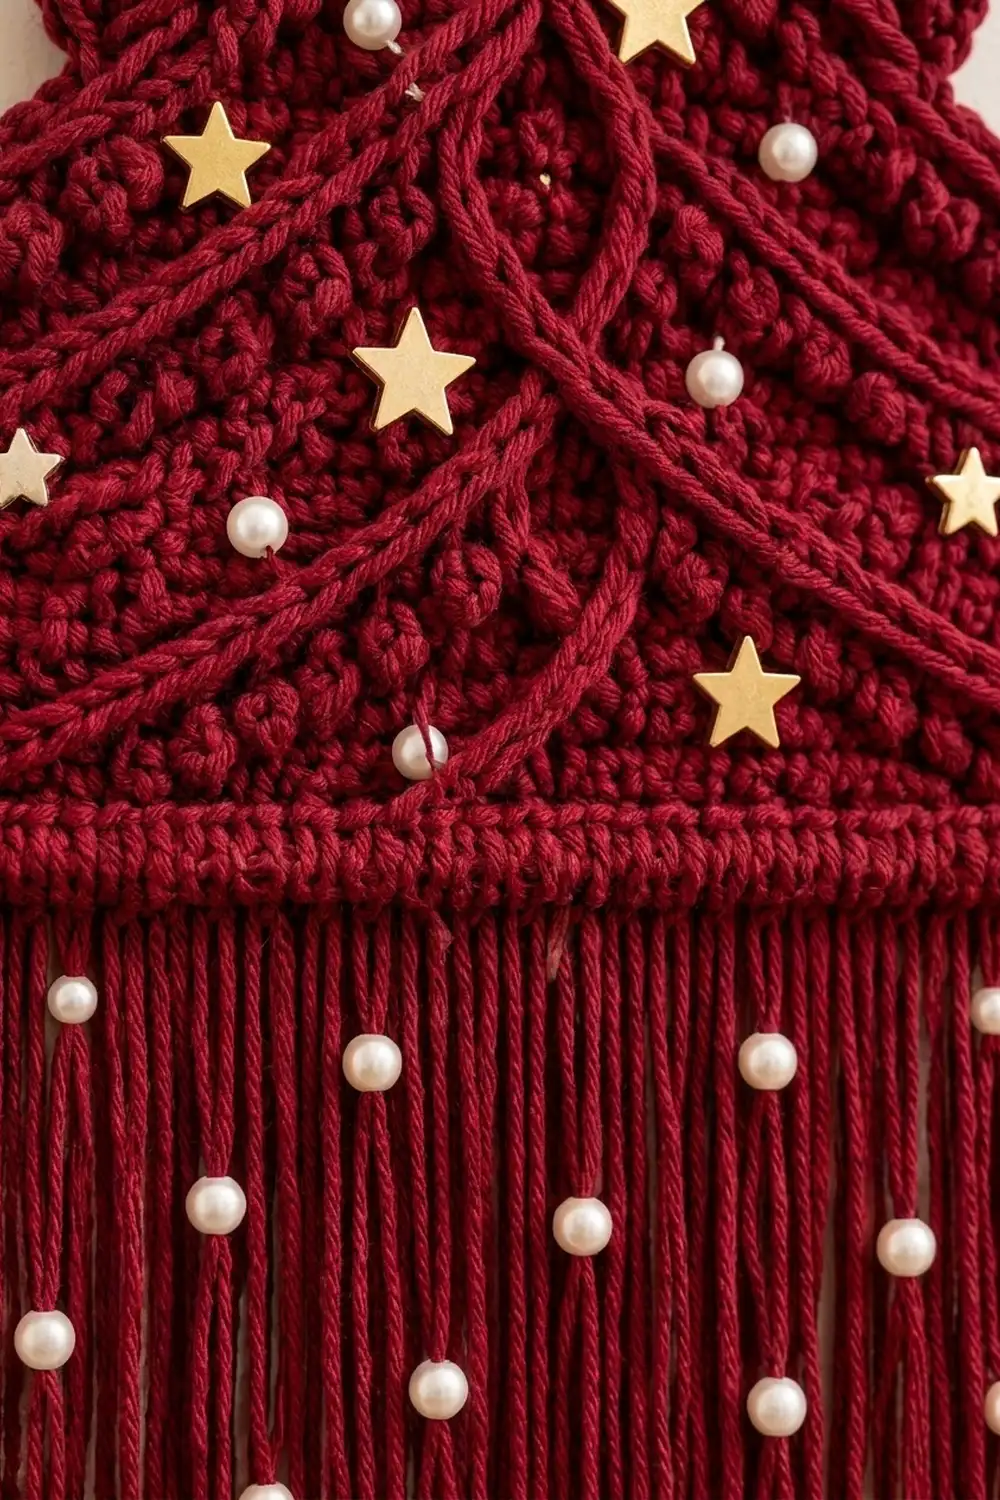
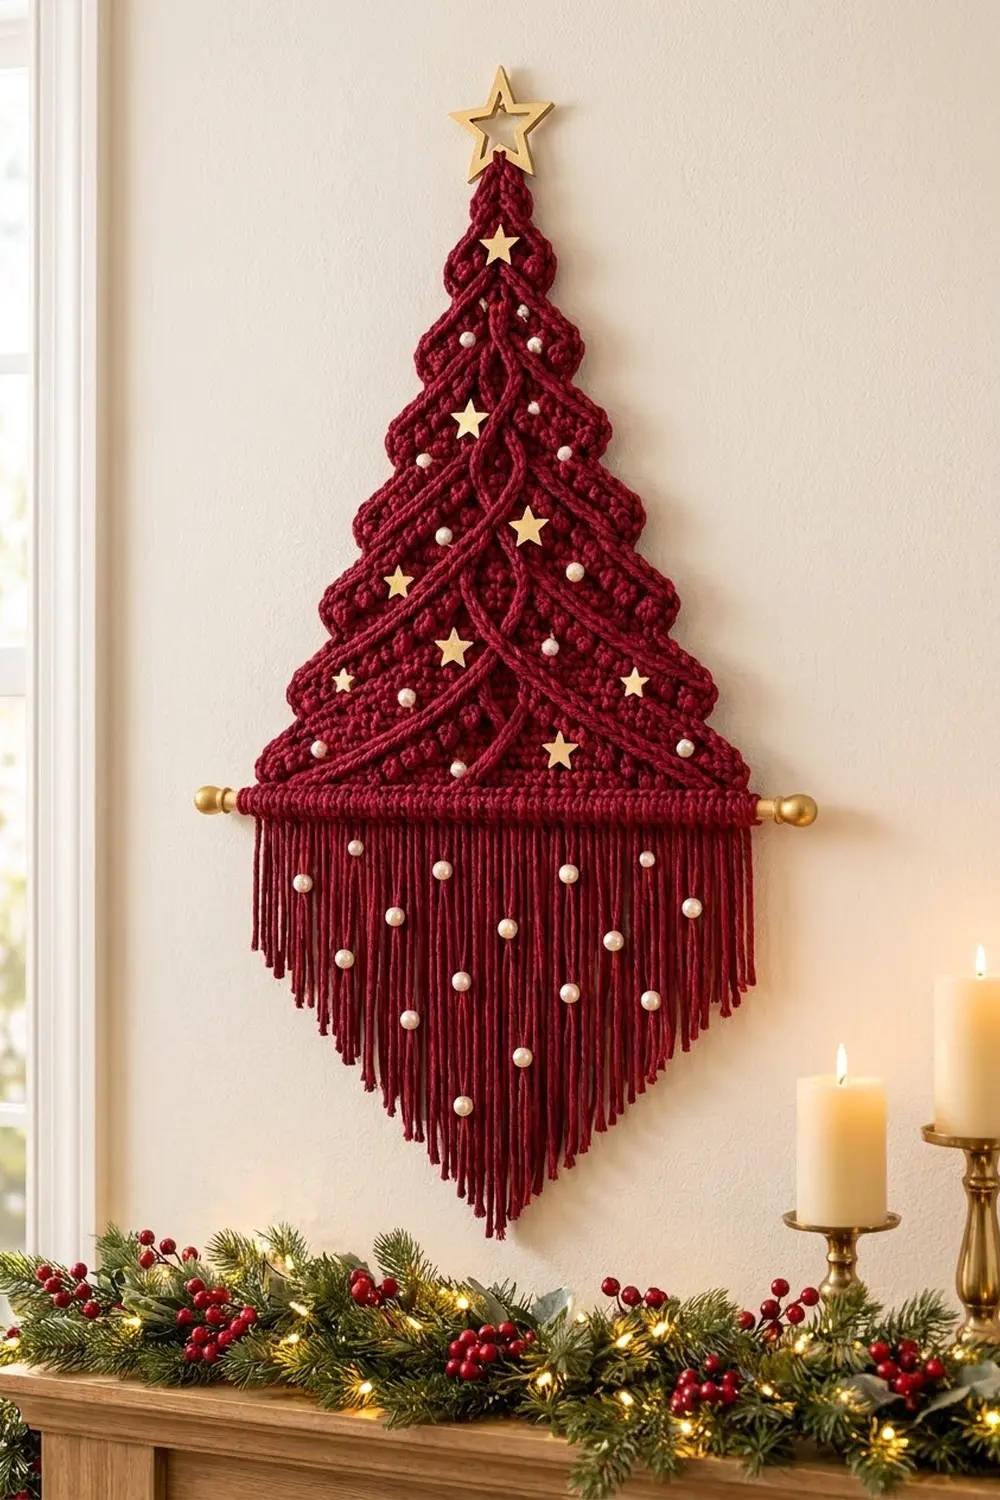
This tree is a festive wall hanging in one deep color. A stepped burgundy tree sits on a knotted dowel above a long V-shaped fringe. Raised bobbles and crossing cord garlands give the tree texture, and gold stars and pearl beads add the sparkle.
The palette is simple: burgundy yarn with gold and pearl trims. Because there is only one color, the shape and texture do the work. It suits a classic or modern holiday room, and it looks good on its own or in a row of matching hangings.
The pattern uses US crochet terms. The bordered tree measures 10¾ in (27.3 cm) wide by 11.2 in (28.4 cm) tall. From the tip of the tree to the point of the fringe, the hanging measures about 24 in (61.0 cm), not counting the star.
You crochet the tree flat from the bottom up, in rows that decrease toward the tip. Every eighth row steps outward to start a new tier. Next you add a two-round edging and a hanging loop, then sew on six cords. Finally, you knot the fringe onto the dowel, stitch the tree to it, and add the embellishments.
Finished Size and Construction
- Finished tree (bordered): 10¾ in x 11.2 in (27.3 cm x 28.4 cm)
- Overall length: about 24 in (61.0 cm), not counting the star
- Skill level: Intermediate
- Terminology: US
- Yarn weight: Worsted (#4)
- Hook: US H-8 (5.0 mm)
- Number of pieces: 1 tree, plus 6 cords sewn on top
- Layout: a single tree centered above the dowel and fringe
- Tree size before border: 10¼ in x 10.7 in (26.0 cm x 27.2 cm)
- Border depth: about ¼ in (0.6 cm) on each edge
Materials
Yarn: Use a smooth worsted yarn with good stitch definition, such as acrylic or a cotton blend. Fuzzy yarn hides the bobbles and cords. A slightly firm yarn also makes a fringe that hangs straight.
- Burgundy: 110 g / 220 m (about 240 yd). That covers about 90 m for the tree, cords and border, and about 67 m for the fringe, plus a margin.
All quantities include about a 30% margin for your swatch and gauge differences.
Tools and notions:
– US H-8 (5.0 mm) crochet hook
– Tapestry needle
– Wooden dowel, 12 in (30.5 cm) long and ⅜ in (1.0 cm) thick, with gold paint or gold end caps
– 9 small gold stars, ¾ in (1.9 cm), wooden or felt
– 1 gold star topper, 2 in (5.1 cm)
– 14 white pearl beads, 6 mm, for the tree
– 20 white pearl beads, 8 mm, with large holes (2.5–3 mm), for the fringe
– Clear-drying fabric glue
– Sharp scissors, stitch markers, ruler, blocking pins
Abbreviations (US Terms)
- ch: chain
- sc: single crochet
- sc2tog: single crochet 2 together (decrease)
- sc3tog: single crochet 3 together
- sl st: slip stitch
- st(s): stitch(es)
- RS / WS: right side / wrong side
- rev sc: reverse single crochet (crab stitch)
- yo: yarn over
Special stitch – Bobble (bob): *Yo, insert hook in st, yo, pull up a loop, yo, draw through 2 loops; repeat from * 3 more times in the same st (5 loops on hook). Yo and draw through all 5 loops. A bobble counts as 1 stitch. You always work bobbles on WS rows so they pop out on the RS.
Gauge and Checkpoints
Gauge: 16 sc x 18 rows = 4 in (10.2 cm) in sc worked in rows.
Test first: Ch 21 and work 20 sc per row for 18 rows. The swatch should measure 5 in (12.7 cm) wide by 4 in (10.2 cm) tall. Add one bobble row and check that the bobbles don’t pucker the fabric.
Checkpoints:
– Row 1: 10¼ in (26.0 cm) wide
– After Row 8: 1.8 in (4.6 cm) tall
– After Row 24: 5.3 in (13.5 cm) tall
– After Row 48: 10.7 in (27.2 cm) tall
– After the border: 10¾ in x 11.2 in (27.3 cm x 28.4 cm)
If your tree is too big, go down a hook size. If it is too small, go up a size. Changing hooks keeps the tiers in proportion, so don’t add or remove rows to fix the size.
Tree Body
Each tier is 8 rows long. Within a tier, the rows follow this order:
- Row 1 – Step row: Ch 1, 3 sc in first st, sc in each st to last st, 3 sc in last st (adds 4 sts). In Tier 1, the foundation row replaces the step row.
- Rows 2, 3, 5, 6 and 8 – Decrease rows: Ch 1, sc2tog, sc in each st to last 2 sts, sc2tog (removes 2 sts).
- Row 4 – Bobble row (WS): worked with no change in count.
- Row 7 – Plain row: Ch 1, sc in each st across.
The turning ch-1 never counts as a stitch. Row 1 is a RS row, so every even-numbered row is a WS row.
Bobble row patterns:
– Pattern A (odd tiers): Ch 1, sc in first 2 sts, bob in next st, sc in next 3 sts; repeat from * to last 3 sts, bob in next st, sc in last 2 sts.
– Pattern B (even tiers): Ch 1, sc in first 3 sts, bob in next st, sc in next 3 sts; repeat from * to last 4 sts, bob in next st, sc in last 3 sts.
Tier 1
Row 1 (RS): Ch 42, sc in 2nd ch from hook and in each ch across, turn. (41 sts)
Rows 2–3: Decrease. (39 sts, then 37 sts)
Row 4 (WS): Pattern A. (37 sts, 9 bobbles)
Rows 5–6: Decrease. (35 sts, then 33 sts)
Row 7: Plain. (33 sts)
Row 8: Decrease. (31 sts)
Checkpoint: 1.8 in (4.6 cm) tall.
Tiers 2–6
Work each tier with the same 8-row recipe. Starting at Row 9, every step row adds 4 stitches and pushes out a ledge that is 2 stitches wide on each side.
| Tier | Rows | Step row | After Rows 2–3 | Bobble row | After Rows 5–6 | Plain row | Last row |
|---|---|---|---|---|---|---|---|
| 2 | 9–16 | 35 | 33, 31 | 31 (B, 7 bob) | 29, 27 | 27 | 25 |
| 3 | 17–24 | 29 | 27, 25 | 25 (A, 6 bob) | 23, 21 | 21 | 19 |
| 4 | 25–32 | 23 | 21, 19 | 19 (B, 4 bob) | 17, 15 | 15 | 13 |
| 5 | 33–40 | 17 | 15, 13 | 13 (A, 3 bob) | 11, 9 | 9 | 7 |
| 6 | 41–48 | 11 | 9, 7 | 7 (B, 1 bob) | 5, 3 | 3 | 1 |
Row 48: Ch 1, sc3tog. (1 st) Do not fasten off.
The tree has 30 bobbles in total.
Checkpoint: 10.7 in (27.2 cm) tall and 10¼ in (26.0 cm) wide at Row 1.
Quick math check: Every tier loses 10 stitches over its five decrease rows. Each new tier starts with a 4-stitch step, so each tier ends 6 stitches narrower than the one before. Tier by tier, the last-row counts go 31, 25, 19, 13, 7 and 1, landing exactly on a single stitch at the tip.
Garland Cords
Make 2 of each size:
– Short cord: Ch 21, sc in back bump of 2nd ch from hook and each ch across. (20 sc, 5 in / 12.7 cm)
– Medium cord: Ch 31, work the same way. (30 sc, 7½ in / 19.1 cm)
– Long cord: Ch 37, work the same way. (36 sc, 9 in / 22.9 cm)
Fasten off each cord and leave a 6 in (15.2 cm) tail at both ends. The cords will twist slightly, which gives them a rope-like look.
Placement (RS facing):
– Short pair: One cord runs from the left edge of Row 41 to the right edge of Row 29. Its mirror runs from the right edge of Row 41 to the left edge of Row 29.
– Medium pair: These run from the edges of Row 33 down to the opposite edges of Row 17.
– Long pair: These run from the edges of Row 25 down to the opposite edges of Row 9.
Each pair crosses on the center line. Weave the second cord of each pair over its mate, then under the next pair down, to get the braided look. Let each cord sag a little into a gentle swag.
Pin all six cords first, then check that the tree is symmetrical. Sew them down with small stitches through the back of the cords every ½ in (1.3 cm).
Border
Border gauge: 4 border sc = 1 in (2.5 cm) along the bottom edge. On the slanted sides, work 1 sc per row end.
Round 1 (RS): Rotate the tree to work down the right side, starting from the tip.
– Right side: Work 1 sc in each row end of Rows 47 down to Row 2. At each step-row end (Rows 41, 33, 25, 17 and 9), work 3 sc into that row end instead of 1. (56 sts)
– Bottom: Along the foundation chain, work 3 sc in the first st, sc in the next 39 sts, and 3 sc in the last st. (45 sts, including both 3-sc corner groups)
– Left side: Work up the left side the same way as the right. (56 sts)
– Tip: Work 3 sc in the single st of Row 48. (3 sts)
– Sl st to the first sc. Total: 56 + 45 + 56 + 3 = 160 sts
Round 2: Ch 1, rev sc in each st around, sl st to the first st. (160 sts) This round makes a corded edge that outlines every tier ledge.
Fasten off.
Why the math works: Each slanted side has 46 row ends (Rows 2–47). Five of those are step rows, which get 2 extra stitches each, so each side has 46 + 10 = 56 stitches. Sc rows are slightly shorter than sc stitches are wide (18 rows vs 16 sts per 4 in). Because the edge is slanted, it runs a little longer than it would vertically, so 1 sc per row end lies flat. The extra 2 stitches at each step row turn the outward point of the ledge without cupping it.
The bottom edge has 41 foundation stitches. The two corner groups add 2 stitches each, so 41 + 4 = 45. The bottom has no row ends, so nothing else is added.
Hanging loop: Join yarn in the center sc of the tip’s 3-sc group. Ch 12, sl st in the same st, and fasten off. The loop is about 1½ in (3.8 cm) long.
Fringe and Dowel
- Cut the strands. Cut 88 strands, each 30 in (76.2 cm) long.
- Knot them on. Hold 2 strands together and fold them in half, so each side is 15 in (38.1 cm). Attach them to the dowel with a lark’s head knot. Make 44 knots, centered on the dowel and spanning 10¾ in (27.3 cm). That leaves 5/8 in (1.6 cm) of bare dowel at each end for the gold caps.
- Attach the tree. Lay the tree with its bottom edge across the front of the knot heads. With a tapestry needle and yarn, sew each of the 45 bottom border stitches to the dowel. Pass the needle between knots and around the dowel. There are 43 gaps between the 44 knots, plus the 2 outer ends, which makes 45 passes, one for each bottom stitch.
- Comb and trim. Comb the fringe straight and lay the piece flat. Trim it to a V: the center strands hang 13 in (33.0 cm) below the dowel, and the outer strands hang 5 in (12.7 cm). Cut along a straight line from each edge to the center.
- Add the fringe pearls. Thread the 20 large pearls onto single strands at staggered heights. Tie a snug overhand knot under each pearl, and add a dot of glue for security.
Final Blocking
- Pin the tree flat, RS up, on a blocking mat at 10¾ in x 11.2 in (27.3 cm x 28.4 cm). Do this before sewing on the cords, or pin carefully around them.
- Pin out each tier ledge so it points slightly outward and down.
- Mist the tree with water until it is damp, but not soaked. Pinch each bobble to round it.
- Let it dry completely, at least 12 hours.
- Hang the fringe and steam it lightly from 2 in (5.1 cm) away to straighten any kinks, then trim again if needed.
- After blocking, glue on the 9 small stars and sew on the 14 pearls of 6 mm. Glue the 2 in (5.1 cm) star to the tip, in front of the hanging loop.
Final Quality-Control Checklist
- [ ] Row 1 has 41 sts, and Row 48 ends at 1 st
- [ ] Each tier has 2-stitch ledges on both sides
- [ ] All 30 bobbles pop out on the RS
- [ ] The border totals 160 sts, with 56 on each side, 45 on the bottom and 3 at the tip
- [ ] The cords are mirrored and cross on the center line
- [ ] The tree measures 10¾ in x 11.2 in (27.3 cm x 28.4 cm)
- [ ] The fringe runs from 13 in (33.0 cm) at the center to 5 in (12.7 cm) at the edges
- [ ] Stars and pearls are secure, and no glue shows
Troubleshooting
- The ledges curl under: Make sure you worked 3 sc into each step-row end in border Round 1, then re-block.
- The bobbles sink to the back: You worked them on a RS row. Bobble rows are always the even-numbered (WS) rows.
- The tree leans to one side: Your decreases are uneven. Always place a sc2tog at both ends of a decrease row.
- The bottom edge waves: Your foundation chain is too tight. Redo it with a hook one size larger.
- The fringe gaps open at the edges: Push the knots closer together, keeping the span at 10¾ in (27.3 cm).
- The cords pull the tree out of shape: Unpick them and re-pin with a little more slack.
Care
Spot clean only, with a damp cloth and mild soap. Store the hanging flat, with the fringe combed straight and tissue between layers, to protect the stars and pearls.
Final Notes
The measurement chain is simple. A gauge of 16 sc = 4 in (10.2 cm) gives a 41-stitch base 10¼ in (26.0 cm) wide. Forty-eight rows build six tiers 10.7 in (27.2 cm) tall. The 160-stitch border brings the tree to 10¾ in x 11.2 in (27.3 cm x 28.4 cm). Forty-five bottom stitches meet 44 fringe knots on a 12 in (30.5 cm) dowel, and the V-fringe finishes at 13 in (33.0 cm) in the center. Check each stage as you go, and the finished tree will hang straight and even.
Happy crocheting!